I bought a Bambu Lab P1S in 2024 and an X1C six months later. Both shipped with Bambu Studio on the SD card. For a year I ran Bambu Studio because the AMS just worked and the cloud printing felt magical. Then I started caring about flow rate calibration, scarf seams, and being able to print from a Voron alongside my Bambus. So I switched the fleet to OrcaSlicer.
This guide is what I wish I’d had when making that switch. It covers the X1C, X1E, and P1S specifically, with all the LAN-Mode-plus-Developer-Mode walkthrough that nobody warned me about, the AMS configuration changes since the January 2025 firmware lockdown, and the recommended calibration sequence for each printer. Written against OrcaSlicer v2.3.2, current stable.
The article focuses on the X1 series and P1S because those are the printers most likely to drive an OrcaSlicer switch. The A1 and A1 Mini share the AMS Lite ecosystem and similar lockdown but use different printer profiles in OrcaSlicer; quick mention at the end. The P1P is referenced briefly since it’s open-frame and only useful for low-temp filaments.
Per-printer spec reference
The X1C, X1E, and P1S share the same 256mm cubed build volume but differ on key features:
| Spec | X1C | X1E | P1S |
|---|---|---|---|
| Build volume | 256×256×256 | 256×256×256 | 256×256×256 |
| Default plate | Textured PEI / Cool | Engineering | Textured PEI |
| Hotend max temp | 300°C | 320°C | 300°C |
| Heated chamber | No (passive enclosure) | Yes, active 60°C | No (passive enclosure) |
| Stock nozzle | Hardened steel 0.4 | Hardened 0.4 | Stainless 0.4 |
| AMS support | Yes | Yes | Yes |
| Lidar (auto Flow Dynamics) | Yes | Yes | No |
| Touchscreen | 5″ capacitive | 5″ capacitive | 2.7″ mono LCD + knob |
| Ethernet | Wi-Fi only | Wi-Fi + Gigabit Ethernet | Wi-Fi only |
| Air filter | Activated carbon | G3 + H12 HEPA | Activated carbon |
| Camera port (LAN) | 322 | 322 | 6000 |
The X1E is the enterprise variant. The active heated chamber is what unlocks PPA-CF and PPS-CF printing; X1C and P1S can’t reach the chamber temps those filaments need. The X1E also adds Gigabit Ethernet with WPA2-Enterprise (cert upload via SD card) and the H12 HEPA filter rating that makes it factory-floor-friendly.
The P1S is the budget X1C analog. Same enclosed CoreXY, same AMS support, but no lidar, no auto Flow Dynamics, mono LCD instead of capacitive. The lack of lidar is the single biggest reason P1S owners switch to OrcaSlicer; you’re on a manual calibration path either way, and OrcaSlicer’s manual suite is dramatically deeper than Bambu Studio’s.
The big context: the January 2025 firmware lockdown
Before any setup, you need to understand what changed. On January 16, 2025, Bambu Lab pushed firmware 1.08.02.00 (P-series) and 1.05.00.00 (A-series) introducing what they call the Authorization Control System. The firmware now requires third-party tools to route through Bambu Connect (a proprietary middleware) for direct print initiation, AMS RFID auto-detection, and cloud features.
OrcaSlicer’s maintainers publicly declined to integrate Bambu Connect (it would require shipping closed code inside an AGPL project). The community workaround that’s stable and supported: enable LAN Only Mode plus Developer Mode on the printer touchscreen, which keeps OrcaSlicer talking to the printer over LAN. Cloud printing through Orca is gone. AMS RFID auto-detect is gone (you assign filament types manually now).
An independent fork called OrcaSlicer-BambuLab by developer Paweł Jarczak briefly restored cloud printing by replicating Bambu’s authorization handshake. Bambu issued a cease-and-desist in early May 2026; the fork is shuttered. Don’t try to install copies floating online; they’re unmaintained and may be modified in unsafe ways.
So in 2026, the practical answer for Bambu plus OrcaSlicer is: LAN Mode + Developer Mode. Or stay on firmware 1.07.x to keep the older direct-print behavior (downgrade is possible on consumer X1C and P1S via SD card; X1E enterprise units are signed-locked tighter).
Enabling LAN Mode + Developer Mode (verified menu paths)
The toggle paths differ between the X1 series 5″ capacitive touchscreen and the P1 series 2.7″ mono LCD with click-wheel.
X1C and X1E (5-inch capacitive)
- Tap the gear / settings icon in the top-right of the home screen
- Scroll the left-side rail to WLAN (or Network on X1E, which adds a separate Ethernet sub-page)
- Toggle LAN Only Mode ON. A confirmation dialog warns that cloud features (Bambu Handy, Studio cloud project sync, MakerWorld direct) will be disabled. Confirm.
- Scroll down in the same WLAN screen. A new entry appears: Developer Mode. (It only appears after LAN Only is ON.)
- Tap Developer Mode. Read the warning page. Scroll to the bottom (the Enable button is greyed until you reach the bottom). Tap Enable.
- Back out to General → Device Info / Network tab. Write down the IP address (e.g., 192.168.1.41) and the 8-digit Access Code.
X1E with Ethernet: plug in the cable, set the WLAN kill switch OFF and the LAN kill switch ON via the physical toggles next to the rear ports. WPA2-Enterprise certs upload via SD card.
P1S and P1P (2.7-inch mono LCD with click-wheel)
The P1 menu structure differs. There’s no nested WLAN page; LAN Only sits under the general Settings list.
- From home screen, click the wrench / settings icon
- Scroll down to General
- Inside General, scroll to LAN Only Mode, click, toggle ON. Confirm warning.
- Back out to Settings. Scroll down. Developer Mode entry now appears (hidden until LAN Only is enabled).
- Click. Read the scrolling warning. Scroll to the bottom. Click Enable.
- Back out to WLAN. The screen now shows IP address and Access Code on a single page. (P1S puts IP/Access Code under WLAN, not under Device info like X1.)
The Access Code resets if you regenerate it. If OrcaSlicer ever gets stuck with a stale code (issue #6169 documents this happening), tap or click the Access Code value on the printer to regenerate it, then re-enter in OrcaSlicer.
Connecting OrcaSlicer to your Bambu printer
Once LAN + Dev Mode is on:
- Open OrcaSlicer. Switch to the Device tab
- Click Add Printer (or the + icon)
- Enter the IP address (e.g., 192.168.1.41) and the 8-digit Access Code
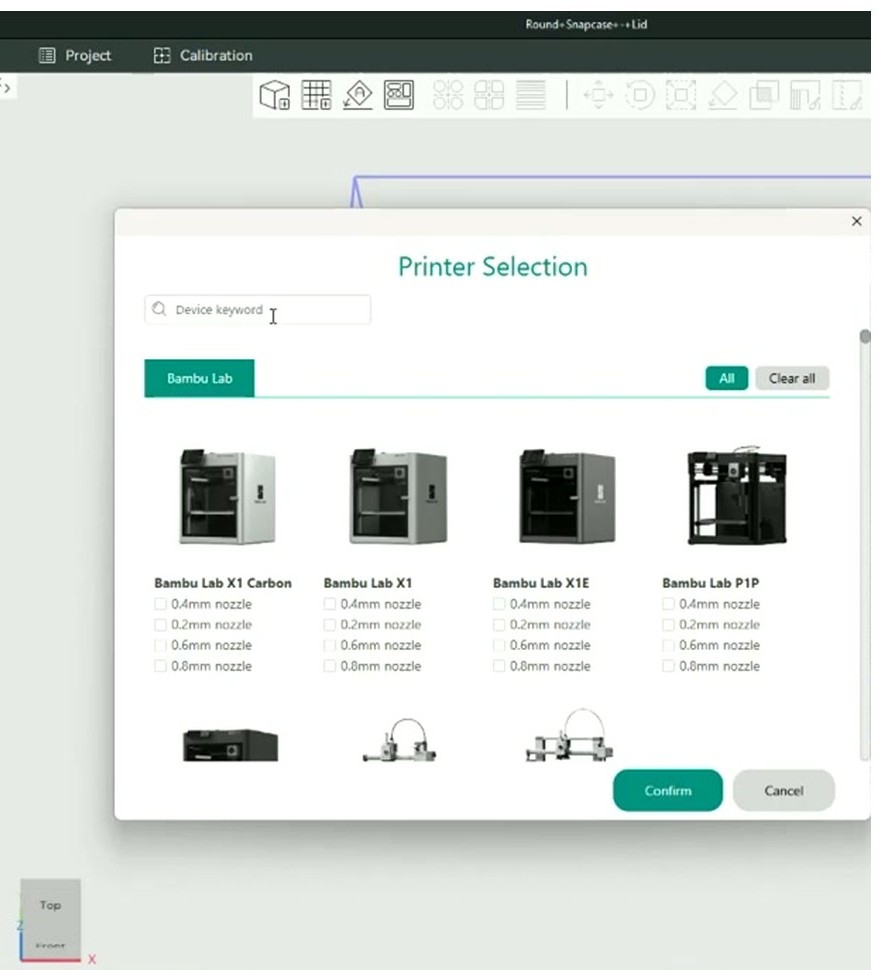
- Pick the model: Bambu X1C, X1E, or P1S
- Click Bind / Connect
If the connection succeeds, the Device tab shows your printer’s name, current temperatures, and (for X1C/X1E) the camera feed. AMS slot count and currently-loaded filament type appear in the AMS panel on the left.
If it fails, the most common causes are: wrong Access Code, IP changed because of DHCP rotation (set a static lease on your router), or the network plugin needs reinstalling. Open Preferences → Network plugin → Reinstall to fix the third one.
What works and what doesn’t in LAN + Dev Mode
This is the practical capability matrix. As of the firmware in May 2026:
Works:
- Sending sliced 3MF / G-code to printer over LAN
- Print-job initiation via Bambu Connect helper app (OrcaSlicer hands the file to Bambu Connect, which executes the authorized print start)
- Reading AMS slot count and currently-loaded slot identity
- Plate selection (Cool / Engineering / Textured / High-Temp / PEI Plus) for slicing presets
- Camera live view in LAN (port 322 X1, port 6000 P1)
- Printer status telemetry (temps, position, fan speeds, AMS slot temps)
- LED control
- Firmware updates via SD card
Broken:
- Direct print initiation from Orca without Bambu Connect (the network plugin is signed-only)
- RFID auto-detect of Bambu spools propagating filament info into Orca’s AMS mapping (you mirror the choice manually)
- Live AMS slot calibration commands from Orca
- Cloud project sync, MakerWorld push, Bambu Handy notifications
- Any motion control, nudging, first-layer-tweak from inside OrcaSlicer
The growing minority workaround is to pair Orca with OctoEverywhere or Obico for remote functionality, while using stock LAN+Dev for local printing. Bambu Connect installed and running in the system tray is also a common path; Orca → Send hands the file to Bambu Connect, which handles the authorized start.
AMS configuration in OrcaSlicer
The X1C, X1E, and P1S all accept the full Bambu AMS lineup:
- AMS (Gen 1): 4 slots, RFID coil per slot, daisy-chain to a hub for up to 16 slots total
- AMS Lite: 4 open-frame slots with rotary RFID. Originally A1-only, now P1S/X1 compatible via firmware ≥1.08 plus a hub modification. Most users stick with regular AMS on X1/P1S.
- AMS 2 Pro: 4 slots with active drying up to 65°C, RFID, condensation drain. Connects to X1C, X1E, P1S over the standard AMS port. Daisy-chain limit of 4 units.
- AMS HT: single-spool high-temp dryer for PA-CF and PPA-CF. X1E supports it natively; X1C needs firmware ≥1.08.
Slot mapping workflow (manual since the lockdown)
RFID is no longer auto-pushed to the slicer in Dev Mode. For each slot, the manual workflow:
- In OrcaSlicer’s Device tab, confirm the printer shows the AMS panel with the slot count (1-A through 1-D for first AMS; 2-A onward for daisy-chained units)
- In the Filament panel (left rail in Prepare tab), click each slot icon and select the filament preset (e.g., “Bambu PLA Basic @BBL X1C”)
- Set color manually. Click the swatch, enter HEX or use the eyedropper
- For multi-color prints, use the + button to add filaments up to the AMS slot count. Orca auto-assigns one Orca filament index per AMS slot if “Sync with AMS” is on; otherwise drag-drop in the AMS Mapping dialog before sending.
- Send-time AMS Mapping dialog: top row is sliced project filaments, bottom row is AMS slots. Reorder if material/color mismatch. Click “Use AMS” then Send.
Multi-color paint workflow
- Load model. Activate the Paint Tool (brush icon in the manipulation toolbar, hotkey N)
- Add filaments using + up to the AMS slot count (max 16 with 4 daisy-chained)
- Tools available: brush, bucket fill, smart fill (edge detect), height-range fill. Disable edge detection for organic models; leave it on for mechanical.
- Color → Filament assignment grid at the bottom: each painted color maps to a filament index → AMS slot
- Configure flush volumes in Filament Settings → “Flushing volumes” matrix. Typical 350 to 700 mm³ between PLA-PLA, 700 to 1200 between PLA-PETG. X1C/X1E with the poop chute can handle high flush; P1S users should reduce flush to save filament since waste is more visible.
- Use “Wipe to infill” and “Wipe to object” options on inner objects to bury purge material
Recommended calibration sequence
X1C and X1E: lidar handles much, manual fills the gaps
The lidar plus load-cell auto-calibrates Flow Dynamics (the K-value, equivalent to pressure advance) on every print start. The print starts with about 30 seconds of squiggles on the plate while the lidar measures actual extrusion. This is not exposed in OrcaSlicer; the printer just does it.
So on X1C/X1E, the manual calibration order is:
- Skip Flow Dynamics manual. Lidar does it.
- Flow Rate (extrusion multiplier) via Orca’s two-pass test. Lidar doesn’t adjust this. Pass 1 ±5, then Pass 2 ±0.5 fine.
- Temperature Tower for any non-Bambu filament. Bambu’s profiles are dialled for their own PLA Basic / Matte / Tough.
- Max Volumetric Speed, especially on X1C with the high-flow hotend (can push 30+ mm³/s with Bambu PLA HF).
- Retraction only if you see stringing. X1 default 0.8mm at 30 mm/s is usually fine.
- Skip input shaping. Bambu firmware handles this automatically.
- Skip tolerance and cornering tests unless you’re printing functional fit-test parts.
P1S: full manual suite (the reason most P1S owners switch)
P1S has no lidar, no eddy sensor. OrcaSlicer’s calibration suite is the main draw. Order:
- Temperature Tower per filament: 180-230°C for PLA, 220-260°C for PETG, 240-270°C for ABS/ASA, 260-300°C for PA-CF.
- Pressure Advance manual via Orca’s line or pattern method. Pick the cleanest corner, read K. Save into the filament profile (NOT into Bambu Studio, because switching back overwrites).
- Flow Rate Pass 1 then Pass 2.
- Max Volumetric Speed. P1S hotend is the older non-HF design; cap is around 21 mm³/s for PLA, 12 for PETG, 10 for ABS, 7 for PA-CF.
- Retraction tower. P1S Bowden-less direct drive is clean by default but TPU benefits from manual tuning.
- Cornering / Junction Deviation. Improves circles and chamfers visibly on P1S.
For the full per-test walkthrough, the OrcaSlicer calibration guide covers all nine tests.
Per-filament settings for X1C / X1E / P1S
Real numbers from Bambu’s wiki and community profiles. X1E differs only on chamber-temp-locked materials.
| Filament | Nozzle °C | Bed °C | Plate | Fan % | Max vol speed | Notes |
|---|---|---|---|---|---|---|
| Bambu PLA Basic | 220 / 230 | 55 | Tex PEI / Cool | 100 after L3 | 21 (P1S) / 28 (X1C HF) | K ~0.020 |
| Bambu PLA Matte | 215 / 220 | 55 | Tex PEI | 100 | 14 (P1S) / 18 (X1C) | More brittle, slow infill |
| Bambu PLA Tough+ | 220 | 55 | Tex PEI | 80 | 18 | K ~0.022 |
| Bambu PETG HF | 250 / 255 | 70 | Tex PEI | 30-50 | 12 (P1S) / 16 (X1C) | Glue stick on smooth PEI |
| Bambu PETG-CF | 255-265 | 80 | Engineering | 30 | 8 | Hardened nozzle, prefer 0.6 |
| Bambu ABS | 270 / 275 | 100 | Eng / Tex PEI | 0 first / 20 after | 14 | Enclosure closed, top glass on |
| Bambu ASA | 270 | 100 | Engineering | 20 | 12 | Same as ABS, slightly stiffer |
| Bambu PC | 270 | 100 | Eng + glue | 10 | 12 | X1C/P1S struggle without enclosure mods; X1E with chamber heat preferred |
| Bambu TPU 95A | 235 | 35 | Tex PEI | 80 | 5 | Slow speeds, no AMS for soft TPU |
| Bambu PA-CF | 290-300 | 80-90 | Eng + glue | 0 | 8 | Dry filament, hardened 0.6 nozzle, AMS HT recommended |
| Bambu PPA-CF / PPS-CF | 320 | 100 | Engineering | 0 | 8 | X1E only (X1C and P1S can’t reach 320°C) |
Note the X1E-only row at the bottom. The active heated chamber (60°C) is required for PPA-CF and PPS-CF; without it, prints warp catastrophically. X1C and P1S top out at ABS / ASA / PA-CF.
Common Bambu-specific issues with OrcaSlicer
“Cannot find printer” after firmware update
Symptom: Orca worked yesterday, can’t see the printer today. Cause: post-firmware-update LAN+Dev toggles get reset, or the network plugin signature changed. Fix: re-enable LAN Only Mode and Developer Mode on the printer screen, re-enter Access Code in Orca, install the latest network plugin via Preferences → Network plugin → Reinstall.
Access Code keeps resetting (issue #6169)
Symptom: Orca forgets the access code between sessions. Cause: Orca writes credentials to the user dir; Bambu account sync overwrites on launch if you’re logged in. Fix: disable “Auto sync user presets” in Preferences. Alternative: move config from %AppData%\Roaming\OrcaSlicer\user\<numeric>\ to \user\default\ and stay logged out for fully offline workflow.
“Camera initialization failed” in LAN-only
Cause: stale network plugin or blocked port. Fix: install Bambu Studio alongside OrcaSlicer (forces correct plugin), turn off Windows firewall once to test, ensure port 322 is open for X1 series or 6000 for P1 series. Restart Orca.
AMS slot mapping mismatch mid-print
Cause: AMS RFID propagation gated post-1.08, causing slot-index drift. Fix: before sending, in the AMS Mapping dialog, manually drag-drop each filament to its physical AMS slot. Disable “Use AMS” auto-mapping. Re-bind the printer if persistent.
Print sent but never starts (heats up, then cancels)
Cause: Bambu Connect handshake missing after January 2025 update. Fix: install Bambu Connect desktop app, log in, leave running in tray when slicing. Orca → Send hands the file to Connect, you press Print on Connect. Alternative: downgrade firmware to 1.07.x via SD card.
P1S won’t bind in LAN-only mode on Windows 11
Cause: P1S firmware sometimes fails to broadcast mDNS in Dev mode on Win 11. Fix: use IP-direct binding (not auto-discovery), disable IPv6 on the host NIC, add a Windows firewall inbound rule for OrcaSlicer.exe on ports 8883, 990, 322 / 6000.
Multi-color color assignment looks wrong on the print
Cause: AMS slot order in OrcaSlicer differs from physical AMS load order. Fix: always check the AMS Mapping preview dialog before sending. Top row is project filaments, bottom is physical slot 1-4. Remap manually.
Profiles disappeared after login
Cause: Bambu cloud sync overwrote local custom profiles with empty defaults (a known data-loss path). Fix: restore from \AppData\Roaming\OrcaSlicer\user\<id>\backup\ if backup exists. Going forward, disable cloud sync, manually export profile JSONs to a Git repo or external drive.
First layer too high after firmware update
Cause: load-cell offset reset on X1C/X1E firmware update. Fix: run full bed-level + Z-offset calibration from the printer touchscreen (Settings → Calibration → Full). Don’t slice in OrcaSlicer with a custom Z-offset stacked on top of the printer’s.
PA-CF clogs immediately on X1C/X1E
Cause: brass nozzle still installed, or filament not dried. Fix: confirm hardened steel 0.4 or 0.6 nozzle in printer’s hardware page. Run AMS HT or external dryer at 80°C for 8 hours pre-print. Increase nozzle to 290°C.
Profile labels gotcha (cosmetic, not functional)
OrcaSlicer issue #6183: X1, X1E, and P1S all inherit X1C process presets. Labels show “@BBL X1C” even on a P1S. The behavior is correct (presets are tuned per process, not per machine for these settings). The label is just cosmetic confusion. Don’t worry if your P1S setup shows X1C in profile names.
Brief note on A1 / A1 Mini
Out of scope for this article but worth mentioning. The A1 and A1 Mini share the AMS Lite ecosystem and were caught in the same January 2025 lockdown but use different printer profiles in OrcaSlicer (@BBL A1, @BBL A1M). The setup workflow on the A1’s touchscreen is similar to the P1S but the menu paths differ slightly. The A1 has the eddy-current Flow Dynamics calibration (firmware 01.04+), so its calibration position is between X1C (lidar handles auto) and P1S (full manual).
Choosing the right plate for the print
Bambu plates are interchangeable on all three printers. Picking the right one for the filament makes adhesion failures basically disappear.
| Plate | Best for | Avoid for |
|---|---|---|
| Cool Plate (smooth, low-temp) | PLA at low bed temps, prints needing ultra-flat bottoms | PETG, ABS, anything above 60°C bed |
| Textured PEI | PLA, ABS, ASA, PETG-CF (with glue), most everyday printing | Plain PETG without glue stick (PETG bonds too aggressively) |
| Smooth PEI | Mirror-finish bottoms, ASA, ABS | Plain PETG without glue (rips PEI off the plate) |
| Engineering Plate | PA-CF, PA, PC, ABS / ASA at high temp, PETG-CF | PLA (overkill, scuffs the plate) |
| High Temp Plate | PPA-CF, PPS-CF, PEEK (X1E only) | Anything below 100°C bed; the plate is overkill |
| PEI Plus | Engineering plastic with extra adhesion needed (PA on humid days) | Standard PLA |
Set the plate type in the Process tab’s “Bed type” dropdown so OrcaSlicer’s profile applies the right first-layer flow and bed temp offsets. Mismatched plate-to-profile is the most common cause of “first layer was perfect last week but now won’t stick”, where a frustrated user changes filament profile but forgets to change the plate selection.
Wrap-up
Switching from Bambu Studio to OrcaSlicer on a Bambu printer in 2026 means losing some convenience (cloud printing, RFID auto-detect, MakerWorld direct browse) and gaining real depth (calibration suite, scarf seams, multi-brand fleet support). For X1C and X1E owners with happy AMS workflows, the trade is debatable; you’re swapping convenience for power. For P1S owners, the trade is obvious; you were going to calibrate manually anyway, and OrcaSlicer’s suite is dramatically better than Bambu Studio’s two tests.
If you’re new to OrcaSlicer entirely, the beginners guide covers setup. The OrcaSlicer vs Bambu Studio comparison walks through the broader feature differences. Or grab the install from the download page.