I added an Ender 3 V3 KE to my fleet in mid-2024 and immediately spent the first weekend trying to figure out why OrcaSlicer kept saying “Update OctoPrint to 1.1.0 or higher” when I tried to connect it. The KE doesn’t run OctoPrint. It runs Creality OS, which is a Klipper fork. The fix turned out to be appending :4408 to the IP address. Two characters. Saved nowhere obvious in the Creality docs.
This is the article I wish I’d had. It covers the Creality Ender 3 V3 family with OrcaSlicer in 2026: V3 SE (Marlin, USB/SD only), V3 KE (Klipper, network), V3 Plus (Klipper, larger 300mm bed), and the V3 base model (CoreXZ kinematics, Klipper). All four models are bestselling Crealities of the 2024-2025 era and they need different setup paths in OrcaSlicer.
One quick note before we start: there is no “Ender 3 V3 Core XY”. The base V3 is CoreXZ (belts on X and Z, traditional Y bedslinger). The CoreXY in Creality’s 2025 lineup is the standalone Creality Hi, not branded as Ender 3 V3. I keep getting asked about this; saving you the search. Written against OrcaSlicer v2.3.2 (current stable; v2.3.1 specifically fixed Ender 3 V3 KE profile inconsistencies, so 2.3.1 is the minimum recommended version).
V3 family spec reference
| Spec | V3 SE | V3 KE | V3 (base CoreXZ) | V3 Plus |
|---|---|---|---|---|
| Build volume | 220×220×250 | 220×220×240 | 220×220×250 | 300×300×330 |
| Motion | Cartesian bedslinger, dual Z lead screws | Cartesian bedslinger, linear rail on X | CoreXZ bedslinger | CoreXZ bedslinger, dual Y motors |
| Firmware | Marlin 2.x | Klipper (Creality OS, open-source) | Creality OS (Klipper-based, more locked) | Creality OS |
| Web UI out of box | None | Creality Cloud only (Mainsail/Fluidd via root + helper) | Creality Cloud only | Creality Cloud only |
| Hotend max | 260°C (PTFE-lined Sprite DD) | 300°C (bi-metal heatbreak, ceramic 60W, copper unicorn) | 300°C unicorn | 300°C |
| Bed max | 100°C | 100°C | 100°C | 100°C |
| Default plate | PEI-coated spring steel (smooth) | Textured PEI spring steel | PEI flex | PEI flex |
| Accelerometer | None | NOT built-in (ADXL345 is $14 add-on) | None built-in | None built-in |
| Auto-leveling | CR-Touch + strain-gauge auto Z-offset | CR-Touch + strain-gauge | Strain-gauge nozzle probe | Strain-gauge nozzle probe |
| Network | None (USB + microSD) | Wi-Fi + LAN, Klipper/Moonraker | Wi-Fi | Wi-Fi |
| Max speed (rated) | 250 mm/s | 500 mm/s | 600 mm/s | 600 mm/s |
| Max acceleration | 2,500 mm/s² | 8,000 mm/s² | ~12,000 mm/s² | ~12,000 mm/s² |
| AMS analog | None | None (CFS not yet supported) | Future CFS teased | Future CFS teased |
Important to call out: none of the V3 models has a built-in accelerometer. The KE and Plus support adding an aftermarket Creality ADXL345 G-Sensor for $14, but it’s an accessory, not stock equipment. People mistakenly assume the K1’s onboard MPU-6500 is also on V3 KE; it isn’t.
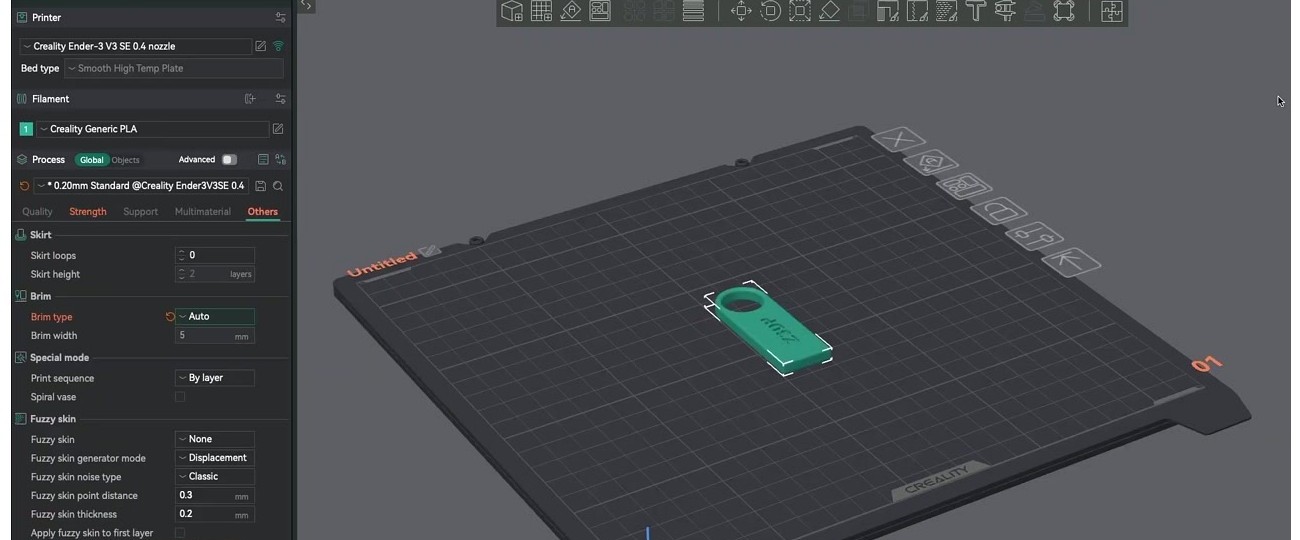
Picking the right OrcaSlicer profile
OrcaSlicer’s Add Printer wizard ships profiles for all four V3 models: “Creality Ender-3 V3 SE”, “Creality Ender-3 V3 KE”, “Creality Ender-3 V3 Plus”, and “Creality Ender-3 V3” (the CoreXZ base). Pick the one matching your hardware. Stock nozzle is 0.4mm on all four; tick that.
The profiles in OrcaSlicer 2.3.1+ correctly place the print origin and use the right start G-code. If you’re on an older OrcaSlicer version (2.2.x or earlier), the V3 SE profile in particular had a wrong origin that printed parts off-bed. Update OrcaSlicer first.
Connecting OrcaSlicer to the V3 series
V3 SE: SD card workflow only
The V3 SE runs Marlin and has no built-in network capability. Workflow is microSD only, with USB-C as a backup that has known driver flakiness on Windows 11 (install the CH340 driver if Windows doesn’t see the printer).
Slicing flow: File → Export → Export plate sliced file (.gcode). Save to the root of the microSD card as print.gcode (older firmware doesn’t traverse subfolders). Eject, insert into the printer, choose from the print menu.
If you want network printing on a V3 SE, the only path is adding an external Raspberry Pi running OctoPrint connected to the printer’s USB-C port. Set baud to 115200. OrcaSlicer’s network printing remains best-effort because Marlin doesn’t expose Klipper-style status APIs.
V3 KE: Klipper native via Moonraker
The KE is the easiest V3 to network-print to because Creality publishes the Klipper source on GitHub.
- Find printer IP:
Settings (gear icon) → Network → Wi-Fi/Ethernet. Note the IPv4. - (Optional) Enable root for full Mainsail/Moonraker access:
Settings → Root Account Information → accept disclaimer. Default credentials:root/creality_2023. Not required for vanilla Orca uploads, but needed if you want to install Mainsail or Fluidd via Helper Script. - In OrcaSlicer, select the V3 KE printer profile, click the Wi-Fi icon next to the printer name, and the Physical Printer dialog opens:
- Host Type: Klipper (Octo/Klipper)
- Hostname / IP:
http://192.168.x.x:4408/(Creality’s Moonraker shim runs on port 4408) - Device User Interface: same as hostname
- API Key: blank (Creality stock doesn’t use one)
- Click Test. Should return “Connected to OctoPrint…”
If you’ve installed Mainsail or Fluidd via the Guilouz Helper Script, the web UI lives at port 4409 (distinct from the slicer port). Don’t confuse them.
V3 Plus and V3 base CoreXZ: same as V3 KE
Both run Creality OS Klipper. Same wizard, same port 4408, same Host Type. Profile names: “Creality Ender-3 V3 Plus” and “Creality Ender-3 V3”.
Common connection errors
“Update OctoPrint to 1.1.0 or higher”: most common error. Means you forgot to append :4408 to the IP. Add the port suffix and the error goes away. (GitHub issues #3804 and #5545 are full of users hitting this.)
“Connection failed: 404” (issue #8733): trailing slash matters. http://IP:4408/ works; http://IP:4408 without the slash sometimes fails on KE.
“Upload OK, print won’t start”: Creality’s Klipper fork ignores OrcaSlicer’s start_print signal unless “Print after upload” is checked AND the printer has been freshly homed since boot.
“Klipper reports: MESH_BED_LEVELING undefined”: V3 KE/Plus uses BED_MESH_PROFILE LOAD=default, not Marlin’s M420. OrcaSlicer’s profile usually inserts the right macro, but custom start G-codes can break this.
Calibration sequence
V3 SE (Marlin, manual SD workflow)
- Auto-level once from the LCD: Level → Auto-Level. Wait the full cycle (~5 minutes cold).
- Auto Z-offset via the strain-gauge sequence on the LCD (already done at first boot). Re-run if you swap the nozzle.
- Temperature tower: Orca menu → Calibration → Temperature → choose PLA range (190-230°C). Slice, save to SD, print, read off the lowest stringing band.
- Flow ratio: Calibration → Flow Rate (one-pass). Default 0.98 is usually too high for the SE. Community average is around 0.95 for Creality Hyper PLA on the SE.
- Pressure Advance: stock SE Marlin does NOT include Linear Advance, so OrcaSlicer’s PA test won’t apply. Skip it.
- Max volumetric speed: skip the test, set 11 mm³/s for PLA in filament settings (the SE caps around 10-12 mm³/s on the stock hotend).
V3 KE / Plus / V3 base (Klipper)
- Bed mesh: SSH or via Mainsail run
BED_MESH_CALIBRATEonce after assembly. The strain-gauge auto-Z handles per-print Z-offset. - Pressure Advance: OrcaSlicer Calibration → Pressure Advance → Line method. Direct-drive setting. Print, measure, set in filament profile. Real-world starting points for the Creality Sprite-style direct extruder:
- PLA: ~0.030-0.045
- PETG: ~0.045-0.060
- ABS: ~0.030-0.040
- TPU 95A: ~0.060-0.090
- Flow ratio: Calibration → Flow Rate → Pass 1 then Pass 2. KE community values: PLA ~0.97, PETG ~0.96, ABS ~0.95.
- Max volumetric speed: KE/Plus hotend rated at 32 mm³/s with PLA Hyper, realistic 22-24 mm³/s for general PLA, 14 mm³/s PETG.
- Input shaping (KE/Plus only, requires aftermarket ADXL345 sensor): in Mainsail run
SHAPER_CALIBRATEfor X then Y. Without the sensor, leave Creality’s factory-tuned mzv shaper at its defaults; you can still print at 200 mm/s without visible ringing. - KAMP (Klipper Adaptive Meshing and Purging): install via the Guilouz Creality Helper Script. In OrcaSlicer enable Others → Label objects AND Others → Exclude objects so KAMP can read the print bounds.
For the full calibration walkthrough, the OrcaSlicer calibration guide covers all nine tests in order.
Per-filament settings for the V3 family
| Filament | Nozzle°C | Bed°C | Speed (V3 SE) | Speed (V3 KE/Plus) | Cooling | Flow ratio | PA (KE/Plus) |
|---|---|---|---|---|---|---|---|
| PLA | 210 | 60 | 100/200 mm/s | 200/350 mm/s | 100% | 0.97 | 0.035 |
| PLA Hyper | 220 | 60 | n/a (SE can’t keep up) | 250/500 mm/s | 100% | 0.95 | 0.030 |
| PETG | 235 | 75 | 60/120 mm/s | 80/200 mm/s | 30-50% | 0.96 | 0.050 |
| ABS | 245 | 100 | 50/100 mm/s | 70/150 mm/s | 0-10% | 0.95 | 0.035 |
| TPU 95A | 230 | 50 | 30 mm/s | 40 mm/s | 60% | 1.00 | 0.080 |
| PA-CF | 280 | 100 | not advised | 50/100 mm/s | 0% | 1.02 | 0.040 |
Notes:
- PLA first layer cooling on KE: 50% to avoid lifting on the textured PEI plate.
- PETG on V3 series: drop bed to 70°C if PETG over-adheres. Glue stick on the smooth side of the SE plate.
- ABS: all V3 models are open-frame; small parts only without an enclosure mod. Tents work; preheat the chamber for 15 minutes before printing.
- TPU on the SE: direct-drive helps; disable retraction or set to 0.4mm. Sprite extruder grub screw on the drive gear comes loose from the factory on a small fraction of units; tighten before blaming filament.
- PA-CF: KE/Plus only. Needs hardened steel nozzle (NOT the stock copper unicorn, which wears in one spool). Order a hardened steel unicorn ($12) before trying CF or GF.
The Others tab: brim, skirt, special modes
V3-specific tips:
- Skirt loops 0: fine on V3 series because the printer auto-purges before each print via START_PRINT. No skirt needed for nozzle priming.
- Brim type: most prints don’t need a brim on V3 PEI plates; adhesion is good. Switch to “Mouse ears” only for parts wider than 100mm with sharp corners (warp risk).
- Print sequence By layer is the default. By-object only works for short objects that fit under the gantry (limited by the V3 SE’s exposed Y-axis screws if you’re printing tall).
- Spiral vase: V3 KE excels at vase-mode prints because of the high default acceleration. Single-wall vases come out clean at 200 mm/s outer wall.
- Fuzzy skin: off by default. Enable for organic/textured surfaces. Default 0.3mm point distance and 0.2mm thickness work well.
Common V3 + OrcaSlicer issues and fixes
“HTTP 502 Bad Gateway” on connection test (V3 KE): wrong port. Must be :4408/ not :4409/. The 4409 endpoint is Mainsail’s frontend; 4408 is Creality’s slicer-facing Moonraker bridge.
First layer not sticking on stock PEI: the textured PEI ships with a fingerprint or oil film. Wash with dish soap and warm water, NEVER isopropyl alcohol (IPA leaves a residue on PEI). Z-offset typically wants -0.04 to -0.08mm tweak after first auto-leveling. Bed at 60°C is the floor for PLA; many users run 65°C on textured PEI for reliable adhesion.
“Klipper reports: MESH_BED_LEVELING undefined” (issue #4420): OrcaSlicer’s V3 SE/KE start G-code historically used Marlin’s M420. Community fix: replace with BED_MESH_PROFILE LOAD=default for KE/Plus. Leave M420 in place for V3 SE Marlin.
V3 SE prints offset or off-bed: SE profile in OrcaSlicer pre-2.2 had a wrong origin. Update to OrcaSlicer 2.3.1+ where the V3 KE profile fix landed (and the SE profile got refreshed alongside).
Ringing or ghosting on KE at 300+ mm/s: no built-in accelerometer; factory MZV shaper is a generic preset. Either lower outer wall speed to 150 mm/s OR install the $14 Creality ADXL345 G-Sensor and run SHAPER_CALIBRATE.
Z-offset drifts between prints (V3 KE): strain-gauge needs a clean nozzle; cold-pulled gunk skews probing. Cold-pull every ~50 hours or after PETG runs. Also disable QUICK_PROBE if you’ve enabled it via custom config.
“Print starts then immediately pauses”: Creality OS has an idle filament-runout timeout that fires during long OrcaSlicer uploads. Pre-upload from Orca, then start manually from the KE LCD.
TPU under-extrusion on V3 KE: Sprite extruder grub screw on the drive gear comes loose from factory on a small fraction of units. Tighten the small set screw before blaming filament.
The KE / Plus / V3 base differences worth knowing
KE is the most upgrader-friendly. Creality publishes the full Klipper source on GitHub (CrealityOfficial/Ender-3_V3_KE_Klipper). Root + Mainsail + Fluidd is a one-script install via the Guilouz Helper Script. The Plus and base V3 ship a more locked-down “Creality OS” build; rooting is possible but more fragile, and the Helper Script works but is less officially blessed.
Plus is the only one with a 300×300 bed. Only choice if you want to print helmets, planters, or anything bigger than a Benchy on steroids. Dual Y-motors prevent gantry skew over the longer Y travel.
V3 base CoreXZ is the speed king on paper at 600 mm/s, but real-world rarely hits it. Users report it’s fastest on infill, not perimeters. Linear rod on X (not rail like the KE) is a polarising choice.
None of the V3 family ships with an enclosure. ABS, ASA, and PA-CF all require third-party enclosure tents or printing tiny parts only.
None ships with a hardened nozzle. The KE/Plus copper “unicorn” nozzle wears fast on glow-in-dark, wood-fill, or any CF/GF filament. Order a hardened steel unicorn ($12) before printing abrasives.
Helper Script: when you actually need it
The Guilouz Creality Helper Script is the de-facto community method for unlocking K-series and V3 KE capability. It installs Mainsail / Fluidd / KAMP / M600 onto stock V3 KE and the larger V3 Plus.
You need Helper Script if you want:
- KAMP adaptive bed mesh (OrcaSlicer’s adaptive checkbox needs this)
- Filament runout pause and resume with M600
- EXCLUDE_OBJECT for “Skip Failed Objects” before firmware 1.3.6.0
- Mainsail web UI on port 4409 (in addition to the stock Fluidd-equivalent)
- Per-object cancel from OrcaSlicer’s Device tab
You don’t need Helper Script if you just want OrcaSlicer to send G-code and start prints. Stock V3 KE plus OrcaSlicer at port 4408 covers basic printing.
Install instructions are at guilouz.github.io/Creality-Helper-Script-Wiki. Requires SSH access; on stock V3 KE/Plus, default credentials are root / creality_2023.
Migrating from Creality Print or Cura to OrcaSlicer
Most V3 series owners come to OrcaSlicer from either Creality Print (the bundled slicer) or Cura. Migration tips:
From Creality Print: the in-box slicer is a Cura fork with Creality skins. Filament profile values transfer manually. Look up your tuned PLA temperatures, retraction, and flow ratio in Creality Print, then enter them into OrcaSlicer’s filament profile (Filament Settings → custom filament). Creality Print’s “Hyper PLA” preset is roughly equivalent to OrcaSlicer’s PLA at 220°C with 32 mm³/s max volumetric speed; that’s the closest mapping.
From Cura: Cura uses XML printer-definition format; OrcaSlicer uses JSON inheritance from a base printer profile. There’s no automatic import. Re-create your printer profile in OrcaSlicer (use the V3 SE / V3 KE / V3 Plus / V3 base profile from the wizard as your base), then customise from there. Filament settings transfer manually too. Plan ~30 minutes per printer.
Things that won’t transfer either way: support painting (Cura’s paint isn’t compatible with Orca’s), custom support modifiers, and any Cura-specific plugins (CalibrationShapes, AutoTowersGenerator). OrcaSlicer’s built-in Calibration menu replaces those plugins entirely; it’s actually simpler.
Frequently asked questions
Why does OrcaSlicer say “Update OctoPrint to 1.1.0 or higher” when I try to connect my V3 KE?
Because you forgot to append :4408 to the IP address. The KE doesn’t run OctoPrint; it runs Creality OS Klipper, with a Moonraker bridge on port 4408. The error message is misleading.
Does OrcaSlicer support the V3 SE for network printing?
Not directly. The V3 SE runs Marlin and has no built-in network. You can add an external Raspberry Pi running OctoPrint connected via USB-C, then connect OrcaSlicer to OctoPrint. Or just use the SD card workflow.
Can I use OrcaSlicer’s adaptive bed mesh on the V3 KE?
Only if you’ve installed KAMP via the Guilouz Helper Script. Stock Creality OS doesn’t include KAMP, so OrcaSlicer’s adaptive bed mesh checkbox does nothing without the install.
Does the V3 KE have an onboard accelerometer?
No. None of the V3 series ships with one. The KE and Plus support adding the Creality ADXL345 G-Sensor accessory ($14) which Creality publishes an install guide for. Without the sensor, you rely on Creality’s factory-tuned MZV input shaper preset.
What’s the right port for connecting OrcaSlicer to my V3 KE?
Port 4408 (Creality’s Moonraker bridge). NOT port 4409 (that’s Mainsail’s frontend if you’ve installed it via Helper Script). NOT port 80 (that’s Creality Cloud’s web UI). NOT port 7125 (raw Moonraker, often firewalled).
Is there an Ender 3 V3 Core XY model?
No. The base Ender 3 V3 is CoreXZ (belts on X and Z axes). The CoreXY in Creality’s 2025 lineup is the standalone Creality Hi, not Ender-branded.
Why won’t my V3 KE start the print after OrcaSlicer uploads?
Creality OS ignores OrcaSlicer’s start_print signal unless “Print after upload” is checked AND the printer has been freshly homed since boot. Either tick the checkbox in OrcaSlicer’s Send dialog, or upload the file then start the print manually from the KE’s LCD.
Can I print PA-CF or PETG-CF on the V3 KE?
Technically yes; practically you need to swap the stock copper unicorn nozzle for a hardened steel unicorn ($12) before printing CF or GF filaments. The copper version wears in less than one spool. Even then, CF / GF need an enclosure for proper print quality, and the V3 series ships open-frame.
What’s the difference between port 4408 and port 4409?
Port 4408 is Creality OS’s Moonraker bridge (which OrcaSlicer talks to). Port 4409 is the Mainsail web UI (which you reach in a browser if you’ve installed it via Helper Script). Don’t confuse them.
Wrap-up
The Creality Ender 3 V3 family with OrcaSlicer is excellent once you’ve cleared the firmware-and-port maze. The biggest single piece of advice: port 4408. Append it to the IP in the Physical Printer dialog and 80% of “OrcaSlicer can’t connect to my V3 KE” questions vanish.
For the V3 SE, slice and save to SD; the network workflow doesn’t really exist without an OctoPrint mod. For everything Klipper-based (KE, Plus, V3 base), use Host Type “Klipper (Octo/Klipper)” with port 4408 and a blank API key.
For full calibration, the OrcaSlicer calibration guide walks the nine-test suite. If you’re new to OrcaSlicer entirely, start with the beginners guide. Or grab the install from the download page.
Related OrcaSlicer guides
- OrcaSlicer Settings Master Guide: Every Setting Explained (2026)
- OrcaSlicer Fuzzy Skin: Add Texture to Any Print (2026 Settings Guide)
- OrcaSlicer for Anycubic Kobra 2 / Neo / Plus / Max: Setup and Best Settings (2026)
- OrcaSlicer for Sovol SV06 / SV07 / SV08: Setup and Best Settings (2026)
- How to Connect OrcaSlicer to OctoPrint: IP, API Key, and the Common Errors