
I’ve installed OrcaSlicer four times this year on three different machines and the same thing happens every time: the antivirus flags it, Microsoft tells me it might be malware, my friend asks if it’s safe. The short answer is yes, but the long answer is that the download experience is genuinely confusing for anyone who hasn’t done it before. This is the unfiltered version of what version to grab, where to grab it, and what’s new in the current 2.3.2 line.
I’ll walk you through every step, every warning dialog you’re going to hit, and exactly which of the six download files on the GitHub releases page you actually want. No filler, no marketing fluff, and definitely no pretending the SHA-256 hash situation is something it isn’t.
Table of contents
- Download OrcaSlicer (latest stable: v2.3.2)
- Which file do I actually need?
- Is OrcaSlicer safe to download?
- What’s new in OrcaSlicer 2.3.2
- Stable or nightly: which build should you grab?
- Installing it once you’ve downloaded
- Common problems and the fixes that actually work
- Updating from an older version without wrecking your profiles
- Should you actually be using OrcaSlicer?
- System requirements
- OrcaSlicer download FAQ
Download OrcaSlicer (latest stable: v2.3.2)
The current stable release is OrcaSlicer v2.3.2, published on the GitHub releases page on March 23, 2026. If you’re on this page because you want the file, here’s the file. Pick your operating system, click through to the official release page, and grab the matching asset:
Get the latest stable build here: github.com/OrcaSlicer/OrcaSlicer/releases/latest
That’s the only URL I’d trust. Not orcaslicer.net (this site, which is a third-party content guide and doesn’t host any binaries), not orca-slicer.com, not orcaslicer.info, not any of the dozen lookalike domains Google will happily serve you. The OrcaSlicer maintainers publish builds directly to GitHub and link to that page from their own official site at orcaslicer.com. Anywhere else is somebody else’s mirror at best and somebody else’s repackaged installer at worst.
Here’s exactly what’s on the release page right now:
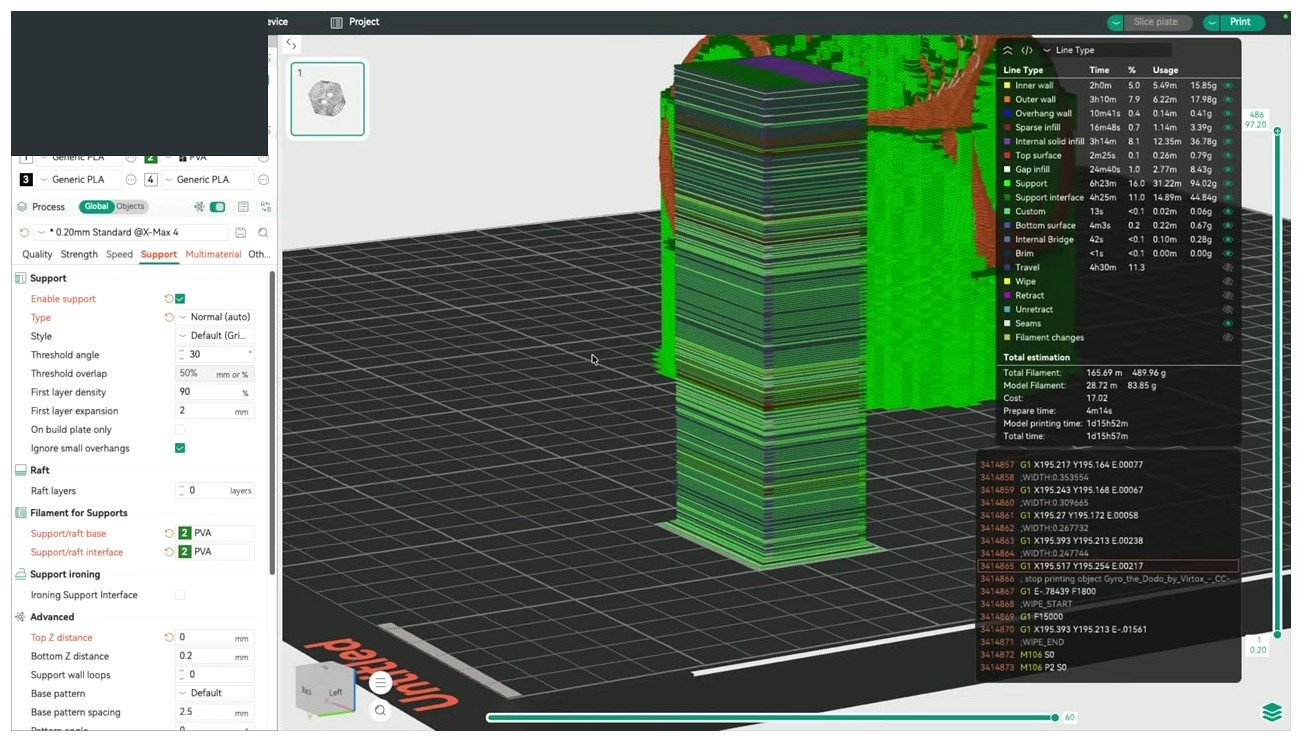
| Platform | Filename | Size | What it is |
|---|---|---|---|
| Windows (installer) | OrcaSlicer_Windows_Installer_V2.3.2.exe | ~119 MB | Standard installer, registers file associations and Start menu entries. |
| Windows (portable) | OrcaSlicer_Windows_V2.3.2_portable.zip | ~150 MB | Extract and run. Settings sit next to the .exe. Good for USB drives. |
| macOS (universal) | OrcaSlicer_Mac_universal_V2.3.2.dmg | ~214 MB | One DMG covers both Apple Silicon and Intel. No more “pick the right architecture.” |
| Linux (AppImage) | OrcaSlicer_Linux_AppImage_Ubuntu2404_V2.3.2.AppImage | ~119 MB | Built on Ubuntu 24.04 base. Needs libfuse2t64 on newer Ubuntu. |
| Linux (Flatpak x86_64) | OrcaSlicer-Linux-flatpak_V2.3.2_x86_64.flatpak | ~114 MB | Flathub-distributed sandboxed build for desktop x86_64 systems. |
| Linux (Flatpak aarch64) | OrcaSlicer-Linux-flatpak_V2.3.2_aarch64.flatpak | ~110 MB | ARM64 Flatpak. For Raspberry Pi 4/5 desktops or ARM workstations. |
Six files. Most readers only need one. If you’re not sure which, the next section breaks it down.
Which file do I actually need?
The release page lists six assets and that’s a lot of choice for what should be a one-click action. I’ve made every one of these decisions wrong at some point, so here’s the picker I wish I’d had the first time.
Windows
If you’ve never installed OrcaSlicer before, you want OrcaSlicer_Windows_Installer_V2.3.2.exe. Double-click, click through the wizard, done. It installs to C:\Program Files\OrcaSlicer\, drops a shortcut on your Start menu, and registers .3mf and .stl file associations so double-clicking those files opens OrcaSlicer. Your user profiles, presets, and printer configs live in %APPDATA%\OrcaSlicer\, which expands to C:\Users\<you>\AppData\Roaming\OrcaSlicer\.
The installer bundles Microsoft Visual C++ Redistributable 2019 and the WebView2 runtime if you don’t already have them, so you don’t need a separate download. If you’ve got a fresh install of Windows and the installer asks to install those first, let it.
The portable ZIP is for a narrower audience. I use it when I want to run a stable build and a nightly side by side without one stomping on the other’s settings, or when I’m testing on a machine I don’t have admin rights on. Extract the ZIP anywhere, double-click orca-slicer.exe, and OrcaSlicer reads and writes its settings to a data/ subfolder right next to the executable. That makes it portable in the literal sense: drop the folder on a USB stick and your full configured slicer goes with you.
If you’re a regular user just trying to slice some prints, take the installer. I’m not going to talk you into the portable build unless you specifically need it.
macOS
Grab OrcaSlicer_Mac_universal_V2.3.2.dmg. That’s it. The “universal” in the filename means it works on both Apple Silicon Macs (M1, M2, M3, M4) and older Intel Macs in a single binary. If you were here a year ago and remember picking between an arm64 DMG and an x86_64 DMG, that split ended with the 2.3.1 release. The 2.3.2 line ships one DMG for everybody.
Mount the DMG, drag OrcaSlicer to your Applications folder, eject the DMG. The first launch will throw a Gatekeeper warning, which I’ll cover in the safety section, but the fix is a single command and you’ll be slicing within two minutes.
If you live in your terminal and use Homebrew, you can also do brew install --cask orcaslicer and Homebrew handles the download and install for you. That cask conflicts with orcaslicer@nightly, so you can only have one of the two installed at a time through Homebrew.
Linux
Linux is where it gets opinionated. There are three reasonable paths and you should pick based on your distro and how much sandboxing you want.
Flatpak via Flathub is what I recommend to almost everyone now that the maintainers have made it the official Linux distribution channel. Run flatpak install flathub com.orcaslicer.OrcaSlicer, then launch with flatpak run com.orcaslicer.OrcaSlicer or from your application menu. Updates are handled by your system’s Flatpak runner, libraries are bundled and isolated, and you don’t fight your distro’s package versions. The one gotcha: USB serial access to a printer is sandboxed, so if you’re using a direct USB connection (rather than network or SD card), you’ll need to grant device permissions via Flatseal or the --device=all flag.
AppImage is the right choice if you want a single self-contained file you can copy to any machine. It’s built on Ubuntu 24.04, so on newer distros it just runs. On Ubuntu 22.04 or Mint 21, you’ll need to install libfuse2 (older releases) or libfuse2t64 (Ubuntu 24.04 renamed the package). I’ll cover the troubleshooting steps in the problems section below.
AUR is for Arch and Manjaro. You’ve got four options: orca-slicer-bin (pre-built, easiest), orca-slicer (builds from source), orca-slicer-git (latest main branch), and orca-slicer-nightly-bin (pre-built nightly). I’d pick orca-slicer-bin unless you have a specific reason to want otherwise.
The quick picker
| Your situation | File to grab |
|---|---|
| First-time Windows user | Windows installer .exe |
| Want stable + nightly side by side on Windows | Portable ZIP |
| Mac (Apple Silicon or Intel) | Mac universal DMG |
| Mac with Homebrew | brew install --cask orcaslicer |
| Generic Linux desktop | Flatpak via Flathub |
| Linux, want one self-contained file | AppImage |
| Arch / Manjaro | yay -S orca-slicer-bin |
| Raspberry Pi 4/5 desktop or ARM workstation | aarch64 Flatpak |
Is OrcaSlicer safe to download?
Yes, with caveats that you should actually understand. Let me walk you through what’s real and what’s noise.
OrcaSlicer is open-source software licensed under AGPL-3.0. The source code lives at github.com/OrcaSlicer/OrcaSlicer and anyone, including security researchers, can read every line of it. The project is a fork of Bambu Studio, which is itself a fork of PrusaSlicer, which descends from the original Slic3r. That entire lineage is open source. There’s no hidden telemetry binary phoning home to anyone’s ad network.
I wrote a deeper analysis of the trust question over on our “is OrcaSlicer safe” article if you want the full breakdown, but the short version is below.
The only safe download source is GitHub
Every official OrcaSlicer build is published to github.com/OrcaSlicer/OrcaSlicer/releases. Each asset URL follows the pattern github.com/OrcaSlicer/OrcaSlicer/releases/download/v<version>/<filename>, served over HTTPS with GitHub’s TLS certificate. That URL, plus the padlock in your browser, is what you’re verifying. If a download link sends you anywhere else, the maintainers haven’t endorsed it.
The official orcaslicer.com website (which is the project’s own marketing site, launched in 2024) doesn’t actually host its own copies of the installer either. It links straight to the GitHub release page. The maintainers have said in public discussion threads that GitHub is the only authoritative source and that they cannot vouch for any third-party redistributor.
Note that the repository moved from SoftFever/OrcaSlicer to OrcaSlicer/OrcaSlicer when the project transitioned to its own GitHub organization. The old SoftFever URL still redirects, but the new URL is the canonical one going forward.
About SHA-256 hashes (and why I’m not telling you to verify one)
You’ve probably read other download guides that tell you to verify the SHA-256 checksum of your download. I can’t tell you to do that here because the OrcaSlicer project does not publish SHA-256 hashes alongside its releases. There’s an open feature request on the repo (issue #7005, originally filed on the SoftFever repo) asking the maintainers to add them, but it hasn’t been actioned at the time I’m writing this. Anyone who tells you to “verify the published SHA-256” is making something up, because there isn’t one to verify.
What you can actually do:
- Confirm your browser’s URL bar shows
https://github.com/OrcaSlicer/OrcaSlicer/releases/download/...when the download starts. Notorcaslicer.something-else.com. - Confirm the padlock icon shows a valid TLS certificate for
github.com. - If you want a second opinion, upload the downloaded installer to virustotal.com. Expect a small number of generic heuristic flags (unsigned installers and bundled WebKit components trigger some signatures) but no real malware detections from major engines like Microsoft Defender, Bitdefender, or Kaspersky. I’m not going to quote a specific “X out of 70 engines” number because that figure shifts daily.
Code signing: the honest answer
The Windows installer is not code-signed with an Authenticode certificate. The macOS DMG is not Apple-notarized. That’s why you’re going to see scary dialogs the first time you run either one.
This isn’t a security failure of OrcaSlicer. It’s an economics problem. An EV code-signing certificate that Microsoft’s SmartScreen will trust without warnings costs several hundred dollars a year, plus identity verification overhead. Apple’s notarization requires a $99 per year Developer Program enrollment plus running every build through Apple’s signing API. OrcaSlicer is a volunteer-driven AGPL project. Those costs aren’t in scope, and they don’t need to be in scope for the binary to be safe.
On Windows you’ll see Microsoft Defender SmartScreen saying “Windows protected your PC.” Click “More info” and a “Run anyway” button appears. Click it. That’s the entire fix.
On macOS, the first time you open OrcaSlicer you’ll get one of two dialogs: either “OrcaSlicer can’t be opened because it is from an unidentified developer” (the polite one, with a workaround via right-click → Open) or “OrcaSlicer is damaged and can’t be opened” (the rude one, which lies). The dialog claims the app is damaged. It isn’t. macOS is just refusing to launch it because the binary doesn’t have an Apple notarization stamp and arrived with the com.apple.quarantine extended attribute set by your browser.
The fix is one terminal command:
sudo xattr -rd com.apple.quarantine /Applications/OrcaSlicer.appEnter your admin password, then launch OrcaSlicer normally. Done.
About the lookalike sites
OrcaSlicer is popular enough that a small constellation of unofficial download sites has sprung up around the project. Some redirect to GitHub. Some serve their own modified installers. Some are ad-blocker flagged. The maintainers’ position is that the ownership of these domains can change without notice, so trusting any of them today doesn’t mean they’ll be safe tomorrow.
The rule I follow, and the one I’d suggest you follow: if a download button sends you anywhere other than github.com/OrcaSlicer/OrcaSlicer/releases, close the tab. That’s the only address that’s authoritative no matter how the third-party landscape shifts. The official maintainer discussion on this (GitHub Discussion #11361) makes the same recommendation in plainer language.
What’s new in OrcaSlicer 2.3.2
The 2.3.2 release shipped on March 23, 2026, after a beta in mid-February and two release candidates in early March. It’s not a feature blockbuster like 2.3.1 was. It’s a stabilization release with one genuinely important security fix and a handful of useful quality-of-life improvements.
The headline items:
- Patched path-traversal vulnerability in .3mf import. Earlier versions could be tricked, by a crafted .3mf file, into writing to arbitrary filesystem locations during import. This is a real bug fix and reason enough to update on its own. Don’t open .3mf files from random sources on 2.3.1 or earlier.
- Configurable wipe tower type as a printer-level setting. Type 2 is the recommendation for MMU systems, filament cutters, and tool changers. The interface ports Bambu Studio’s wipe tower improvements, which matter for “PETG support under PLA” or “PLA support under PETG” workflows where you want to tune interface temperature, extrusion, ironing, and flushing separately.
- CLI segfault fixed affecting
--info,--slice, and--export-3mf. If you’ve been running OrcaSlicer headless in a CI pipeline, the 2.3.1 CLI was unreliable. 2.3.2 fixes that. - Dynamic title bar that shows long project names with ellipsis truncation, and accordion-style sidebar tabs that collapse to icons when the window is narrow.
- G-code preview color-codes by feature type by default for single-material prints, which is far more useful out of the box than the old per-layer color scheme.
- New canvas menu with a zoom button and navigator / XYZ-axis toggles, accessible without diving into the View menu.
- Linux improvements: the double title bar bug is gone, dual-GPU Linux setups now prefer the discrete GPU automatically, and the Flathub release is now officially endorsed by the project.
- Cancellable beam interlocking generation. The old beam interlocking on dense models could lock the UI up for minutes. You can cancel it now.
- Modular network agent architecture with experimental filament-info sync from printers with material stations (Moonraker/Klipper, Qidi, Snapmaker). This is the foundation work for upcoming AMS-like features on non-Bambu hardware.
The 2.3.2 release also expanded the supported-printer list. The new printer profile that turned heads in this cycle is the Snapmaker U1, which is the first multi-extruder Snapmaker the project has shipped a tuned profile for.
Be honest: 2.3.2 isn’t bug-free
There’s a tracking issue (#12684 on the repo) that catalogs regressions still present in 2.3.2 that the maintainers know about and have fixes in flight for. The ones likely to affect you:
- Skip points notch and pre-extrusion distance settings on the prime tower don’t apply correctly to non-Bambu printers.
- Internal ribs setting doesn’t work on non-Bambu printers (a different tower shrinking algorithm gets applied instead).
- Spiral tower ironing strategy is currently restricted to the Bambu H2D.
- Adaptive flowrate only takes effect with Bambu filaments.
- Filament grouping is forced to “Auto” mode for unsupported printers.
- Window lag during layer slider navigation on Windows.
- Notification close issues in preview mode.
- Temperature mixing notifications reappear incorrectly after dismissing.
- Access-violation crashes when loading some older profiles (back up your
user/folder before upgrading).
None of these are dealbreakers. Several have pull requests already up. I’d rather you know about them than be surprised. If any of them bite you, the canonical reporting channel is the GitHub issues tracker, not Reddit, not this site, not a Discord.
The 2.3.1 features people are still using
The 2.3.1 release (October 2025) was the big features release of the recent cycle, and most of what people think of as “new in OrcaSlicer” actually shipped there:
- Template-based sparse infill rotation for stronger prints in specific load directions.
- Fuzzy skin (extrusion mode) and fuzzy skin painting, where you can paint specific faces to fuzz rather than fuzzing the whole outer wall.
- Extra solid infills at user-specified layers, useful for reinforcing critical layers without raising overall infill percentage.
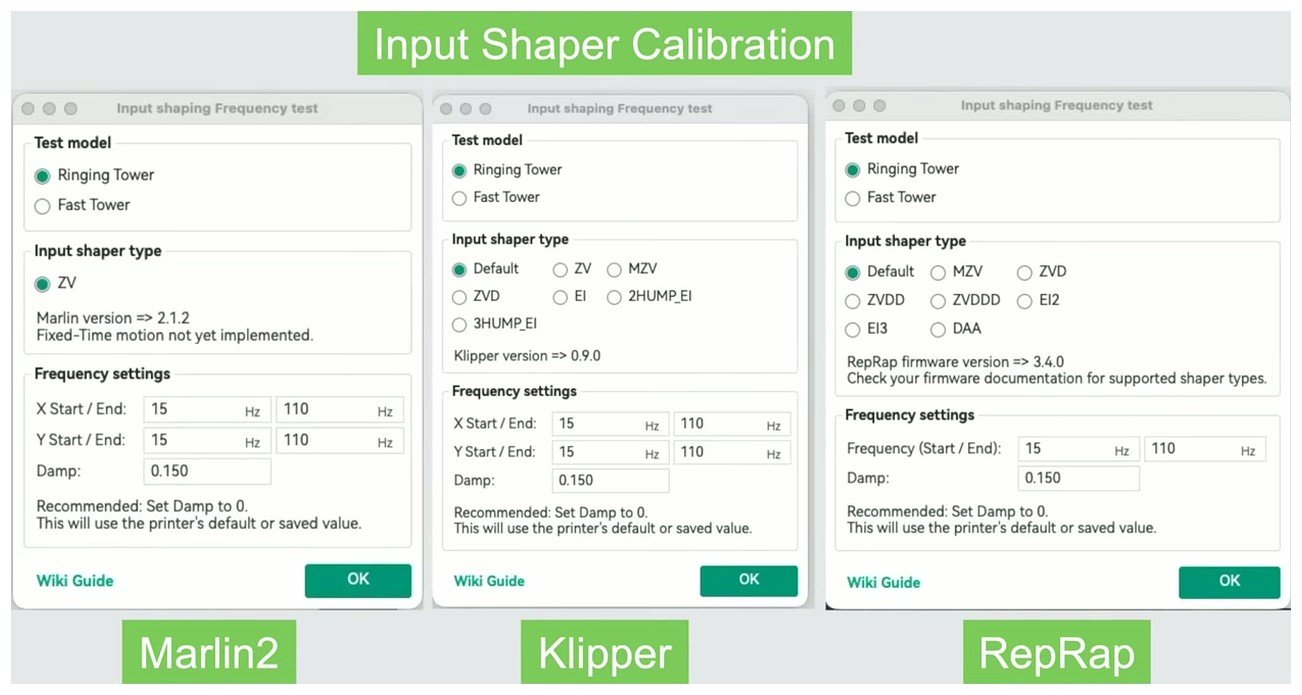
- Built-in Input Shaping and Junction Deviation calibration wizards. Marlin, Klipper, and RepRap firmware all get their own flow now.
- Multi-material color remapping.
- RIB wipe tower with a sturdier geometry that’s less prone to falling over on tall prints.
- Official support for the Bambu Lab AMS 2 and AMS 2 HT.

If you’re updating from a 2.2.x build, you’re really getting 2.3.1’s feature set plus 2.3.2’s stabilization on top, which is a substantial jump from where you started.
The 2.3.0 release (March 2025)
For context, the 2.3.0 line introduced the automatic profile backup on upgrade, brims inside holes (so brim adhesion works for objects positioned inside cutouts), performance improvements for large Bambu prints, and changed the default sparse infill pattern to crosshatch. If you’ve been off OrcaSlicer for over a year, these are baseline now.
For a deeper feature walk-through I wrote up our full 2026 review, but if you just want to slice and print, you don’t need to read it before installing.
Stable or nightly: which build should you grab?
Almost certainly stable. That’s the v2.3.2 build I’ve been talking about for the whole article.
Nightly builds are auto-generated from the main branch after every commit and published as the single rolling release tag nightly-builds at github.com/OrcaSlicer/OrcaSlicer/releases/tag/nightly-builds. The download URL stays the same but the file behind it gets overwritten with each new build. They’re useful in two situations: when you’re chasing a specific bug fix that’s merged but not yet released, or when you want to play with an experimental feature that hasn’t landed in a stable yet (during the late 2025 cycle, parts of the calibration wizards and AMS 2 HT support were nightly-only for a few weeks before 2.3.1).
The maintainers explicitly warn that nightlies may crash, produce incorrect G-code, or behave unpredictably. If you do run nightlies, run them as the Windows portable build (or the orca-slicer-nightly-bin AUR package on Arch) so your stable install stays untouched, and back up your user/ profile folder before launching for the first time.
I run nightly on a separate machine for testing. On my main slicing workstation, I run stable. If you’re not sure which category you’re in, you’re in the stable category.
Installing it once you’ve downloaded
The download is the easy part. The install has OS-specific gotchas worth knowing before you start clicking.
Windows
Double-click OrcaSlicer_Windows_Installer_V2.3.2.exe. SmartScreen will fire with the “Windows protected your PC” dialog. Click “More info,” then “Run anyway.” The installer launches, you accept the AGPL-3.0 license, pick an install location (the default C:\Program Files\OrcaSlicer\ is fine), and click through. If you don’t already have the WebView2 runtime, the installer offers to grab it for you. Say yes. The whole flow takes maybe two minutes.
For the step-by-step with screenshots and every edge case, I wrote a dedicated OrcaSlicer Windows install guide. If the basic flow above worked, you don’t need it.
macOS
Double-click the DMG. A Finder window opens with OrcaSlicer.app and an alias to the Applications folder. Drag OrcaSlicer.app onto the Applications alias. Eject the DMG. Now run OrcaSlicer from your Applications folder.
You’ll hit either the “damaged” or “developer cannot be verified” dialog. Open Terminal, run sudo xattr -rd com.apple.quarantine /Applications/OrcaSlicer.app, enter your password, then launch OrcaSlicer again. It opens normally.
I’ve got the full walk-through with the right-click workaround for the verifiability dialog over on the OrcaSlicer macOS install guide.
Linux
If you went the Flatpak route: flatpak install flathub com.orcaslicer.OrcaSlicer, then launch from your app menu or with flatpak run com.orcaslicer.OrcaSlicer. Updates happen automatically when your system runs flatpak update.
If you went the AppImage route, make it executable and launch it:
chmod +x OrcaSlicer_Linux_AppImage_Ubuntu2404_V2.3.2.AppImage
./OrcaSlicer_Linux_AppImage_Ubuntu2404_V2.3.2.AppImage
If you went the AUR route on Arch: yay -S orca-slicer-bin (or paru -S orca-slicer-bin). Future updates come through your regular yay -Syu.
Once installed, the UI is mostly self-explanatory. Add a printer profile, drop in an STL, slice. The default view looks like this after you’ve loaded a model:
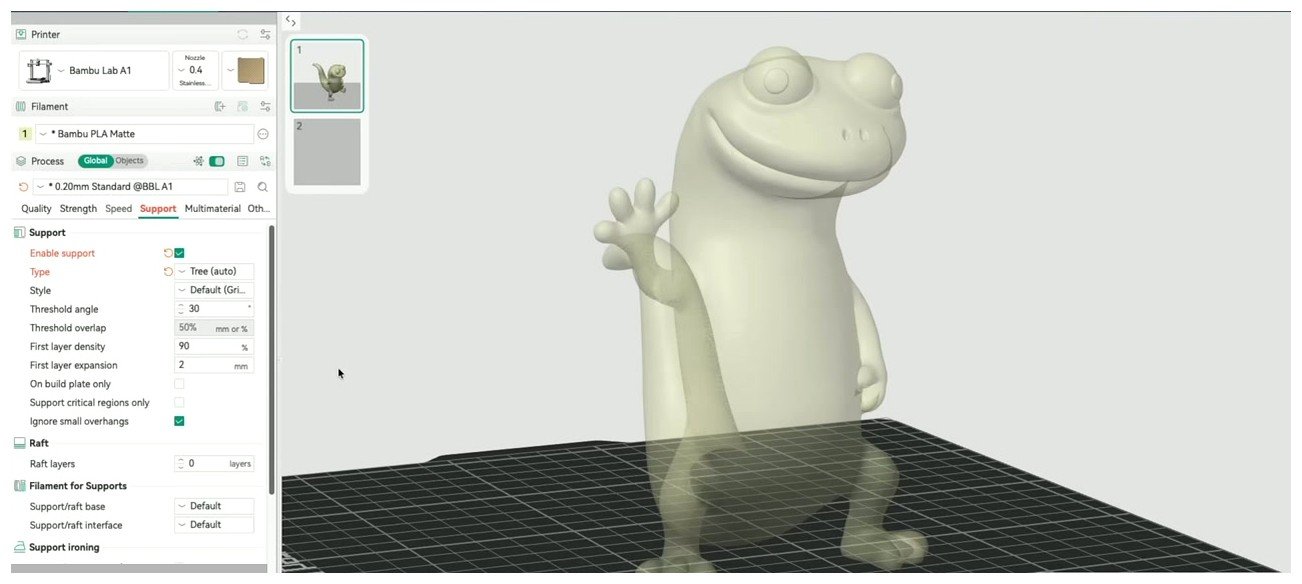
If this is your first OrcaSlicer print, our beginner’s first-print walk-through covers everything from adding your printer profile to dialing in your first benchy.
Common problems and the fixes that actually work
I’ve hit most of these myself. Here are the ones that come up in support threads over and over.
Windows: SmartScreen blocks the installer
Already covered. Click “More info” → “Run anyway.” That’s the fix.
One rare edge case: occasionally a specific build’s hash gets actively revoked by SmartScreen reputation scoring rather than just unrecognized. That’s tracked in issue #7484 on the repo. When it happens, “Run anyway” doesn’t appear. The workaround is to download a newer release (the 2.3.2 build I’m linking is not affected).
Windows: Defender quarantines OrcaSlicer as a virus
Some antivirus engines flag OrcaSlicer’s bundled WebKit and network-agent components as suspicious. It’s a false positive. The fix: restore from quarantine (Windows Security → Protection history → find the OrcaSlicer entry → Actions → Restore), then add an exclusion for C:\Program Files\OrcaSlicer\.
Windows: “Error opening file for writing” during install
Almost always means OrcaSlicer is still running in the background. Open Task Manager, kill any orca-slicer.exe processes, then re-run the installer. If that doesn’t fix it, run the installer as administrator, and if you have third-party antivirus, temporarily disable it for the install.
macOS: “OrcaSlicer is damaged and can’t be opened”
Run this in Terminal:
sudo xattr -rd com.apple.quarantine /Applications/OrcaSlicer.appThat’s the one fix that always works. The right-click → Open workaround works for the “developer cannot be verified” variant of the dialog but not the “damaged” variant. xattr handles both.
Linux: AppImage won’t run
Try these in order:
- Make sure it’s executable:
chmod +x OrcaSlicer_Linux_AppImage_Ubuntu2404_V2.3.2.AppImage. - Install FUSE. On Ubuntu 22.04 and earlier:
sudo apt install libfuse2. On Ubuntu 24.04 (where the package got renamed):sudo apt install libfuse2t64. On Fedora:sudo dnf install fuse. - If you hit a fusermount permission error:
sudo chmod u+s "$(which fusermount)". - If you’re missing
libwebkit2gtk-4.0.so.37on an older distro, the cleanest fix is to switch to the Flatpak, which is self-contained. - Last resort:
./OrcaSlicer_*.AppImage --appimage-extractunpacks the AppImage into asquashfs-root/folder you can run directly without FUSE at all.
Linux Flatpak: printer USB access doesn’t work
The Flatpak sandbox blocks raw USB serial access by default. Install Flatseal (a graphical Flatpak permissions manager), open OrcaSlicer’s entry, and grant Devices → All devices, or grant --device=all via the command line. Network and SD-card workflows aren’t affected by the sandbox.
If you’re hitting something I haven’t covered, our OrcaSlicer troubleshooting reference has the larger catalog of fixes.
Updating from an older version without wrecking your profiles
OrcaSlicer 2.3.0 introduced an automatic profile backup on upgrade, which means the app makes its own copy of your user/ folder before applying changes. It’s a safety net. I still back up manually for any major-version jump, because data loss from a botched upgrade is a misery I’ve experienced once and don’t want to repeat.
Where your profiles actually live
| OS / install method | Profile location |
|---|---|
| Windows (installer) | %APPDATA%\OrcaSlicer\ (i.e. C:\Users\<you>\AppData\Roaming\OrcaSlicer\) |
| Windows (portable) | data/ subfolder next to orca-slicer.exe |
| macOS | ~/Library/Application Support/OrcaSlicer/ |
| Linux (AppImage, native, AUR) | ~/.config/OrcaSlicer/ |
| Linux (Flatpak) | ~/.var/app/com.orcaslicer.OrcaSlicer/config/OrcaSlicer/ |
Note the Flatpak path is different from the native path. If you’re switching between Flatpak and AppImage on Linux, copy your user/ subfolder across.
The shortcut that beats memorizing paths
Inside OrcaSlicer, go to Help → Show Configuration Folder. It opens the folder in your OS file manager, no matter which path applies to your install. I’d recommend using this instead of trying to remember the table above.
The full backup-before-update workflow
- Open your current OrcaSlicer.
- Help → Show Configuration Folder.
- Copy the
user/subfolder somewhere safe (Desktop, Dropbox, USB). - Also export presets explicitly: File → Export → Export preset bundle. You get
.orca_filamentand.orca_printerbundles that are portable across machines and versions. - Run the new installer (or replace your AppImage, or
flatpak update, oryay -Syu). - Launch the new version. If profiles look intact, you’re done.
- If anything is missing, File → Import → bring in the exported bundles from step 4.
Updating through a package manager
- Homebrew (macOS):
brew update && brew upgrade --cask orcaslicer - Flatpak (Linux):
flatpak update com.orcaslicer.OrcaSlicer - AUR (Arch):
yay -Syu - Windows: No auto-updater. Download the new installer manually. It detects your existing install and offers to upgrade in place.
Should you actually be using OrcaSlicer?
Probably yes. But I’m not in the business of telling you to install something just because you landed on this page, so here’s the honest sanity check.
If you only have a Bambu printer and you never want to tinker, Bambu Studio is the upstream that OrcaSlicer forks from and you get first-party support from Bambu Lab. OrcaSlicer adds calibration wizards, finer-grained parameters, and tighter Klipper integration on top. I’ve got the full breakdown in OrcaSlicer vs Bambu Studio.
If you have a Prusa printer or you want the most conservative, well-documented option, PrusaSlicer is the grandparent of OrcaSlicer (via Bambu Studio) and remains the safer, more stable choice. OrcaSlicer moves faster but breaks more things. The comparison in OrcaSlicer vs PrusaSlicer goes deeper on this.
If you’re an absolute beginner who just wants something with a soft learning curve, Cura from UltiMaker has the biggest installed base and a friendlier settings model, but its default profiles are slower than OrcaSlicer’s. OrcaSlicer vs Cura covers when one wins over the other.
The one-sentence verdict: if you have any modern FDM printer that isn’t a generic Ender 3 from 2018, OrcaSlicer is the one to grab. If your printer is Prusa-branded or you want the safest possible default behavior, PrusaSlicer. If you’ve been on Cura for years and your prints are fine, you have no reason to switch.
For the full list of pre-tuned printer profiles OrcaSlicer ships with (Bambu Lab, Voron, RatRig, Creality K1, Sovol, Snapmaker, Qidi, plus the longer tail), I’ve got the printer profiles hub on this site.
System requirements
OrcaSlicer is not a heavyweight, but it’s not Notepad either. Here’s the baseline:
| Requirement | Minimum | Recommended |
|---|---|---|
| Windows version | Windows 10 64-bit | Windows 11 |
| macOS version | macOS 11.3 Big Sur | macOS 13 or newer |
| Linux base | GTK 2/3, glibc compatible with Ubuntu 24.04 | Ubuntu 24.04+, Fedora 40+, or a current rolling distro |
| RAM | 4 GB | 8 GB or more |
| GPU / OpenGL | OpenGL 3.3 (Intel HD 4000-era or newer in practice) | Dedicated GPU for large prints |
| Disk | ~500 MB for the app, more for cached G-code | Solid-state recommended |
| Architecture | x86_64 / ARM64 (universal Mac, ARM Linux Flatpak available) | Same |
The OpenGL number is worth flagging. OrcaSlicer’s own site (orcaslicer.com/download/) cites OpenGL 3.3, and that’s the safer number to use. Older guides quote 2.0+ or 4.5; in practice anything from a 2012-era integrated graphics chip onward is fine. If you’re running a really old machine and you get a blank 3D viewport, that’s the cause.
OrcaSlicer download FAQ
Is OrcaSlicer really free?
Yes. OrcaSlicer is open-source software released under the AGPL-3.0 license. No trial periods, no upsells, no paid tier. You can read the source on the GitHub repo and modify it yourself if you want, as long as you respect the AGPL-3.0’s copyleft terms.
Is OrcaSlicer the same as Bambu Studio?
No. OrcaSlicer is a fork of Bambu Studio with substantially different features layered on top (calibration wizards, broader printer support, Klipper integration, finer parameter exposure). They share a code lineage but are independent projects with different release cadences and feature sets.
Does it work with my [Prusa / Bambu / Creality / Voron] printer?
Almost certainly yes. OrcaSlicer ships pre-tuned profiles for Bambu Lab (X1, P1, A1, H2D), Prusa (MK3S, MK4, XL, MINI), Voron (V0, V2, Trident), Creality K1 series, Sovol, RatRig, Snapmaker (including the new U1), Qidi, Anycubic, Elegoo Neptune, and dozens of others. If your printer isn’t in the built-in list, the community-profiles repository on GitHub usually has one.
Do I need to uninstall the old version first?
No. The Windows installer detects an existing install and upgrades in place. On macOS, drag-replace the app in Applications. On Linux, replace the AppImage file or run flatpak update.
Where are my profiles after I update?
Same place as before. The installer doesn’t touch your user/ folder. Use Help → Show Configuration Folder to confirm.
Can I run a beta and the stable build side by side?
Yes, on Windows use the portable ZIP build for your beta. On Linux use the orca-slicer-nightly-bin AUR package alongside the stable AUR package, or run the Flatpak plus an AppImage. On macOS the Homebrew nightly cask conflicts with the stable cask, so the cleanest approach is to install one through Homebrew and the other manually.
Why is the file size so big? 200 MB for a slicer?
OrcaSlicer bundles its own WebKit runtime, all printer and filament profiles, calibration test models, and a network agent for talking to Klipper, Moonraker, and Bambu printers. The macOS DMG is larger because it’s universal (both Apple Silicon and Intel binaries in one file). It’s still small compared to most modern desktop apps.
Does OrcaSlicer phone home or track me?
The source is on GitHub and has been audited by community members repeatedly. There’s a network agent that talks to your printer over LAN and an optional update-check ping. There’s no advertising telemetry. If you want to be paranoid about it, the Flatpak build’s sandbox lets you revoke network permissions entirely (the slicer still slices; you just lose printer-control features).
Where’s the SHA-256 hash for verification?
The project doesn’t publish them. There’s a feature request open. Verify the GitHub URL and the TLS certificate on the download page; that’s the verification that’s actually available. If you want a second opinion on the binary, run it through VirusTotal.
What if I’m still on the SoftFever repo URL?
The old URL (github.com/SoftFever/OrcaSlicer) still redirects to the new one (github.com/OrcaSlicer/OrcaSlicer). All your existing bookmarks will work. Update them when you get a chance.
Wrap-up
If you’ve read this far, you know more about installing OrcaSlicer than 95% of the people who land on a download page. The summary: grab v2.3.2 from github.com/OrcaSlicer/OrcaSlicer/releases/latest, pick the file for your OS from the table near the top of this article, expect a SmartScreen or Gatekeeper warning on first launch, and follow the one-step bypass. The software is free, open-source under AGPL-3.0, and the only download source the maintainers endorse is GitHub itself. Bookmark that URL, ignore the lookalike domains, and go slice something.