
The first time I ran ColorFabb woodFill through a 0.4mm brass nozzle, I got about ninety minutes of beautifully grainy printing and then a clog that took me two hours and a bent guitar string to clear. I’ve since burned through a stock brass nozzle, replaced it with hardened steel, and printed wood-filled spools from three different brands across two printers, so I’ve earned the right to say this loudly: wood-filled PLA is not brown PLA, and treating it like brown PLA inside OrcaSlicer is how you cook a hotend.
This guide pulls together the settings I actually use, the nozzle gear that survives the abrasion, and the brand-by-brand gotchas that aren’t obvious from the spool label. I’ll flag the foaming-PLA trap, which catches more first-time wood-PLA buyers than any other issue, and I’ll show you how to start from a Generic PLA profile because OrcaSlicer’s wood coverage is still thin.
Table of contents
- What wood-filled PLA actually is
- What’s in your spool: composition by brand
- OrcaSlicer profile coverage for wood PLA
- Nozzle size and material: the most important call
- Nozzle pricing, verbatim from vendors
- Temperature, speed and retraction in OrcaSlicer
- Drying wood-PLA and clog prevention
- Sanding, staining and sealing
- Common gotchas I’ve hit personally
- FAQ
What wood-filled PLA actually is
A real wood-filled PLA is a composite. You’ve got a PLA matrix (sometimes blended with PHA), and that matrix carries milled wood fibre. The proportion sits roughly between 11% and 30% by weight depending on the brand, and that fibre is what gives the print the matte fibrous surface, the brown gradient, and the unmistakable smell of a wood shop while it’s running. It’s also what wrecks soft nozzles. The fibres are physically larger than a clean PLA pellet stream, so they snag inside a small bore, swell when heated, and grind down brass over hours of printing.
Here’s the trap I want to clear up front: not every spool branded “wood” contains wood. Polymaker is open about this. Their PolyWood and Polymaker Wood PLA are 100% PLA with a foaming additive, density around 0.8 g/cm³, and zero actual wood powder. The Polymaker product page calls PolyWood a “wood mimic filament without actual wood powder, which removes all risks of nozzle clogs.” Foaming PLA looks like wood but doesn’t sand or stain like wood, and it doesn’t require the same nozzle precautions. If your spool’s data sheet brags about foaming or low density, you’re holding plain PLA dressed in a brown jacket.
Confirmed wood-filled options I trust: ColorFabb woodFill at roughly 30% wood by weight, and Bambu Lab PLA Wood which the Bambu wiki describes as PLA mixed with “fine wood powder.” Hatchbox Wood PLA is reported at around 11% wood fibre, but the Hatchbox product page returned a 403 when I tried to verify it directly, so treat that number as third-party reported rather than vendor confirmed.
What’s in your spool: composition by brand
I keep a sticky note above the printer with this table because I’ve embarrassed myself in front of fellow makers by mixing up which spool is which. The composition genuinely changes how you slice, dry and finish the part, so it’s worth committing to memory.
- ColorFabb woodFill: PLA/PHA matrix plus fine pinewood fibres, roughly 70/30 PLA to wood. Real fibre. Will sand and stain like wood.
- Bambu Lab PLA Wood: PLA with fine wood powder. Real fibre. Bambu’s own wiki warns the powder can clog a 0.2mm nozzle.
- Hatchbox Wood PLA: reported as around 11% recycled wood fibre. I haven’t run it personally and the vendor page wasn’t reachable, so flag as third-party reported.
- Polymaker PolyWood: 100% PLA, foaming, density 0.8 g/cm³. Zero wood powder per Polymaker’s own copy.
- Polymaker Wood PLA: also 100% PLA with foaming technology. Don’t confuse the name for real wood content.
- eSUN: this one is messy. Their older line was a foaming PLA at 0.7 g/cm³ marketed for wood look. Their newer “PLA-Wood” product copy mentions “natural plant fibers.” Don’t generalise. Read the specific SKU’s TDS before assuming.
The practical takeaway: if you’re holding a real wood-filled spool, you need a bigger and tougher nozzle, slightly different settings, and a drying routine. If you’re holding a foaming pretender, you can run it like normal PLA but you lose the sand-and-stain magic.
OrcaSlicer profile coverage for wood PLA
I’ll be honest with you about the state of profiles inside OrcaSlicer, because the official wood-PLA support is thinner than people expect. When I went looking for a generic Wood PLA filament JSON in the top-level resources/profiles/Generic/filament/ folder of the repo, I didn’t see one in the rendered listing. There are vendor folders that may carry brand-specific profiles, but the generic Wood PLA slot isn’t sitting there waiting for you.
The community has been asking for this. GitHub Issue #7527 is an open request to “incorporate newly released Bambu filament types, specifically Bambu TPU For AMS and wood fill types,” explicitly to “maintain compatibility with Bambuslicer profiles.” A second ticket, Issue #8147 opened in January 2025, asks the maintainers to “add bambu pla wood” and was tagged as an enhancement. So you’re not crazy if you can’t find a built-in Wood PLA option. It’s a known gap.
What I do in practice: clone Generic PLA, rename the clone to something obvious like “Wood PLA (woodFill)” or “Bambu PLA Wood,” and then tweak the temperature, retraction and speed against the brand’s data sheet. OrcaSlicer saves user filament profiles with a .orca_filament extension (singular), which is the file you’ll want to back up so a profile reinstall doesn’t nuke your custom settings. If you’ve never built one of these from scratch, I’ve written a separate walkthrough on how to create a custom .orca_filament profile that goes step by step through the dialog.
For the printer side, I keep my base machine profile untouched and store the wood-specific tweaks at the filament level only. That way switching back to plain PLA is one dropdown click and I don’t carry low retraction settings into a non-abrasive print where they’d cause stringing.
Nozzle size and material: the most important call
If you take one thing from this article, take this. The single biggest predictor of whether your wood-PLA print finishes cleanly is the nozzle you put in front of the filament. Get this wrong and the rest of your settings don’t matter, because you’ll be unclogging at hour two.
Start with size. ColorFabb’s own how-to-print-with-woodFill blog states “0.4 mm nozzle or larger” as the floor, with the practical recommendation being to go bigger. I run 0.6mm hardened for almost all my wood-PLA work and it’s been the right call. Bambu Lab’s wiki is even more explicit: 0.4mm, 0.6mm and 0.8mm are all supported on their hotends, but the 0.2mm nozzle is specifically not recommended because “PLA Wood is made of high-quality PLA mixed with fine wood powder, which can clog the 0.2 mm nozzle.” That’s the manufacturer telling you straight out that small bores and wood powder don’t mix.
Now material. Brass is fine for a single test print so you can decide whether you even like the filament, but it’s a wear part with wood-PLA. The fibres are abrasive, the bore widens with use, and once that bore starts to round out you’ll see your extrusion width drift and your top surfaces get fuzzy. I got maybe four or five medium-size prints out of my last brass nozzle before retiring it. I’m not going to give you a hard “X hours to failure” number because I haven’t seen credible data on wood-PLA brass wear, and the well-known CNC Kitchen nozzle wear study actually tested carbon-fibre PETG and glow-in-the-dark PLA, not wood. Anyone quoting a specific wood-PLA hours-to-failure figure is guessing.
The materials that actually last:
- Hardened steel: the affordable durable choice and what I default to. ColorFabb’s how-to specifically recommends “hardened steel or ruby nozzle” for woodFill.
- DLC-coated tool steel: E3D’s ObXidian line uses a tool steel insert with what they call an E3DLC Diamond-Like Carbon coating. MatterHackers describes it as “harder than Nozzle X and other generic hardened steel nozzles,” able to “easily withstand abrasive filament thanks to E3DLC.”
- Ruby-tipped: ruby-tipped nozzles like the Olsson Ruby will outlast most things, but they cost more and you give up some speed. Worth it if you print abrasives daily.
- Tungsten carbide: the endgame, also expensive, niche enough that I’d only reach for it if I were running wood-PLA production runs.
Nozzle pricing, verbatim from vendors
I’d rather quote real numbers than vibe at you, so here’s what I see on actual product pages.
The E3D V6 ObXidian lists at £38.50 GBP on E3D’s own store, with the same nozzle going for $44.99 USD at Filastruder. The Revo ObXidian variant runs £48.50, the Volcano ObXidian is £40.50, and the Prusa Nextruder ObXidian is £41.50. If you’re shopping Bambu-compatible ObXidian HotEnds, those climb into the £55-90 bracket depending on configuration. Round numbers, you’re looking at roughly $50-90 USD across the ObXidian range from V6 to Revo to Bambu-compatible HotEnds.
For Slice Engineering kit, the Mosquito hotend itself is $119.99 USD per Slice’s product page, described as “rated to 500°C, enabling printing of every commercially available filament, from basic PLAs to custom, medical-grade PAEKs.” The hardened option is the Slice Engineering Mosquito with hardened or ruby nozzle. A small note here that matters because I see it misnamed online constantly: there is no “Mosquito Hardcore” product. Don’t search for that. The correct phrasing is “Slice Engineering Mosquito with hardened or ruby nozzle.” Slice’s vanadium nozzle (their hardened option) is reported around $24.99 sale to $34.99 list, forged from a high-speed-steel and vanadium alloy coated in tungsten disulfide for abrasion resistance.
What I’d recommend for someone starting out: a single hardened steel nozzle in 0.6mm, fitted to whatever hotend your printer ships with, costs less than a spool of decent wood-PLA and pays itself off on the first print. The ObXidian and Mosquito options are upgrades you can grow into.
Temperature, speed and retraction in OrcaSlicer
Now we get to the settings I actually punch into the OrcaSlicer Filament Settings dialog. These come straight from the vendor data sheets, with my own preferences noted where I deviate.
Temperature. ColorFabb woodFill’s official window is 195-220°C, with the blog refining that to “between 200°C and 220°C” for the extruder. I print mine at 205°C and it’s been the sweet spot for grain visibility without overcooking. Bambu PLA Wood per the Bambu wiki runs 190-240°C nozzle and a 35-45°C bed, which is a generous window because Bambu’s hotend has the flow to handle it. For reference, Polymaker’s foaming Wood PLA sits at 190-210°C, which is narrower because the foaming reaction is temperature sensitive. The wider community range from 3D Printerly puts wood filament in general at 175-220°C with some makers pushing to 245°C on stubborn rolls.
Speed. ColorFabb’s product page lists 40-100 mm/s with the blog narrowing it to “40-60 mm/s ideal” and “slowing to around 30 mm/s” for fine detail. That matches my experience on a Bowden printer. Bambu PLA Wood on a Bambu hotend can run up to 250 mm/s per the wiki, which is wildly faster than the old “40 mm/s wood-PLA rule” because the X1 and P1 series can melt that fast. Foaming Polymaker Wood PLA wants 25-60 mm/s. eSUN’s older foaming TDS lists 20-30 mm/s, which is slow but worth respecting if that’s what you’ve got. My rule of thumb: start at 50 mm/s for any wood-fill I haven’t tuned before, then push up from there if surface quality holds.
Retraction. This is where wood-PLA differs the most from regular PLA, and where people get into trouble. ColorFabb’s blog is explicit: “1-2 mm retraction distance, 20-30 mm/s retraction speed” with the warning that “excessive retraction can cause clogging.” Bambu PLA Wood wants 0.6-1.0 mm retraction length at 20-40 mm/s. For Bowden machines, 4-6 mm at the same speed range is the community consensus and lines up with the direct-drive numbers scaled up for the tube length. The reason short retractions matter: when you pull the filament backward too far, you drag a wood-rich melt slug up into the heat break, where it cools just enough to stick. Next time you push forward, you’ve got a partial plug.
If you want a deeper read on how the retraction and pressure settings interact across filament types, my walkthrough on OrcaSlicer filament settings covers the dialog tab-by-tab. And if you’re already chasing wisps of grey hair across your prints, wood PLA stringing fixes walks through the specific tuning order I follow.
Drying wood-PLA and clog prevention
Wood fibre is hygroscopic. It pulls moisture out of the air faster than the surrounding PLA matrix, and that moisture flashes to steam in the hot zone. The symptom is the one that gives the game away every time: popping sounds, a halo of fine stringing, and prints that are weaker and more brittle than they should be.
Bambu’s wiki gives the most specific drying numbers I’ve seen for a real wood-filled spool: “55°C in a blast drying oven for 8 hours, or 65-75°C on an X1 series printer heatbed for 12 hours.” I follow the 55°C/8h spec on my filament dryer and it’s been reliable. If you don’t have a dedicated dryer and your printer has a heated bed enclosure, the 65-75°C/12h bed-dry method is a real option for Bambu hardware specifically.
A few practical clog-prevention rules I’ve earned the hard way:
- If a fresh spool sat opened on a shelf for more than a week, dry it before you print, no exceptions.
- Keep retraction short. If you’ve copied a high-retraction PETG profile, you’ll yank wood fibre up into the heat break.
- Don’t pause-and-resume wood-PLA prints for more than a few minutes. The melt sits in the nozzle and chars.
- Clean the nozzle with a cold pull between spool changes if you’re switching from a clean PLA, otherwise you’ll get colour streaks for the first metre of the new spool.
Sanding, staining and sealing
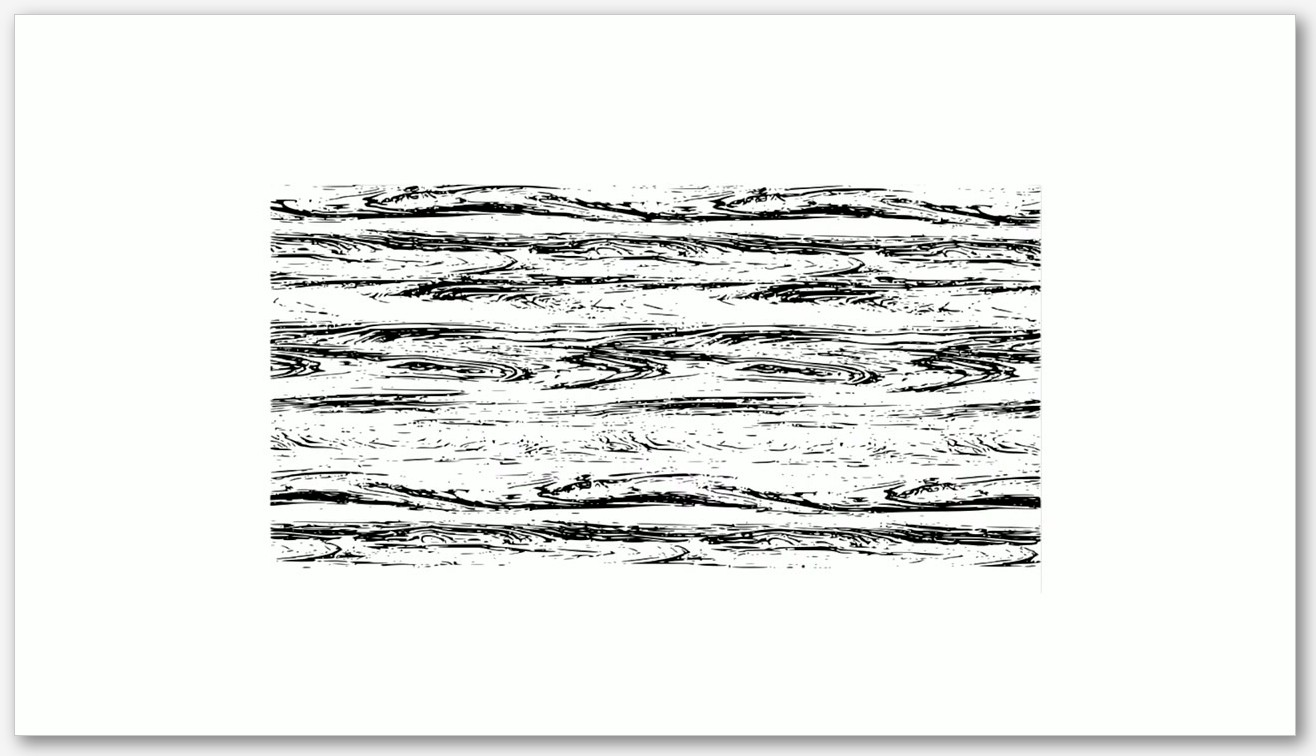
This is the part of the workflow that justifies wood-PLA existing. Plain PLA doesn’t sand into anything interesting and doesn’t take stain at all. Real wood-filled PLA does both, and if you’ve never finished a print this way before, it’s surprisingly satisfying.
Sanding. MatterHackers recommends starting at “200 grit” for problem areas and “400 grit” for the rest, then optionally working up to “3000 grit” for “a near mirror finish.” The key insight from that guide is that random sanding actually helps: “The more random it is the better it sells the wood grain.” ColorFabb’s blog suggests starting at “120-240 grit” to remove layer lines and progressing to “400-600 grit” for smoothing. I usually go 200, then 400, then 800 and stop there for utility parts. For showpieces I’ll push to 1500.
Staining. Use a wood stain the way you’d use it on real wood, but expect it to absorb slower because of the PLA content. MatterHackers’ guidance: “Pour just a small amount of stain onto a lint free cloth” and “rub it into the surface of the 3D print,” with the warning that “these filaments absorb stain slower than natural wood due to their plastic content, so you may need to leave more stain on the surface rather than wiping it completely away.” I’ve had the best results with oil-based walnut stain, left for around five minutes longer than the can says, then wiped back.
Sealing. Tung oil “preserves the filament’s natural color while bringing out grain definition” per MatterHackers, which is what I reach for on small parts where I want the natural look. Polyurethane gives “a thick coating that will give your wood 3D print a glossier finish” and is better for items that’ll see handling or moisture.
Common gotchas I’ve hit personally
A handful of mistakes I’ve made or watched friends make. Save yourself the time.
The foaming-PLA confusion. Bought my first “wood” spool in 2022 thinking it was wood-filled. It was Polymaker PolyWood. Beautiful print, foamed up nicely, would not take stain at all because there’s nothing in it for the stain to soak into. Always check the data sheet for actual wood content before you commit to a finishing plan.
Treating it like an abrasive carbon-fibre filament. Wood is abrasive but in a different way than chopped CF. Carbon fibre will mince a brass nozzle in a single roll. Wood-PLA wears it gradually, but the bigger nozzle requirement comes from particle size, not just hardness. If you’re already running a hardened setup for CF work, the same nozzle handles wood just fine. The carbon-fibre side of this story is in my carbon-fiber filament profile guide if you want the comparison.
Cranking retraction “just in case.” Most ooze-fighting muscle memory comes from PETG, where you turn retraction up. With wood-PLA, that move actively causes clogs because you’re pulling fibre up into the heat break. Start short, raise only if you’re genuinely seeing strings.
Mistaking a wood-look PLA for a wood-filled PLA. Brown PLA is just brown PLA. If the spec sheet doesn’t mention wood fibre or wood powder, it doesn’t have any. There’s nothing wrong with brown PLA but you’ll be disappointed when you try to sand a grain into it.
Skipping the drying step on a fresh spool. The wood fibre absorbs moisture before the matrix does. A sealed spool from a fast-moving distributor is usually fine. A spool that’s been on your shelf in a humid room for a month is not.
Pairing wood-PLA with a 0.2mm nozzle for “fine detail.” Bambu’s own wiki tells you not to do this. The wood powder genuinely will clog at that bore size. Step up to at least 0.4mm. If you need finer detail than 0.4mm can deliver on a wood print, you’re using the wrong filament for that job.
FAQ
Can I run my first wood-PLA test with the 0.4mm brass nozzle my printer shipped with? Yes, for one or two prints to confirm you like the look. Brass will wear from wood fibre over hours of use, so don’t treat it as your daily-driver setup, and swap to hardened steel if you decide you’re going to keep printing wood-PLA regularly. Don’t go below 0.4mm. Bambu’s wiki specifically warns against 0.2mm with PLA Wood.
Will wood-PLA clog my AMS or multi-material unit? Wood-filled PLA can be more prone to friction and snagging in the AMS feed tubes than smooth PLA, mostly because the surface texture isn’t as slick. I haven’t seen vendor guidance saying don’t use it, and Bambu actively supports PLA Wood. Run it, but watch the first few colour changes and listen for grinding.
Does Polymaker PolyWood actually contain real wood? No. Polymaker’s product page is explicit that PolyWood is “a wood mimic filament without actual wood powder” and that their Wood PLA is “made entirely with PLA using a special foaming technology.” Both are 100% PLA with a foaming additive. They look like wood, they won’t behave like wood when you sand or stain them, and they don’t carry the same nozzle wear risk.
How long before a brass nozzle wears out printing wood-PLA? Nobody has published a credible number that I trust. The widely cited CNC Kitchen nozzle wear study tested carbon-fibre PETG and glow-in-the-dark PLA, not wood, so quoting “X hours” from that study would be wrong. What I can tell you is that I see noticeable extrusion drift after a few medium-sized prints on brass, which is why I switched to hardened steel and stopped counting.
Can I really sand and stain it like real wood? Real wood-filled PLA, yes. ColorFabb woodFill and Bambu PLA Wood both sand to a soft fibrous surface and take wood stain, slower than real wood does because of the plastic content. Foaming “wood” PLAs do not stain because there’s no wood fibre to absorb the pigment.
Is wood-PLA biodegradable or compostable? Industrial compostability for PLA depends on the specific grade and the composting conditions, not the wood content. Don’t assume your wood-PLA scrap will break down in a backyard compost pile. Recycle the spool, dispose of the print as you would any PLA waste, and don’t lean on biodegradability claims that aren’t on the data sheet.
Closing
Wood-filled PLA is one of the most rewarding filaments I’ve printed once you’ve got the gear and the settings right. It’s also one of the most punishing if you treat it like ordinary PLA on a 0.4mm brass nozzle with PETG retraction values. The recipe that’s worked for me: real wood-filled spool (verify the data sheet), 0.6mm hardened nozzle, 200-210°C, 50 mm/s, 1mm retraction at 25 mm/s, dry the filament first, and clone your Generic PLA profile inside OrcaSlicer because the built-in wood coverage is still catching up. If you’re new to building filament profiles, my OrcaSlicer filament settings walkthrough will get you oriented in the dialog.
You can grab the current OrcaSlicer build from the official GitHub releases page and have a wood-PLA profile cloned and ready before your filament finishes drying.
Related OrcaSlicer guides
- Best OrcaSlicer Filament Settings: All Materials Cheatsheet
- OrcaSlicer Glow and Sparkle PLA: Print Speed and Nozzle Wear
- How to Use Bambu Lab AMS Filaments with OrcaSlicer (2026 Guide)
- OrcaSlicer Filament Drying Guide: When and How to Dry It
- How Often Should You Recalibrate OrcaSlicer? 2026 Maintenance Schedule