
I spent most of a Saturday last spring running every calibration test in OrcaSlicer on a fresh roll of generic black PLA. Temp tower, two-pass flow rate, pressure advance line, pressure advance pattern, retraction, max volumetric speed, the works. Six hours of printer time, about 80 grams of filament, and a perfectly tuned profile for a $19 spool I burned through in three weeks. The print quality was good. It was also good before I started, because I’d already calibrated the previous spool of the same brand and color two months earlier.
That was the moment I admitted I had a problem. Not a printer problem. A FOMO problem. Every “you must calibrate every new spool” YouTube video had wormed its way into my workflow until I treated calibration like brushing my teeth, something you do on schedule because you’re supposed to, regardless of whether anything had actually changed. The math is brutal once you sit down with it. If you swap filament weekly and “calibrate everything” takes six hours, that’s a part-time job for a hobby that’s supposed to relax you.
So I rebuilt my approach from scratch, and the rule I landed on is the one I want to make the case for in this article: recalibration is trigger-driven, not calendar-driven. The right question isn’t “how often should I recalibrate?” It’s “what actually changed since my last good print?” Because what changed determines which test you need, and most of the time, the answer is “nothing changed, just print.”
Table of contents
- The two myths to kill first
- The mental model: what causes calibration to drift
- The master maintenance schedule
- When you DO need to recalibrate (11 triggers)
- When you DON’T need to recalibrate
- Time investment per calibration
- Per-printer differences (Bambu, Klipper, Marlin)
- Profile management is the real maintenance discipline
- A decision tree before every print
- FAQ
The two myths to kill first
Before any schedule makes sense, two pieces of bad advice need to go in the bin.
Myth 1: You must recalibrate everything for every new spool. This one comes from a generous place. Creators want to be thorough, and “do all the tests” is the safest possible recommendation. It’s also wildly overkill for the average home printer. A new spool of the exact same brand, exact same color, exact same material, opened the same week from the same vendor box, will have flow and PA values within about 1 to 2 percent of the spool you finished yesterday. You won’t see the difference on a benchy. You will see the difference on your wallet and your weekend.
Myth 2: Bambu handles all of this automatically, so you don’t have to do anything. Also wrong, in a more interesting way. Bambu’s auto features are real and they’re great. The X1C, X1E, and H2D run Flow Dynamics Calibration (Bambu’s PA equivalent) with LiDAR, and every Bambu printer runs vibration calibration (auto input shaper) at print start. That’s two genuinely automated calibrations per print. But flow rate is still manual on every Bambu printer in 2026, including the X1C, and temperature tower is still manual on every Bambu printer ever shipped. The community thread at P1S Flow Calibration on the Bambu Lab forum is full of P1S owners discovering this the hard way after months of assuming the printer was tuning itself.
If you take only one thing from this section: automatic on Bambu means K-value and shaper. It does not mean flow rate, temp, retraction, or MVS. Those are still on you, and the rules in the rest of this article apply to your Bambu just like they apply to a Voron.
The mental model: what actually causes calibration to drift
Once you’ve killed the calendar-driven approach, the next thing to install is a framework for thinking about what can drift and why. There are exactly four categories of change that move calibration values, and every trigger in the rest of this article falls into one of them.
1. Filament path changes. Anything that alters what’s flowing through the hotend. New brand, new material, new color (in some cases), new moisture state. These changes hit flow rate and pressure advance first, temperature tower second. The reason is straightforward: PA and flow are direct functions of the melt’s viscosity and elasticity, and viscosity is a function of the resin formulation. Two PLAs from two manufacturers can have measurably different additive packages (heat stabilizers, slip agents, pigment loadings) that shift behavior at the nozzle.
2. Hardware changes. Anything mechanical: nozzle (material or diameter), hotend assembly, heatbreak, extruder gears, belts, leadscrews. These changes hit the mechanical calibrations: input shaper for belts, e-steps for extruders, MVS and PA for nozzles. A new nozzle is the most invasive single change you can make. It can require almost a full recalibration sweep.
3. Firmware changes. Klipper config edits, Bambu firmware bumps, OrcaSlicer version updates. Klipper config changes that touch rotation distances or accel limits invalidate input shaper. Bambu firmware updates have, in some past releases, shifted the K-value behavior. OrcaSlicer version updates rarely require recalibration on their own, but if Orca flags a profile incompatibility on import, a quick visual check on a 20mm cube is prudent before trusting the saved values.
4. Environmental changes. Seasonal humidity, ambient temperature, enclosure use. These hit drying state primarily, and PA secondarily on hygroscopic materials. A spool that prints beautifully in February (35% indoor humidity) can string and puff in August (70%) without you changing a single setting in OrcaSlicer.
If none of those four categories of change has happened, your calibration is still valid. Print the thing. The single most important calibration discipline isn’t running more tests, it’s recognizing when zero tests are the correct answer.
For the full lineup of what each test does and how to run it, I keep coming back to the consolidated OrcaSlicer calibration guide rather than chasing individual tutorials. That’s the hub. Everything below is the schedule for using it.
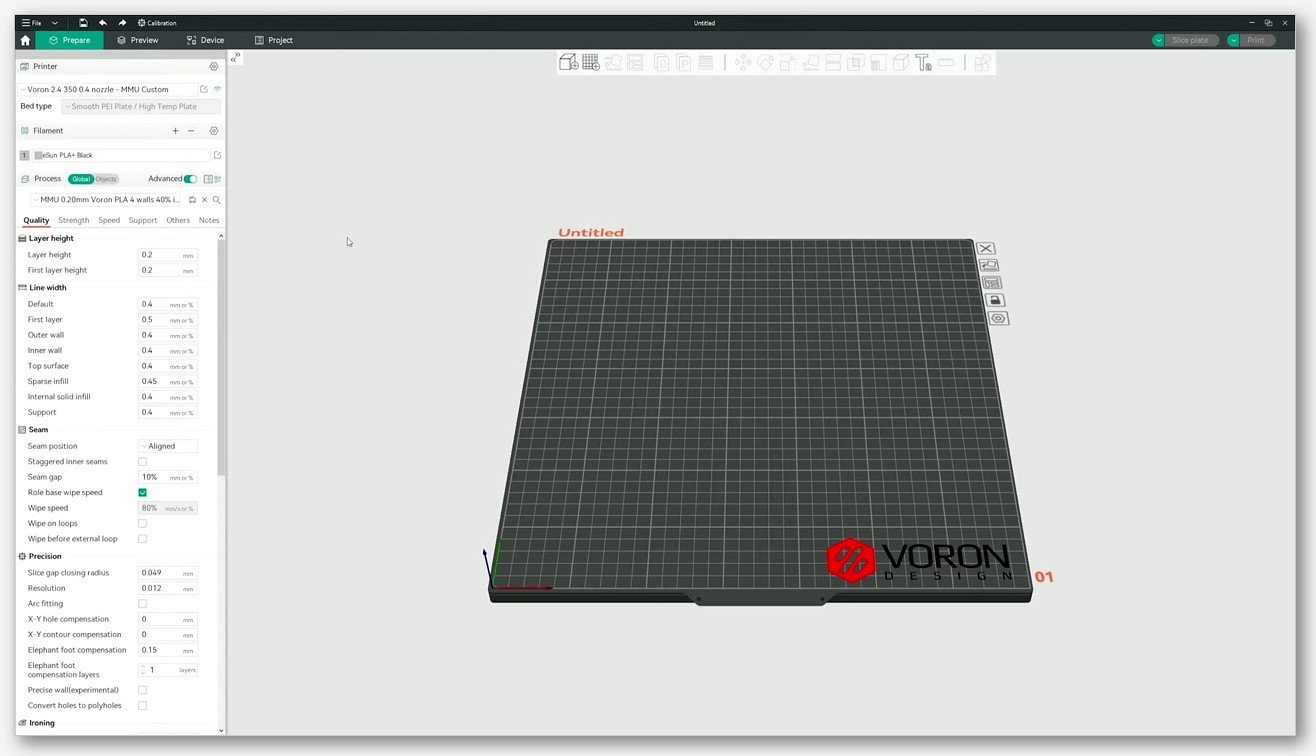
The master maintenance schedule
This is the table I wish I’d had two years ago. Rows are triggers (the thing that changed), columns are calibrations. Cell values are Yes (run it), No (skip it), or Optional (run only if you see the symptom). Read across a row to see what your specific trigger demands, then drop down to the trigger-by-trigger walkthrough below for the why.
| Trigger | Temp Tower | Flow Rate | Pressure Advance | MVS | Retraction | Input Shaper | Bed Mesh | E-steps |
|---|---|---|---|---|---|---|---|---|
| New filament brand | Yes | Yes | Yes | Optional | Optional | No | No | No |
| Same brand, new color (plain) | No | Optional | No | No | No | No | No | No |
| Same brand, new color (filled, silk, glow) | No | Yes | Optional | No | No | No | No | No |
| Same spool after long storage | No | Yes (after drying) | No | No | No | No | No | No |
| Nozzle material change (brass to hardened or back) | Yes | Yes | Yes | No | Yes | No | No | No |
| Nozzle diameter change | Yes | Yes | Yes | Yes (first) | Yes | No | No | No |
| Hotend replacement | Yes | Yes | Yes | No | No | No | No | No |
| Firmware update (Klipper config-changing) | No | No | Optional | No | No | Yes | No | No |
| Firmware update (Bambu major) | No | No | Optional (spot-check) | No | No | No (auto) | No | No |
| Firmware update (OrcaSlicer only) | No | No | No (visual check) | No | No | No | No | No |
| Belt re-tension or mechanical | No | No | No | No | No | Yes | No | No |
| Extruder gear swap (BMG and similar) | No | Yes | Yes | No | No | No | No | Yes (first) |
| Seasonal humidity shift | No | No | Optional spot-check | No | No | No | No | No |
| Bed disturbance or ~50 prints | No | No | No | No | No | No | Yes | No |
| Bed surface change (PEI to smooth PEI) | No | No | No | No | No | No | Yes | No |
| Nothing changed | No | No | No | No | No | No | No | No |
How to read “Optional”: run that test only if you visually see the symptom. Corner blobbing or sharp-corner bulge means run PA. Visible over-extrusion (z-seam blobs, top-layer pillowing) or under-extrusion (gaps, weak walls) means run flow rate. Otherwise, skip and save the filament.
The bottom row is the most important one in the whole table, and it’s the row most users refuse to act on. If nothing has changed since your last good print, your calibration is still good. Don’t waste an hour re-proving what you already know.
When you DO need to recalibrate: the 11 triggers, walked through
This section is the meat of the article. For each trigger, I’ll say what to run, what to skip, and why. Where a separate pillar article exists on the test itself, I’ll link to it rather than re-explain the method.
1. New filament brand
Run temp tower, flow rate, and pressure advance. This is the one trigger where the “calibrate everything” advice is almost right. New brand means new resin formulation, even if the spec sheet says “PLA, 1.75mm, +/- 0.02mm.” The additives that brand X uses to keep their PLA from going brittle on the shelf are not the additives brand Y uses, and the difference shows up at the nozzle.
Obico’s pressure advance guide puts it this way: “Different filaments and even different colors of the same brand can react differently. It’s a good practice to recalibrate Pressure Advance when you switch filaments.” I’d extend that to flow and temp as well when the brand is new. Budget about 90 minutes of printer time: roughly 45 minutes for the temperature tower, 20 minutes for a two-pass flow rate test, 10 minutes for a PA line, and 15 minutes of interpretation and saving. Most of that is print time, not your attention.
What to skip on a new brand: MVS and retraction, in most cases. MVS is a hotend property as much as a filament property. The hotend’s max volumetric flow ceiling doesn’t change when the filament does (within the same material class), so if you’ve already tuned MVS for your nozzle, that number stays valid. Retraction is similarly hardware-dominant. Only re-run if you see stringing that wasn’t there with the previous filament.
2. Same brand, new color (plain)
For a plain non-filled color shift (Sunlu PLA Blue to Sunlu PLA Green, both standard pigments), an optional flow-rate confirmation cube is all that’s reasonable. Skip temp, skip PA, skip everything else. Color masterbatch in plain PLA is added at percentages low enough that the rheology shift is small. Some users skip even the confirm cube and accept a tiny surface-finish penalty on the first print. That’s a legitimate trade-off.
The popular advice (Sovol’s flow rate guide says “every time you start a new roll of filament, even if it’s the same brand and color, you should recalibrate flow rate”) is technically defensible. But the cost is real and the benefit is tiny for plain colors. Save the full test for the next case.
3. Same brand, new color (filled, silk, glow, glitter)
This one is different. Run flow rate. Optionally run PA, especially for silk PLAs and matte/filled blends.
Filled and special-effect filaments carry a much higher additive load than plain pigments. Silk PLA uses copolymer blends and sometimes plasticizers that change melt behavior noticeably. Glow-in-the-dark filaments contain strontium aluminate at percentages of 10 to 20 percent by weight. Glitter PLAs have actual flake suspensions in the melt. Black PLA, weirdly, also shows up here for some manufacturers because carbon black loading can run high. Expect a 2 to 5 percent flow correction relative to the base color of the same brand. PA shifts are smaller but real, especially on silk where the pressure dynamics get different.
Budget around 30 minutes total: flow rate pass 1, plus a quick PA line if you’re being thorough. The PA line method is the right tool here because it’s fast.
4. Same spool after long storage
Reassess moisture first, then check flow if you had to dry.
The rule of thumb that’s served me well: if a PLA spool has been open in a humid room more than 30 days, dry it before printing. PETG more than 7 days, dry it. Nylon and PA-CF, more than 24 hours, dry it. Bambu’s drying guide has good per-material temp and time recommendations.
The recalibration question is what to do after drying. Wet filament has lower effective viscosity and extrudes more aggressively, then once dried, the apparent diameter and density shift back. The flow ratio you calibrated when the spool was fresh is usually still close, but a single flow-rate confirm cube is worth the 15 minutes. Full PA rerun is overkill unless you specifically see corner blobbing after the dry. A small visual check on a 20mm cube tells you everything you need to know.
5. Nozzle material change (brass to hardened, or back)
Run temp tower, flow rate, PA, and retraction.
Hardened steel has lower thermal conductivity than brass. Same setpoint, lower effective melt temp at the nozzle exit. Community consensus across many forum threads (and personal experience with three of my printers) lands around a 5 to 15 degree Celsius offset upward when moving from brass to hardened. That’s why the temp tower comes back: you’re hunting the new sweet spot.
PA shifts because melt rheology at the new effective temp is different. Flow rate shifts for the same reason. Retraction can shift because the new nozzle’s internal melt pool geometry isn’t identical. The full sweep here is justified. Budget two hours of printer time and a quiet evening.
6. Nozzle diameter change (0.4 to 0.6, 0.4 to 0.2, anything to anything else)
This is the biggest recalibration trigger in the entire schedule. Run MVS first, then flow rate, then PA, then retraction. The order matters.
Max volumetric speed comes first because diameter changes the hotend’s flow ceiling. A 0.6mm nozzle can routinely push 22 to 28 mm³/s on a standard hotend that maxed out at 10 to 14 mm³/s with a 0.4mm. If you run flow rate calibration before re-establishing MVS, the test maxes out the hotend in the high-speed bands and gives you nonsense.
PA values typically drop substantially with larger nozzles because there’s less back-pressure for the extruder to overcome. A common illustrative range from community data: a filament tuned to PA 0.087 on 0.4mm might land near PA 0.039 on 0.8mm. Don’t take those exact numbers as gospel. Take the direction: bigger nozzle equals lower PA. The reverse for smaller nozzles.
One critical honesty point: OrcaSlicer filament profiles are nozzle-specific by default. The “Sunlu PLA Black” profile you tuned on 0.4mm will not surface when you select the 0.6mm nozzle. You have to create or duplicate the profile under the new nozzle configuration. The custom filament profile guide walks through that clone flow.
7. Hotend replacement
Run temp tower, flow rate, and PA. PID auto-tune is also worth a pass if the new hotend has different thermal mass.
Different hotend assemblies have different thermistor placements and thermal masses. A “210°C” reading on the new hotend might correspond to a slightly different actual melt temp than your old one. Flow rate can shift if the new heatbreak has a different inner diameter or thermal break length. PA almost always shifts because the melt pool geometry inside the heatblock is different.
This is less invasive than a nozzle diameter change but more invasive than a material change. Budget about 90 minutes of printer time. Don’t bother re-running MVS unless the new hotend is a known higher-flow design (Volcano, CHT, Revo High Flow). In that case, MVS first.
8. Firmware update
This trigger splits into three by platform.
Klipper: If your config changed (rotation distances, max accel, max smoothing), re-run SHAPER_CALIBRATE. If only the Klipper version itself updated and your printer.cfg didn’t change, no recalibration is needed. Klipper’s docs are explicit on this point: shaper drift comes from physical changes (belt tension, mass) and config changes, not from version bumps.
Bambu: Bambu firmware updates have, in some past releases, adjusted the K-value range or the calibration algorithm. The honest recommendation is to spot-check PA on your most-used filament after a major firmware bump. Print the filament you care about most, look at corner sharpness on a benchy or calibration cube, and if it looks normal, you’re done. If it looks blobby, re-run Flow Dynamics on that filament.
OrcaSlicer: Slicer version updates do not change firmware. They change how OrcaSlicer interprets the saved profile. If Orca flags a profile incompatibility on import (you’ll see a warning dialog), re-verify visually with a small test cube before printing anything important. Don’t burn a full recalibration sweep on a slicer version bump alone.
9. Belt re-tension or mechanical changes
Run input shaper. That’s the whole answer.
Resonance frequencies move with belt tension. Klipper’s docs say it directly: “The resonance frequencies may change over time because the belts tension has changed (belts got more loose), so it is a good idea to check and re-measure the ringing frequencies.” If you re-tensioned a belt, swapped a GT2 belt, replaced an idler, or did any structural work on the motion system, that’s your trigger.
Klipper users with ADXL345 wired in: SHAPER_CALIBRATE runs both axes in under 5 minutes. Marlin users with M593 support can run the input shaper test from OrcaSlicer, which is slower (a printed test piece) but works fine. Bambu users get this one for free because vibration calibration runs at every print start.
Nothing else needs to change. Flow, PA, temp all stay valid because the melt path hasn’t changed.
10. Extruder gear swap (BMG, dual-gear, new drive gear)
Run e-steps first, then flow rate, then PA. The order matters here too.
A new gear ratio (BMG is 3:1, stock Bowden Titan is around 3:1, dual-gear Sherpa Mini sits around 50:11) directly changes how much filament moves per motor step. If you tune flow rate before fixing e-steps, the flow calibration is compensating for the wrong baseline, and the result is fragile (it works at your test speed but falls apart at print speed). Run the classic extrude-100mm-measure test first to get e-steps right. BMG defaults around 415 steps/mm but real-world users often land between 415 and 440 after the actual measurement.
Once e-steps are right, flow rate calibration sits on top of correct math. Then PA, because the rate of pressure build at the nozzle has changed with the new gear ratio.
11. Seasonal humidity shift
Reassess your drying schedule. Maybe a quick PA spot-check on hygroscopic materials.
This is the trigger most users miss entirely. Same filament, same brand, same color, same spool, same printer, but the weather shifted from 30% indoor humidity to 70%, and now it’s stringing. That’s not a calibration problem, that’s a moisture problem. Dry the filament. If you’re printing nylon, PETG, PA-CF, or TPU, get a dryer and use it.
After drying, you generally don’t need to recalibrate anything. A spot-check on PA is reasonable if the filament has been wet for a while and the drying was aggressive, but most users won’t see a measurable shift. The bigger payoff is fixing the storage problem (dry box, desiccant) so this trigger stops firing.
When you DON’T need to recalibrate (and most users do anyway)
This is the section that should save you the most time. Here’s a list of triggers that look like they should require recalibration but don’t.
Same spool, different print. Nothing changed. The filament is the same, your slicer’s per-filament settings are the same, your model has nothing to do with calibration. Print it.
Slight color shift on same brand (generic PLA blue to generic PLA green, both plain non-filled, same manufacturer batch logic): a 30-second flow ratio confirm cube is fine if you want to sleep well. Skip PA recal.
Reslicing the same model with the same settings. Nothing changed in the filament path or hardware. The output G-code might differ slightly if you tweaked walls or infill, but those are slicing settings, not calibration values. No recal needed.
OrcaSlicer version update, no firmware change. Slicer versions change UI and slicing logic. They don’t change what your printer does mechanically. Print a small test object first to confirm visual quality, then proceed. Skip the full recalibration sweep.
Print profile change (0.2mm layer height to 0.16mm, same nozzle, same filament). No recal needed. PA, flow, MVS, and temp all stay valid. OrcaSlicer’s per-layer-height speed profile handles the difference internally. The values that matter live at the filament-profile level, not the print-profile level.
New STL from a new designer. Yes, people ask this. No. The model has zero relationship to your calibration values. Print it.
Same brand same color, new spool from the same vendor box. Skip it. Maybe a confirm cube if you’re paranoid. The variance between two spools of the same SKU manufactured in the same batch is below the noise floor of your calibration tests for plain materials.
Reusing a profile from a friend with the same printer and same filament. Test print a calibration cube first to confirm. If it looks fine, use the profile. The honest recalibration trigger here is only “if the visual check fails.” Saving an hour by trusting a friend’s profile is exactly the kind of efficiency the article advocates for.
The mindset shift is simple. Calibration is a tool to fix a problem. If you don’t have the problem, you don’t need the tool.
Time investment per calibration: real numbers
The “is this trigger worth the time?” question only makes sense if you know how much time each test actually costs. Here’s the real budget per test, based on my own kitchen-timer measurements across an X1C, a Voron 0.2, and a stock Ender 3 V2.
| Calibration | Filament cost | Active time | Total time (including print) | Notes |
|---|---|---|---|---|
| Temperature tower | ~10 to 15g | 5 min setup, 5 min interpret | 35 to 50 min | Auto-generated in OrcaSlicer with 5°C steps |
| Flow rate (Pass 1, coarse) | ~5g | 5 min | 15 to 20 min | YOLO 1-pass mode runs about 25 min total |
| Flow rate (Pass 2, fine) | ~5g | 5 min | 15 to 20 min | Only if Pass 1 wasn’t conclusive |
| PA line method | ~3g | 5 min | ~10 min | Obico: “the line method test takes under 10 minutes” |
| PA pattern method | ~5g | 10 min | 20 to 30 min | More accurate for slower printers |
| Max volumetric speed | ~8g | 5 min | 20 to 30 min | Required after nozzle diameter change |
| Retraction tower | ~10g | 5 min | 30 to 45 min | Only after nozzle/hotend change in most cases |
| Input shaper (Klipper, SHAPER_CALIBRATE) | 0 | 5 min | ~5 min | Needs ADXL345 wired; runs both axes |
| Input shaper (OrcaSlicer M593, Marlin) | ~5g | 10 min | 30 to 45 min | Two-stage: frequency, then damping |
| Input shaper (Bambu, automatic) | 0 | 0 | ~3 min at print start | User does not initiate |
| Bed mesh (Klipper BED_MESH_CALIBRATE) | 0 | 1 min | 5 to 8 min | |
| Bed mesh (Bambu auto-mesh) | 0 | 0 | ~2 min at print start | |
| E-steps calibration | ~0 (1m of filament) | 10 min | 10 min | One-time per gear ratio change |
Then translated to “what does each trigger actually cost”:
| Trigger | Printer time | Active time | Filament cost |
|---|---|---|---|
| New filament brand (PLA-class) | ~90 min | ~20 min | ~25g |
| Same brand, new color (filled or silk) | ~30 min | ~10 min | ~10g |
| Same brand, new color (plain) | ~15 min | 5 min | ~5g |
| Same spool after long storage | ~20 min (plus dry time) | ~5 min | ~5g |
| Nozzle diameter change | ~3 hours | ~30 min | ~50g |
| Belt re-tension (Klipper) | ~5 min | ~5 min | 0 |
| OrcaSlicer version update | ~5 min (visual check) | ~2 min | ~3g |
| Nothing changed | 0 | 0 | 0 |
That bottom row is, again, the most important. If you can correctly identify “nothing changed” you’ve saved yourself anywhere from 30 minutes to 3 hours and a chunk of filament.
Per-printer differences: Bambu, Klipper, Marlin
The recalibration schedule above is platform-agnostic, but the implementation details vary heavily by what’s driving your printer. Here’s how each platform changes the picture.
Bambu Lab (X1C, X1E, P1S, P1P, A1, A1 mini, H2D)
Bambu’s automation is real but narrow. Three things happen automatically:
- Vibration calibration (input shaper) runs at the start of every print. You can’t fully disable it for most filaments. This means the “belt re-tension” trigger essentially handles itself on Bambu, which is great.
- Flow Dynamics Calibration (PA equivalent) runs automatically with LiDAR on the X1C, X1E, and H2D. K-value gets stored per filament profile. On P1S, P1P, A1, and A1 mini, Flow Dynamics is manual. You run it from the slicer.
- Bed mesh runs at every print start on all current Bambu models.
Everything else is manual. Flow rate calibration is manual on every Bambu printer, including X1C. Temperature tower is manual. Retraction is manual. MVS is manual. The popular “Bambu does it all” perception is wrong, and the Community Tech Talk: Deep Dive into Auto Flow Dynamics thread on the Bambu Lab forum is a good read for what the auto features actually do.
Practical Bambu recalibration schedule: same as the master table, minus input shaper (auto), minus bed mesh (auto). Everything else still on you.
Klipper printers (Voron, Sovol SV08, RatRig, BTT Manta, Creality K1 with Klipper)
Klipper is manual but fast. Input shaper costs about 5 minutes with an ADXL345 wired, including both axes. Bed mesh costs about 5 to 8 minutes. PA and flow are manual through OrcaSlicer (line or pattern method).
The Klipper-specific tip worth knowing: if your printer has frame-temp variation (chamber-heated enclosed printers, all-metal Voron 2.4, anything with a heated build chamber), re-mesh per print. The thermal expansion of the frame changes the bed-to-nozzle relationship subtly. The Voron team’s secondary printer tuning doc covers this in detail.
One more Klipper note: the SAVE_CONFIG command after SHAPER_CALIBRATE actually writes the shaper values into your printer.cfg. They live on the printer, not in OrcaSlicer. If you reflash the SD card or rebuild Klipper from scratch, you’ll lose them. Back up your printer.cfg.
Marlin without input shaper (older Ender 3, CR-10, A8, Anycubic Kobra 1)
Input shaper isn’t available natively. The practical workaround is conservative max accel limits (1500 to 2000 mm/s²) and slower print speeds (50 to 80 mm/s) to keep ringing under control. If your prints look fine at those speeds, you’re not “missing out” on input shaper. You’re just running a slower, simpler printer that prints beautifully when you don’t push it past its mechanical limits.
PA support depends on firmware. M900 linear advance is the Marlin equivalent, available on most modern Marlin builds but not all. If your firmware supports M900, OrcaSlicer’s PA calibration works fine. If it doesn’t, skip PA entirely and accept slightly soft corners.
The recalibration schedule for Marlin-no-shaper users is the simplest: temp tower, flow rate, and PA per new filament brand. Retraction per nozzle change. No input shaper, no Klipper-style mesh refresh. Honestly the simplest workflow of the three.
Marlin with input shaper (newer firmware on K1, Sovol Zero/SV04 builds, custom Marlin)
Same as Klipper for shaper logic. Test your M593 implementation with OrcaSlicer’s input shaper calibration, which generates the correct G-code. Frequency first, damping second. Once tuned, the values live in your firmware’s EEPROM, not in the slicer.
Everything else (flow, PA, temp, retraction) follows the Marlin or Klipper rules depending on what else your build is running. The schedule above still applies.
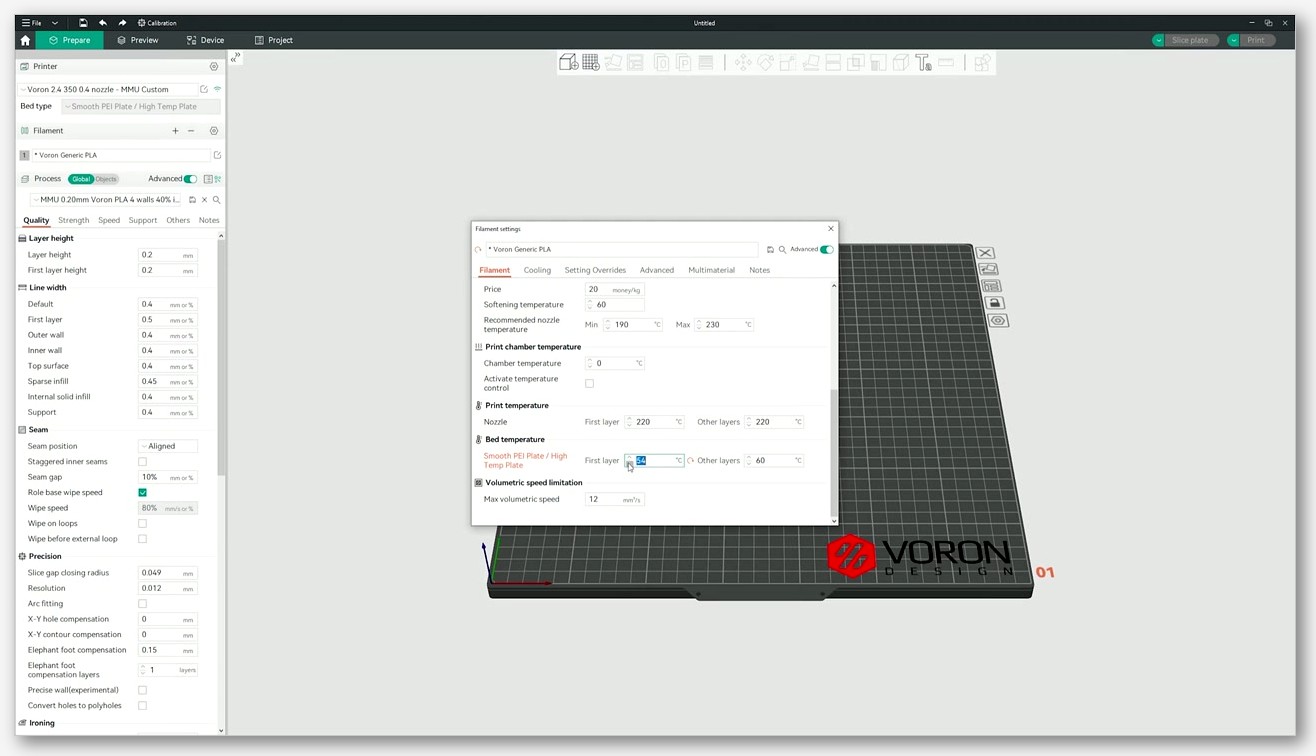
Profile management: the real maintenance discipline
I’ll be blunt: the single biggest reason users feel like they “have to recalibrate every time” is that they didn’t save their per-filament profile last time. If your workflow is “tune the spool, then forget to save the profile, then re-tune next month when the print quality dips,” you’re not having a calibration problem. You’re having a profile management problem.
What OrcaSlicer saves per filament profile
- Nozzle temperature (per layer and first layer)
- Bed temperature
- Flow ratio (the result of flow rate calibration)
- Pressure Advance / K-value (per filament + printer combo)
- Max volumetric speed
- Retraction length and speed (printer-side, but inheritable)
- Filament density (used by MVS and weight estimation)
- Cooling fan curve
What it doesn’t save (and you shouldn’t assume transfers)
- Input shaper values: those live on the printer, not in the slicer
- Bed mesh: lives on the printer
- E-steps and rotation_distance: printer firmware
- PID values: printer firmware
How to clone a profile per spool or batch
The simple workflow inside OrcaSlicer:
- Open Filament Settings.
- Find the filament you want to clone. Right-click the filament name, choose “Save as new.”
- Rename with brand, color, and (optionally) batch or date. Example: “Sunlu Meta PLA Black, Spool 4, 2026-05.”
- Edit the values from your calibration tests (flow ratio, K-value, temp, MVS).
- Save. The new profile is in your local sidebar and tied to that physical spool.
The custom filament profile guide covers the full creation flow, including inheriting from a parent profile so you only have to edit the deltas.
One critical detail worth repeating: OrcaSlicer filament profiles are per nozzle diameter. A “0.4mm Sunlu PLA Black” profile will not appear in the dropdown when a 0.6mm nozzle is selected. The GitHub issue at OrcaSlicer #9576 is a long thread of users discovering this. The fix is either to create a parallel profile under the new nozzle, or to duplicate across nozzle profiles when you change nozzle.
Per-spool vs per-brand: when does cloning matter?
For most home users, one profile per brand + material + color is enough. You tune Sunlu Meta PLA Black once, you save it, you reuse it for every spool of that SKU you ever buy. The variance between spools is small enough that you won’t see it on hobbyist prints.
Per-spool cloning is for production users who care about dimensional consistency across batches, or for users running fit-critical parts (functional prints, multi-part assemblies, machined-tolerance jigs). If you’re printing miniatures and benchies, per-brand is fine. If you’re printing parts that have to mate with machined aluminum at 0.1mm tolerance, clone per spool and use the tolerance calibration test at the start of each batch.
Optional but recommended: a small piece of masking tape on the physical spool with the profile name written on it. Three identical-looking black PLA spools with three different flow ratios is a debugging nightmare. Five seconds of tape solves it.
A decision tree before every print
Before you slice the next thing, run through this in your head.
Did something change since your last good print?
→ No: Print. Don’t recalibrate.
→ Yes, the filament: Same brand, same color, plain (non-filled)? Just print, watch the first layer. Different brand, or filled/silk/glow variant? Temp tower + flow + PA.
→ Yes, the hardware: Nozzle, hotend, extruder gears, belt? Look up the specific trigger in the master schedule. Worst case (nozzle diameter change): block out 3 hours.
→ Yes, the firmware: Bambu major update? Spot-check PA on your most-used filament. Klipper config change? Re-shaper. OrcaSlicer version only? Print a 20mm cube first.
→ Yes, the environment: Humidity spike? Dry the filament. Quick flow check after if you printed something visible before drying.
That’s the entire methodology. Five questions, mostly answered “no,” and a clear set of actions when the answer is “yes.”
For new users still building their first profiles, work through the consolidated calibration guide once on a baseline filament, then never repeat that full workflow unless the master schedule tells you to. After that initial pass, you’re maintaining, not building, and maintaining is much cheaper than building.
Post-PA finishing touches: the optional 5% improvement
One section I get asked about a lot: once your master profile is dialed, are there optional tests that are worth running for the last 5% of print quality?
The honest answer is yes, but only for certain use cases.
VFA (vertical fine artifact) test. Worth running once per printer to identify resonance bands at specific speeds. Not a per-spool test. The VFA test tells you which speeds to avoid, which becomes a print-profile setting, not a filament-profile setting. One-and-done.
Cornering / junction deviation calibration. For Marlin users without input shaper, this is the closest equivalent to a shaper tune. The cornering calibration finds the JD value that gives smooth corners without ringing. Run it once per printer, not per spool.
Tolerance calibration. For functional parts where holes have to fit pins or threads have to mate, the tolerance calibration tells you what XY offset to set. Once per printer + filament combo, not per spool.
None of these belong in a recalibration schedule. They belong in an initial setup checklist. Run them once when you build the printer or buy a new filament brand. Don’t re-run them on every spool swap.
The anti-patterns I see most often
Patterns I see new OrcaSlicer users fall into, and the fix for each.
“I just upgraded OrcaSlicer, so I’m recalibrating everything.” No. OrcaSlicer version updates don’t change firmware. Print a small test cube first. If it looks fine, your calibration is fine. Move on.
“I swapped colors of the same brand, so I’m running the full sweep.” Overkill for plain colors. Skip to a confirm cube. Save the sweep for filled or silk variants.
“My Bambu auto-calibrates so I don’t run anything.” Wrong. Auto-calibrate is K-value + shaper + mesh. Flow rate, temp, retraction, MVS are still manual. Run them on new brands.
“I never saved my last profile, so I’m starting over.” Fix the profile management, not the calibration. Clone, name, save. Future you will thank present you.
“My first layer looks bad, so I’m running PA.” Wrong test. First layer issues are bed mesh, z-offset, or first-layer flow ratio, not pressure advance. PA fixes corners, not the base layer.
“My corners look bad, so I’m running flow rate.” Also the wrong test. Corner blobbing is PA, not flow. Match the test to the symptom.
FAQ
Do I need to recalibrate after every OrcaSlicer update?
No. OrcaSlicer version updates change slicing logic and UI, not firmware. The exception: if OrcaSlicer flags a profile incompatibility on import (you’ll see a warning dialog), print a small test cube to verify visual quality before trusting the imported values. A full recalibration sweep on a slicer version bump is wasted time in 99% of cases.
Does Bambu’s auto-calibration replace flow rate calibration?
No. Bambu’s auto features cover input shaper (vibration calibration at print start), bed mesh (auto-mesh), and Flow Dynamics (K-value, auto on X1C/X1E/H2D with LiDAR, manual on P1S/P1P/A1/A1 mini). Flow rate is manual on every Bambu printer in 2026. Temperature tower is manual. Retraction is manual. The Bambu Lab wiki’s Flow Rate Calibration page confirms this: you still run flow rate in Bambu Studio or OrcaSlicer per filament profile.
How often should Klipper users re-run SHAPER_CALIBRATE?
Only after physical or config changes. Klipper’s docs say resonance frequencies drift over time because belt tension drifts. The practical rule: re-shaper after belt re-tensioning, belt replacement, idler replacement, or any significant config change to accel limits or rotation distances. If none of those happened, your shaper values are still valid no matter how many prints you’ve run.
Why does my flow change when the spool gets damp?
Moisture content directly affects mass flow. Wet filament has lower effective viscosity at print temp, which makes it extrude more aggressively (puffing, stringing). The actual cross-sectional flow at the nozzle exit isn’t quite what your calibrated flow ratio predicts, because water in the filament is flashing to steam and disrupting the melt. Dry the filament, then a confirm cube tells you if the flow ratio needs a small tweak.
Do I need a separate profile for each color of the same brand?
For plain colors of the same brand and material, one profile is fine for most users. For filled, silk, glow, or glitter variants, a separate profile is worth it because flow can shift 2 to 5 percent. For production work with tight tolerances, separate profiles per color is the right discipline regardless. For hobbyist printing, per-brand-per-material is usually enough.
Same brand, same color, just a new spool. Do I really need to recalibrate?
No. The variance between two spools of the same SKU from the same manufacturer is small enough that your existing calibration values will still produce a good print. If you want to sleep well, print a 20mm calibration cube first as a sanity check. If it looks fine, proceed. Skip the full sweep.
I haven’t printed in 6 months. What should I check before my first print?
Filament moisture first. Six months in ambient air means even PLA has absorbed some moisture, and PETG and nylon are almost certainly wet. Dry the spool you plan to use. Bed adhesion second: clean the build plate with IPA. Belt tension third on Klipper printers: pluck and listen, or use the manufacturer’s tension gauge. Then print a calibration cube. If it looks fine, no calibration tests are needed. If it doesn’t, the visible symptom tells you which test to run (corners equals PA, walls equals flow, layer adhesion equals temp).
I’m running a new STL from a designer I don’t know. Any calibration?
No. The model file has no relationship to calibration values. Calibration is between the filament and the printer. The STL just describes geometry. Slice it, print it.
Does printing PETG after PLA on the same nozzle need a recal?
Yes, but only because the material changed, not because you swapped. PETG vs PLA is a “new filament brand” trigger from the master table. Run temp tower, flow rate, and PA on the PETG profile. Then save that profile separately from your PLA profile. After that, switching between profiles is a dropdown selection in OrcaSlicer, not a recalibration sweep.
The honest closing
The calibration culture in 3D printing skews toward “more is better” because it sounds safe. It isn’t. More tests cost more time and more filament, and beyond a certain point they don’t improve print quality. The skill isn’t running every test. The skill is knowing which one to skip.
My current workflow, after the Saturday-burned-on-black-PLA reckoning: when I open a new spool, I look at the brand. New brand? Temp + flow + PA, 90 minutes, save the profile, done. Same brand, plain color? Skip everything. Just print. Same brand, filled or silk? Flow rate, optional PA, 30 minutes. Nozzle change is the one expensive event a year, and it’s always a deliberate evening. Everything else is print first, recalibrate only if something visible is off.
Six months of that approach and I print more, waste less, and the print quality is identical to the bad old days when I calibrated on schedule. The savings compound, because the time you don’t spend running pressure advance is time you spend designing things, printing things, or doing literally anything else that’s more fun than watching a calibration tower fall off the bed at 28 minutes in.
OrcaSlicer is free, the printers are getting better every year, and the calibration tools have never been more accessible. The bottleneck isn’t tooling, it’s discipline. Specifically, the discipline to leave a calibrated profile alone when nothing has changed.
If you want the canonical references for the individual tests in this schedule, the OrcaSlicer GitHub Calibration wiki and the OrcaSlicer calibration guide on this site cover every test the master table mentions. Save them, bookmark them, and come back to them only when a trigger fires. That’s the entire discipline.
Build a calibrated profile once. Save it. Print. Repeat. Recalibrate when something changes, not because the calendar says so.
Related OrcaSlicer guides
- The Complete OrcaSlicer Calibration Guide (Order Matters)
- OrcaSlicer Cornering & Junction Deviation Calibration (2026)
- OrcaSlicer Tolerance & Fit Test: Functional Parts (2026 Guide)
- OrcaSlicer Input Shaper Calibration for Klipper (2026 Guide)
- Elephant Foot in OrcaSlicer: Compensation Done Right (2026 Guide)