
I once cracked open a fresh roll of PA6-CF, slapped it on the spool holder, and watched my nozzle pop like microwave popcorn within ninety seconds. I’d let the bag sit half-open on the workbench for two days, and that was enough to wreck the print, the part, and most of my afternoon. If you’ve ever heard that crackling sound or pulled a vase off the bed that looks like it was sandblasted, you’re reading the right guide.
This is the practical drying playbook I wish I had when I started running nylon and PETG through my Bambu rig. We’ll cover what wet filament actually sounds and looks like, the per-material drying temps straight from vendor TDSs, how the AMS HT and AMS 2 Pro compare for in-printer drying, what standalone dryers are worth the bench space, and why your kitchen oven is a last resort and not a first choice. I’ll also flag where OrcaSlicer can mask wet-filament symptoms (the Cooling tab), and where it categorically can’t help (drying itself).
Table of contents
- Why your filament is making popping sounds
- Which filaments are hygroscopic, and which barely care
- Per-material drying temperature and time table
- In-printer drying: AMS HT vs AMS 2 Pro vs original AMS vs AMS Lite
- Standalone filament dryers compared
- Can you use a kitchen oven?
- The OrcaSlicer angle: Cooling tab tuning
- Storing filament after drying
- Common gotchas
- FAQ
Why your filament is making popping sounds
The single most diagnostic symptom of wet filament is audible. You’ll hear popping, crackling, or hissing right at the nozzle, and that’s not the hotend, that’s trapped water flashing to steam as the filament enters the melt zone. Sovol’s writeup describes it as a violent little explosion inside the nozzle, and that’s exactly what’s happening, just at a microscopic scale.
The visual tells stack up fast once you know what to look for. You’ll see wisps of steam coming off the nozzle in good light. The print surface goes from glossy to foamy or pitted. Stringing gets dramatically worse on PETG and TPU, even with retraction settings that worked fine yesterday. Inter-layer bonding weakens, and parts snap along layer lines under loads they used to handle.
Here’s the part most beginners miss: drying removes water, but it doesn’t undo hydrolysis. Once water molecules have been sitting at melt temperatures inside the polymer, they act like tiny chemical scissors, severing the long polymer chains. That damage is permanent. A long-wet spool of PETG might print after drying, but it’ll often still be brittle because the polymer backbone has been chopped up. So drying isn’t a fix for filament you’ve been printing wet for weeks; it’s a fix for filament that’s just sat in humid air.
Don’t get hung up on chasing a specific moisture percentage. Vendor TDSs don’t publish a “below X%” threshold for printable, and pretending there’s one is internet folklore. Use the symptoms instead: popping, visible steam, fuzzy surface, sudden stringing on a profile that used to work. If two of those three show up, dry the spool before you change a single slicer setting.
Which filaments are hygroscopic, and which barely care
Not every filament drinks water at the same rate. Roughly ordered worst to best for absorption: nylon (PA, PA-CF, PA-GF) is the worst offender, followed by PVA, polycarbonate (PC), PETG, ABS, ASA, then PLA at the milder end. TPU sits somewhere in the middle and varies wildly between brands and shore hardness.
Nylon can become functionally unprintable within a humid day. PVA goes squishy in a few hours of high-humidity exposure. PLA can sit on an open shelf for weeks in a dry climate and still print fine, which is why so many makers skip drying entirely. The trap is that habit catches up the moment you switch to PETG or nylon.
Absorption is a function of humidity, temperature, and time, not just the material. The same spool of PETG behaves differently in Phoenix in August than in London in February. I keep a cheap hygrometer on the workbench, and anything above 45% relative humidity means spools come out of dry-boxes only when I’m loading the printer.
Per-material drying temperature and time table
This is the table I check before every drying cycle. Every row pulls from the actual vendor TDS, not forum guesses. If your filament brand isn’t Polymaker or eSUN, check your specific TDS, but these values are a sane starting point for most common formulations.
| Material | Temp | Time | Source |
|---|---|---|---|
| PLA (Polymaker PolyLite / PolyMax / PolyTerra) | 55°C | 6 h | Polymaker TDS |
| HT-PLA (Polymaker) | 60°C | 6 h | Polymaker wiki |
| PETG (PolyLite PETG) | 65°C | 6 h | Polymaker TDS |
| ABS (PolyLite ABS) | 70°C | 6 h | Polymaker TDS V5.5 |
| ASA (PolyLite ASA) | 70°C | 6 h | Polymaker TDS V5.3 |
| TPU 95A (PolyFlex TPU95) | 65°C | 8 h | Polymaker TDS V5.1 |
| TPU 95A-HF | 70°C | 8 h | Polymaker wiki |
| Nylon PA6-CF (PolyMide PA6-CF) | 80°C | 12 h (oven) | Polymaker TDS V5.2 |
| Polycarbonate (PolyLite PC) | 75°C | 12 h | Polymaker TDS V5.3 |
| PVA (Polymaker PolyDissolve S1) | 80°C | 12 h | Polymaker wiki |
| PVA (eSUN ePVA) | 45°C | >10 h | eSUN TDS V4.0 |
| BVOH (Verbatim / Ultrafuse) | Follow vendor TDS for your specific BVOH grade; published Ultrafuse and Verbatim datasheets cover storage only. | Ultrafuse / Verbatim datasheets | |
A note on PVA between the two main brands: Polymaker’s PolyDissolve S1 wants 80°C for 12 hours, while eSUN’s ePVA wants only 45°C for more than 10 hours. That’s a huge spread, and it’s because the polymer chemistry isn’t identical between brands. Don’t average them. Read your specific TDS.
Bambu’s own wiki suggests a different convention for the “dry while printing” use case. It sets PLA to 45°C and PETG to 55°C when drying happens alongside a print, on the logic that the heated chamber acts as a long, gentle dry. That’s a perfectly valid maintenance mode, but it’s not a replacement for the higher-temp recovery cycle the TDS calls for when a spool has actually gone wet.
In-printer drying: AMS HT vs AMS 2 Pro vs original AMS vs AMS Lite
If you’re on the Bambu ecosystem, your in-printer drying options vary wildly across the AMS lineup. They aren’t interchangeable, and three of the four can’t actually dry filament at all in the active-heat sense.
AMS HT is the new high-temperature unit and it’s the only Bambu AMS that hits truly useful drying temperatures. Per the Bambu wiki, it has a “built-in heating and drying module with a maximum drying temperature of 85°C,” and the spool rotates 30° every five minutes for uniform drying. Two important caveats: it holds a single spool, and “each AMS HT requires an external 220V power supply for drying,” meaning you can’t draw drying power from the printer. The wiki is also explicit that “the AMS HT cannot perform standalone drying without a connection to the printer.” Per Bambu Lab specifications it pulls roughly 170W during drying cycles, though I’d treat that figure as a ballpark rather than a guaranteed continuous draw.
AMS 2 Pro hits 65°C max via “two drying modules, consisting of heaters, fans, and temperature sensors,” per the official drying-function page. There’s a gotcha buried in the same doc: “the maximum temperature is only achievable when the ambient temperature is ≥25°C.” If your garage is at 18°C in winter, the AMS 2 Pro will dissipate heat faster than it can produce it and your actual chamber temp won’t reach 65°C. That makes it a decent in-place dryer for PLA, PETG, and ABS in a climate-controlled room, but a poor fit for nylon, PC, or PVA, which need higher temps. Bambu themselves point users to the AMS HT for those materials.
Original AMS (the unit shipping with X1 and P1 series before AMS 2 Pro) has no active heating at all. It’s desiccant-only, with a humidity sensor and an orange-indicator desiccant pack that changes color when spent. You replace the pack when it goes dark. That’s passive storage, not drying, and you cannot use it to recover a wet spool.
AMS Lite (A1 and A1 mini) is open-frame. Bambu’s wiki states bluntly that “AMS Lite has no enclosure and no humidity sensor, with filaments stored in it fully exposed to ambient air” and that “A1 and A1 mini, as open-frame printers, cannot be used to dry filament.” If you’re on an A1 and printing hygroscopic materials like PETG, PA, or PVA, you need a standalone dryer or a sealed dry-box with desiccant. The AMS Lite is feed hardware, not a storage solution.
One more note: no Bambu AMS variant cleanly auto-feeds flexible TPU. For flexible TPU on AMS HT, use the external side-spool feed, not the AMS routing path. The bends chew up soft TPU and cause feed issues that look like clogs.
Standalone filament dryers compared
Outside the AMS ecosystem, or alongside it for multi-spool drying, the standalone dryer market has matured a lot. Here’s what the main contenders look like on paper. I’m only listing temp, capacity, watts, and the notable distinguishing feature, because prices shift constantly and watts plus max temp tells you most of what you need to know about thermal capability.
| Dryer | Max temp | Capacity | Heater | Notable |
|---|---|---|---|---|
| SUNLU FilaDryer S2 | 70°C | 1 x 1 kg | 48 W | 4.6″ LCD, pre-set profiles |
| SUNLU FilaDryer S4 | 70°C | 4 spools at 1 kg each | 330-350 W PTC + triple fan | Print-while-drying, 8 filament holes |
| SUNLU FilaDryer E2 | 110°C | 1 spool | 500 W PTC dual-chamber | Drying plus annealing; AMS HT alternative |
| Polymaker PolyDryer | ~70°C (Level 3) | 1 x 1 kg | DC 24V 68 W | Three preset levels: 50/60/70°C |
| eSUN eBox Lite (v2) | 50°C (marketing 40-55°C) | 1 spool | 48 W | Entry-level; PLA, PETG, PVA, ePA, TPU |
| Creality Space Pi | 70°C | 1 spool | 145 W PTC + 360° fan | 12 presets including PLA-CF, PA-CF, PC, TPU |
| Creality Space Pi Plus | 70°C | 2 spools | 160 W PTC | Dual 360° fans |
Quick verdict by use case, based on running most of these on the bench. If you’ve got a print farm or a multi-color setup, the SUNLU S4 with four spools and print-while-drying is the obvious workhorse. If you need to dry PA6-CF, PC, or hit the 80°C-plus range that vendor TDSs ask for, only the SUNLU E2 (110°C) or the Bambu AMS HT (85°C) actually qualify; everything else tops out at 70°C and you’re undershooting the nylon spec. For smallest footprint and casual PLA / PETG drying, the eBox Lite or the PolyDryer are fine. The Creality Space Pi line is a solid middle ground if you’re already in the Creality ecosystem.
One flag: don’t claim a food dehydrator is the same thing. Dehydrators have no humidity readout, wrong chamber geometry for cylindrical spools, and poor temperature uniformity. They work in a pinch but they’re not equivalent to a purpose-built filament dryer.
Can you use a kitchen oven?
Yes, with serious caveats. The kitchen oven is the classic last-resort drying method, and it works for some materials, but the failure mode is brutal: a deformed spool that won’t fit in your feeder, or in the worst case, layers of filament fused together into a solid ring.
The core problem is calibration. As EIBOS puts it, “drying above 60°C should be avoided because PLA has a low glass transition temperature, and excessive heat can soften the filament, leading to oval-shaped spools or even sticking and fusing of adjacent filament layers.” Home convection ovens routinely overshoot their set point by 10°C to 20°C. So if you set 55°C for PLA, you might actually see 70°C at the rack, and 70°C is well past the PLA softening threshold.
If you’re going to oven-dry, do these first. Put a separate oven thermometer on the rack and verify the temperature empty, at your target setting, for 20 minutes. Use convection mode if you have it. Sit the spool on a parchment-lined tray, not directly on the wire rack. And never walk away on the first cycle.
Prusa’s knowledge base takes the same line: ovens work but they’re risky, and a dedicated dryer is the right tool for the job. The Bambu community PSA thread on the official forum is full of users posting photos of melted spools to prove the point. Read that thread before you preheat anything.
Some hard rules I follow. Never put PVA in the oven. Polymaker’s PolyDissolve S1 wants 80°C for 12 hours, and if your oven overshoots, you’ll get a sticky water-soluble mess that may damage the heating element when you turn the oven back on for actual cooking. Never put TPU in the oven, because it’ll fuse to itself. ABS, ASA, PC, and nylon tolerate oven temps better than PLA does, so if you’re going to oven-dry anything, those are the safer bets. For PLA specifically, only do it if you’ve verified your oven’s actual temperature with a thermometer and confirmed it stays under 60°C.
The OrcaSlicer angle: Cooling tab tuning
Let’s be honest about what OrcaSlicer can and can’t do here. OrcaSlicer has no firmware-side drying control. Slicers don’t dry filament; dryers do. There’s no toggle, no setting, and no feature to add to your filament profile that will pull water out of a wet spool. If you see a YouTube comment claiming otherwise, it’s wrong.
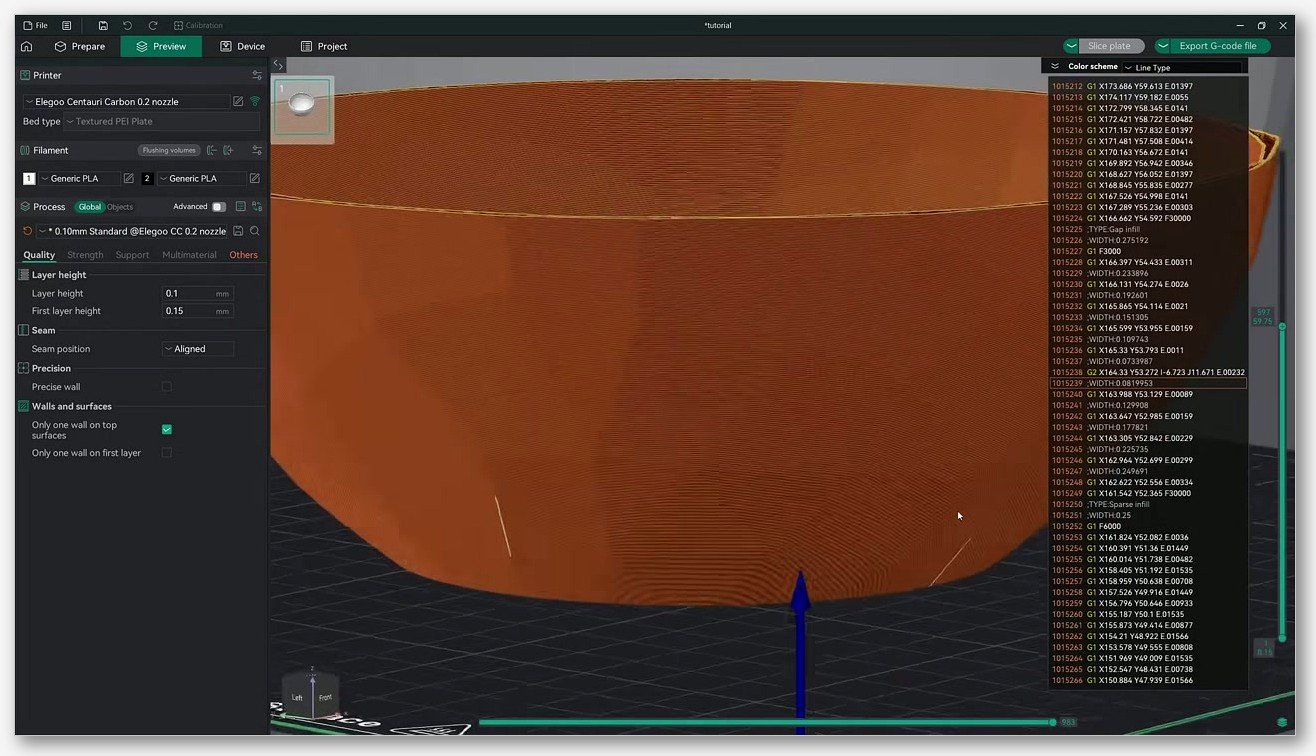
What OrcaSlicer can do is interact with the symptoms of wet filament in ways that either mask the problem or make it worse. The Cooling tab inside Material settings is where this plays out, particularly for PETG. According to the OrcaSlicer wiki cooling documentation, the fan-control settings (fan_min, fan_max, overhang threshold) govern how aggressively the part-cooling fan runs at different layer types and overhang angles.
The PLA defaults assume fan_min of around 100, because PLA tolerates aggressive cooling and benefits from it on overhangs. The PETG defaults sit much lower, often around 20 for fan_min, because PETG’s layer adhesion suffers when you blast it with cold air. Now layer in wet filament: if you’ve got moisture in your PETG, the steam pockets weaken layer bonds, and cranking the part-cooling fan to “fix” stringing will further weaken those bonds, leaving you with parts that snap along Z. The symptom looks identical to bad cooling settings, but the root cause is moisture.
So my rule of thumb is this: if you’re tempted to dive into the Cooling tab to fix what looks like a layer-adhesion issue, dry the spool first. Run a small test print after drying. If the issue persists, then start tuning cooling. Slicer tuning is downstream of dry filament, not a substitute for it.
Storing filament after drying
Drying without storage is a treadmill. You’ll dry a spool, leave it on the printer overnight in a humid garage, and find it’s reabsorbed enough moisture to start popping again within 48 hours for the worst offenders like nylon and PVA.
The minimum viable setup is a sealed plastic tub (the cheap clear ones with the rubber-gasket clamp lids work fine), reusable indicator silica gel, and a hygrometer card or digital meter inside the tub. Target sub-20% relative humidity inside the box. When the indicator silica gel goes from blue to pink (or orange to dark green, depending on the brand), bake the gel pack in the oven per its instructions and reuse it. Indicator desiccant from Bambu Lab works the same way: the original AMS uses orange-indicator gel that goes dark when spent.
For the spools you’re actively printing, a heated dry-box (essentially a filament dryer set to its low maintenance temperature, around 45°C for PLA or 55°C for PETG) keeps moisture from re-entering during a long print. This is the use case the Bambu wiki calls “drying while printing,” and it’s where lower-temp dryers like the eBox Lite and the SUNLU S2 earn their keep.
The hardest case is AMS Lite. As covered earlier, it has no enclosure and no humidity control, so any hygroscopic filament loaded into it is just sitting in ambient air. If you’re running PETG or nylon on an A1, store the spool in a sealed dry-box and load it into the AMS Lite right before you print, not the day before.
Common gotchas
- Cardboard spools warp. Some filament brands still ship on cardboard cores, and those cores absorb moisture and warp at drying temperatures. You’ll end up with a wobbling spool that fights the feeder. Transfer to a plastic spool before drying if you can.
- The AMS HT can’t operate standalone. It needs a connection to the printer to dry, and it needs an external 220V supply on top of that. So you can’t just plug it into the wall and dry a spool in another room. Plan your bench layout accordingly.
- Ovens overshoot, every time. Even “good” home ovens overshoot by 10°C to 15°C on first heat. Verify with a thermometer before you trust any oven for PLA drying.
- Drying degraded filament won’t restore it. If a spool has been printing wet for weeks, hydrolysis has already chewed up the polymer chains. The dried spool will be less stringy, but the parts will still be brittle. Mark it for prototypes only.
- New spools sometimes still pop. Vacuum-sealed bags fail, warehouses get humid, shipping containers cook in summer. Don’t assume “brand new” means “dry.” A quick 4-hour cycle at the TDS temp on a suspect new spool costs you nothing.
- The AMS Lite is not a dry-box. I’ll repeat this because I see it ignored constantly: do not load hygroscopic materials into AMS Lite and expect them to stay dry. Sealed external storage is mandatory on A1 / A1 mini setups.
- TPU absorption surprises people. Flexible TPU absorbs faster than most makers expect, and wet TPU shows up as severe stringing and inconsistent extrusion rather than the classic popping sound. If your TPU is suddenly worse, dry it before you blame your retraction settings.
FAQ
How often should I dry my filament?
It depends on the material, your storage, and your climate. PLA in a sealed dry-box might go six months without needing a cycle. Nylon in an open-room setup might need drying every week, sometimes every print session. The honest answer is: dry when the symptoms appear, and store properly so the symptoms don’t appear often.
Does drying reverse moisture damage?
No. Drying removes free water from the filament. It can’t reverse hydrolysis, which is the chemical breakdown of polymer chains that’s already happened. A spool that was wet for a week will print better after drying, but it’ll still be weaker than a spool that was kept dry from new.
Can I print while drying?
Yes, if your dryer is designed for it. The SUNLU S4, Polymaker PolyDryer, and most current dedicated units have filament pass-through holes for exactly this. The Bambu AMS HT and AMS 2 Pro dry while printing by design. Just remember the “dry while printing” temps are lower than the recovery temps (around 45°C for PLA, 55°C for PETG per Bambu’s wiki), so this is maintenance, not recovery.
Why does my new spool still pop?
Vacuum bags fail in transit, warehouses get humid, and some manufacturers don’t pull a hard vacuum. A new spool of nylon or PVA, especially, can arrive wet enough to pop. Run a short drying cycle at the TDS temperature before your first print on hygroscopic materials.
Is desiccant alone enough?
For storage of already-dry filament, yes, provided the container is genuinely sealed and the desiccant is fresh. For recovering wet filament, no. Desiccant can pull humidity out of the air slowly but it can’t pull bound water out of polymer fast enough to matter. You need active heat for recovery, then desiccant for maintenance.
What’s the best dryer for a Bambu A1?
Since AMS Lite can’t dry, you’re picking a standalone unit. For one or two spools at a time, the Polymaker PolyDryer or SUNLU S2 are fine. If you run PETG, PA, or PVA regularly, the SUNLU S4 (four spools, print-while-drying) or the SUNLU E2 (110°C for higher-temp materials) are better long-term picks. Pair it with a sealed dry-box for storage of the spools you’re not actively using.
Wrapping up
Drying isn’t optional once you move past basic PLA. The path of least pain is: match temp and time to your specific filament’s TDS, use a dedicated dryer rather than an oven when you can, and store dried spools in sealed boxes with fresh desiccant so the work doesn’t undo itself overnight. The OrcaSlicer side of the equation is downstream of all of this; the slicer’s Cooling tab can mask wet-filament symptoms, but it can’t replace the dryer.
If you’re working through PVA or BVOH support material specifically, our PVA and BVOH support filament guide goes deeper on soluble-support drying quirks. For stringing problems where you’re not sure if moisture or retraction is the root cause, the common stringing fixes walkthrough has the diagnostic flow. And if you’ve got an AMS-equipped Bambu and want the full multi-material workflow, the AMS workflow guide covers loading, mapping, and per-slot temperature handling. When in doubt, drop back to the troubleshooting master for the full diagnostic tree.
Related OrcaSlicer guides
- Best OrcaSlicer Filament Settings: All Materials Cheatsheet
- How to Use Bambu Lab AMS Filaments with OrcaSlicer (2026 Guide)
- OrcaSlicer Silk PLA Settings for That Glossy, Satin Finish
- OrcaSlicer Wood-Filled PLA Settings and Nozzle Choice Guide
- OrcaSlicer Input Shaper Calibration for Klipper (2026 Guide)