
I’ll never forget the first silk PLA print I pulled off the bed and held up to a window expecting fireworks. What I got was a dull, slightly waxy benchy that looked like standard PLA wearing a cheap rain jacket. The spool wasn’t bad. My settings were. I’d loaded a no-name silk roll, kept my standard PLA profile, and cranked outer-wall speed because “PLA is fast.” That print taught me more about silk than any wiki could, and most of what I learned eventually mapped back to a handful of OrcaSlicer fields I’d never bothered to read.
Since then I’ve put several kilos of silk through three printers, mostly Polymaker Panchroma Silk and Eryone Silk plus a few mystery rolls. OrcaSlicer ships a usable starting point for silk, and the rules are fairly consistent across brands. But vendor TDSs disagree with each other and sometimes with OrcaSlicer’s bundled profile, so you can’t grab one number and run with it. This guide walks through what’s in the slicer, what the vendors say, where they fight each other, and how I’d dial in a silk profile today.
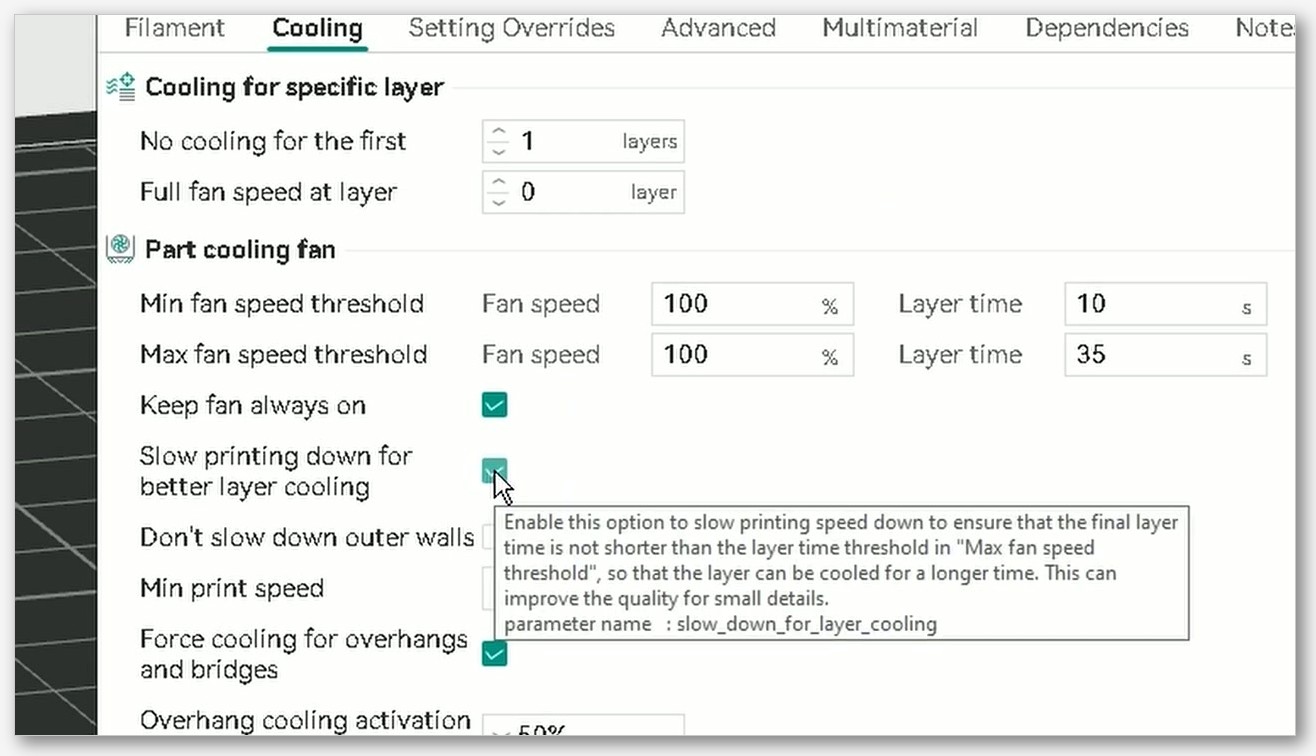
Table of contents
- What silk PLA actually is (and isn’t)
- What OrcaSlicer actually ships for silk
- Speeds: 40 to 60 mm/s, with caveats
- The fan-speed argument nobody wins
- Layer height: the 0.12 to 0.20 mm range
- The glossy-bottom trick (community wisdom)
- Multi-color silk in OrcaSlicer
- The Eryone profile quirk you should know
- Gotchas: stringing, brittleness, clogging
- A starter profile you can actually use
- FAQ
What silk PLA actually is (and isn’t)
Let’s clear something up before we touch a slicer field. There is no silk in silk PLA. The “silk” part is marketing for the satin sheen on the finished print. Spectrum’s official PLA Silk technical data sheet calls it “a PLA-based material for additive manufacturing with colour concentrates which imparts the satin texture effect to printed items,” and Polymaker, when rebranding their silk line as Panchroma in 2024, described it as “a new family of engineered polymer compounds containing PLA.” So we’re talking about a PLA backbone with additives mixed in.
What are those additives? Honestly, the vendors don’t tell you. Material-science write-ups speculate about fatty-acid ester lubricants combined with pigments, and some second-tier blogs claim there’s a small amount of TPE or TPU mixed in. I’ve seen that last one repeated everywhere, but I couldn’t find a single vendor TDS that confirms it, so I’m going to leave it alone. The honest framing is: PLA plus proprietary additives that change how the surface reflects light and how the polymer chains slide past each other in the melt zone.
This matters because silk doesn’t behave like standard PLA. It’s typically run hotter (most TDSs sit between 200 and 230°C versus 190 to 210°C for plain PLA), the surface is more sensitive to layer time, and mechanical properties drop a bit. Spectrum’s TDS records a notched Izod impact strength of 6 J/m, on the lower side for PLA, and Polymaker’s PolyLite PLA Silk V5.1 TDS lists Charpy impact at 3.46 kJ/m². Silk PLA is a finish material first, a strength material a distant second. Treat it like decorative trim, not structural parts.
What OrcaSlicer actually ships for silk
If you go digging in OrcaSlicer’s source tree, the silk story is more interesting than you’d expect. There isn’t a single monolithic “silk” profile. There’s a small handful of silk JSON files split across the Eryone vendor folder and the consolidated OrcaFilamentLibrary folder that the project introduced in 2024. Here’s what’s actually in there at the time of writing:
- Eryone Silk PLA. Lives at
resources/profiles/Eryone/filament/Eryone Silk PLA.json. There’s also a 0.2 nozzle variant in the same folder. - Generic PLA Silk @System. Lives in
OrcaFilamentLibrary/filament/. This is what you’ll select for unbranded silk rolls. - fdm_filament_pla_silk. The base silk profile in
OrcaFilamentLibrary/filament/base/. Every silk variant ultimately inherits from this. - Polymaker Panchroma PLA Silk @System and @base. In
OrcaFilamentLibrary/filament/Polymaker/. - PolyLite Dual PLA @System. The multi-color spool’s profile, which doesn’t actually apply silk-specific settings. We’ll get into that.
You won’t find a dedicated eSUN eSilk profile in there. eSUN’s folder inside OrcaFilamentLibrary has PLA+, PLA-Basic, PLA-Marble, PLA-Matte, and ePLA-LW, but no silk JSON. If you’re running an eSUN silk roll, your cleanest move is to load Generic PLA Silk and override the nozzle temp. I do that all the time and it’s fine.
Now for the interesting bit. Open the base silk file, fdm_filament_pla_silk.json, and you’ll see it’s almost empty:
{
  "type": "filament",
  "name": "fdm_filament_pla_silk",
  "inherits": "fdm_filament_pla",
  "from": "system",
  "filament_id": "OGFL96",
  "instantiation": "false",
  "description": "To make the prints get higher gloss, please dry the filament before use, and set the outer wall speed to be 40 to 60 mm/s when slicing.",
  "filament_flow_ratio": ["0.98"],
  "slow_down_layer_time": ["8"]
}
That’s it. Inherits from the standard PLA base, drops flow ratio to 0.98, bumps slow_down_layer_time from 4 to 8 seconds, and tucks the dry-and-slow advice into the description field. Everything else (nozzle 220°C, bed 55°C, fan_min_speed 100, close_fan_the_first_x_layers 1) comes from the standard PLA base unchanged. OrcaSlicer’s silk profile is really “standard PLA with longer cooling time per layer plus a friendly note.”
If profile inheritance feels a bit mysterious, our walkthrough on OrcaSlicer filament settings covers how the @base, @System, and vendor JSON files stack up. Worth a read if you plan to make your own.
There’s one quirk worth flagging right away. Polymaker’s Panchroma PLA Silk @base inherits from fdm_filament_pla, not from fdm_filament_pla_silk. So while the Generic PLA Silk profile gets the 8-second layer time, Panchroma Silk inherits the standard PLA 4-second layer time. Two profiles, both technically “silk,” both shipping with OrcaSlicer, with different cooling behavior. Not a bug exactly, but it’s the kind of thing that bites you if you assume “silk” means the same setup across brands.
Speeds: 40 to 60 mm/s, with caveats
The most quotable number is hiding in plain sight: OrcaSlicer’s base silk JSON description tells you to “set the outer wall speed to be 40 to 60 mm/s when slicing.” That’s the bundled recommendation, written by the profile maintainers. If you do nothing else from this guide, do that.
The problem is that if you go cross-check against vendor TDSs, you get a circus. Here’s what the major silk brands tell you:
- OrcaSlicer base silk profile. 40 to 60 mm/s for the outer wall.
- Polymaker PolyLite PLA Silk TDS (V5.1). Printing speed 30 to 70 mm/s.
- Polymaker Panchroma Silk wiki. Claims usable up to 250 mm/s and “maintains rich, silky shine even at 150 mm/s.”
- Eryone Silk PLA product page. 30 to 60 mm/s (see the Eryone Silk PLA listing).
- eSUN eSilk PLA. Less than 200 mm/s.
- Spectrum PLA Silk TDS. 40 to 110 mm/s.
That’s a 30 to 250 mm/s spread. The reality after enough botched prints to fill a parts bin: ignore the upper end of vendor claims when finish matters. Polymaker’s 150 mm/s number is achievable on a stiff CoreXY, but the sheen falls off well before you get there. I’ve never beaten OrcaSlicer’s 40 to 60 mm/s outer-wall window for actual gloss, even on a well-tuned Bambu X1C. Push inner walls and infill to 150 to 200 mm/s if your printer can handle the volumetric flow. Outer wall is what your eye reads as “silky,” so don’t gamble there.
A Numakers community guide is stricter, recommending 30 to 45 mm/s and “no more than 50 mm/s” for excellent visual results. For day-to-day printing, the 40 to 60 mm/s OrcaSlicer window is the right balance.
The fan-speed argument nobody wins
This is the section that took me longest to write because I don’t fully agree with myself. Here’s the setup. Every silk PLA TDS I’ve read says fan ON, often full blast:
- Polymaker PolyLite Silk TDS. “Cooling fan ON.”
- Polymaker Panchroma wiki. “Leave the cooling fan on at full blast for best surface quality.”
- Spectrum TDS. “Active cooling fan YES (up to 100%).”
- eSUN eSilk PLA. “Fan Speed 100%.”
OrcaSlicer agrees. The base PLA profile that silk inherits from sets fan_min_speed: 100, close_fan_the_first_x_layers: 1, and overhang_fan_threshold: 50%. The silk base doesn’t override any of that. So out of the box, OrcaSlicer’s Generic PLA Silk profile will hammer the part cooling fan at 100% from layer 2 onwards. That’s what the official sources want.
And yet. Plenty of well-regarded community guides (Numakers, Amolen, several Bambu wiki proxies) recommend dropping the fan to 50 to 70% for silk specifically, on the theory that lower fan equals better layer adhesion and a wetter, glossier melt. There’s genuine disagreement here and I’m not going to pretend there isn’t.
What I actually do: start at the OrcaSlicer default (100% min, fan closed on layer 1). If the print comes out brittle along layer lines, or if the surface looks gritty rather than satin, I drop fan_min_speed to 70 and try again on the same model. I’ll usually leave overhang fan at 100% regardless, because silk’s overhangs are already gnarly and you need the cooling there.
Don’t take “100% fan” or “70% fan” as gospel. Take “test both, pick what your specific spool and printer like” as gospel.
Layer height: the 0.12 to 0.20 mm range
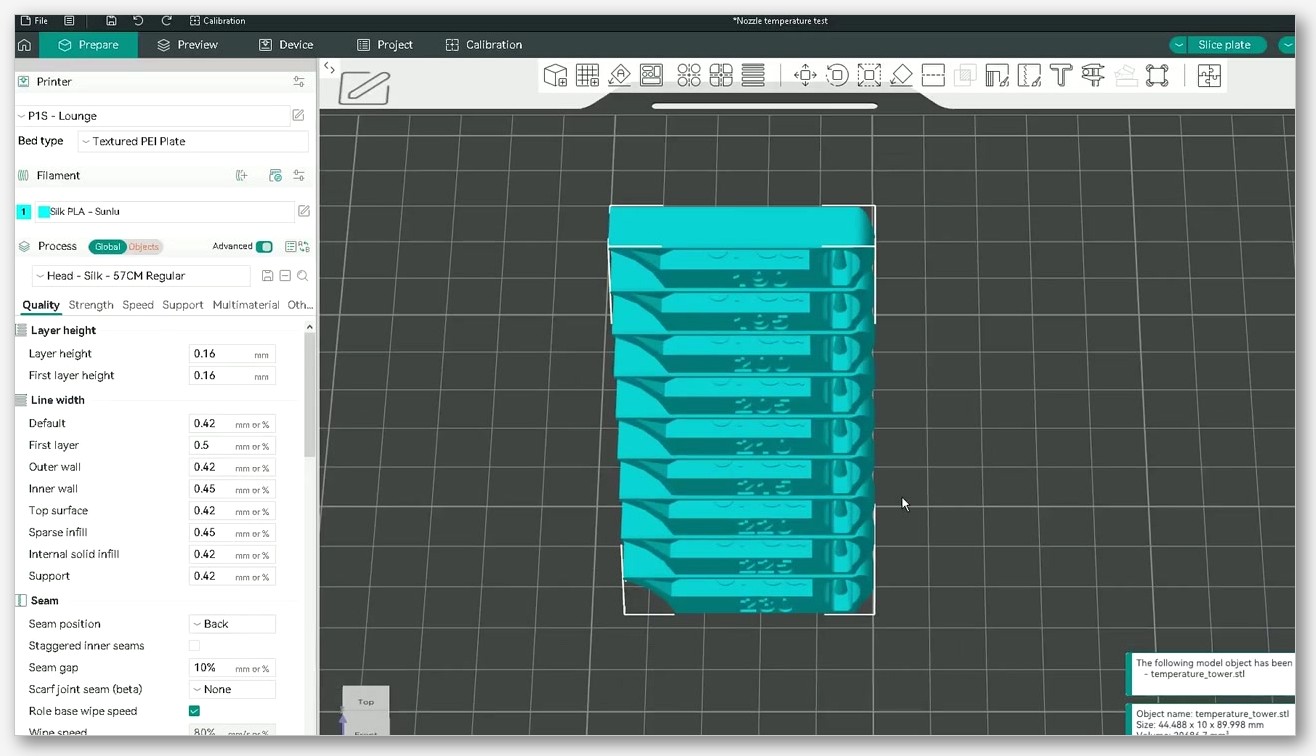
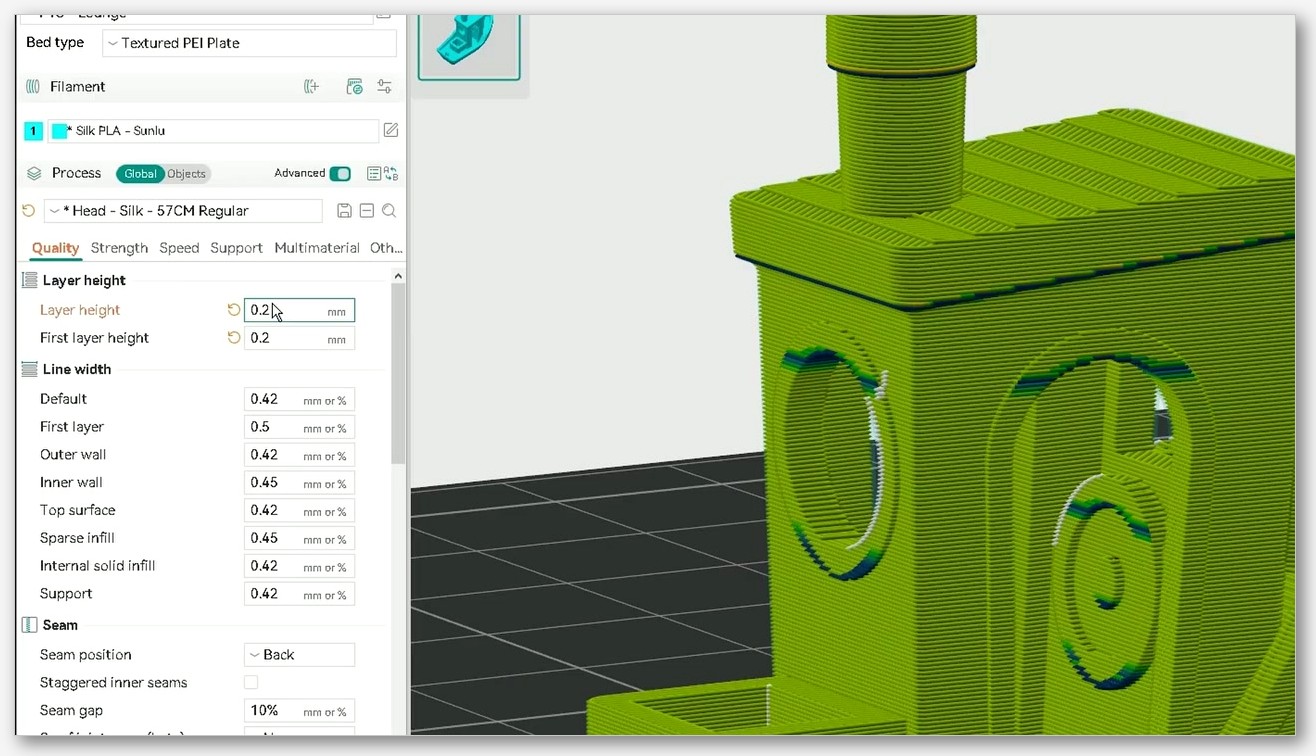
You’ll see a lot of articles confidently declare that 0.20 mm is “the sweet spot” for silk. I went looking for a primary source on that and couldn’t find one. The Numakers guide actually pushes the other direction, recommending “a layer height of no more than 0.15 mm” for excellent visual results, and Spectrum’s TDS just lists 0.05 to 0.30 mm as the supported range. So the honest answer is: 0.12 to 0.20 mm is the practical band, with the lower end favoring more visible sheen and the upper end favoring print speed.
My personal default for silk on a 0.4 mm nozzle is 0.16 mm. It’s a decent compromise between layer-line invisibility and print time, and it tends to look glossier than 0.20 mm without doubling the print duration like 0.10 mm would. If I’m printing a display piece I’ll drop to 0.12 mm and accept the time penalty. For utility decor (planters, vase-mode lamps) 0.20 mm is genuinely fine and the silk additives still hide layers reasonably well. Spectrum even calls out in their TDS that the silky surface texture “largely reduces the visibility of layers on the side surface of printed items,” which is the official version of “you can get away with thicker layers and still look good.”
The glossy-bottom trick (community wisdom)
If you’ve seen those mirror-finish silk prints where the bottom looks wet, that’s not a profile setting. The printer is pressing the first layer against a smooth build surface, usually glass or a high-gloss PEI sheet. Print upside-down (or print a flat piece face-down) on a polished surface and let the bed do the polishing. The smoother the bed, the glossier the bottom.
Honest caveat: I couldn’t find a primary vendor or OrcaSlicer documentation source that describes the trick. It’s repeated everywhere by users, and I use it with good results, but it’s community wisdom, not official guidance.
Practical notes from my own printing: smooth PEI gives a softer satin reflection, glass gives the wettest mirror look, textured PEI ruins the effect entirely. I run a thin layer of glue stick on glass with silk because adhesion is otherwise hit-or-miss, and the glue doesn’t dull the finish if you wipe it down with a wet cloth. Set first-layer speed to around 20 mm/s and first-layer height to your standard 0.20 to 0.24 mm.
Multi-color silk in OrcaSlicer
Polymaker sells Panchroma Dual Silk and Panchroma Gradient Silk. Eryone sells tri-color silk. These are all single-spool products where the color shift is baked into the filament itself, no AMS or toolchanger required. They’re great fun and they print beautifully on any single-extruder machine.
Here’s the thing about OrcaSlicer’s support for them. The bundled PolyLite Dual PLA @System.json profile is essentially a renamed shell that inherits PolyLite PLA @base, which itself inherits standard PLA. There are no silk-specific overrides. The full JSON is about as minimal as it gets: a name, an inheritance line, and a setting ID. So if you load that profile, you’re effectively printing with standard Polymaker PLA settings on a silk filament.
What I do: load Generic PLA Silk instead, adjust the nozzle temp to whatever your specific dual-silk spool wants (Polymaker’s range for Panchroma Silk is 190 to 230°C, so something like 215°C is a safe middle), and treat it as a single-color silk for slicing purposes. The color transitions just happen as the filament feeds through. If you’re new to multi-color in general, our OrcaSlicer multi-color guide goes deeper into AMS-based versus spool-based color, and the differences matter.
One related project note: OrcaSlicer Issue #7971 (“Add support for Bambu PLA Silk+”) was about AMS detection of Bambu’s silk product not being recognized properly. It’s marked closed now, but it’s a useful reminder that vendor coverage in the slicer can lag actual filament releases by a few months. If your spool isn’t in the dropdown, build your own profile and move on.
The Eryone profile quirk you should know
This caught me out the first time I loaded an Eryone Silk spool. OrcaSlicer’s bundled Eryone Silk PLA.json hard-codes the nozzle temperature at 230°C for both the first layer and subsequent layers. Eryone’s own product page lists the recommended print temperature as 190 to 220°C. That’s a 10°C gap between what the slicer ships and what the vendor publishes.
I’m not going to tell you which one’s right because I don’t actually know. 230°C is on the higher end of typical silk PLA but not unreasonable, especially if you’re printing fast. 220°C is what I’ve personally found works well for Eryone silk on the printers I own. The honest move is: load the Eryone profile, then check the nozzle temp field, and decide whether to override based on your printer’s heatbreak quality and your print speed. If you’re seeing stringing or burnt filament smells, drop to 215 to 220°C. If layers are separating, push back up.
This is a good general lesson for silk in OrcaSlicer. The bundled profiles are a starting point. The vendor TDS is a starting point. Your actual best settings live somewhere in the overlap, and only test prints will find them.
Gotchas: stringing, brittleness, clogging
Silk’s tax for the gloss is that it misbehaves in ways standard PLA doesn’t. Three common ones, with the fixes I actually use.
Stringing. Silk strings more than standard PLA because the additives change melt viscosity. Amolen’s guide notes that “printing too hot or using weak retraction settings encourages oozing,” which lines up with my experience. The fix is the usual retraction tuning, but with a slightly more conservative temperature. I run 1.0 mm retraction at 35 mm/s on a direct drive, 4 to 5 mm at 40 mm/s on a Bowden, and I drop nozzle temp by 5°C before reaching for fan or retraction changes. If you’re still wrestling stringing after temperature work, our OrcaSlicer stringing and oozing fixes guide has a longer troubleshooting flow.
Brittleness. The Numakers guide puts it plainly: “Silk PLA is softer and easier to break than standard PLA due to additives used to make it shiny.” Their mitigation is to “increase the number of perimeters to 4 and the infill to at least 15%.” I usually run silk at 4 perimeters and 20% infill for anything that’ll get handled, and I’m careful about thin features like text or sharp corners on display models. If a part needs to survive being dropped, don’t print it in silk.
Clogging. Silk PLA’s lubricant additives can build up on cold sections of the hotend, especially the heatbreak, and partial clogs show up as under-extrusion and surface flecking. Numakers recommends keeping “the heatsink fan running full speed” and avoiding “long pauses or extremely slow speeds.” They also recommend an all-metal hotend and hardened nozzles for long-term use, although a standard brass nozzle is fine for occasional silk printing. The OrcaSlicer base silk profile’s description field also reminds you to “please dry the filament before use” because moisture compounds all of these problems. I dry silk for 4 to 6 hours at 45°C before any print I care about. It’s annoying. It works.
A starter profile you can actually use
Here’s the synthesized starting point I’d actually recommend, built only from numbers I can defend. Load Generic PLA Silk as your base, then set:
- Outer wall speed. 40 to 60 mm/s (straight from OrcaSlicer’s base silk profile description).
- Inner wall and infill speed. 150 to 200 mm/s if your printer’s flow can handle it. Volumetric speed of 12 mm³/s is the inherited cap.
- Nozzle temperature. 215°C for unknown spools. The vendor ranges overlap most cleanly in the 210 to 220°C window.
- Bed temperature. 55 to 60°C. Standard PLA territory, no need to overthink it.
- Layer height. 0.16 mm for general use, 0.12 mm for display, 0.20 mm if speed matters more than maximum gloss.
- Perimeters. 4 walls. The brittleness mitigation is worth the time.
- Infill. 15 to 20%. More if the part is structural-adjacent.
- Fan. Start at the OrcaSlicer default (100% min). Drop to 70% only if you see brittle layer-line failures or gritty surfaces.
- slow_down_layer_time. Leave at 8 seconds (the silk default). This is the one setting OrcaSlicer actually overrides for silk and it’s there for a reason.
- Retraction. Conservative. 1.0 mm at 35 mm/s for direct drive, 4 to 5 mm at 40 mm/s for Bowden.
- Dry the filament. 45°C for 4 to 6 hours before printing.
If you want to go further and build a fully custom silk profile from scratch (especially handy for off-brand spools that don’t have an OrcaSlicer entry), the OrcaSlicer custom filament profile walkthrough covers it step by step. And if you haven’t tuned standard PLA yet, the OrcaSlicer PLA settings guide is the right stop before this one, because most silk problems are PLA problems with a glossier wrapper.
You can grab the current build of OrcaSlicer from the official OrcaSlicer GitHub releases page. The bundled profiles update with the slicer, so newer builds occasionally pick up new silk vendor coverage.
FAQ
Is silk PLA stronger or weaker than standard PLA?
It depends on which vendor you trust, but it’s generally weaker in practice. Spectrum’s TDS claims silk maintains “all the mechanical strength parameters of the standard PLA,” yet their own number for notched Izod impact strength is 6 J/m, which is on the lower end for PLA. Polymaker’s PolyLite Silk lists Charpy impact at 3.46 kJ/m². Most printers report silk feels more brittle and breaks more easily along layer lines. Treat it as decorative.
Why does my silk print look matte instead of glossy?
Three usual culprits, in order: outer wall speed too high (try 40 to 60 mm/s per OrcaSlicer’s own recommendation), nozzle temperature too low (silk wants 210 to 220°C, sometimes higher), or wet filament. Dry the spool at 45°C for 4 to 6 hours before reprinting. If none of that fixes it, the spool itself may be a low-gloss formulation.
Can I iron the top surface of silk PLA in OrcaSlicer?
Yes, ironing works on silk and can produce a striking mirror-flat top. The trade-off is print time and the risk of nozzle drag-marks if the height isn’t dialed in. Start with default ironing settings and reduce ironing flow if you see ridging.
Does silk PLA need an enclosure?
No more than standard PLA does. PLA generally prefers open chambers because excess heat softens the print. An enclosure won’t ruin a silk print, but it isn’t required and may actually hurt overhang quality.
Will silk PLA wear my brass nozzle?
Not meaningfully for occasional use. Silk PLA isn’t abrasive the way carbon-fiber filled or glow-in-the-dark filaments are. If you’re printing kilos of silk monthly, Numakers recommends a hardened nozzle as a long-term precaution. For typical hobby use, brass is fine.
Does the OrcaSlicer Generic PLA Silk profile work for all silk brands?
It’s a reasonable starting point for any brand without a dedicated profile. The 8-second slow_down_layer_time override is the main silk-specific behavior. You’ll still want to tune nozzle temperature per spool, because vendor recommendations range from 190°C (Eryone product page low end) to 240°C (Spectrum TDS high end).
Why does Polymaker’s Panchroma profile behave differently from Generic PLA Silk?
Because Panchroma PLA Silk @base inherits from fdm_filament_pla (the standard PLA base) rather than fdm_filament_pla_silk (the silk base). So Panchroma silk gets the 4-second layer time from standard PLA rather than the 8-second override silk gets. Not a bug, just an inheritance quirk worth knowing.
Silk PLA is one of those filaments where the difference between “wow” and “meh” comes down to a few specific OrcaSlicer fields and a willingness to ignore vendor marketing claims about 250 mm/s print speeds. Slow the outer wall, dry the filament, leave OrcaSlicer’s 8-second layer time alone, and you’ll get the sheen you paid for.
Related OrcaSlicer guides
- Best OrcaSlicer Filament Settings: All Materials Cheatsheet
- OrcaSlicer Polycarbonate (PC) Settings – Strong Functional Parts (2026 Guide)
- OrcaSlicer Wood-Filled PLA Settings and Nozzle Choice Guide
- OrcaSlicer Glow and Sparkle PLA: Print Speed and Nozzle Wear
- OrcaSlicer Retraction Test: Solving Stringing in 30 Minutes