The first PETG print I pulled off my P1S looked like a spider had gotten loose in the chamber. Hairy whiskers between every part on the plate, plus a glossy blob the size of a grain of rice on the seam of a 30 mm cube. Thirty minutes with the OrcaSlicer Retraction Test fixed 90 percent of it; the rest came down to drying the spool overnight.
If you’re staring at a hairy benchy or a webbed multi-part plate, you’re in the right place. This walkthrough covers OrcaSlicer 2.x from menu click to saved filament profile. I’ll cite the OrcaSlicer wiki and Ellis’s Print Tuning Guide as we go, plus GitHub issues that bite tuners. Retraction won’t save a wet spool, a worn nozzle, or a hotend running 15 degrees hot, so we’ll cover that distinction too. The OrcaSlicer calibration guide sets out the full sequence for context.
What retraction actually does (and why too much hurts)
Retraction is the cold-end gear pulling filament backward by a small amount before the toolhead travels across open air. The goal is to drop pressure inside the melt zone so molten plastic doesn’t weep out during the move. CNC Kitchen has the classic primer if you want the physics, but the short version: the nozzle holds a tiny reservoir of molten plastic, and you need to pull the column above it back hard enough that surface tension holds it in place during travel.
Distance and speed both matter. Pull back too little and the plug keeps oozing. Pull back too much and you create a void that has to refill before the next perimeter starts, which shows up as gaps at the start of every line. Worse, on direct drive, over-retraction yanks molten filament past the heatbreak where cooling falls off, and that’s how heat creep clogs happen 30 minutes in.
So the sweet spot is the smallest distance that gives you clean travel. The retraction tower finds that band by changing the retraction length per Z range and printing the same travel pattern so you can read which band stopped stringing.
The 30-second version
One-paragraph recipe: Open OrcaSlicer, confirm your printer and filament profile match what you’re about to print. Click Calibration in the top menu bar, then Retraction Test. Leave the defaults (Start 0, End 2, Step 0.1 for direct drive; Start 1, End 6, Step 0.2 for Bowden). Click OK, slice, print. Read the tower bottom to top. Find the lowest band with no whiskers between the two posts. Plug that number into the filament profile’s Retraction Length field. Save under a duplicated name. Done.
The rest of this guide is about what goes sideways, per-material differences, and bugs that send people in circles.
Direct drive vs Bowden, why the numbers differ
The biggest mistake I see on Reddit is people copying retraction values between machines with wildly different filament paths. A Bambu A1 (direct drive) and an Ender 3 V2 (Bowden) live in separate retraction universes.
On direct drive, the gear sits right above the hotend, with maybe 30 to 50 mm of rigid filament between gear teeth and nozzle. Retract 0.8 mm and nozzle pressure drops within milliseconds because there’s almost no compliance. That’s why direct drive numbers stay well under 1 mm.
On Bowden, a long PTFE tube (around 400 mm) connects gear to hotend. PTFE compresses and stretches under load, so the first 0.5 to 1 mm of any retraction goes into “unloading” tube spring before nozzle pressure starts dropping. That’s why Bowden lands at 3 to 7 mm. Polymaker’s wiki on travel and retraction explains the physics without slicer-specific marketing.
OrcaSlicer’s defaults reflect the split: 0 to 2 mm in 0.1 mm steps for direct drive (21 bands), 1 to 6 mm in 0.2 mm steps for Bowden (26 bands).
Speed matters more than people credit. Retract too slowly (say 15 mm/s) and the nozzle keeps oozing during the retraction itself, making the tower look under-retracted at any distance. Ellis recommends starting at 30 mm/s for both retract and unretract. Practical window: 25 to 60 mm/s; direct drive 35 to 50, Bowden 30 to 45.
Step-by-step walkthrough, every click
Sanity check first. Update OrcaSlicer to a recent 2.x build. The 2.1.x line had a bug (issue #5896) where “Retract amount before wipe” didn’t apply correctly, causing phantom stringing during calibration. Fixed in later 2.x builds.
Pick the printer profile that matches your machine, then pick (or duplicate) the filament profile for the spool you’re calibrating. Confirm the nozzle temperature in that profile matches what you actually print at. Calibrating at 240 C and printing at 220 C invalidates the test, because hot filament strings more. If you’re unsure of the temp, run the temperature tower test first.
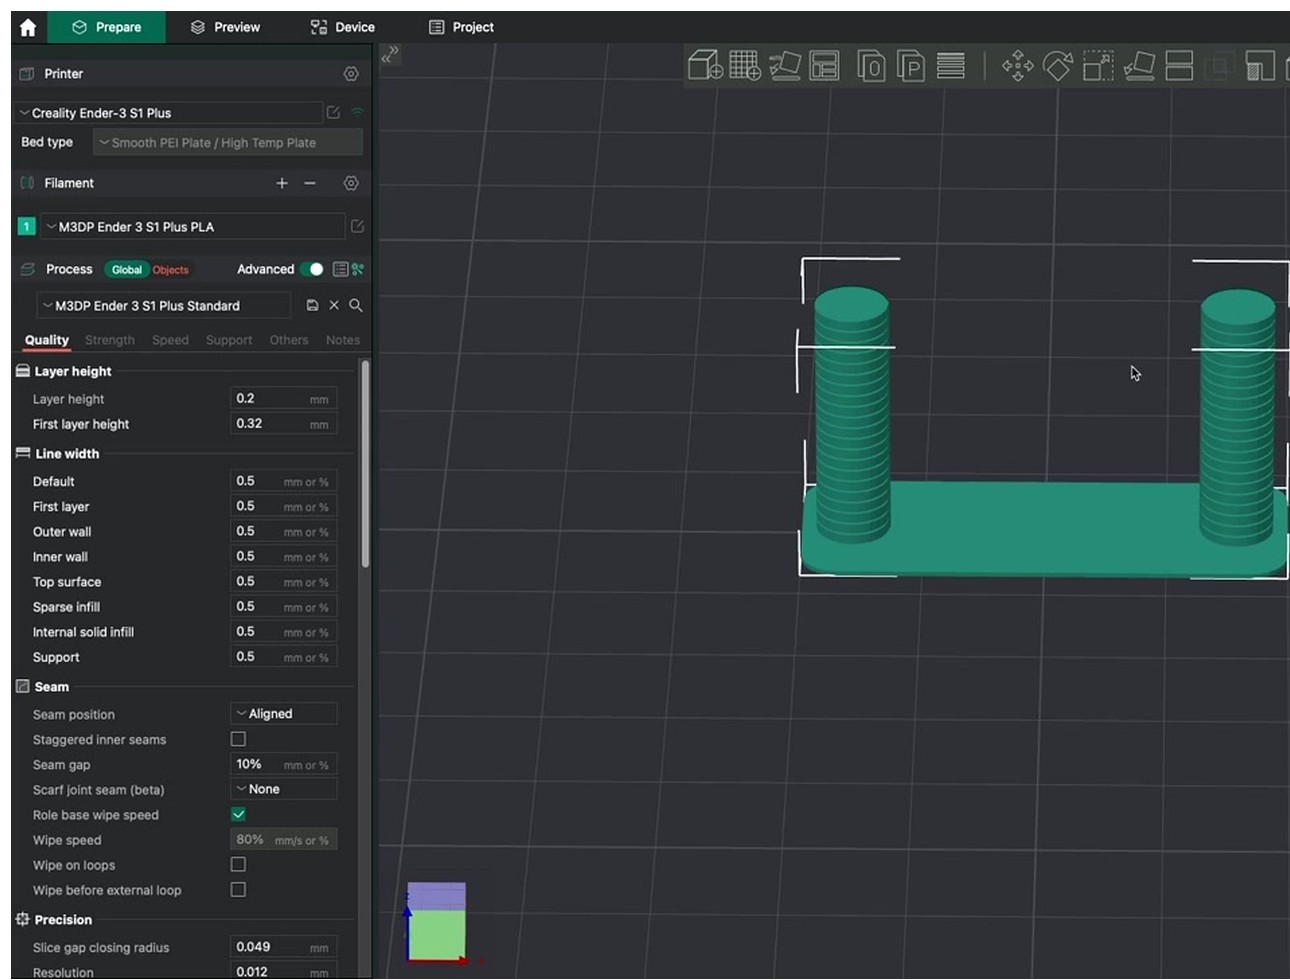
Click Calibration in the top menu bar (next to File, Edit, View). Click Retraction Test. A dialog appears with three fields: Start, End, Step.
For a fresh direct-drive calibration, leave defaults: Start 0, End 2, Step 0.1. For Bowden: Start 1, End 6, Step 0.2. If you already have a tuned value and want to refine, narrow the range. Running 0.8 mm and want a tighter look? Try Start 0.4, End 1.4, Step 0.05.
Click OK. OrcaSlicer auto-generates the two-tower model with band metadata baked in.
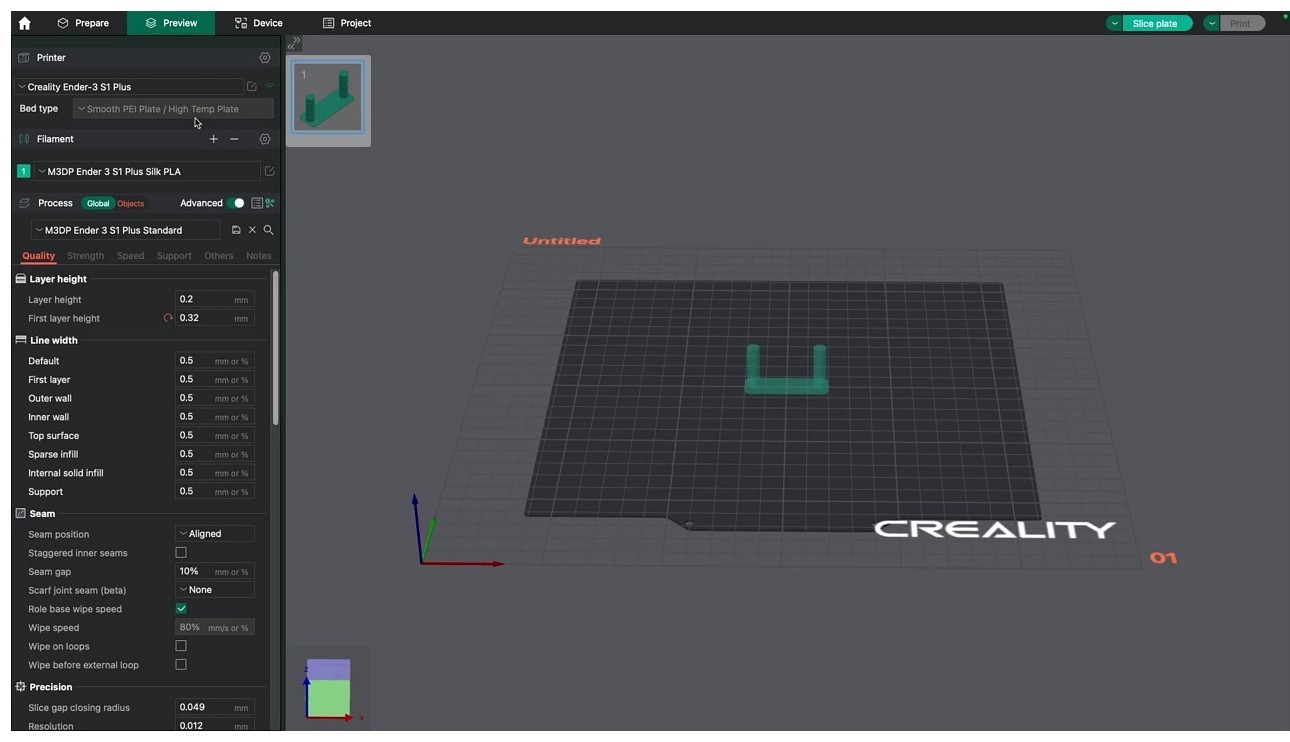
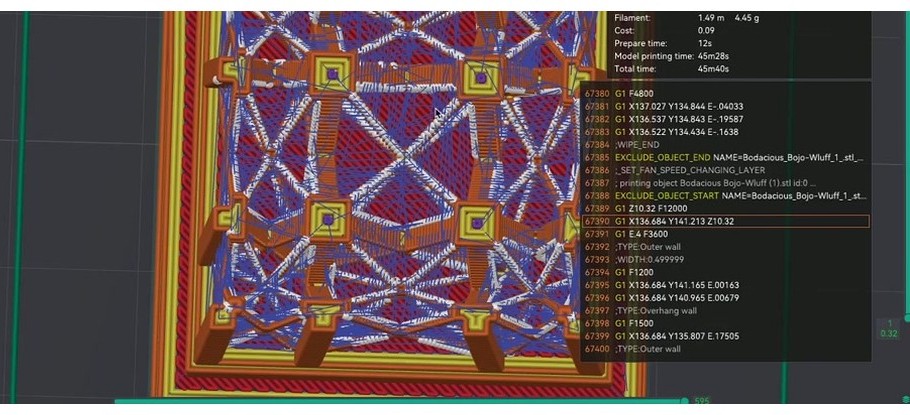
Slice and check the preview. Scrub through layers and confirm travel moves are visible as dashed lines crossing between the posts. Band labels are visible in the layer scrubber’s metadata pane in OrcaSlicer 2.x.
Print. A direct-drive tower with the default range takes 25 to 35 minutes on most modern machines; Bowden runs closer to 45 because the range is wider. Walk away. Come back when it’s done.
Pull the print, read it bottom to top. The bottom is your Start value, the top is End. Look at the gap between posts on each band. The first band where whiskers stop or become so thin you can pinch them off is your winner. Pick the lowest clean distance.
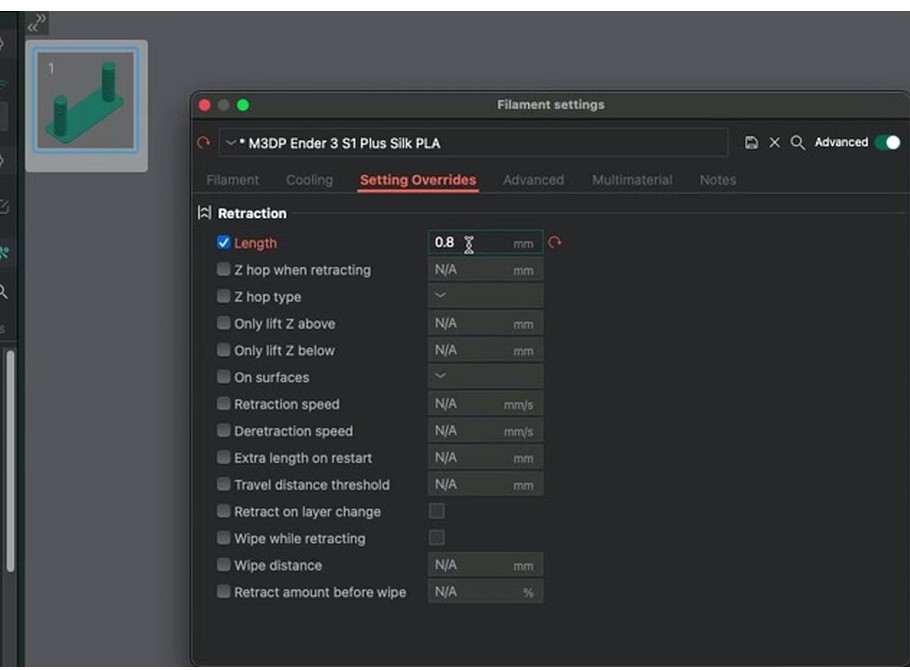
Open Filament Settings, find the Retraction tab on the override panel, enter the value. Save under a new name like “Polymaker PETG (calibrated 2026-05)” so you keep stock as a reset point. The filament settings reference walks through the override pane in detail.
How to read the towers
Reading the tower is half the test. Here’s what each pattern means.
- Clean towers, no whiskers, no holes at the bottom of the next band. Done. Save the value.
- Hair-thin whiskers you can wipe off. Acceptable on PETG. Save the cleanest band.
- Tiny blobs at the start of each tower segment. Slight under-extrusion from too-aggressive retraction. Drop 0.1 mm.
- Glossy “snot” between towers. Massively under-retracted. If at the highest band, rerun with a wider range.
- Hollow gaps at the bottom of upper bands. Significantly over-retracted. Drop 0.2 to 0.3 mm.
- Clicking from the extruder during the test. Over-retracting or pulling too fast. Slow speed first (try 30 mm/s), then shorten distance.
- Stringing identical at every band. Not a retraction problem. Skip to heat creep, wet filament, worn nozzles.
That last one’s the most important. If the tower looks identical top to bottom, the test is telling you retraction can’t fix this print. Issue #4062 on the OrcaSlicer GitHub is a long thread of people who learned that the hard way.
Per-material retraction characteristics
These ranges assume a 0.4 mm nozzle. Scale proportionally for 0.6 or 0.8. Speed values are starting points; verify with your tower.
| Material | Direct drive distance | Bowden distance | Retract speed | Cooling fan | If retraction can’t fix it |
|---|---|---|---|---|---|
| PLA | 0.4 to 0.8 mm | 3 to 5 mm | 35 to 50 mm/s | 80-100% after layer 3 | Drop hotend 5 C |
| PETG | 0.8 to 2.0 mm (cap at 2) | 3 to 5 mm | 25 to 35 mm/s | 30-50%, never 100% | Dry at 65 C for 6-7 hours |
| ABS | 1 to 2 mm | 3 to 4 mm | 25 to 45 mm/s | 0-20% | Enclose, kill drafts |
| ASA | 1 to 2 mm | 3 to 4 mm | 25 to 40 mm/s | 0-30% | Same as ABS |
| TPU 95A or softer | 0.5 to 1.5 mm, sometimes 0 | Avoid Bowden, max 2 mm | 15 to 25 mm/s | 50-100% | Path friction, slow travel |
| PC | 1 to 2 mm | 3 to 4 mm | 20 to 30 mm/s | 0-20% | Dry 4-6 hr at 70-80 C |
| PA / Nylon | 2 to 3 mm | 4 to 6 mm | 25 to 40 mm/s | 30-60% | Dry, dry, dry |
| PA-CF | 1 to 3 mm | 4 to 6 mm | 20 to 35 mm/s | 30-60% | Hardened nozzle wear, dry |
| Wood-PLA | 0.5 to 0.8 mm | 4 to 5 mm | 30 to 45 mm/s | 80-100% | Partial nozzle clog |
| Silk PLA | 0.4 to 0.8 mm | 3 to 5 mm | 35 to 50 mm/s | 70-90% | Often runs hot, drop temp |
PETG is the worst stringing offender, often through no fault of yours. It’s hygroscopic, pulling moisture in days. A spool open on a shelf for two months strings no matter how well you tune retraction. Ellis calls it out: wet filament produces unfixable stringing because trapped water flashes to steam in the melt zone. The Bambu Lab wiki recommends drying PETG at 65 C for 6 to 7 hours. If you’ve tuned retraction and still see whiskers, dry the spool before anything else.
Keep PETG retraction at or under 2 mm on direct drive. Above 2 mm, the molten plug climbs into the heatbreak, and PETG is sticky enough to grab the cooler walls. The Bambu Lab forum calls this the 2 mm clog ceiling.
Per-printer notes
Stock filament profiles lean conservative. Here’s what owners of common machines actually run after a tower test.
- Bambu A1 / A1 mini. Direct drive. Stock 0.8 mm at 30 mm/s. PETG typically lands at 1.0 to 1.5 mm. The A1 mini benefits from staying at or under 0.8 mm on PETG because the smaller heatsink is heat-creep prone.
- Bambu P1S / X1C. Direct drive, same module as A1. Stock 0.8 mm at 30 mm/s; PETG 1.0 to 1.5 mm. The Bambu Lab forum thread on P1S retraction with PETG settles on 1.0 to 1.5 mm at 25 to 35 mm/s.
- Creality K1 / K1 Max. Direct drive. Stock errs high; most owners drop to 0.5 to 1.0 mm at 40 mm/s.
- Prusa MK4 / MK4S. Direct drive Nextruder. Stock 0.8 mm at 35 mm/s. PLA users often go down to 0.5.
- Prusa MK3 / MK3S+. Direct drive Bondtech. Stock 0.8 mm at 35 mm/s. Don’t exceed 1.5 mm; the Bondtech gear can grind PETG on long pulls.
- Voron 2.4 / Trident Stealthburner. Galileo or Clockwork. Galileo 2 likes 0.5 to 0.8 mm; Clockwork prefers 0.8 to 1.0.
- Voron 0 Mini Stealthburger. Tiny direct drive. 0.4 to 0.7 mm at 30 mm/s.
- Ender 3 V1 / V2 / Pro stock Bowden. Stock 5 mm at 40 mm/s. Loose Capricorn? Go higher; snug? Drop to 4 mm.
- Ender 3 S1 / Sprite, V3 SE / V3 KE. Direct drive. 0.5 to 0.8 mm at 40 mm/s. Sprite’s stock 85 mm/s retract speed is too aggressive; back it down.
- Anycubic Kobra 2 / Kobra Go. Direct drive. Tune to 0.5 to 1.0 mm at 40 mm/s.
- Sovol SV06 / SV06+. Direct drive Bondtech-style. Stock 0.8 mm at 40 mm/s. Sovol forum users report 1.0 mm often works better on PETG.
- Sovol SV07 / SV08. 0.6 to 1.0 mm at 40 to 50 mm/s.
- Elegoo Neptune 4 / Pro / Plus. 0.5 to 0.8 mm at 40 mm/s.
Every individual unit varies. Two P1S printers off the same shipment can land 0.2 mm apart after the tower. Run the test on yours.
When retraction can’t save you
If your tower comes out identical at every band, retraction isn’t the bottleneck. Diagnostic order, fastest checks first.
- Did stringing change between bands? If no, retraction isn’t the variable. Stop.
- Hotend at the high end of the filament’s range? Drop 5 to 10 C and rerun a single band.
- Spool been open long? PLA tolerates weeks; PETG cares within days; Nylon and PC drink water from closed bags. Dry before tuning. The Bambu Lab wiki on filament drying lists temps and times.
- Nozzle worn? Pull it cold. Oblong orifice or rounded edges means swap. A worn nozzle drools because the hole is bigger than the slicer thinks.
- Bowden tube loose at the hotend coupler, or yellowed? Replace with Capricorn. Old PTFE compresses unpredictably.
- Fan speed below 30% on PLA? Bump it. Cool plastic doesn’t ooze.
- Multi-part plate strung between objects? Switch print sequence to “By object.” Issue #7854 documents this.
If everything checks out and it still strings, the spool itself may be the problem. Some cheap PETG won’t stop stringing at any setting. I’ve thrown out two spools in three years for this.
Heat creep deserves its own callout. If prints start clean and degrade 20 to 40 minutes in, filament is softening above the heatbreak. Long direct-drive retractions accelerate this. Fix is less retraction, not more. Drop 0.2 mm and see if it shifts.
Z-hop, wipe, and retract-before-wipe
Three settings interact with retraction in confusing ways. Calibrate first, then add these one at a time.
Z-hop lifts the nozzle 0.2 to 0.4 mm during travel. Its real job is preventing drag across finished top surfaces, not preventing stringing. On PETG, Z-hop often makes things worse because the extra travel time gives the plug more chance to ooze. Run the retraction test with Z-hop disabled. Turn it on later only if you see scratches on top surfaces. OrcaSlicer offers Normal, Slope, and Spiral; Slope and Spiral are smoother and faster.
Issue #6232 documented a conflict between Z-hop and the pressure advance calibration pattern; worth a read if you’ve chased weirdness with both enabled.
Wipe drags the nozzle across just-printed surface so trailing ooze deposits on existing plastic. Complements retraction, doesn’t replace it. Leave it at default length.
Retract amount before wipe is a percentage. At 100%, the printer fully retracts before wiping. At 0%, all retraction happens during the wipe. Issue #5896 documented that 0% wasn’t behaving correctly in older builds. Set between 70 and 100% during calibration. Direct drive does well at 100%; Bowden lands at 60 to 80%.
Retract on layer change forces a retraction at every Z transition. Enabled by default. Useful for tall single-wall vases. PR #3094 updated wipe logic to respect retraction speed, making layer-change retracts cleaner on builds from late 2023.
Common mistakes
- Calibrating at the wrong temperature. Tune at 240 C and print at 215 C and your number’s too high. Always calibrate at your real print temp.
- Pretending retract speed doesn’t matter. 0.8 mm at 15 mm/s on direct drive still strings because the plug oozes during the retract itself.
- Blaming retraction for moisture or temperature. If all bands string identically, retraction isn’t the variable.
- Copying PLA values to PETG. PETG needs more distance and slower speed. PLA values on PETG produce whiskers every time.
- Going too long on direct drive. Past 2 mm, the molten zone retracts above the heatbreak. Filament jams 30 to 45 minutes in.
- Z-hop on during the test. Adds variables. Disable while testing.
- Saving over the stock filament profile. Always duplicate first. Stock is your reset button.
- Forgetting to dry filament. Wet PETG strings at any retraction value.
Known bugs and quirks
If you’re chasing something that doesn’t make sense, check whether one of these GitHub threads describes your symptom.
- Issue #5896, “Retract amount before wipe” not working. Affected 2.1.x. Percentage didn’t apply correctly, causing phantom stringing. Fixed in later 2.x builds.
- Issue #7854, stringing tied to Print Sequence “By layer”. Multi-part plates produce strings between objects with By layer that don’t appear with By object.
- Issue #4062, “bad stringing that can’t be tuned out.” Long thread on Voron 2.4 with Stealthburner where stringing only resolved by disabling Z-hop.
- Issue #9722, first-layer retraction acceleration applied globally. First-layer accel bled into the rest of the print. Worth knowing if you customize first-layer accel.
- Issue #6232, calibration pattern conflict with Z-hop. CalibPressureAdvancePattern does Z-hop before retraction, Z-hop cannot be adjusted or disabled. Closed via PR #6245.
- Issue #3150, stringing report on Anycubic Vyper, closed without fix. Comments hold useful per-printer field notes.
- PR #3094, wipe respecting retraction speed. Merged late 2023. Cleaner layer-change wipes.
After retraction, what to calibrate next
Retraction tuning is the biggest single win for stringing, but a clean tower doesn’t mean your prints are done. The order experienced OrcaSlicer users follow: temperature, flow rate, pressure advance, retraction. If you’ve done retraction first, go back and verify the others.
Flow rate calibration sets the volumetric extrusion ratio. If flow is wrong, retraction looks wrong. The pressure advance test tunes how the slicer compensates for melt-zone pressure during direction changes, affecting seam appearance and corner sharpness. The temperature tower test sits at the top: lower temp first if strings persist after retraction tuning.
For everything else, the OrcaSlicer troubleshooting reference covers symptom-by-symptom flow. If you’re updating from an older build, the download OrcaSlicer page has current versions.
Frequently asked questions
How do I calibrate retraction in OrcaSlicer?
Top menu, Calibration, Retraction Test. Set Start, End, Step. Defaults work for most setups (0 to 2 in 0.1 for direct drive; 1 to 6 in 0.2 for Bowden). Slice, print, read the tower, plug the lowest clean band into the filament profile’s Retraction Length.
What’s the best retraction setting for PETG?
Starting window is 0.8 to 2.0 mm on direct drive and 3 to 5 mm on Bowden, both at 25 to 35 mm/s. Don’t exceed 2 mm on direct drive because of heat creep. Dry the spool first.
Why is my PETG stringing so much in OrcaSlicer?
Most likely moisture. PETG pulls water from the air in days. Dry at 65 C for 6 to 7 hours. If it still strings, run the retraction test, then check the hotend isn’t 10 degrees too hot, then check the nozzle.
What’s a good retraction speed?
25 to 60 mm/s is the practical window. Direct drive runs 35 to 50; Bowden 30 to 45. PETG wants 25 to 35. Ellis recommends starting at 30 mm/s for both retract and unretract.
Should I enable Z-hop?
Not while calibrating retraction. Z-hop adds travel time and can worsen stringing on PETG. Turn it on later (Slope or Spiral for fast machines, Normal for slower) if you see nozzle scratches on top surfaces.
What’s the difference between Bowden and direct drive retraction?
Direct drive needs short pulls (under 1 mm) because the filament path is rigid. Bowden needs 3 to 7 mm because the long PTFE tube acts like a spring; you absorb tube compliance before nozzle pressure drops.
How long does the retraction test take to print?
25 to 35 minutes on direct drive with default range; longer on Bowden because of the wider 1-to-6 range. Narrow the range and it prints faster.
Filament profile or printer profile for retraction?
Filament profile by default. The tuned value travels with the spool, not the printer. Save on a duplicated filament profile with a clear name.
Why does it still string after I picked a good band?
Wet filament, hotend too hot, worn nozzle, or Z-hop interaction. Run the diagnostic order. If all bands strung identically, retraction isn’t the variable.
Can too much retraction cause clogs?
Yes. Past 2 mm on direct drive, molten filament gets pulled past the heatbreak, where it cools and gums up the path. Heat creep clogs appear 20 to 45 minutes in. Less retraction, not more.
Temperature tower or retraction first?
Temperature first. Hot filament strings more, so retraction calibrated at the wrong temp gives you the wrong number.
That’s the whole test. Thirty minutes on direct drive, longer on Bowden, and the result is a number you save on the filament profile and forget until you change spools. Most of the time it solves the stringing; the other times it tells you the problem is elsewhere, which is also useful.
Related OrcaSlicer guides
- The Complete OrcaSlicer Calibration Guide (Order Matters)
- OrcaSlicer Max Volumetric Speed Test: Find Your Hot End Limit (2026)
- OrcaSlicer Cornering & Junction Deviation Calibration (2026)
- OrcaSlicer Tolerance & Fit Test: Functional Parts (2026 Guide)
- OrcaSlicer Crashing While Slicing? 8 Fixes for E-Cores, GPU, RAM