
I’ve burned through 47 spools of PLA across 6 different printers in the last two years and I can tell you with confidence that OrcaSlicer’s Generic PLA defaults aren’t wrong, they’re just conservative. The slicer ships with 220°C nozzle, 55°C bed, 100% fan, and a 12 mm³/s max volumetric speed because those numbers work on basically everything from a stock Ender 3 to a Bambu X1C. They’re also leaving roughly 30% of your print speed on the table, and on some brands they’re 10°C hotter than the sweet spot.
Here’s the path I use to go from defaults to dialed in, with the actual numbers pulled from OrcaSlicer’s source profiles on GitHub (verified May 12, 2026). I’ll show you what loads when you click “Generic PLA,” why each value is set where it is, what to change when you swap brands, and how to read the calibration tests so you stop second-guessing every print.
Table of contents
- PLA in 60 seconds, and why it prints the way it does
- OrcaSlicer’s PLA profiles, and why Generic PLA is conservative
- Recommended starting values for PLA on a 0.4 mm nozzle
- Temperature, find the right number for your spool
- Speed and cooling are the same dial
- Max volumetric speed, the ceiling you didn’t know you hit
- PLA variants, when Generic doesn’t cut it
- First layer and bed adhesion by plate type
- Retraction and pressure advance for PLA
- Common PLA problems and what actually fixes them
- PETG, ABS, and TPU sit on the same shelf
- FAQ
PLA in 60 seconds, and why it prints the way it does
I’ll start with the chemistry briefly because a few slicer settings make more sense once you know what’s inside the filament. PLA is polylactic acid, a thermoplastic polyester polymerized from lactide, usually derived from corn starch. I think of it as the easiest filament on the shelf because it doesn’t warp, doesn’t stink, and sticks to almost any bed surface at 55°C. I also remind people that ease has a price. Its glass transition temperature is around 60 to 65°C, so a part sitting in a sun-baked car cabin or going through a dishwasher cycle will droop. I’ve watched a phone holder in my dashboard turn into modern art on a hot July afternoon. OrcaSlicer’s source profile sets the temperature_vitrification field to 45°C as a safety floor.
I keep hammering this with new printer owners. PLA isn’t an engineering plastic. It’s stiffer and harder than PETG, ABS, or TPU, but it’s also more brittle. I find Bambu’s own source profile data useful here: 13.8 MPa impact strength for PLA Basic versus 4.6 MPa for Silk and 7.8 MPa for PLA-CF, so even within “PLA” the numbers swing hard. For a wider map of how PLA fits next to other materials, the OrcaSlicer filament settings pillar is the place to start.
I wish someone had told me one more thing on day one: PLA is mildly hygroscopic. It absorbs roughly 0.5 to 1% water by weight in 24 hours at 50% relative humidity. That’s less than PETG and far less than nylon, but it’s more than the “PLA doesn’t need drying” crowd will admit. Wet PLA pops at the nozzle, strings like spider web, and snaps when you bend a thin wall. I’ve solved more “my prints suddenly look bad” tickets with a filament dryer than with any slicer change. Dry the spool at 45 to 50°C for 4 to 8 hours. Never go above 55°C because the spool can fuse to itself.
OrcaSlicer’s PLA profiles, and why Generic PLA is conservative
I’d open OrcaSlicer alongside this section if you can. The Filament dropdown in the Prepare tab is alphabetical. The base profile that everything else inherits from is Generic PLA @System, and the file it loads (fdm_filament_pla.json) is the canonical default. I pulled the values below directly from that file on May 12, 2026.
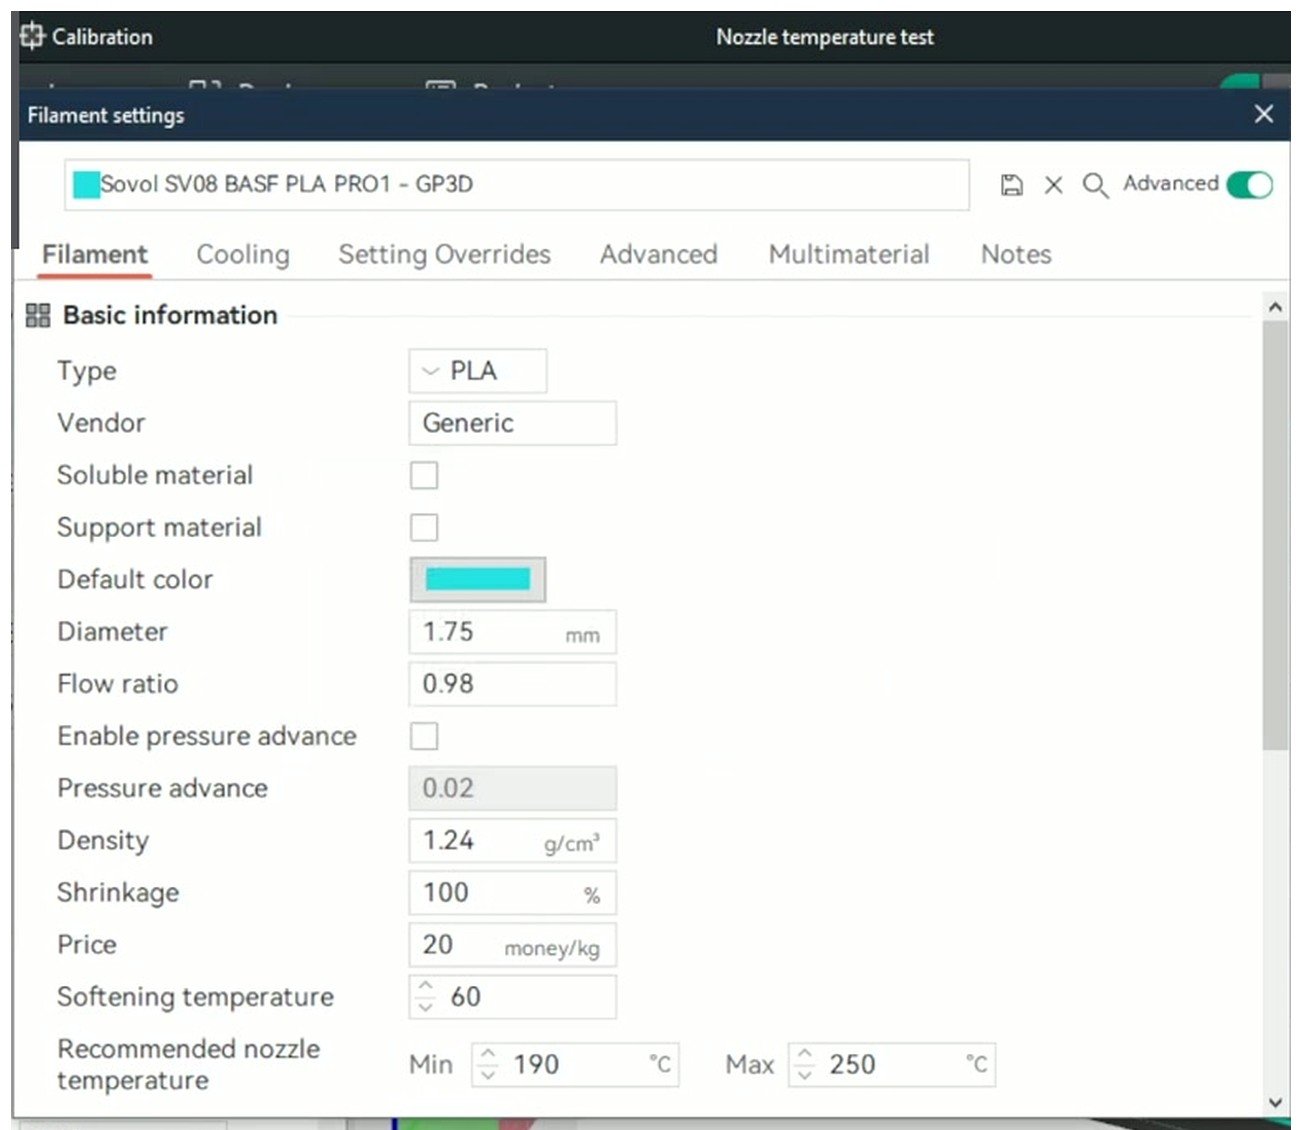
The Filament dropdown in OrcaSlicer with Generic PLA loaded. Everything in this article maps back to fields on this panel.
Generic PLA verified defaults (pulled from source on 2026-05-12)
| Parameter | Value | What it does |
|---|---|---|
| nozzle_temperature | 220°C | Print temp after the first layer |
| nozzle_temperature_initial_layer | 220°C | Same temp on layer 1 |
| nozzle_temperature_range | 190 to 240°C | Allowed slider range |
| hot_plate_temp | 55°C | Bed temp for textured PEI |
| cool_plate_temp | 35°C | Bed temp for Bambu Cool Plate |
| eng_plate_temp | 0°C | Engineering plate, not recommended for PLA |
| filament_max_volumetric_speed | 12 mm³/s | The real ceiling on print speed |
| filament_flow_ratio | 0.98 | Extrusion multiplier baseline |
| filament_density | 1.24 g/cm³ | Used for weight estimates |
| fan_min_speed | 100% | Part cooling fan at full after layer 1 |
| close_fan_the_first_x_layers | 1 | Fan off for layer 1 only |
| overhang_fan_threshold | 50% | Overhang ratio that forces full fan |
| slow_down_layer_time | 4 s | Force minimum 4-second layers on small parts |
| slow_down_min_speed | 10 mm/s | Floor speed when slowing for cooling |
| fan_cooling_layer_time | 100 s | Ramp fan up if layer takes longer |
| additional_cooling_fan_speed | 70% | Aux fan speed if your printer has one |
| temperature_vitrification | 45°C | Orca’s “part deforms above this” floor |
I think the most important thing to understand about these numbers is that they’re conservative on purpose. The 220°C is on the high end of practical, the 12 mm³/s MVS leaves a stock 0.4 mm hot end coasting, and the 100% fan from layer 2 is correct for surface detail but slightly hurts layer adhesion. I compare it with Bambu’s own Generic PLA Basic profile, which sets MVS to 21, almost double. I don’t read that as “the filament is different.” I read it as Bambu knowing their hot end can push more and tuning the profile to it.
Generic PLA variant overrides
I find the Generic PLA variants useful because each one only overrides the values that differ from the base, which keeps things tidy. OrcaSlicer ships several of them.
| Variant | MVS | Retraction | Flow ratio | Notes |
|---|---|---|---|---|
| Generic PLA @System | 12 mm³/s | base | 0.98 | The catch-all baseline |
| Generic PLA High Speed | 18 mm³/s | base | 0.98 | For HF chemistry spools |
| Generic PLA Matte | 11 mm³/s | 0.8 mm | 0.98 | Filler-loaded, slightly slower |
| Generic PLA Silk | 7.5 mm³/s | 0.5 mm | 0.98 | Lower fan, longer min layer time (8 s) |
| Generic PLA-CF | base | base | 0.95 | Hardened nozzle required |
Bambu Lab variants worth knowing
| Variant | Nozzle | MVS | Flow | Notes |
|---|---|---|---|---|
| Bambu PLA Basic | 220°C | 21 | 0.98 | Impact 13.8 MPa, the “standard” PLA |
| Bambu PLA Matte | 220°C | ~15 | 0.98 | Impact 6.6 MPa, more brittle |
| Bambu PLA Tough+ | 245°C | 21 | 0.98 | Range 220 to 250, longer min layer (8 s) |
| Bambu PLA Aero (LW-PLA) | 250°C typ. | 6 | 0.6 | Foaming, fan_min 30% |
| Bambu PLA Silk | 230°C | lower | 0.98 | Outer wall 40 to 60 mm/s |
| Bambu PLA-CF | base | base | 0.98 | Required nozzle HRC 40 |
I scroll further and find Polymaker (PolyLite, PolyMax, PolyTerra), eSUN PLA+, Hatchbox, Prusament, Overture, Atomic, Sunlu, Anycubic, Elegoo, Inland, and Creality presets. They’re available even on a non-Bambu printer. I treat them as starting points because every spool of “Hatchbox PLA” can differ from the next based on which factory pressed it.
Recommended starting values for PLA on a 0.4 mm nozzle
I’ll split this into two columns. The first is what to set when you’ve got a stock printer and a fresh spool. The second is what to set when you’ve tuned the printer and you know the filament. I keep the first column intentionally cautious. I run most of my prints with the second column values.
| Setting | Stock printer, first spool | Tuned printer, known filament |
|---|---|---|
| Nozzle temp | 210 to 215°C | 205 to 220°C (from your tower) |
| First layer nozzle | +5°C of print temp | same as print temp |
| Bed temp (textured PEI) | 60°C | 55°C |
| Bed temp (Cool Plate) | 45°C | 35°C |
| Part cooling fan | 100% from layer 2 | 100% from layer 2 (lower for silk) |
| MVS | 12 mm³/s (Orca default) | 15 to 22 mm³/s (tower it) |
| Flow ratio | 0.98 | 0.95 to 1.02 (from your test) |
| Retraction (direct drive) | 0.8 mm at 30 mm/s | 0.4 to 1.0 mm |
| Retraction (Bowden) | 4 mm at 35 mm/s | 3 to 6 mm |
| Pressure advance | leave default, then tower | from your PA tower |
I want to be honest about how I treat that left column. It’s a starting point that gets you a usable first print without disasters. It’s not the answer. I’ll insist on this: every printer plus brand plus color combination wants its own temp tower, flow rate test, and pressure advance run. I’ve had two spools of “Bambu PLA Basic” in matte black and matte white that landed 5°C apart on the tower. I’ve had Hatchbox spools that printed cleaner at 200°C than at 215. I treat the defaults as a launchpad. From there, the OrcaSlicer calibration guide walks you through the sequence to actually dial it in.
Temperature, find the right number for your spool
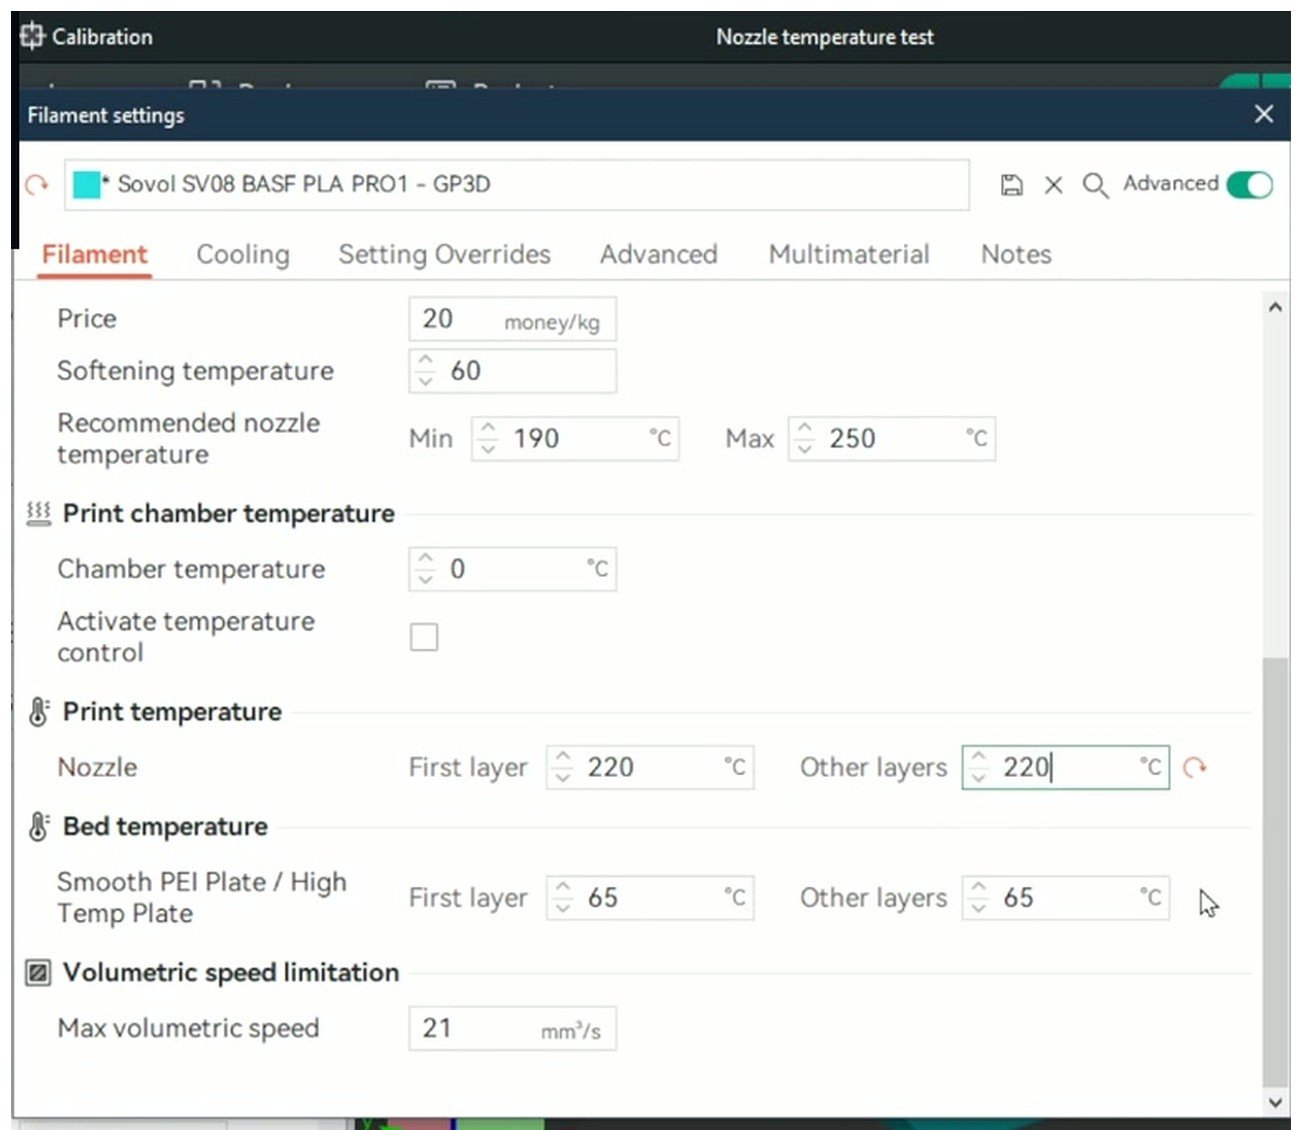
The Filament tab in OrcaSlicer with the print and bed temperature fields, plus MVS, all visible. This is the Bambu PLA Basic profile showing the brand-tuned MVS of 21 mm³/s versus Generic’s 12.
I run a temperature tower every new brand, every color change, every time a print looks off. It takes 25 minutes and it’s the single most useful test in OrcaSlicer’s calibration suite. I walk through it in the temperature tower guide; the short version is Calibration menu, Temperature, set the range, slice, print, read the bands.
I look for four things on each 5°C band: clean wall texture, sharp overhang corners, minimum stringing, no under-extrusion gaps. I pick the lowest band that still gives clean layer bonding. Lower temp means slightly stronger layer adhesion (the polymer crystallizes better at the bottom of the workable range) and less stringing.
I use the bands below as a starting point per brand. These are starting ranges for the tower itself, not final values. Run the tower and pick what your printer wants.
| Brand and variant | Tower range | Where most spools land |
|---|---|---|
| Bambu PLA Basic | 200 to 225°C | 215 to 220 |
| Bambu PLA Matte | 200 to 220°C | 210 to 215 |
| Bambu PLA Tough+ | 220 to 250°C | 235 to 245 |
| Bambu PLA Silk | 215 to 235°C | 225 to 230 |
| Bambu PLA-CF | 215 to 240°C | 220 to 230 |
| eSUN PLA+ | 200 to 225°C | 210 to 220 (dry it first) |
| Polymaker PolyLite | 200 to 220°C | 210 to 215 |
| Polymaker PolyLite Pro | 215 to 235°C | 220 to 225 |
| Hatchbox PLA | 195 to 215°C | 200 to 210 (runs cool) |
| Prusament PLA | 200 to 220°C | 210 to 215 |
| Inland PLA | 200 to 220°C | ~210 |
| Overture PLA | 200 to 215°C | 205 to 210 |
I learned one thing the hard way. Different colors within the same brand can need a 5 to 10°C shift. Black and silver tend to run hotter because the pigment changes the rheology. White and translucent tend to run cooler. I don’t trust a “Bambu Basic = 215” rule of thumb anymore. I trust the tower.
I see a common myth: max cooling plus max temp gives the strongest part. It doesn’t. CNC Kitchen tested this cleanly. For PLA, a medium temp (210 to 215) with fan at 70 to 80% gives noticeably better layer adhesion than 220°C at 100% fan. The catch: detail and overhang quality drop. I run 100% fan for visual prints, 70% with +5°C for functional parts.
Speed and cooling are the same dial
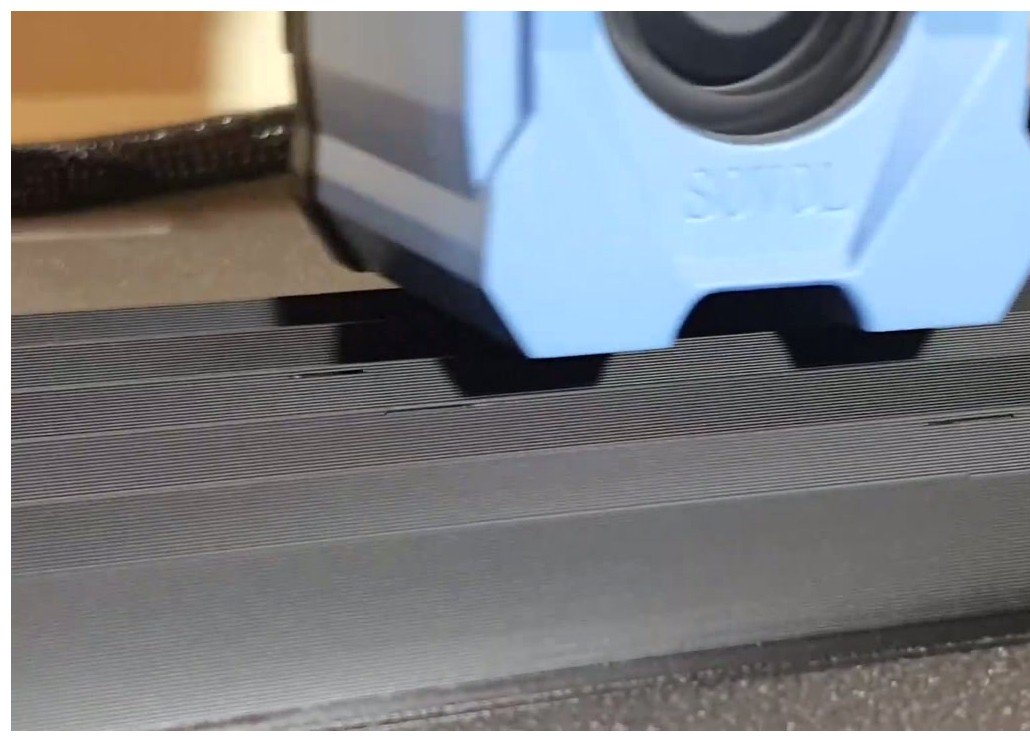
Sovol printer working through a row of PLA test bars I use for speed and cooling shakedowns. Same gcode, same filament, varying speed per row.
I think of speed and cooling as one dial. Every new layer of PLA lands on a layer still above its softening point. Time and airflow pull heat out. If the next layer arrives too soon, you get droopy overhangs, fused stringing, lost detail. If too late, the layer below has cooled past the sweet spot and bonding suffers. Faster speed means less time per layer, which means more cooling needed. That’s why high-speed printers run 100% fan and still need auxiliary cooling.
Speed tiers per printer class
| Tier | Outer wall | Inner wall | Sparse infill | Solid infill | Overhang | Top surface | Travel |
|---|---|---|---|---|---|---|---|
| Beginner / stock Ender / first spool | 40 | 60 | 80 | 60 | 25 | 30 | 150 |
| Standard / Prusa MK4 / Sovol SV06+ | 80 | 150 | 200 | 150 | 50 | 80 | 250 |
| High-speed / Bambu / Voron / K1 / SV08 | 200 | 300 | 300 | 250 | 100 | 150 | 350 to 500 |
| Speed demon / HF PLA, high-flow hot end | 300 to 400 | 500 | 500 | 400 | 150 | 200 | 500 to 800 |
All numbers in mm/s. I run initial layer 30 to 50 mm/s regardless of tier, and I keep outer wall slower than inner wall for surface quality.
I want to call out the Cooling tab field people ignore. OrcaSlicer’s slow_down_layer_time defaults to 4 seconds for Generic PLA. On small parts (Benchy hat, finger-sized models), Orca slows down to 10 mm/s (the slow_down_min_speed floor) to give each layer 4 seconds of cooling. I think that’s correct for PLA. I see people raise MVS hoping it’ll speed up small parts, and it won’t, because they’re layer-time-bound, not MVS-bound. I fix this by printing two at once so the head moves between them while each cools.
I leave overhang_fan_threshold at 50% for almost everything PLA. That value means any segment that’s overhanging by more than half its line width triggers full fan, regardless of what the rest of the print is doing. That’s why a 3D Benchy chimney looks crisp even on a print with the fan otherwise dialed down.
Max volumetric speed, the ceiling you didn’t know you hit
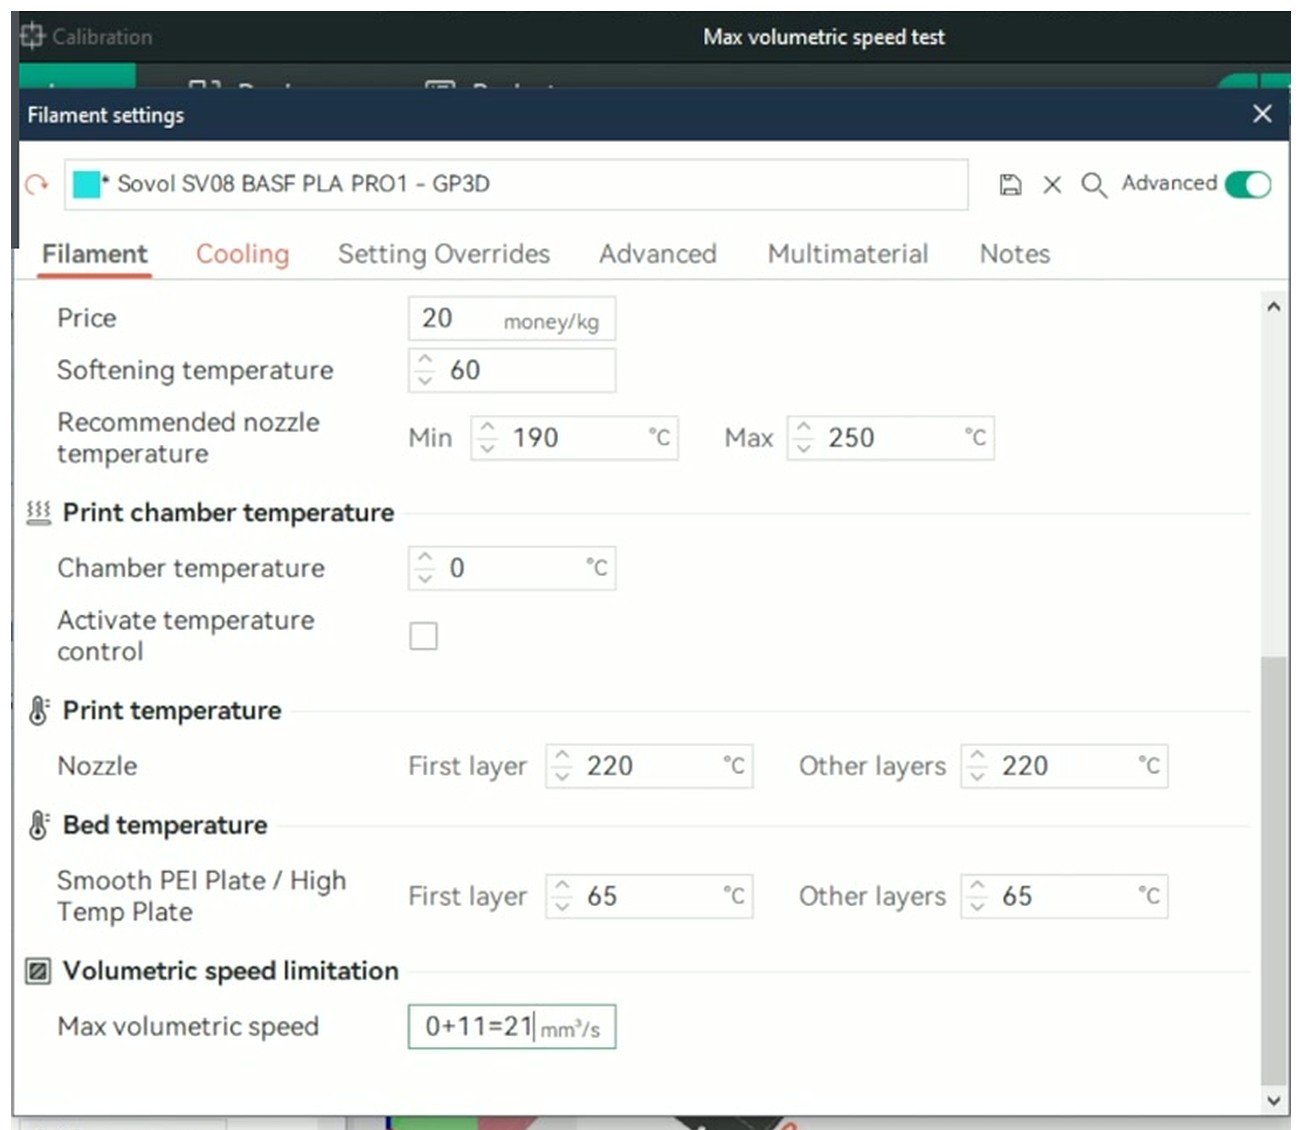
The MVS formula I use when reading a volumetric speed test. Start at the line where extrusion first looks clean, count up bands until quality breaks, that’s your usable ceiling.
I think MVS confuses more people than any other field in the slicer. Here’s the math, because once you see it, everything clicks.
Print speed is bounded by filament_max_volumetric_speed times layer_height times line_width. Generic PLA defaults to 12 mm³/s. I run the numbers at 0.2 mm layer height and 0.42 mm line width: 12 / (0.2 × 0.42) = roughly 143 mm/s. So if you set outer wall to 500 mm/s with the default 12 mm³/s MVS, Orca silently slows to 143 mm/s and ignores your speed slider. I see “I set 300 mm/s but my prints don’t go any faster” as a daily question in the Discord.
I run the volumetric speed calibration on every new spool (Calibration, Flow Rate, Max Volumetric Speed). The test prints a tower where flow rate ramps from 5 to 25 mm³/s. I look for the band where lines start to break up or under-extrude, count up one band, and that’s my usable MVS. Bambu PLA Basic on a stock Bambu hot end consistently hits 21 (exactly what their profile sets). Polymaker PolySonic on a high-flow Bambu hits 30 to 32. Foaming Aero caps at 6.
I link to the dedicated max volumetric speed calibration guide for the full step-by-step on the test setup.
| Hot end / chemistry | Practical MVS for PLA |
|---|---|
| Stock V6 / Bambu standard / Sprite | 12 to 22 mm³/s |
| Bambu high-flow / Volcano / Rapido HF / Revo HF / Mosquito Magnum | 25 to 35 mm³/s |
| Foaming PLA (Aero / LW-PLA) | 4 to 6 mm³/s |
| PLA-CF on any nozzle | 10 to 14 mm³/s |
| HF / high-speed PLA chemistry | 25 to 32 mm³/s |
PLA variants, when Generic doesn’t cut it
I think “PLA” on the spool label hides a lot. Here’s how I deviate from Generic when the chemistry changes.
PLA Matte
I think of Matte as filler-loaded PLA (calcium carbonate, talc for the finish). I print it 5 to 10°C cooler than the same brand’s Basic because it strings badly when hot. I drop MVS 5 to 15% (Orca’s Matte profile sets 11 versus Generic’s 12). I treat Matte as more brittle (Bambu Matte 6.6 MPa versus Basic 13.8). I don’t use it for functional parts; it’s a finish choice.
PLA Silk
I treat Silk as PLA with PETG or PHA blended in for gloss. I print hotter (215 to 235°C) and drop fan to 30 to 50% because full cooling kills the sheen. Bambu’s Silk profile lowers MVS and suggests an outer wall of 40 to 60 mm/s. I notice Orca’s Generic PLA Silk drops MVS to 7.5 mm³/s and stretches slow_down_layer_time to 8 s. Silk punishes you the most for using Generic defaults.
PLA Tough+ / Pro / PLA+
I print these rubber-toughened blends at 215 to 245°C. Bambu Tough+ sets 245°C and stretches min layer time to 8 s. I keep MVS at 21 (same as Basic). I use Tough+ for parts that need to take a knock.
PLA Carbon Fiber and other abrasive fills
I treat all carbon, glass, wood, metal, glow, marble, and sparkle PLAs as abrasive. Hardened steel or ruby nozzle mandatory; Bambu’s PLA-CF profile sets required_nozzle_HRC: 40. I’ve watched brass wear visibly in under 500 g of CF. I print 215 to 240°C and drop flow ratio to 0.95 (Orca’s Generic PLA-CF override). I use 0.4 or 0.6 mm nozzles; 0.2 clogs constantly. I don’t expect CF to dramatically reinforce the part. The fibers are too short. It’s a stiffness and finish upgrade, not a magic strength upgrade.
PLA Aero / LW-PLA (foaming)
I think of Aero as PLA with active-foaming additive. Flow ratio drops to 0.6 because the filament expands after extrusion. I print 240 to 260°C, MVS just 6 mm³/s, fan 30%. I use it for RC plane parts and lampshades. It’s slow.
HF / High Speed PLA
I see HF as a different polymer blend with lower viscosity. Bambu PLA-HF, Polymaker PolySonic, Inland Quantum, Overture EZ. MVS 25 to 32 mm³/s on a stock hot end. I print it 5 to 10°C hotter than regular PLA. I’ve found it slightly more brittle in practice.
First layer and bed adhesion by plate type
I’ll tell you straight: the first layer is where prints die. PLA is the most forgiving filament for first layers, which paradoxically means people skip dialing it in. Five minutes on first-layer settings saves you a failed 12-hour print.
| Bed type | Bed temp | Surface prep |
|---|---|---|
| Bambu PEI Textured | 55 to 60°C | Wipe IPA between prints, no glue |
| Bambu PEI Smooth / Cool Plate | 35°C standard, 45 to 50°C if it pops | Light glue stick. Don’t exceed 50°C on original Cool Plate; SuperTack version handles more |
| Bambu Engineering Plate | not recommended for PLA | Use for ABS / PETG only |
| Generic PEI Smooth (Prusa, BIQU, Energetic) | 55 to 60°C | IPA wipe; if PLA chips the PEI, use a thin glue layer as release |
| Glass | 55 to 60°C | Glue stick or hairspray. Pops off when cool |
| Garolite (G10) | 50 to 55°C | No prep; bonus matte finish on first layer |
| Magnetic spring steel (Creality, Anycubic) | 55 to 60°C | IPA wipe; replace mat when scratched |
| BuildTak / PEI alternates | 55 to 60°C | Light glue stick if PLA chips it |
I run my first-layer slicer settings at 30 to 50 mm/s, line width 110 to 120% of nozzle diameter (0.44 to 0.48 mm on a 0.4 nozzle), fan off, and +5°C nozzle temp if I’m on a marginal surface. I see the same handful of failures repeatedly. Their actual fixes follow.
- Not sticking: raise bed 5°C, slow first layer to 30 mm/s, raise line width to 110%, clean with IPA followed by dish soap if you’ve been touching the plate.
- Sticking too well, chipping plate: use glue stick as a release agent, lower bed 5°C, let the bed cool completely before removing the print.
- Elephant foot: enable Orca’s first-layer compensation at -0.1 to -0.2 mm.
- Warping corners: add a 3 to 5 mm brim, raise bed 5°C, check that you’re not aiming the fan at the bed for layer 1.
If you’re brand new to OrcaSlicer and want a full walk through the first-print process, the beginner’s first print guide covers the slicer side end to end.
Retraction and pressure advance for PLA
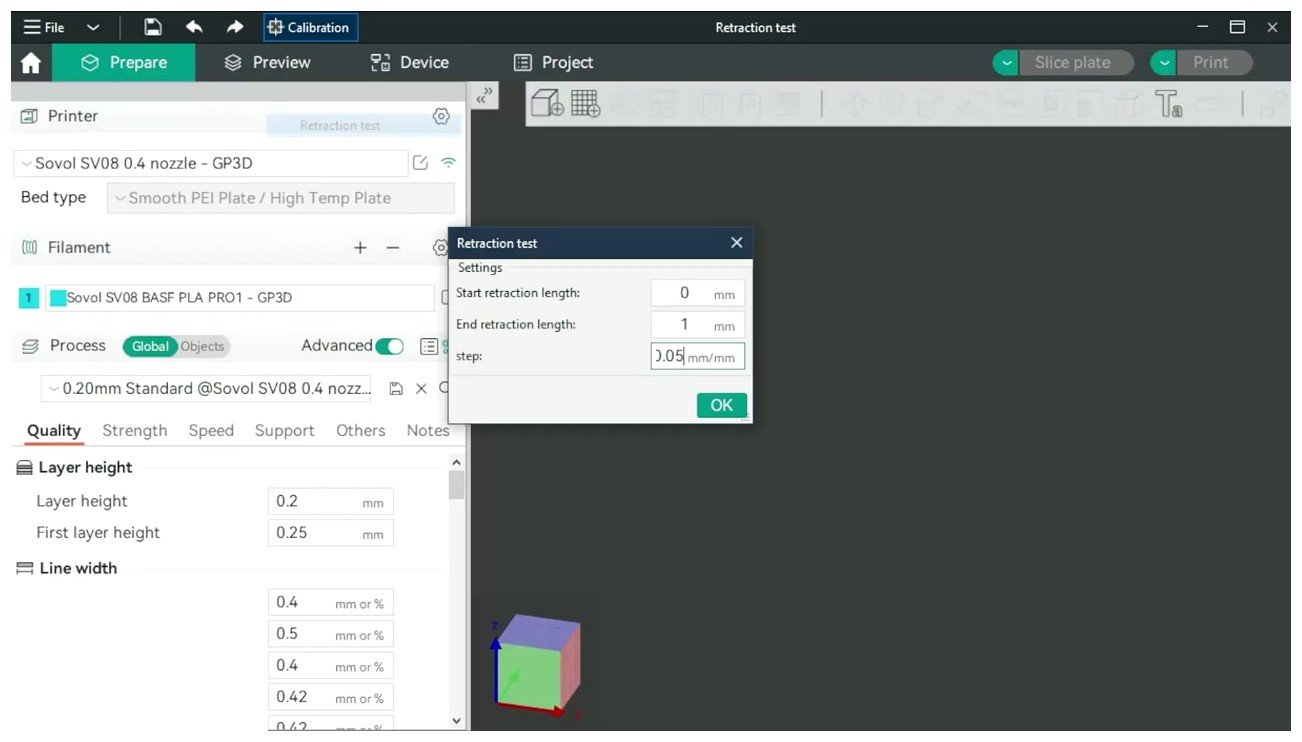
The retraction test dialog in OrcaSlicer’s Calibration menu. Set start and end distances, slice, print, look at where stringing disappears.
I think of retraction and pressure advance as fighting the same problem from two directions. Both control oozing and bulging at direction changes. I find PLA needs less retraction than PETG and less pressure advance than most filaments because of its low melt elasticity.
Retraction starting values
- Direct drive (Bambu, Voron, Ender 3 V3 SE/KE, Prusa MK4, A1): 0.6 to 1.0 mm at 30 to 40 mm/s. Orca’s Generic PLA Silk override drops to 0.5 mm; Generic PLA Matte is 0.8 mm.
- Bowden (older Ender 3, Anet, original Cetus): 3 to 6 mm at 30 to 40 mm/s. I start at 4 mm.
- Z-hop: 0.2 to 0.4 mm for prints with clearance issues, off for fastest prints.
- Wipe on retract: on.
I run the retraction test in Orca’s Calibration menu (see the retraction test guide if you’ve never tried it). It prints a tower where retraction distance ramps from a start to an end value. I look at the bottom of the tower (lowest retraction) and walk up until stringing disappears. That’s your value.
Pressure advance
I run OrcaSlicer’s PA calibration with one of two test variants depending on the extruder type. Pick the right one for your machine.
- Direct drive: PA tower increments 0.002 per mm of height. Starting range is typically 0.020 to 0.060. Sweet spot for most direct-drive PLA lands at 0.030 to 0.045.
- Bowden: PA tower increments 0.02 per mm. Range 0.20 to 1.0. Sweet spot 0.40 to 0.80.
I see Klipper users edit pressure_advance in printer config. Marlin uses M900 K…. Bambu firmware has auto-calibration on the build plate. I won’t publish a specific “perfect” PA value for any printer-plus-filament combo, because the real answer is different on every machine. I’d say every extruder, every hot end, every bowden tube length changes the answer. Run the tower, read the band where the corners look sharpest without overshoot, that’s your value. The pressure advance guide walks through reading the tower in detail.
Flow ratio
I see OrcaSlicer’s Generic PLA default flow ratio is 0.98. I calibrate flow once per filament brand (sometimes per color) using the flow rate test in the Calibration menu. I usually adjust plus or minus 0.02. The full walk-through lives at the flow rate calibration guide.
Common PLA problems and what actually fixes them
I get the same handful of questions every week. I’ll give the real answers, in order of how often they’re the right one.
Stringing despite zero fan and “correct” retraction
I see this 80% of the time as wet filament. Dry it at 45°C for 6 to 8 hours before touching any other setting. I’ll attribute another 15% to the wrong filament profile (Generic PLA on a Silk spool, for example). I find 5% of the time retraction actually needs tuning. Skip step one and you’ll chase your tail for hours.
Brittle prints that snap on light force
I’ll give the same answer. 90% of the time it’s moisture. Dry the spool and reprint. If it’s still brittle, you’ve got a chemistry issue (cheap recycled PLA, expired stock, UV damage) and there’s no slicer fix.
Layer adhesion failing at high speed
I’d drop speed 20%, raise nozzle temp 5°C, or lower fan to 70 to 80% (PLA is the one filament where less fan often means stronger layers). I run a temp tower to confirm you’re not cold for the speed. If you’re at 300 mm/s and MVS is the bottleneck, no setting fixes it; drop speed or upgrade the hot end.
Bambu Cool Plate refusing third-party PLA
I bump Cool Plate temp from 35°C to 45 or 50°C and add a light glue stick layer. I’ve seen Hatchbox and Inland specifically need this. The original Cool Plate’s mat delaminates above 50°C, so don’t go higher without the SuperTack version.
Wispy or fuzzy outer walls
I’d say nozzle temp is too high. Drop 5°C and reprint. If the tower already nailed the temp, check wet filament isn’t causing it.
Temp tower with no clean band
I see two possibilities. The filament is wet (every band looks bad), or the hot end thermistor is off (check with an IR thermometer). If the bottom of the tower looks better than the top, tower again starting 10°C lower.
Setting 300 mm/s on a stock Ender 3 and seeing no change
I’d point at MVS capping you at 12 mm³/s, roughly 140 mm/s effective on a 0.2 mm layer. The fix is mechanical (high-flow hot end, dialed-in PA) plus tuning MVS upward. The OrcaSlicer calibration guide walks the test sequence.
I’d send you to the OrcaSlicer troubleshooting master guide if you’ve worked this list and you’re still stuck.
PETG, ABS, and TPU sit on the same shelf
I call PLA the easy one. The moment you outgrow it (because you need outdoor parts, higher heat resistance, or flexibility) the slicer settings change in ways that surprise people. I’ll give you a quick map of the siblings.
- PETG: 230 to 250°C nozzle, 70 to 85°C bed, lower fan (30 to 50%), more retraction. Strings worse than PLA, but tougher and more heat-resistant. Full breakdown at OrcaSlicer PETG settings.
- ABS / ASA: 240 to 260°C nozzle, 100°C bed, enclosed chamber, no fan or minimal fan, ventilation. The full settings are at OrcaSlicer ABS and ASA settings.
- TPU: 220 to 240°C, slow (20 to 40 mm/s on most printers), low retraction (0.5 to 2 mm), direct drive strongly preferred. Walk through at OrcaSlicer TPU settings.
FAQ
What’s the best temp for Bambu PLA Basic on an A1?
I see most spools land at 215 to 220°C, but I still run a tower. Color matters; I’ve seen black Basic want 220 and translucent want 210 on the same machine.
Should I dry brand-new PLA out of the bag?
I do if it’s been on the shelf more than two months, or if I live somewhere humid. 45°C for 6 hours. eSUN ships wet and benefits from drying every time.
Why does my Bambu Studio profile print differently in OrcaSlicer?
I see OrcaSlicer expose more overrides than Bambu Studio, and defaults for slow_down_layer_time and overhang_fan_threshold can differ. When in doubt, pick the matching Bambu PLA preset in Orca rather than Generic PLA.
Can I print PLA at 300 mm/s on a stock Ender 3?
I’d say no. The MVS ceiling caps effective speed around 140 mm/s at 0.2 mm layer height, and bed-slinger resonance limits you to 80 to 120 mm/s before quality collapses.
Do I need a hardened nozzle for PLA-CF?
I’d say yes. Bambu’s PLA-CF profile literally sets required_nozzle_HRC: 40. Brass wears visibly in 500 g.
Is PLA strong enough for outdoor parts?
I’d say no. UV degrades it, heat above 60°C softens it, water absorption weakens it. I’d use ASA or PETG for outdoor parts.
Should I change OrcaSlicer’s Generic PLA defaults globally?
I don’t. I leave Generic PLA as a fallback and create per-brand tuned presets from calibration tests. The Filament tab’s “Save as new” button is your friend.
I’ll send you off with this. New to the slicer? Start with the filament settings pillar, then run the temperature tower. Got the basics? The calibration guide sequences every test in order. The difference between Generic PLA defaults and a tuned profile is the difference between “it works” and “it looks like the box art.” It’s worth 90 minutes once per brand.