The first time I tried multi-color in OrcaSlicer I burned through 60g of filament on a wipe tower that toppled over at layer 14 and dragged half the print with it. I’d queued a four-color logo plaque overnight, woke up to a beige-and-black puddle welded to the build plate, and spent the morning chiseling PETG off PEI. Three months and a lot of forum reading later, I’m running 4-color prints with under 8g of purge per swap, and the trick wasn’t a magic setting. It was understanding which path to multi-color my hardware actually wanted.
OrcaSlicer in 2026 is genuinely the most flexible multi-color slicer out there. It’s not the smoothest (Bambu Studio’s AMS UX still wins on pure polish) and it’s not the most stable for every multi-material rig (PrusaSlicer remains the official path for the MMU3, more on that later). But it covers more printers, gives you finer control over flush volumes and tower geometry, and exposes the per-filament knobs that the locked-down slicers hide. That’s why it’s worth learning properly, and that’s what this guide is for. I’m going to walk through every realistic path to multi-color, from a $0 manual M600 setup to a 24-slot AMS chain, with the settings and gotchas I’ve actually hit.
If you’re brand new to OrcaSlicer entirely, start with the beginner’s first print walkthrough first. Comfortable with single-color slicing already? Read on. Need the installer? Grab it from the downloads page before you start clicking through screenshots that won’t match your version.
The five paths to multi-color in OrcaSlicer
Before we touch a single setting, you need to know which of these five paths fits the printer on your desk. Pick the wrong one and nothing else in this guide will save you. Pick the right one and the rest is just tuning.
Path 1: Manual M600. Single nozzle, one filament loaded at a time, you swap by hand when the printer pauses. Costs nothing. Works on any Marlin, Klipper, or RepRapFirmware printer. Good for color-by-layer prints (a green base, a yellow body, a red top) but tedious for anything with frequent swaps. I covered this in detail in the M600 manual filament change guide, which is the cluster sibling to this pillar.
Path 2: Bambu AMS family. Auto-feed boxes with 4 spools each, chainable up to 24 slots on H-series printers. The most plug-and-play option if you already own a Bambu printer, and OrcaSlicer treats them as first-class. Full setup walkthrough lives in the Bambu AMS guide.
Path 3: Prusa MMU2S/MMU3. Five filaments via a selector head on a Prusa printer. Stable and mature on PrusaSlicer, semi-supported on OrcaSlicer through community profiles. I’ll be blunt about this in the MMU section below.
Path 4: IDEX printers. Two heads on the same gantry. Snapmaker J1/J1S, the older Sovol SV04 line, and a handful of others. Multi-color without purge waste because each color gets its own nozzle.
Path 5: Toolchangers. Multiple complete tool heads that swap in and out. Snapmaker U1 (4 tools), Prusa XL (up to 5 tools). Faster swaps than AMS, no purge tower, but pricier hardware.
Most readers here are on Path 1 or Path 2. If that’s you, the AMS section and the layer-slider section are the two you’ll actually use. The other paths are covered for completeness and so you can compare against what you might upgrade to.
The multi-color hardware landscape in 2026
Here’s where the market sits as of mid-2026. I’ve kept the table to what OrcaSlicer actually supports, and I’ve noted the support level honestly, because there’s a real difference between “ships a profile” and “works without community workarounds”.
| Hardware | Slots | Approx price (USD) | OrcaSlicer support | Notes |
|---|---|---|---|---|
| Bambu AMS (original) | 4 per unit, up to 16 chained on X1/P1 | ~$349 | Full, first-class | RFID auto-detect on Bambu spools, bowden buffer manages hand-off |
| Bambu AMS Lite | 4 (single-stage open feeder) | ~$249 | Full, A-series only | A1 and A1 mini only, one Lite per printer |
| Bambu AMS 2 Pro | 4 per unit, chainable to 24 with AMS HT | ~$369 | Full | Active 65C drying, brushless servo motor, ceramic inlets |
| Bambu AMS HT | 1 spool | ~$199 | Full | Single-spool drying companion to AMS 2 Pro |
| Prusa MMU2S | 5 | ~$299 used | Community profiles only | No official profile in OrcaSlicer |
| Prusa MMU3 | 5 | ~$369 | Community profiles only | Issue 8876 open since March 2025 |
| Prusa XL toolchanger | Up to 5 tools | ~$3,499 to $4,999 | Multi-tool support, some open issues | Treated as multi-tool extruder printer |
| Snapmaker J1 / J1S (IDEX) | 2 | ~$1,099 to $1,299 | Full, profile shipped since v1.6.2-beta | Copy, Mirror, Backup, Dual-color modes |
| Snapmaker U1 (toolchanger) | 4 heads | ~$899 typical | Native Snapmaker Orca fork plus upstream profile | Roughly 5 to 10 second swaps per Snapmaker numbers |
| Bambu H2D / H2D Pro | 2 nozzles plus AMS chain | $1,899 / $3,799 | Not supported | Bambu Studio is the only official slicer |
| Co Print ChromaSet | 4 or 8 inputs | ~$299 to $499 | Works via SEMM workflow | Marlin compatible, no Klipper required |
| Manual M600 | Unlimited (limited by patience) | $0 | Full | Universal, requires user attention at every change |
Bambu AMS family
The original AMS still works fine and you can find them used. The AMS Lite is an open-feed cube that only works on the A1 series and tops out at one unit per printer. AMS 2 Pro is the current flagship: brushless servo motor (Bambu claims roughly 60% faster feeding versus the original, marketing copy so take it with a pinch of salt), active drying to about 65C, ceramic inlets that should last longer against abrasive filaments, and a top tube that lets you swap spools without dragging the printer out of its enclosure. AMS HT is a single-spool sidekick aimed at high-temp materials like PA, PC, and CF/GF composites, with active drying up to 85C (versus 65C on AMS 2 Pro).
Chain limits matter. Bambu’s H2D supports the maximum configuration: 4 AMS 2 Pro plus 8 AMS HT in series for 24 total slots, where the AMS HT is a single-spool drying unit rather than a 4-bay AMS. On an X1C or P1S with original AMS the practical ceiling is 16. AMS Lite doesn’t chain at all. If you’re shopping for an X1C or P1S setup, the X1C/P1S guide walks through the AMS configuration in OrcaSlicer for those specific machines.
Prusa MMU2S and MMU3
Prusa’s MMU3 is the most refined non-Bambu multi-material option on the market. It’s also where OrcaSlicer’s universal-slicer ambition runs into a wall. As of v2.3.2 there’s no official MMU3 profile shipped, the GitHub feature request (Issue 8876) has been sitting open since March 2025 with no PR or assignment, and the path forward for Prusa MMU users is honestly still PrusaSlicer. I cover the trade-offs more in the OrcaSlicer vs PrusaSlicer comparison, but the short version is: if MMU3 is your only multi-material hardware, don’t fight the slicer.
IDEX printers
IDEX means two independent heads on one gantry. The Snapmaker J1/J1S has had an OrcaSlicer profile since v1.6.2-beta, and the v2.2.0 release expanded the IDEX feature set noticeably. Each head holds its own filament, so a color change is a head swap with retraction and a Z-hop, not a 700mm3 purge into a tower. That alone explains why IDEX prints look so much cleaner at the seams: there’s nothing to purge.
Toolchangers
Snapmaker U1 carries 4 full tool heads and parks them on a dock when not in use. Per Snapmaker’s own numbers, SnapSwap toolhead exchanges take about 5 seconds, and roughly 10 seconds once you include nozzle prime. Either figure is dramatically faster than an AMS swap, and there’s no purge waste either. Take the marketing figures with a healthy pinch of salt, but the structural argument (no purge equals less waste) is real. Prusa XL works the same way with up to 5 heads.
Manual M600 and third-party kits
Co Print’s ChromaSet sits on top of any single-nozzle printer and feeds 4 or 8 colors through a single hot end via a Y-junction. Works in OrcaSlicer through the standard single-extruder multi-material (SEMM) workflow with M600 or T-code commands, and doesn’t require Klipper for the basic version. The Klipper variant uses Moonraker integration, and OrcaSlicer 2.3.2 added experimental filament-info sync for Moonraker-based printers (also covers Qidi and Snapmaker firmware).
Setting up filaments and color slots
Before you slice anything multi-color, the slicer needs to know which colors exist and which physical slot they live in. This is where most beginners stumble, and it’s not because the UI is bad. It’s because the mental model of “filament slot” maps loosely to whatever hardware you have.
Workflow is the same regardless of hardware. Top-left of the prepare view, the Filament panel. Click the plus button to add another filament. For each filament you can pick a profile (which sets temps, retraction, pressure advance, the lot) and a color swatch. The colored dot next to each slot opens a color picker, and the color you pick is what the slicer matches when it auto-assigns colors during 3MF import. Match it to the actual filament on the spool, not just an aesthetic guess, otherwise the auto-match step later will hand you nonsense.
For a Bambu setup with an AMS, the slot order in OrcaSlicer maps 1:1 to the bays in the AMS unit. Slot 1 is bay 1, slot 5 is the first bay on the second AMS in a chain, and so on. For SEMM (single-extruder multi-material) printers like a stock Ender or a Co Print rig, the slots are virtual: any T0 or T1 in the G-code triggers a manual swap or a kit swap, but the slicer doesn’t know or care which physical spool is which. Label your spools.
For full filament profile tuning, including how to set per-color temperatures and pressure advance values, the filament settings pillar covers it end to end. For multi-color specifically you mostly want the colors set correctly and the temperatures within a workable range so the wipe tower interface doesn’t fail when transitioning from say PLA at 215C to PETG at 240C.
The painting tool, end to end
Most multi-color models you download from MakerWorld or Printables already arrive as multi-part 3MFs with colors baked in. But sooner or later you’ll want to add color to a plain STL, or change the color assignments on a downloaded model, and that’s where the painting tool earns its keep. Hotkey is N (verify on a localized build, the keymap can shift). The toolbar shows five sub-tools.
Brush. Paints triangular faces of the mesh under the cursor with a configurable radius. The accuracy you get depends entirely on the mesh’s triangle count. A low-poly model gives you blocky paint regions because the brush can only color whole triangles. If you need precise paint on a low-poly model, decimate-then-subdivide in Blender first or accept the chunky edges.
Smart Fill. Floods a region of connected faces whose normals are within an angle threshold. The smart fill angle slider controls how aggressive the flood is (default sits around 30 degrees). Lower the angle to keep paint inside sharp-edged regions like a logo cut into a flat panel. Raise it to span gradual curvature. This is the tool I reach for first on any model with distinct geometric regions.
Bucket Fill. Floods all connected faces regardless of angle until it hits a face that’s already a different color. Fastest option for a flat panel where you’ve already painted the boundary with the brush. Think of it as “fill this whole sub-shape with one click”.
Height Range. Paints all faces between two Z heights, even across disconnected meshes. There’s a height-range box at the side and a slider you drag to set the top and bottom Z. Good for solid color bands without per-face work, like a stripe across a mug or a colored base on a phone stand.
Gap Fill. Not a sub-tool but a checkbox option that fills small unpainted gaps within a configurable area threshold. Prevents speckle dots where the brush missed a triangle. Always leave it on unless you specifically want stippled regions.
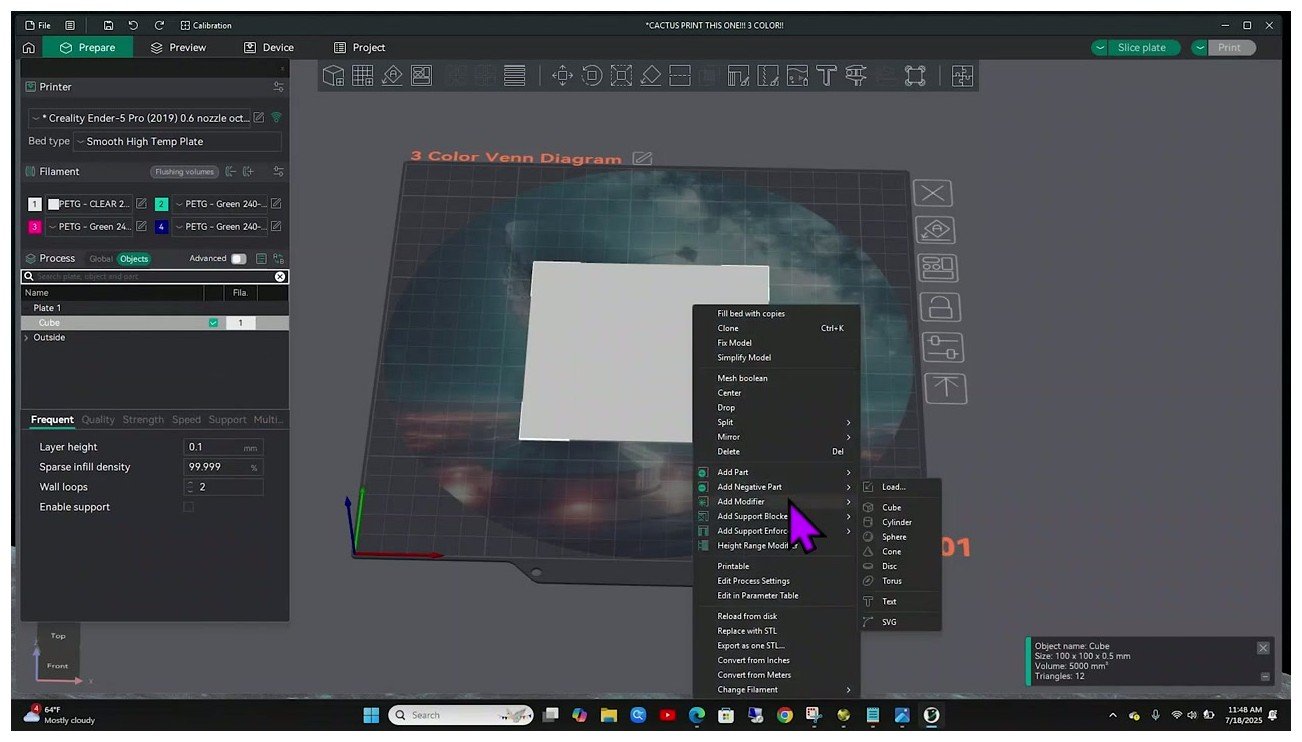
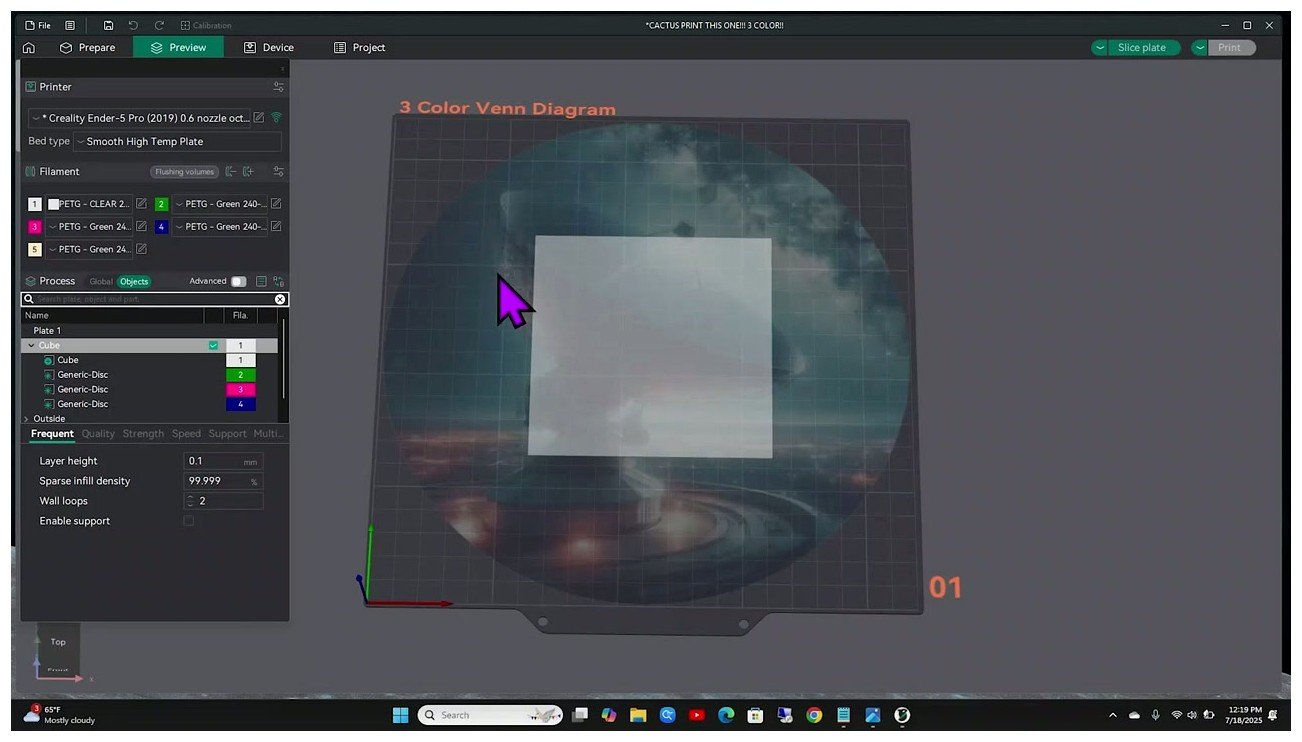
For per-object color (rather than per-face painting), there’s a faster route: right-click the object in the left tree and choose Change Filament. That assigns the entire object to one filament index. For sub-regions of an object that share a clean geometric boundary (a logo cylinder embedded in a plaque, a disc inset on a cube), you can add a Modifier mesh from the same right-click menu. The modifier is a separate STL or primitive that, when overlapped with the parent, takes its filament assignment.
Common painting mistakes
Three painting pitfalls catch almost everyone, including me, more than once.
One: the painting tool only assigns colors per-face, not in volume. The infill underneath stays whatever filament is assigned to the outer surface above it. If you paint a red dot on the top of a cube and slice it, the infill below the dot is red too, all the way down. There’s an open feature request (Issue 12166) to add paint depth, but as of v2.3.2 it isn’t implemented.
Two: painting is destroyed when you re-import or replace the mesh. Painted assignments live per-vertex in the project file, and a fresh STL import wipes them. Always save the project as a 3MF after painting. Don’t trust the slicer to remember.
Three: a large brush radius on a high triangle count tanks editor performance. If a downloaded model has more than about a million triangles (lithophanes are the usual culprits) the brush will lag noticeably. Decimate in Blender first, then paint, then re-export.
Color change by height with the layer slider
This is the simplest multi-color technique in OrcaSlicer. No painting, no AMS, no MMU. Works on any printer that has M600-compatible firmware or supports a pause command. It’s how you do the green-base, yellow-body, red-top phone stand without buying any hardware.
The workflow is short. Slice the model in single-color first to get a layer count. Switch to Preview. On the right edge of the preview window there’s a vertical layer slider with a small plus icon. Drag the slider to the layer where you want the color to change, click the plus (or right-click the slider) and choose Add Filament Change. Pick the filament index to switch to. If you only have one filament loaded, the slicer prompts you to add another in the filament panel first. Re-slice and you’re done.
Two related options are worth knowing. Add Pause inserts an M601 (or whatever the printer’s Pause G-code field says) at the chosen layer and just stops, no filament change implied. Useful for embedding a magnet or nut into a print. Add Filament Change inserts the M600 (or the configured Change Filament G-code), which on Marlin printers parks the head, retracts, and waits for the user to swap filament before resuming. The G-code is editable per printer at Printer Settings, Machine G-code, Change filament G-code field. Worth checking if you’re on a Klipper rig, since you’ll usually want to call a custom CHANGE_FILAMENT macro that wraps PAUSE, parks the head, beeps, and waits for resume. The Klipper setup guide covers the macro pattern.
For Creality K1 owners specifically, the K1/K1 Max OrcaSlicer guide includes the Klipper macro for that printer family. For the deep walkthrough of every M600 variant including bug workarounds, see the M600 manual filament change cluster article. There’s a known issue (Issue 11368, still open as of November 2025) where the M600 lands at the end of the previous layer rather than at the new color start, which can cause a small ooze when the head returns from park to the wrong XY. Workaround is to edit the Change Filament G-code and add an explicit G0 to the new layer’s first XY before resuming. Worth checking whether it’s been fixed in your build.
Wipe tower and prime tower mechanics
The wipe tower (also called the prime tower in Orca’s UI) is a sacrificial column that captures the contaminated extrusion when the nozzle switches filaments. Without it, the next filament prints the first 50 to 700mm3 of mixed-color sludge into your model. With it, the sludge goes into the tower and your model gets clean color.
Settings live under Print Settings, Multimaterial, Prime Tower (verify the exact menu path on your build, the UI has shifted between Multimaterial Setup and Prime Tower across recent releases). The settings that actually matter:
- Enable Prime Tower. Toggle. On for any multi-color print unless you have IDEX or are using flush-into-object exclusively.
- Width. Lateral footprint. Default sits around 60mm. Smaller width is more wasteful per layer because the geometry needs more passes for the same purge volume. Counterintuitive but true.
- Position X / Y. Where on the bed the tower sits. Check it doesn’t collide with the model and stays inside the printable area.
- Brim width. Critical for stability. Default is 3mm. Tall narrow towers without enough brim fall over.
- Stabilization mode. Rectangle, Cone, or Rib. Cone widens the base for tall towers. Rib was added in the 2.3.x line.
- Cone angle. Apex angle, larger means wider base. Larger costs more material but stays standing.
- No sparse layers. Only print tower layers that contain a tool change. Saves filament but introduces a risk: the print head moves down in Z without depositing tower material, which can cause the existing tower to be hit or the new layer’s adhesion to fail.
The single most useful trick I’ve learned for tower stability is the brim. If your tower is taller than about 80mm and narrower than 50mm, default brim won’t hold it. Bump brim width to 5 or 6mm. If you’re printing PLA and PETG together, also enable the wipe tower interface options. The 2.3.2 release notes specifically called out wipe tower features for using PETG as PLA support or vice versa, which means the tower’s interface layer logic has been improved for cross-material adhesion. Verify the exact wording in your release notes, but the practical effect is fewer towers delaminating at the PLA-PETG boundary.
For the deep dive on tower geometry, brim tuning, cone vs rib stabilization, and which tower position works best for which bed size, see the wipe and prime tower cluster article. This pillar gives you the overview, the cluster article gives you the tuning matrix.
Cutting waste from multi-color prints
Multi-color is wasteful by default. A 4-color print with stock settings on a Bambu profile can easily burn 30g of filament into the wipe tower for every 50g of model. That’s not a slicer flaw, it’s the physics of single-nozzle multi-material: every color change requires purging the previous color out of the hot end. The job is reducing it as far as the print quality allows.
Here are the levers, ordered by impact in my experience.
1. Enable Flush into Object’s Infill. Print Settings, Multimaterial, Flush options. Routes purge volume into the model’s sparse infill instead of the tower. The infill becomes a sandwich of all the colors being purged into it, which doesn’t matter because nobody sees it. There’s a limitation: flush-into-infill cannot fully replace the prime tower today. The tower stays as a fallback when infill capacity is exhausted in a given layer. Issue 13164 (open as of April 2026) is the active feature request to lift this restriction. Don’t disable the tower entirely if you’re using this option.
2. Enable Flush into Object. Right-click an object on the plate and choose Flush into this object. Designates that object as a sacrificial purge sink. Best when you’re printing a multi-part assembly where one piece is hidden inside the assembly and won’t be seen.
3. Color order strategy. Print light colors first, dark last. Auto flush calculation uses RGB difference, so dark-to-light requires more purge than light-to-dark. The pigment opacity asymmetry isn’t fully modeled in the auto-calculation, which is why a black-to-white swap with stock settings still bleeds gray for the first 200mm3.
4. Tune Flush Volumes manually. Open the Flush Volumes matrix from the right-click menu on a filament slot. Default Bambu profiles err on the safe side, often around 700mm3 per cell. PLA-only setups with similar-saturation transitions can usually settle around 300-400mm3 without color bleed. Identical-color cells (slot 1 to slot 1) should be near zero. To find your actual numbers, print the Flushing Volumes Calibration model from MakerWorld and walk down from the default until you see bleed, then back off one step. The full calibration guide covers the methodology for any kind of calibration print, including this one.
5. Enable No Sparse Layers on the prime tower. Saves the layers between tool changes where the tower would otherwise grow alongside the model. Watch for tower collapse risk on tall thin towers.
6. Reduce prime tower width. A change from 60mm to 45mm can save up to 30% of tower filament for the same purge volume per the Issue 1588 discussion (the issue author’s own calculation, your mileage will vary). Diminishing returns past about 40mm because the slicer has to do many more passes per layer.
7. Use Filament Sequence to cluster color changes by feature. Print Settings, Multimaterial, Filament for Features. Lets you assign say “outer wall always uses filament 1” so the slicer doesn’t bounce between colors mid-perimeter.
8. Hardware path: IDEX or toolchanger. Eliminates purge entirely on tool change since each color has its own nozzle. If you’re going to print multi-color heavily for years, the math eventually favors the hardware investment.
Real numbers from my own setup, for context. A 4-color desk plaque, 80g of model, sliced with stock Bambu PLA profile defaults: 47g of waste in the tower. Same model with flush volumes manually tuned to 400mm3 between similar saturations and 600mm3 dark-to-light, no sparse layers on, and flush-into-infill enabled with a 35% infill model: 11g of waste. That’s a 4x reduction without changing the model, the colors, or the printer.
AMS workflow from setup to first print
If you’ve got a Bambu printer with an AMS, this is the path of least resistance. OrcaSlicer detects the AMS through the printer profile and treats each bay as a filament slot automatically.
The first-time setup is mostly about getting the connection right. For cloud-mode Bambu printing, OrcaSlicer talks to the printer via Bambu Connect, which Bambu introduced as an intermediate proxy in 2025. For LAN-only operation, you need the printer in LAN Mode plus Developer Mode enabled in the printer’s network settings. The Bambu cloud vs LAN guide walks through the toggles in detail. Worth knowing: there are reports of multi-color send failures over Bambu Connect in certain combinations (Discussion 10464 covers the recurring complaints), so if you have intermittent issues with multi-color jobs not starting, switching to LAN+Developer often resolves it.
Loading filaments. Each AMS bay holds one spool. RFID tags on official Bambu spools auto-detect material and color. Third-party filament needs manual entry: pop the bay, scroll to the filament profile in the printer’s touchscreen, save, and the bay is “loaded” with that profile until you change it. AMS units have two RFID-reading boards but they can’t read tags when filament is pre-loaded out into the bowden buffer (the tags rotate out of position). If “Read Filament on Insertion” is on by default, the AMS will re-scan when you insert a fresh spool.
Slot mapping. When you send a multi-color print from OrcaSlicer, the slicer auto-matches each model filament color to the closest AMS slot color by RGB. You can override the mapping in the send dialog before printing. If you ignore the mapping screen and just hit print, the printer will print whatever it thinks matches, which on a 4-color print with similar shades can give you the wrong combination.
For the deep AMS workflow including troubleshooting “AMS stopped auto-detecting filament” and the chain configuration for 16-slot setups, see the Bambu AMS deep-dive cluster article. For the A1 and A1 mini specifically, which only support AMS Lite, the A1 mini guide covers the slimmer-feature set.
Prusa MMU and OrcaSlicer in 2026
I’m going to be direct here, because the forums have been polite about this for too long. As of OrcaSlicer 2.3.2, MMU3 support is community-only. Issue 8876 (the official feature request) has been open since March 2025 with no PR, no roadmap commitment, and no maintainer assignment. The original MMU2S was never officially supported either. The path forward for Prusa MMU users in 2026 is, frankly, still PrusaSlicer.
That said, you can make it work. The community has shipped a handful of Printables profiles. Victor’s MK3S+ profile (Printables model 941909) claims to have been tested across over 1000 tool changes without clogs. Victor also published an MK4S/MMU3 beta profile (model 956083). N0dr4C published an MK4S+MMU3 config (model 1229593) derived from a PrusaSlicer config export. The MK4 community profile is no longer actively maintained per the author’s own note, so check the comments before relying on it.
What works in OrcaSlicer for MMU3 today: importing PrusaSlicer multi-material .ini configs as the starting point, manually defining 5 filaments, wipe tower with manually tuned flush volumes, and the standard SEMM tool change G-code. What doesn’t: no native MMU selector profile, no optimized loading and unloading speeds for the MMU’s distinct mechanical motion, no Idler Park macros, and soluble support handoff (PVA or BVOH) requires manual G-code surgery.
If MMU3 is your only multi-material option and you’re committed to OrcaSlicer for everything else, run it. If you primarily want stable MMU3 prints and OrcaSlicer is a nice-to-have, use PrusaSlicer for MMU jobs and Orca for single-color. The cluster article on manual M600 changes covers the AMS-free, MMU-free option that works perfectly fine for layer-banded color prints.
IDEX and toolchanger workflows
IDEX (Independent Dual Extruder) and toolchangers solve the purge problem by giving each color its own nozzle. Color change becomes a head park-and-swap, not a 700mm3 purge.
For Snapmaker J1/J1S, profile shipped since OrcaSlicer 1.6.2-beta and was significantly updated in v2.2.0. Setup is straightforward: add a second filament in the panel, then in the printer settings assign filament 1 to extruder 1 and filament 2 to extruder 2. The pre-configured printer scripts handle the head dock and park. Four IDEX modes are available and worth understanding:
- Dual Color. Standard multi-color, one color per extruder, alternating prints.
- Copy. Both heads print identical objects in parallel. Doubles throughput for batch jobs.
- Mirror. Heads print mirror images simultaneously, useful for symmetric pairs.
- Backup. Second head loads identical filament and takes over when the first runs out.
For toolchangers (Snapmaker U1, Prusa XL), OrcaSlicer treats them as multi-tool extruder printers. Each tool gets its own filament slot and nozzle profile. The Snapmaker U1 has its own Snapmaker Orca fork with deeper integration, but the upstream OrcaSlicer profile works for basic multi-color. The Prusa XL profile has had some lingering wipe tower issues per Issue 12570, worth checking the latest discussion if you’re on XL.
One tuning note that catches IDEX newcomers: the prime tower can be much smaller, often width 30mm or even disabled, since the second head’s idle ooze shield handles the cleanup. Don’t carry your single-nozzle wipe tower instincts into IDEX, you’ll just waste filament for no reason.
Verifying the slice in Preview
Before you hit print on a multi-color job, the Preview tab is where you catch every problem the slice might hide. I learned this the hard way after watching a 4-hour print fail at hour 3 because I’d missed a filament misassignment that was visible in Preview the whole time.
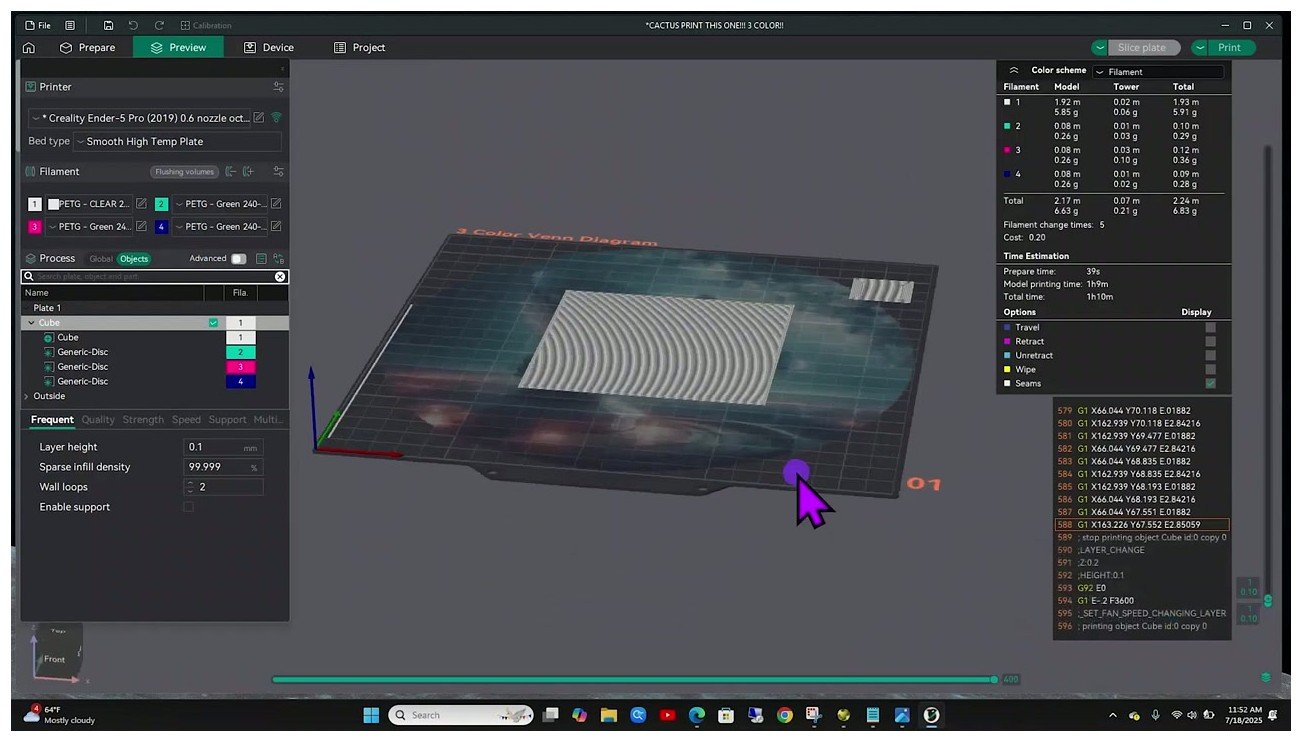
What to check, in order. Switch the Preview color scheme dropdown (top of the preview area) to Filament. The model now shows in your assigned colors, and you can see immediately whether the painting and slot assignment did what you expected. Switch to Tool Change view and you can see exactly where each swap happens. The right-side panel lists total filament per slot, total flushed volume, and total print time.
The numbers to watch: total flushed volume should be under about 25% of total model weight on a 4-color print with reasonable tuning. If it’s over 40%, your flush volumes are still too high for the colors you’re using or your wipe tower is doing too much per-layer work. Filament per slot should match your physical spool weights with margin (don’t slice a print that needs 240g of red if you’ve got 200g on the spool).
Drag the layer slider in Preview to spot-check critical layers. The layer where a color change happens, the first layer of any new color, and any layer where flush-into-object is depositing into a hidden region. If anything looks weird, fix it before exporting. Re-slicing a 50MB G-code file is annoying but not nearly as annoying as a failed 5-hour print.
Common multi-color failures and fixes
Five failure modes I’ve personally hit, with the fixes that actually worked. Cross-link to the troubleshooting master for the full failure-mode catalogue, but these five are specific to multi-color.
Failure: Wipe tower falls over at layer 12 to 30. Almost always brim width or stabilization mode. Bump brim width to 5-6mm and switch from Rectangle to Cone stabilization with a 10-15 degree angle. If you’re mixing PLA and PETG, also enable the wipe tower interface options that 2.3.2 added for cross-material adhesion. If it still falls over, reduce tower height by enabling No Sparse Layers, or move the tower position to a corner of the bed where airflow from any cooling fans is gentler.
Failure: Purge tower ends up taller than the model. This happens when the model has many small layers between tool changes and No Sparse Layers is off. Enable No Sparse Layers and the tower only grows on layers that actually have a swap. If the tower height per swap is still excessive, reduce flush volumes (especially identical-color cells in the matrix that should be near zero) and consider Flush into Object’s Infill if your model has substantial sparse infill.
Failure: First-layer purge tower deposits a single line. Documented in Issue 9328 (closed via PR 9235, fix shipped before v2.3.2). If you’re on an older build the workaround is to manually increase first-layer flush volumes, or add a brim on the model itself that absorbs initial nozzle pressure. On v2.3.2 the first-layer purge volume should already match subsequent layers.
Failure: Colors come out wrong on dark-to-light transitions. Auto flush volume calculation under-purges dark-to-light because it uses RGB difference and doesn’t model pigment opacity. Manually increase the dark-to-light cell in the Flush Volumes matrix by 50-100%. Better still, reorder your colors so the print goes light to dark wherever possible.
Failure: Unwanted M600 inserted at layer 0. Documented in Discussion 6140 and Issue 9558 (closed as not planned, so the workaround is the long-term answer). Disable Manual Filament Change in the start G-code, or use a Klipper macro that ignores M600 at layer 0.
Failure (bonus): Painted colors disappear after editing the model. Painted assignments live per-vertex and are tied to the mesh. Re-importing destroys them. Always Save Project as a 3MF after painting, never re-import the STL.
For the M600-specific failure modes (head returns from park to wrong XY and oozes, retraction wrong on resume, manual change not waiting for confirm), the M600 cluster article has the full diagnostic flow. For OctoPrint users seeing pause/resume issues with M600, the OctoPrint troubleshooting page covers the macro tweaks that fix the most common ones.
Where multi-color is heading next
Two things are worth watching as you build out your multi-color workflow.
First, color mixing as a slicer feature. Bambu Studio rolled out a FullSpectrum-derived color prediction in 2025 (Bambu Lab acknowledged the OrcaSlicer FullSpectrum fork by ratdoux as the basis, per a Tom’s Hardware piece at the time). What this enables: print intermediate colors by interleaving two or three filaments in patterns that the eye reads as a blend. Lithophane printing has used this for years; it’s now becoming a general-purpose multi-color feature. OrcaSlicer’s fork landscape is fragmented on this, with the FullSpectrum fork being the most-developed but not yet merged upstream.
Second, dual-nozzle and toolchanger printers continue to undercut single-nozzle multi-color on per-print waste. The Bambu H2D launched in early 2025 and the H2D Pro followed in August 2025, the Snapmaker U1 transitioned from preorder to retail in April 2026, and Prusa XL toolchangers are mature. The economics change once you’re printing multi-color at any volume: a single-nozzle AMS print at 30% waste vs an IDEX or toolchanger print at near-zero waste means a 1kg spool lasts a third as long on the AMS. For hobbyists, that’s annoying. For small-batch production, that’s a different printer purchase.
OrcaSlicer’s relationship to the H2D is worth noting honestly: as of v2.3.2, the H2D is not supported in upstream OrcaSlicer. Discussion 9236 indicates no foreseeable support, and Bambu Studio is the only official slicer for it. If you’re considering an H2D specifically because you want OrcaSlicer’s flexibility, that mismatch matters. The OrcaSlicer vs Bambu Studio comparison covers what each slicer does better in 2026.
Wrap-up and next steps
If you skipped to the bottom, here’s the matrix. Manual M600 with the layer slider is your free, universal path for layer-banded color (best starting point if you don’t own multi-material hardware yet). Bambu AMS family is the smoothest plug-and-play option if you’ve already bought into Bambu’s ecosystem (read the AMS cluster article for setup). Prusa MMU2S/MMU3 is workable in OrcaSlicer with community profiles, but PrusaSlicer is still the better tool for that specific hardware. IDEX and toolchangers eliminate purge waste entirely if your print volume justifies the hardware. Co Print and other third-party kits give you SEMM multi-color on any printer, with manual swaps replaced by automated ones.
Whichever path you’re on, start small. Print a 2-color test before you commit to 4, tune your flush volumes with the calibration model from MakerWorld before you commit to a complex print, and save your project as a 3MF after every significant painting session. The settings master guide is the home for everything tuning-related in OrcaSlicer if you want to dig further. If you’re brand new to OrcaSlicer, circle back to the beginner’s first print walkthrough for the fundamentals before going deep on multi-color.
Multi-color in OrcaSlicer isn’t a single workflow, it’s five workflows that share a slicer. Pick the one that fits the printer in front of you and the rest is just patience and tuning.
Related OrcaSlicer guides
- OrcaSlicer Settings Master Guide: Every Setting Explained (2026)
- OrcaSlicer Project Files (.3mf): How to Save and Share (2026 Guide)
- OrcaSlicer Cooling and Fan Curves Explained (2.3.x Guide)
- How to Update OrcaSlicer Without Losing Your Profiles (2026)
- OrcaSlicer Slow Slicing on Complex Models: How to Speed Up