I sliced my first model on a freshly built Voron 2.4 350 in OrcaSlicer last spring, hit upload, and watched the bed climb to 100 C while the toolhead just sat there idle. Then the nozzle started heating. Then PRINT_START finally ran and tried to heat soak the chamber. I’d already been waiting six minutes before any actual print prep began, because OrcaSlicer’s Voron profile ships an M190 and an M109 above the PRINT_START call, and Voron’s own docs warn against exactly that pattern.
That’s the kind of thing that doesn’t show up in a generic “how to slice on a Voron” article. So this is a Voron-first walkthrough of OrcaSlicer: which profiles actually ship, what’s wrong with the default start G-code, where the per-variant motion numbers come from, and what’ll bite you on a 300 or 350 bed. I run Vorons daily, and the configuration I’ll describe is what I’ve ended up using after burning through the obvious mistakes.
Why OrcaSlicer plus Voron is the new default
For years the default Voron answer was SuperSlicer. The Voron docs still list PrusaSlicer, Cura, SuperSlicer, and OrcaSlicer as the four slicers that ship vendor profiles, so technically nothing’s changed. What’s changed is workflow. I used to slice in SuperSlicer, save the .gcode to disk, switch to a Mainsail tab, drag the file in, then hit print. Four windows, three context switches, easy to upload yesterday’s file by accident.
OrcaSlicer collapses that into one window. The Device tab connects to Moonraker, the Calibration menu has the flow ratio, pressure advance, input shaper test pattern, and tolerance tests baked in, and the Prepare tab respects whatever klipper macro stack you’ve already got. I’m not going to claim Orca “invented” anything Voron-specific. CoreXY support is firmware-side. What Orca did is ship machine profiles whose max-speed envelopes don’t fight CoreXY motion, and add the calibration suite Voron builders were already running by hand.
If you’re coming from PrusaSlicer or SuperSlicer the muscle memory transfers. The placeholder syntax is the same `[bed_temperature_initial_layer_single]` style, the start/end G-code fields live in the same place, and the process inheritance works the same way (base profile then per-nozzle override). The thing that will catch you out is the default start G-code, which we’ll get to.
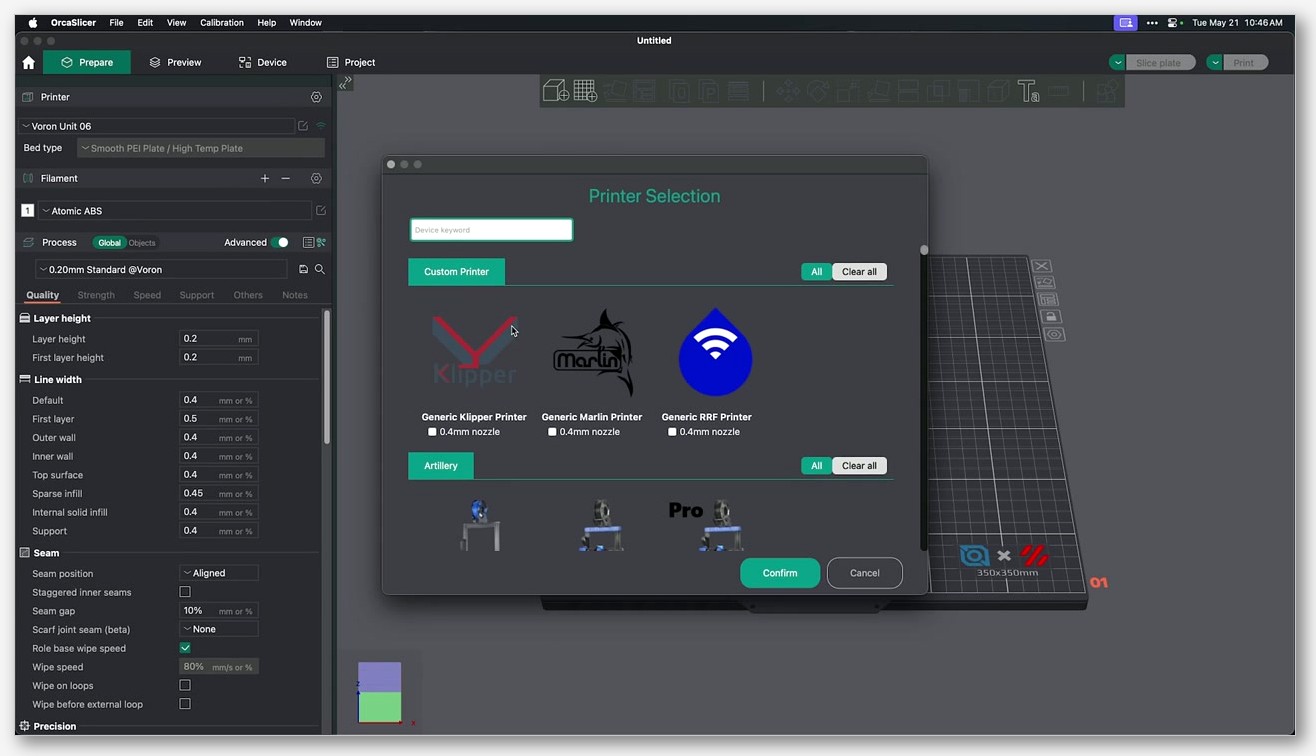
Which Voron profiles actually ship in OrcaSlicer
OrcaSlicer ships eight base Voron machine models out of the box. You’ll find them in resources/profiles/Voron/machine in the source repo. Here they are, exactly as the wizard names them:
- Voron 0.1. 120 build, used for both V0.1 and V0.2.
- Voron 2.4 250. 250 x 250 plate.
- Voron 2.4 300. 300 x 300 plate.
- Voron 2.4 350. 350 x 350 plate.
- Voron Switchwire 250. The conversion design.
- Voron Trident 250. 250 x 250 plate.
- Voron Trident 300. 300 x 300 plate.
- Voron Trident 350. 350 x 350 plate.
Notice what’s missing. There is no profile called “Voron 0.2.” If you’ve built a V0.2 you pick the Voron 0.1 entry in the wizard, because the build volume is identical (120 cubed) and the kinematics are the same CoreXY. The V0.2 redesign changed the toolhead (Mini Stealthburner), added sensorless homing, and reworked the tophat. None of that affects slicer geometry. So the V0.1 profile is correct for both. Don’t go hunting for a missing Voron 0.2 entry, you’ll waste an afternoon.
Each base machine has additional JSON files for 0.15, 0.2, 0.25, 0.4, 0.5, 0.6, 0.8, and 1.0 mm nozzles. The nozzle_diameter declaration string in every base machine is "0.4;0.15;0.2;0.25;0.5;0.6;0.8;1.0". The process side is around 40 JSONs ranging from 0.05 mm Fine on a 0.15 nozzle up to 0.80 mm Extra Draft on a 1.0 nozzle, plus a stack of base process files named fdm_process_voron_common*.json, one per nozzle size, that hold the shared defaults.
For the full list of vendor profiles across other printer ecosystems Orca ships, the printer profiles hub covers the shipped manifests in more detail.
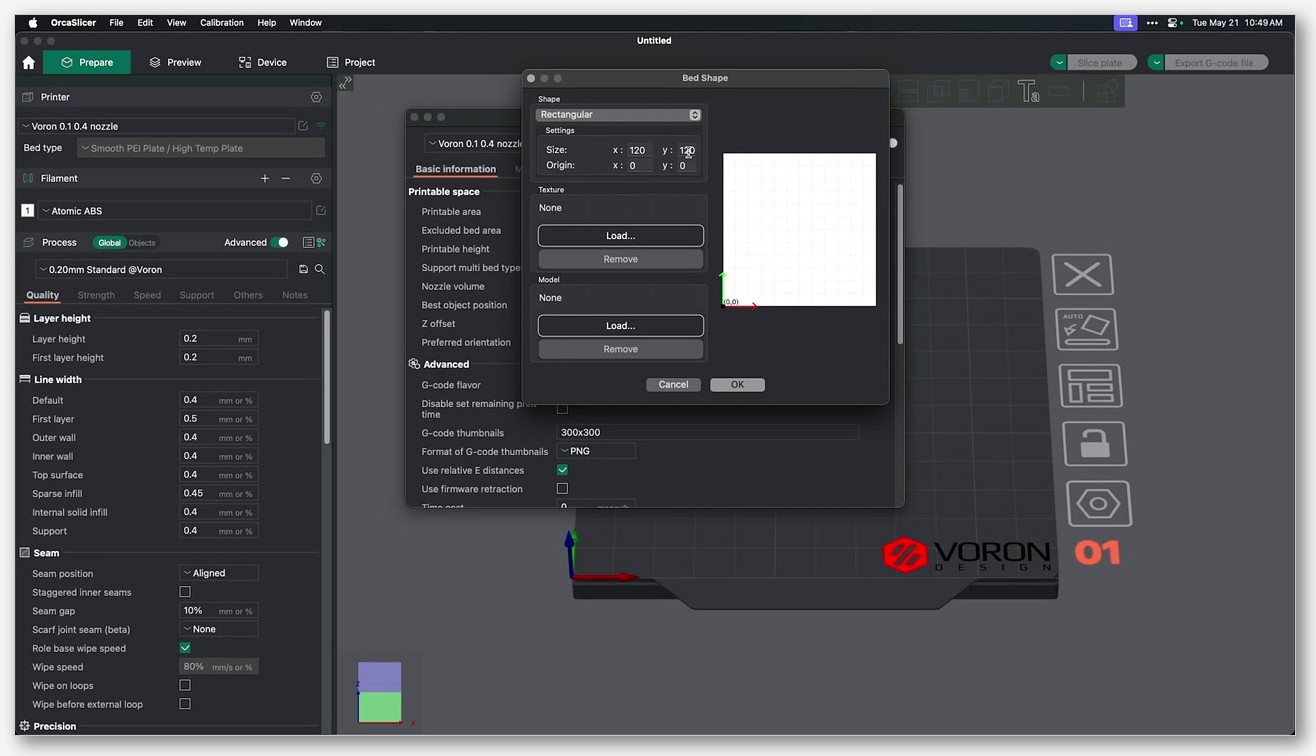
Build volumes per variant (and the V2.4 350 height trim)
Here are the numbers OrcaSlicer’s machine profiles bake in, mapped against the official VoronDesign hardware page.
- Voron 0.2. 120 x 120 x 120 mm (Voron hardware doc says “tiny 120mm^3 print area” for V0.2r1). Use the Voron 0.1 profile in Orca.
- Voron 2.4 250. 250 x 250 x 220 mm (official Z height 220).
- Voron 2.4 300. 300 x 300 x 280 mm.
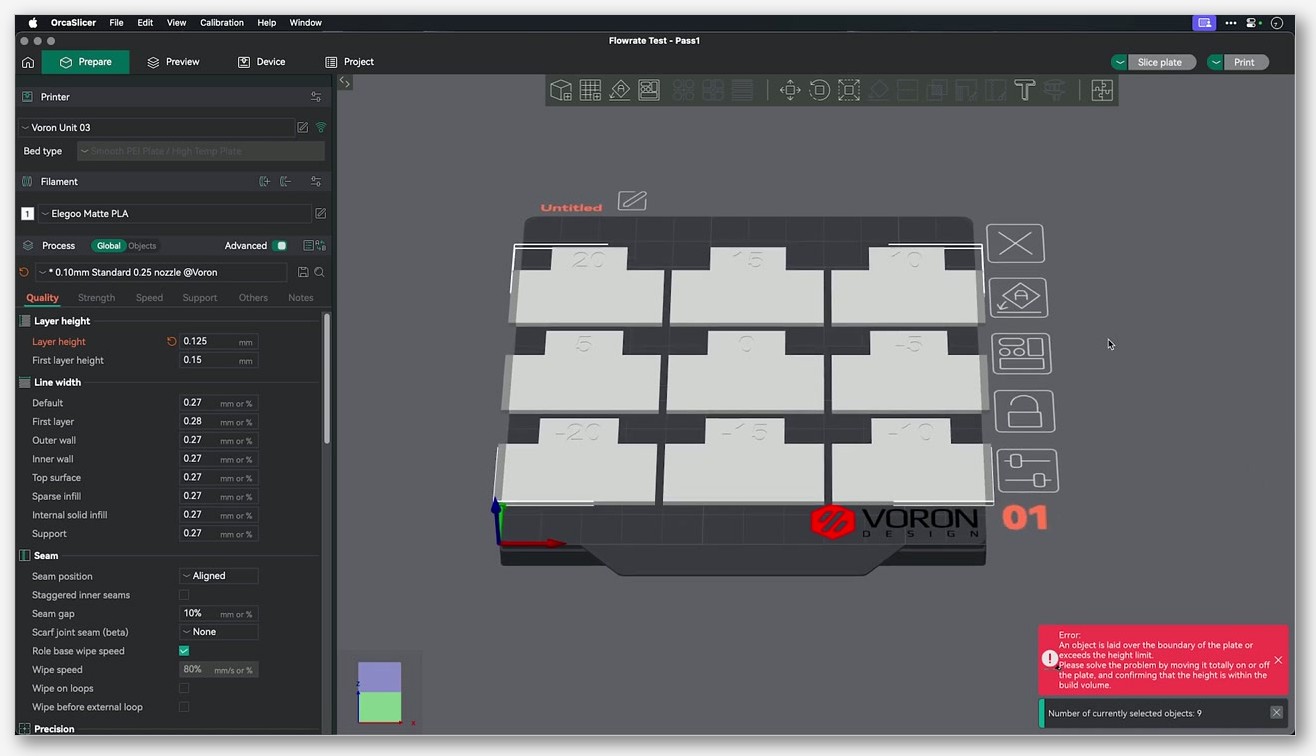
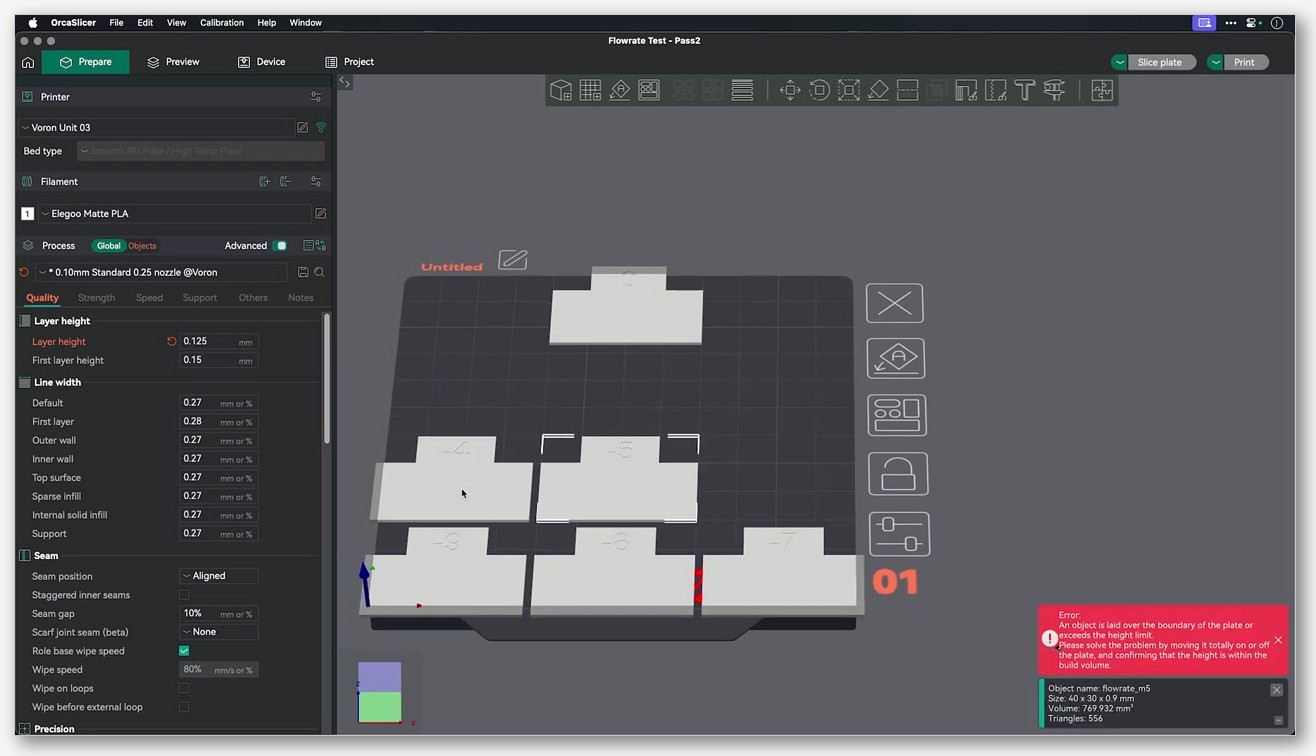
- Voron 2.4 350. 350 x 350 x 330 mm officially, but OrcaSlicer’s profile reports
printable_heightas 325. Three millimetres of headroom you don’t have in the slicer that you do have in the hardware. If you’re slicing a 328 mm tall pillar and Orca whines about height, that’s why. Bump it to 330 yourself if you trust your Z homing offset. - Voron Trident 250. 250 x 250 plate.
- Voron Trident 300. 300 x 300 plate.
- Voron Trident 350. 350 x 350 plate. The Trident Z is capped around 250 mm in practice without custom leadscrew motors, so all three Trident profiles share roughly the same usable Z envelope.
If you’ve modded your frame (taller extrusions, longer rails, custom leadscrews on a Trident) you’ll want to clone the profile and edit the printable area and height fields manually. Don’t edit the shipped profile directly, because an OrcaSlicer update will overwrite it.
Connecting OrcaSlicer to Klipper over Moonraker
This is the bit that makes the one-window workflow possible. Orca talks to Moonraker through the OctoPrint compatibility layer, so the setup is short.
- SSH into your printer and edit
moonraker.conf. Add a section[octoprint_compat]with no parameters, save, and restart the Moonraker service. - In OrcaSlicer, open the printer settings, go to the Connection or Device tab, and select OctoPrint as the host type.
- Hostname / IP / URL field accepts
printer.local,192.168.x.x, or either of those with:7125appended (Moonraker’s default port is 7125 per the Moonraker config docs). - API key. When you’re using
octoprint_compat, Moonraker accepts any non-empty string in the API key field, so type literally anything and move on. - Hit Test. You should get a green confirmation. Now the Device tab will show your printer status, file uploads, and a print-from-Orca button.
I keep my Mainsail tab open anyway because the macros, webcam, and console are more comfortable there, but for slicing-and-printing I don’t need to leave Orca. The Fluidd slicer uploads doc covers the same OctoPrint compat path, and the same applies to Mainsail since they both sit on top of Moonraker. For a deeper dive on the upload side, the Klipper setup walkthrough goes step by step.
The PRINT_START macro and the M109/M190 trap
Here’s the thing the brief at the top of this article was about. OrcaSlicer’s Voron vendor profile ships this exact start G-code, verbatim from fdm_klipper_common.json:
M190 S[bed_temperature_initial_layer_single]
M109 S[nozzle_temperature_initial_layer]
PRINT_START EXTRUDER=[nozzle_temperature_initial_layer] BED=[bed_temperature_initial_layer_single]
The PRINT_START line is correct. The two lines above it are the problem. The Voron docs explicitly say:
“Some slicers do not recognize the Klipper PRINT_START macro as a valid start macro and add an additional bed heat and nozzle heat to the start gcode.”
“If examination of the output gcode shows an M109 and/or M190 before the PRINT_START macro, consider using a different or newer slicer.”
What happens in practice. M190 is “set bed temp and wait.” M109 is “set nozzle temp and wait.” Both are blocking. So the slicer brings the bed up to first-layer temp (call it 100 C for ABS), waits, then brings the nozzle up to first-layer temp, waits, then finally calls PRINT_START. Your PRINT_START is the macro that’s supposed to home, mesh, purge, line-purge, and do the chamber soak. By the time it runs you’ve already burned five minutes on serialized heating that should have happened in parallel with homing.
The fix is one paragraph. Open Printer Settings, go to Machine G-code, scroll to Machine start G-code, and delete the M190 and M109 lines. Leave the PRINT_START line. Your start G-code should now be a single line:
PRINT_START EXTRUDER=[nozzle_temperature_initial_layer] BED=[bed_temperature_initial_layer_single]Your PRINT_START macro on the klipper side needs to actually accept EXTRUDER and BED as params (Voron’s standard EricZimmerman example does, jontek2’s “A better print_start macro” does). If you’re running a community PRINT_START that accepts a CHAMBER param too, you can add CHAMBER=[chamber_temperature] to the slicer call. Param names are case-sensitive on the klipper side. If your macro references params.EXTRUDER_TEMP internally, the slicer has to send EXTRUDER_TEMP, not EXTRUDER, or you’ll get a silent zero. The custom G-code guide covers the placeholder syntax in more depth.
This is tracked as OrcaSlicer issue #4360 (“Assuming all klipper configurations use ‘PRINT_START’ and other macros causes many to run into issues”). It’s closed as not planned, which is to say Orca shipped the M190/M109 by design as a defensive fallback for users without a PRINT_START macro. If you’ve got PRINT_START set up properly, you delete those lines. If you don’t, you build PRINT_START first.
Stealthburner, Mini Stealthburner, and hotend selection
OrcaSlicer doesn’t care which extruder you’ve got. Klipper does. But the hotend you pick matters for the filament profile (max volumetric speed especially), and the toolhead matters for the firmware retraction defaults. Quick map.
Stealthburner is the V2.4 and Trident toolhead. The official Voron docs describe it as “the collective name for the Voron direct-drive interchangeable toolhead system” with “three interchangeable components: the extruder, the toolhead holding the hot end, and the cooling assembly.” Extruder side it’s typically Clockwork 2 or, increasingly, Galileo 2 as a drop-in upgrade.
The official Stealthburner Printheads README lists exactly these hotends as supported on the stock printhead mounts:
- Chube Compact.
- Phaetus / Trianglelab Dragon ST, SF, HF.
- Phaetus BMO.
- Phaetus BMS (6 fin).
- Phaetus BMS (7 fin).
- Phaetus Rapido.
- E3D Revo Micro.
- E3D Revo Six.
- E3D V6.
- E3D Revo Voron.
What’s not on that list. Rapido UHF is not on the official Stealthburner Printheads README. Dragonburner is a separate community toolhead (chirpy2605 mods), not a Stealthburner printhead. If you’re running either you’re on a community mount, which is fine, but don’t expect the stock CAD to drop in.
Mini Stealthburner is the V0.2 toolhead specifically, with a built-in direct-drive extruder. Voron’s V0 repo lists supported hotends for V0.2 as Revo VORON, Dragon, Dragonfly BMO, DropEffect XG, and Creality Spider Pro. Don’t try to fit Mini Stealthburner onto a V2.4 or Trident, it’s not designed for those frames.
Galileo 2 is the newer extruder that drops into a Stealthburner CW2 mount. If you’ve installed one, you’ll need to update gear_ratio and rotation_distance in your klipper config and re-run your extruder calibration. OrcaSlicer doesn’t know or care, it just sees the resulting filament feed at whatever flow you’ve calibrated.
Speeds, accelerations, and jerk: profile vs printer.cfg
There are two motion envelopes you need to keep straight, because they can fight. The slicer envelope (set in OrcaSlicer’s machine profile) and the firmware envelope (set in klipper’s printer.cfg). The lower of the two wins at any given moment.
OrcaSlicer’s Voron klipper common machine profile ships these:
- gcode_flavor. klipper
- machine_max_acceleration_extruding. 20000, 20000
- machine_max_acceleration_retracting. 5000, 5000
- machine_max_acceleration_travel. 20000, 20000
- machine_max_acceleration_x / _y. 20000, 20000
- machine_max_acceleration_z. 500, 200
- machine_max_acceleration_e. 5000, 5000
- machine_max_speed_x / _y. 500, 200
- machine_max_speed_z. 12, 12
- machine_max_speed_e. 25, 25
- machine_max_jerk_x / _y. 12, 12
- machine_max_jerk_z. 0.2, 0.4
- machine_max_jerk_e. 2.5, 2.5
- Default retraction. 0.8 mm at 30 mm/s, Z-hop 0.4 mm (Normal Lift)
The klipper side, taken verbatim from the official VoronDesign Octopus printer.cfg for V2.4 (Trident is identical):
[printer]
kinematics: corexy
max_velocity: 300
max_accel: 3000             #Max 4000
max_z_velocity: 15          #Max 15 for 12V TMC Drivers, can increase for 24V
max_z_accel: 350
square_corner_velocity: 5.0
Notice the gap. Orca’s profile lets the slicer schedule moves up to 20000 mm/s^2 and 500 mm/s. Klipper will cap that at 3000 mm/s^2 and 300 mm/s. That’s fine, klipper is the source of truth at runtime. The slicer envelope just has to be high enough to not clip Voron’s real envelope. Where this matters: if you’ve raised max_accel on your klipper side after input shaper tuning (many builders push past the stock 3000 once their shaper is locked in), Orca’s profile won’t need any change because it’s already well above your real value.
For V0.2 the stock printer.cfg URL in the Voron-0 repo returned a 404 when I last checked, so I won’t quote a canonical V0.2 number. Community LDO kit defaults float around max_velocity 200, max_accel 2000, max_z_velocity 15, max_z_accel 45, but treat those as kit-default rather than VoronDesign canonical until you verify against your specific config.
Process side, the shipped fdm_process_voron_common.json (0.4 nozzle, 0.2 layer) gives you these speeds out of the box: travel 350 mm/s, outer wall 120, inner wall 200, top surface 100, sparse infill 200, support 150, initial layer 50. Acceleration: default 5000, outer wall 3000, top surface 3000, travel 7000, initial layer 500. Layer 0.2 mm, line width 0.4, 15 percent crosshatch infill, 3 wall loops, 5 mm brim, 0.95 bridge flow, prime tower enabled at 60 mm width.
On the jerk side, issue #7464 flagged that the Voron jerk defaults Orca inherited were originally copied over from a Bambu profile and don’t suit Voron builders running Shake and Tune. The issue requested a default jerk of 5 for all axes. The issue is closed; if you’re running SnT and want to set jerk yourself, do it in the slicer’s machine settings rather than expecting the shipped Voron profile to be SnT-correct out of the box. For the full picture on jerk and cornering, see cornering calibration.
Recommended calibration order on a Voron
Here’s the order I run on every new Voron, in the order that matters. Skip ahead at your own risk.
- Input shaper first. Use klipper’s ADXL345 method (RESONANCE_TEST on each axis, INPUT_SHAPER_CONFIG, save to printer.cfg) before you try to print anything. Don’t rely solely on Orca’s ringing tower for a Voron, because the klipper-side shaper data is what actually gets applied at runtime. The Orca test pattern is fine as a sanity check after. If you want a workflow that combines both, the input shaper guide walks through it. To repeat the brief here: input shaper masks resonance, it does not fix mechanical layer shifts. If you’re getting actual layer shifts, your belts, pulleys, or grub screws are the problem, not your shaper.
- Flow ratio. Orca’s Calibration menu has a flow rate test. Print, measure, enter the result. On a Voron with a fresh extruder calibration this is usually within a few percent of 1.0.
- Pressure advance. Run klipper’s TUNING_TOWER method first if you want the highest-confidence number, or use Orca’s PA pattern test. Set the final value on the klipper side via
SET_PRESSURE_ADVANCEin your PRINT_START so it persists per-filament. - Temperature tower. Per-filament. Orca’s Calibration menu has it.
- Max volumetric speed. Last, because it’s filament-specific and depends on your hotend. For a Revo Voron with PETG you’ll land around 15-20 mm^3/s; for a Rapido with PLA you can push past 30. Don’t copy somebody else’s number, run the test.
For the broader walkthrough of every calibration test Orca ships, the calibration suite guide covers each one in sequence.
Voron-specific gotchas and known issues
Five GitHub issues to know about, by number, because they’ll either bite you or already have:
- Issue #4360. The PRINT_START assumption discussed above. Closed as not planned. Fix is to delete the M190/M109 lines from your start G-code, or build a PRINT_START macro if you don’t have one yet.
- Issue #7464. Voron jerk defaults inherited from a Bambu profile. Closed. If you’re tuning with Shake and Tune, set your own jerk values rather than trusting the shipped defaults.
- Issue #4694. Adaptive bed mesh probe count problem. On larger Voron beds, Orca’s adaptive mesh can ask klipper for more than 6 probe points per axis, and klipper rejects with “bed_mesh: cannot exceed a probe_count of 6 when using lagrange interpolation.” Either lower the probe count Orca generates (Machine settings, Basic information, Adaptive bed mesh fields) or change your klipper bed_mesh algorithm from lagrange to bicubic.
- Issue #4875. Same root cause as #4694 but specifically on 300 and 350 Voron beds. Same fix.
- Issue #11184. Build plate image missing on V2.4 and V0 profiles in the 28 Oct 2025 nightly on Windows 11. Closed. Visual-only, didn’t affect slicing.
The adaptive bed mesh G-code Orca generates, for reference:
BED_MESH_CALIBRATE mesh_min={adaptive_bed_mesh_min[0]},{adaptive_bed_mesh_min[1]} mesh_max={adaptive_bed_mesh_max[0]},{adaptive_bed_mesh_max[1]} ALGORITHM=[bed_mesh_algo] PROBE_COUNT={bed_mesh_probe_count[0]},{bed_mesh_probe_count[1]} ADAPTIVE=0 ADAPTIVE_MARGIN=0ADAPTIVE=0 because Orca handles the margin slicer-side, not klipper-side. If you want klipper to do its own adaptive logic instead, you’d switch that to ADAPTIVE=1 and let klipper crop the mesh, but then you don’t need Orca’s adaptive feature at all.
Troubleshooting checklist
Quick hits for problems that show up on Voron specifically.
- “Unknown command: PRINT_START” in console. You don’t have a PRINT_START macro defined in your klipper config. Either add one (jontek2’s “A better print_start macro” is a solid starting point) or revert Orca’s start G-code to plain M190/M109/G28.
- Bed and nozzle heat fully, then nothing happens for minutes. The M109/M190 trap. Delete those two lines from machine start G-code.
- Klipper rejects bed_mesh with “cannot exceed a probe_count of 6.” Issue #4694/#4875. Lower probe count or switch to bicubic.
- “Must home axis first” on print start. Your PRINT_START macro doesn’t G28. Either add G28 to PRINT_START or add it ahead of the macro in slicer start G-code (less clean).
- Upload to Moonraker fails with 401. You didn’t add
[octoprint_compat]to moonraker.conf, or you didn’t restart Moonraker after editing. - Print slices fine but Z height in slicer is 5 mm short of what you expected on V2.4 350. Orca’s
printable_heightis 325, not 330. Clone the profile and edit it. - Bed shows as a black rectangle in 3D view. Issue #11184. Update to the next nightly or stable release.
FAQ
Does Voron 2.4 R2 need a different OrcaSlicer profile?
No. R2 is a hardware revision affecting frame and toolhead mounting, not build volume or kinematics. Use the same Voron 2.4 250/300/350 profile that matches your plate size.
Can I use Stealthburner with Rapido UHF?
Not on a stock Stealthburner printhead. The Rapido UHF is not on the official Stealthburner Printheads README, which lists Chube Compact, Dragon ST/SF/HF, BMO, BMS (6/7 fin), Phaetus Rapido (standard), Revo Micro, Revo Six, V6, and Revo Voron. There are community mounts for UHF; you’d be running an unsupported configuration.
Does OrcaSlicer ship a profile for Tridex or Salad Fork?
No. Both are community designs, not stock VoronDesign machines, so they don’t appear in the vendor profiles. Easiest path is to clone the closest matching Voron profile (Trident 350 for Tridex, V2.4 for Salad Fork) and edit build volume, start G-code, and any non-standard kinematics. See add a custom printer for the cloning workflow.
Why is my V0.2 listed as “Voron 0.1” in the slicer?
Because OrcaSlicer doesn’t ship a separate V0.2 profile. The build volume is identical (120 cubed) and kinematics are the same CoreXY, so the V0.1 profile is correct for both. The V0.2 differences (Mini Stealthburner toolhead, sensorless homing, redesigned tophat) don’t affect slicer geometry.
Do I need to add CHAMBER to my PRINT_START call?
Only if your PRINT_START macro accepts a CHAMBER param. Jontek2’s macro does (default 45 C). The stock OrcaSlicer Voron profile doesn’t include CHAMBER in the call. If you want it, add CHAMBER=[chamber_temperature] to the end of the PRINT_START line and set the chamber temp in Orca’s filament settings.
What’s the safe max_accel for a stock Voron 2.4?
The official Octopus printer.cfg sets max_accel to 3000 with a comment “Max 4000.” After input shaper tuning many Voron builders push past 3000, but the actual ceiling depends on your specific shaper measurements. Don’t copy somebody else’s number. Run RESONANCE_TEST, set max_accel based on what your shaper graph says is safe, then iterate.
Can I use the same OrcaSlicer install for both my Voron and a Bambu printer?
Yes. Orca handles multiple machines fine. The risk is cross-contaminating settings if you copy a process profile between vendors without checking the inherited base. Always start a new process from the Voron base, not from a Bambu-derived one.
Where do I download OrcaSlicer?
The canonical source is the OrcaSlicer GitHub releases page. Don’t grab it from a random mirror, both for security and because the vendor profile manifests update with each release.
Final notes
The bulk of getting OrcaSlicer working well on a Voron isn’t slicer config, it’s making sure your klipper macro stack is built for the placeholders Orca sends. Get PRINT_START right, delete the M190/M109 lines, set your motion envelope in klipper rather than relying on the slicer to hold you back, and run input shaper before you start tuning anything else. After that the workflow is genuinely better than what we had with SuperSlicer plus a Mainsail tab. For the broader configuration picture across other printer ecosystems, the printer profiles hub covers what else ships out of the box.
Related OrcaSlicer guides
- OrcaSlicer Settings Master Guide: Every Setting Explained (2026)
- OrcaSlicer for Anycubic Kobra 2 / Neo / Plus / Max: Setup and Best Settings (2026)
- OrcaSlicer for Sovol SV06 / SV07 / SV08: Setup and Best Settings (2026)
- OrcaSlicer for Qidi X-Plus 3 / X-Max 3 / Q1 Pro: Setup and Best Settings (2026)
- OrcaSlicer Review 2026: Honest Pros, Cons & Who Should Use It