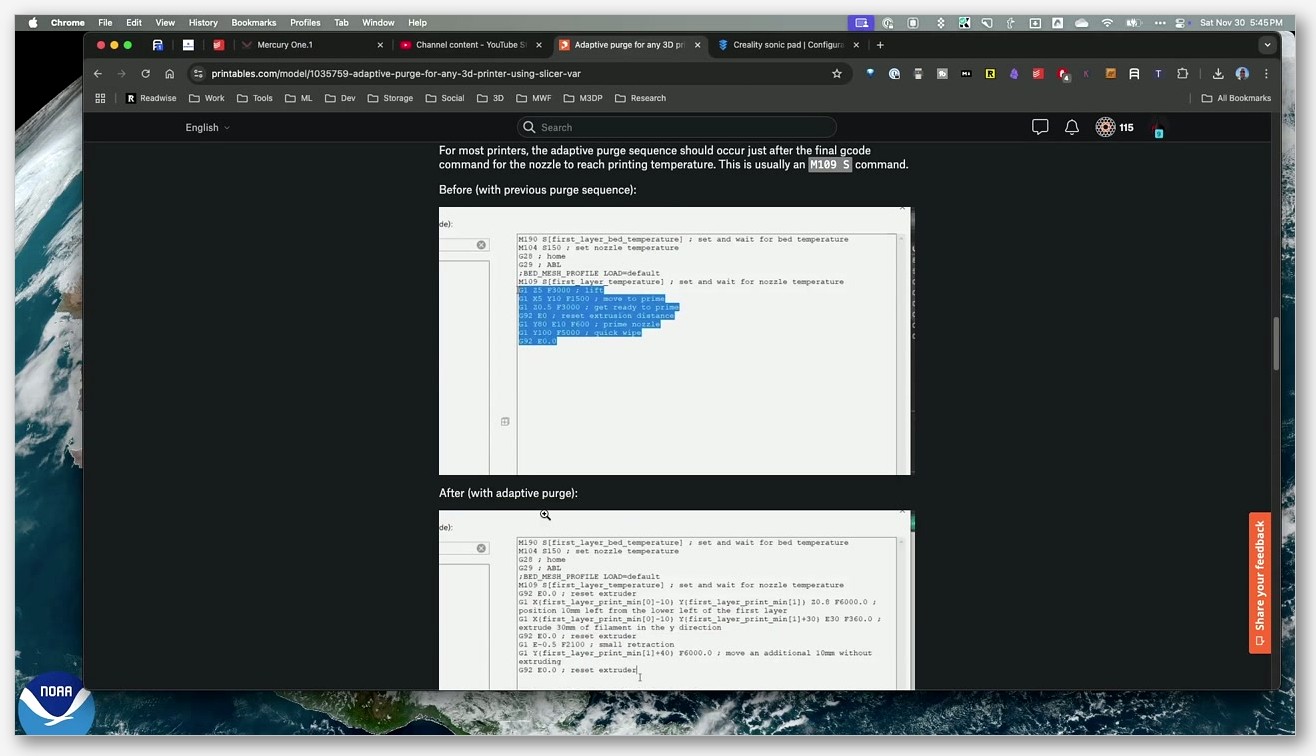
My first real “I broke the printer with custom G-code” moment came on a rainy Tuesday when I pasted what I thought was a clever start macro into OrcaSlicer and watched my Ender 3 cheerfully home, then ram the nozzle straight into a cold bed because I’d referenced [layer_z] in the Start G-code field. The placeholder evaluated to nothing, the conditional branch I thought was guarding the move silently fell through, and the rest is a divot in my PEI sheet. That single mistake taught me more about how OrcaSlicer’s placeholder parser actually works than the next twenty hours of forum reading did.
I’ve since written start and end G-code for a Voron 2.4 on Klipper, a Prusa MK3S on stock Marlin, a Bambu P1S that mostly ignores what I write, and a pair of Creality printers that needed completely different purge lines. Every one of those rigs taught me something specific about which OrcaSlicer hooks fire when, which variables are actually injected (and which silently aren’t), and where the slicer’s template syntax ends and the firmware’s template syntax begins. This guide is the document I wish I’d had on that Tuesday afternoon: a verbatim, source-cited tour of OrcaSlicer’s 15 custom G-code hooks, the two placeholder syntaxes they support, and the per-firmware patterns that actually work on Marlin, Klipper, and Bambu hardware in OrcaSlicer 2.3.x.
Table of contents
- Why custom G-code matters in OrcaSlicer
- Where custom G-code lives in OrcaSlicer 2.3.x
- The full list of machine-profile custom G-code fields
- Per-filament Start G-code and End G-code
- The placeholder language: brackets, braces, and conditionals
- Which variables you can use in each hook
- Writing a clean Marlin start and end G-code
- Writing OrcaSlicer Start G-code for Klipper
- Bambu printers: what you can and can’t change
- Layer-change macros that actually work
- Change Filament G-code and the toolchange context
- Common mistakes and how to avoid them
- Verifying your custom G-code before you print
- FAQ
Why custom G-code matters in OrcaSlicer
Every reliable print starts and ends with a script the operator either wrote or consciously accepted. The slicer hands the printer a stream of moves, but it’s the custom G-code blocks that decide whether the bed is hot before the first travel, whether the nozzle is purged before it touches the model, whether a timelapse camera snaps a frame at the right moment, and whether the machine parks somewhere safe when the print ends. Get any of those wrong and you don’t just lose the print, you can scar the build plate, snap a part-cooling shroud on a stuck blob, or in the worst case (this is me, last year) ram a 240 degree nozzle into a cold sheet of PEI.
OrcaSlicer didn’t invent its custom G-code system. The architecture and most of the bracketed variable syntax come straight from the Slic3r and PrusaSlicer lineage, and you can see that heritage in the source files I’ll be quoting throughout this piece. What OrcaSlicer (and its SoftFever ancestor) adds on top is a set of convenience variables aimed at the kinds of printers the project actually targets: first_layer_temperature and first_layer_bed_temperature as compatibility aliases, current_extruder and current_hotend for multi-tool setups, bed_temperature_initial_layer_single as a single resolved integer rather than a list, and a small handful of Bambu Studio extensions for the AMS and lidar pipeline.
The reason this matters is that every modern firmware speaks a slightly different dialect. Marlin executes whatever literal stream you hand it, so the slicer has to do all the work (M104, M140, M190, M109, G28, G29). Klipper expects you to call printer-side macros (PRINT_START EXTRUDER=... BED=...) and keep the heavy logic in printer.cfg. Bambu printers run a long firmware-side preparation sequence and your custom block is layered on top of it. If you paste a Marlin start sequence into a Klipper field, or a Bambu profile into a Marlin field, the printer will either fight you or simply do nothing for the first 30 seconds while it figures out which set of instructions to ignore. For a deeper view of how the rest of the slicer hangs together, the OrcaSlicer settings master guide walks the broader UI in the same level of detail.
Where custom G-code lives in OrcaSlicer 2.3.x
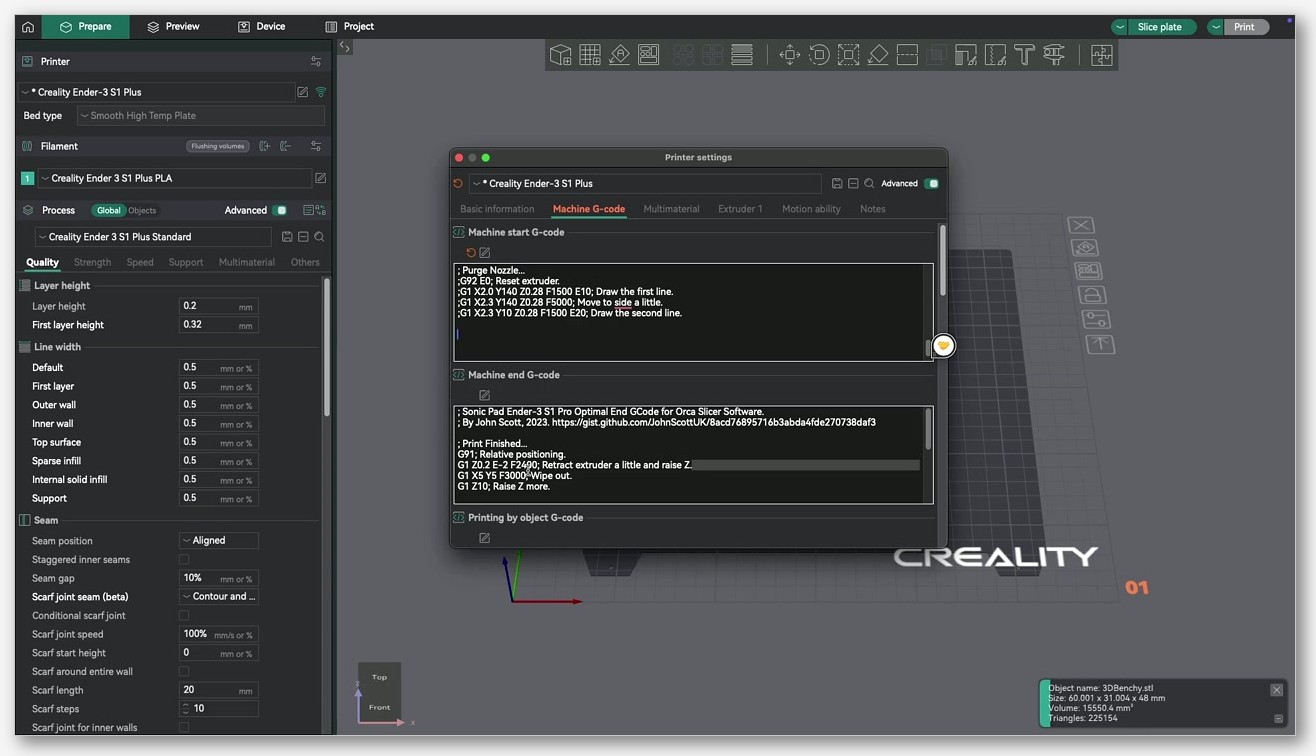
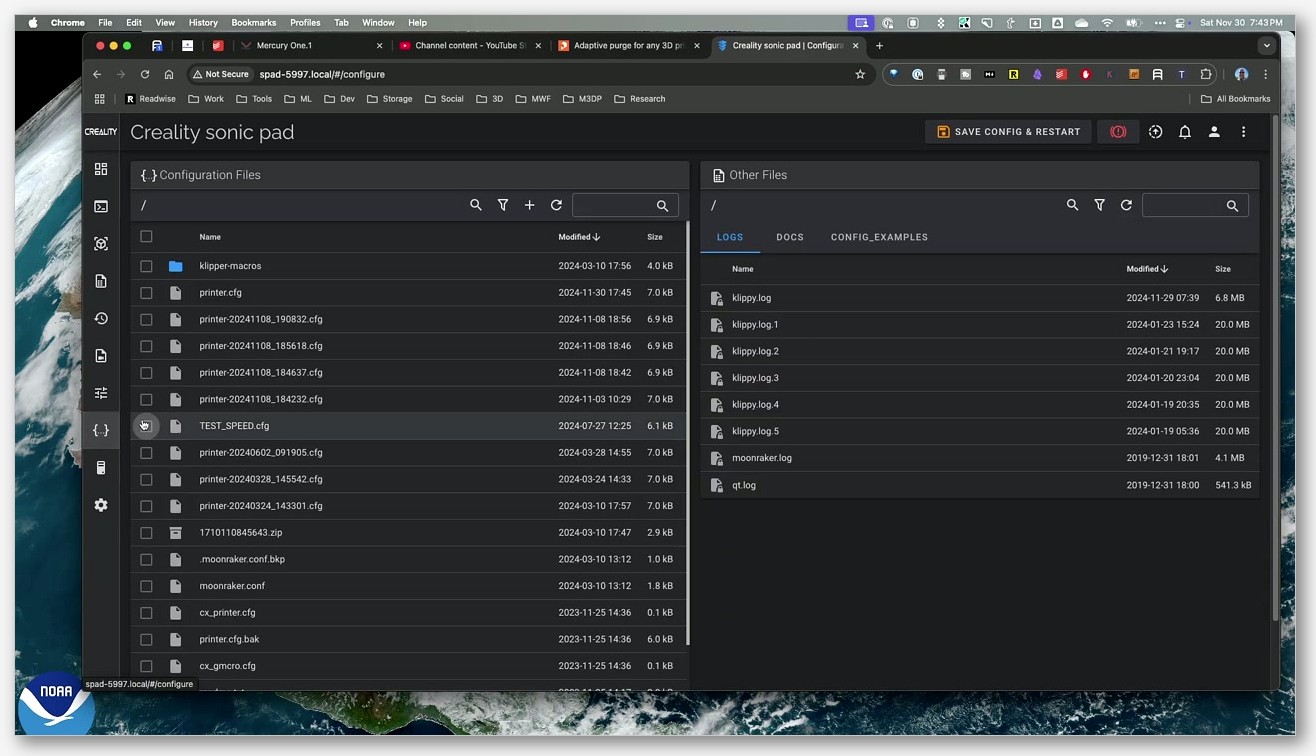
There are two places to find custom G-code editors in OrcaSlicer, and people confuse them constantly. The first is the Printer profile. To get there you open the program, select your printer profile, click the small pencil icon next to it, then navigate to the Machine G-code tab. The Obico team has a clean walkthrough of this exact path at obico.io, and the path is identical in every 2.3.x build I’ve used. That tab holds every per-machine hook: Start, End, Between Object, Before Layer Change, Layer Change, and a handful of more specialised slots I’ll walk through below.

The second place is the Filament profile. Open Filament settings (not Printer settings) and you’ll find a pair of fields labelled Start G-code and End G-code. Yes, the labels are literally the same words as in the Machine profile, which is why people post screenshots in Discord asking why their bed isn’t preheating from “Start G-code” when they’ve actually only edited the per-filament version. To keep the two straight in your own head, I find it useful to refer to them by their internal config keys: the machine-profile field is machine_start_gcode, and the filament-profile field is filament_start_gcode. Those are the names that show up in error messages, in the source, and in every wiki page you’ll read.
One important note before we go any further. There is no user-facing “Color Change G-code” field in OrcaSlicer’s Machine G-code tab. PrusaSlicer has one, OrcaSlicer’s source code still has a color_change_gcode placeholder-parser hook (you can see it invoked around line 4162 of GCode.cpp), but the validation line for it at GCode.cpp:1969 is commented out, which means the editor never appears. Color changes in OrcaSlicer are inserted through the G-code preview’s vertical slider, not through a custom G-code editor field. I see that confused in forum posts at least once a week.
The full list of machine-profile custom G-code fields
This is the reference section. If you bookmark one part of the article, make it this one. Every label below is pulled verbatim from OrcaSlicer’s PrintConfig.cpp via the def->label = L(...) strings. The L() macro is the i18n marker, so what you see in the source is exactly what the UI renders in English.
| Internal key | UI label | When it fires |
|---|---|---|
machine_start_gcode |
Start G-code | Once at the start of the entire print, before the first move. |
machine_end_gcode |
End G-code | Once at the end of the entire print, after the last extrusion. |
printing_by_object_gcode |
Between Object G-code | Between objects when you print object-by-object (sequential mode). |
before_layer_change_gcode |
Before layer change G-code | At every layer change, before the Z lift. |
layer_change_gcode |
Layer change G-code | At every layer change, after the Z lift. |
time_lapse_gcode |
Timelapse G-code | Wherever the timelapse trigger is inserted in the layer cycle. |
wrapping_detection_gcode |
Clumping detection G-code | Used by clumping/wrapping detection routines. |
change_filament_gcode |
Change filament G-code | When filament is changed, including T commands to trigger tool change. |
change_extrusion_role_gcode |
Change extrusion role G-code | When the extrusion role changes (perimeter, infill, etc.). |
process_change_extrusion_role_gcode |
Change extrusion role G-code (process) | Same trigger as above; runs after the machine and filament versions. |
filament_change_extrusion_role_gcode |
Change extrusion role G-code (filament) | When the extrusion role changes for the active filament. |
machine_pause_gcode |
Pause G-code | Used as the pause-print code, insertable from the G-code viewer. |
template_custom_gcode |
Custom G-code | Generic custom code slot, useful for one-off insertions. |
The tooltips in the source spell out the timing very clearly. before_layer_change_gcode is described verbatim as “This G-code is inserted at every layer change before the Z lift,” and layer_change_gcode as “This G-code is inserted at every layer change after the Z lift.” That single word, before or after, decides whether your conditional fan tweak or M117 progress message fires while the nozzle is still at the previous layer’s height or after it’s already lifted to the new one. If you’re triggering a camera, you almost always want it after the Z lift so the snapshot doesn’t catch a blob mid-layer.
The two default values worth memorising are at PrintConfig.cpp lines 5762 and 1947 respectively. Default machine_start_gcode is G28 ; home all axes followed by G1 Z5 F5000 ; lift nozzle. Default machine_end_gcode is M104 S0 ; turn off temperature, then G28 X0 ; home X axis, then M84 ; disable motors. Both are deliberately bare. They’re meant as placeholders, not as production sequences, and you should not ship a printer profile to anyone else with the defaults still in place.
Counting carefully: the s_CustomGcodeSpecificPlaceholders map in PrintConfig.cpp around line 11010 declares 15 custom-G-code keys in total. Twelve of those live on the Machine G-code tab, two (filament_start_gcode, filament_end_gcode) live on the Filament tab, and one (file_start_gcode) is an internal pipeline hook with no UI surface. So when I say OrcaSlicer has “15 hooks,” that’s the strict count from the source map, not a marketing number.
Per-filament Start G-code and End G-code
The two filament-profile fields, filament_start_gcode and filament_end_gcode, are stored internally as coStrings. That’s the option type for a vector of strings, one entry per filament slot. The UI label for the first is “Start G-code” and the tooltip reads “Start G-code when starting the printing of this filament.” The default value is a single space, which the parser treats as effectively empty. This pattern is the same one you’d find in any Slic3r descendant, but it bites people who expect a single string and find that PrusaSlicer-style multi-extruder configs auto-expand it into per-slot entries.
What gets injected into filament_start_gcode? Per the context map, only one extra variable: filament_extruder_id. That’s a one-based or zero-based integer (the source defines it as “The current extruder ID. The same as current_extruder”) which lets you write a filament profile that branches on which physical extruder it landed on. It does not get layer_num or layer_z at the moment of the per-print initial filament start, because that block runs before layer 1 exists. There’s a subtlety: when filament_start_gcode is invoked later in the print during a multi-material toolchange, the local config has layer_num added (you can see that around GCode.cpp lines 783 and 1067), but you should not rely on that for the initial prime block.
I treat per-filament Start G-code as the place to put filament-specific tweaks that don’t belong in the printer’s universal block. PETG-only pressure-advance values, an extra 5 degrees of bed heat for ABS, an air-filter activation line for ASA. It’s also where I drop per-material purge-length adjustments on a multi-material setup, which is a much cleaner pattern than stuffing every variant into a giant conditional in the machine block.
The placeholder language: brackets, braces, and conditionals
OrcaSlicer’s placeholder parser, defined in PlaceholderParser.cpp, supports two distinct syntaxes that coexist in the same file. You can mix them line by line and the parser handles each form independently. Knowing which one you’re using matters because the legacy form is much more forgiving and the modern form gives you the actual expression engine.
The legacy form is square brackets: [name]. It looks up name in the config and substitutes its string representation. Vector variables (like nozzle_temperature_initial_layer, which is a list with one entry per extruder) substitute the entry for the current extruder by default. You can index explicitly with [name[0]] if you want a specific slot. This is what almost every default profile uses, and it’s what every OrcaSlicer wiki example reaches for first. The grammar line at PlaceholderParser.cpp:2048 is literally (lit('[') > legacy_variable_expansion(_r1) [_val+=_1] > ']'), which routes the bracketed token through a function called legacy_variable_expansion.
The modern form is curly braces: {expression}. Inside the braces you get a full expression language, with arithmetic, comparisons, vector indexing, a set of helper functions (min, max, int, round, digits, repeat), and most importantly the conditional construct. The conditional keywords are if, elsif, else, endif, and then (you can see the grammar rules around PlaceholderParser.cpp:2071 and 2085 to 2093). A typical pattern looks like {if printer_notes=~/.*VERBOSE.*/}M117 Layer [layer_num]{endif}. Notice how the conditional is in braces but the variable substitution inside the message is in brackets, that’s the legacy form embedded inside the modern conditional, and the parser handles it fine.
Three rules to internalise. First, names are case-sensitive snake_case and must match the config keys exactly. Capitalising or rearranging letters is the most common reason an expression silently fails. Second, the two forms can be mixed, but the conditional construct only exists in the brace form. Third, if you reference a variable that is not injected for the hook you’re editing, you don’t always get a hard error. Sometimes you get an empty substitution, which can produce silently malformed lines like G1 Z F5000. The strictness of the parser changed somewhere around 2.3.0, which is why issue #9364 reports configs that worked in 2.2 throwing parse errors in 2.3.
Which variables you can use in each hook
This is the table the entire article exists for. It’s a faithful reading of the s_CustomGcodeSpecificPlaceholders map in PrintConfig.cpp. The variables listed in each row are the context-injected ones that are added on top of the global config at the moment that hook is evaluated. The global config (which I’ll cover right after) is always available everywhere.
| Hook | Context-injected variables |
|---|---|
file_start_gcode |
(none) |
machine_start_gcode |
(none) |
machine_end_gcode |
layer_num, layer_z, max_layer_z, filament_extruder_id |
before_layer_change_gcode |
layer_num, layer_z, max_layer_z |
layer_change_gcode |
layer_num, layer_z, max_layer_z |
timelapse_gcode |
layer_num, layer_z, max_layer_z |
change_filament_gcode |
layer_num, layer_z, max_layer_z, next_extruder, previous_extruder, fan_speed, first_flush_volume, second_flush_volume, flush_length_1 through flush_length_4, new_filament_e_feedrate, new_filament_temp, new_retract_length, new_retract_length_toolchange, old_filament_e_feedrate, old_filament_temp, old_retract_length, old_retract_length_toolchange, relative_e_axis, toolchange_count, toolchange_z, travel_point_1_x, travel_point_1_y, travel_point_2_x, travel_point_2_y, travel_point_3_x, travel_point_3_y, x_after_toolchange, y_after_toolchange, z_after_toolchange |
change_extrusion_role_gcode |
layer_num, layer_z, extrusion_role, last_extrusion_role |
filament_change_extrusion_role_gcode |
layer_num, layer_z, extrusion_role, last_extrusion_role |
process_change_extrusion_role_gcode |
layer_num, layer_z, extrusion_role, last_extrusion_role |
printing_by_object_gcode |
(none) |
machine_pause_gcode |
(none) |
template_custom_gcode |
(none) |
filament_start_gcode |
filament_extruder_id |
filament_end_gcode |
layer_num, layer_z, max_layer_z, filament_extruder_id |
The single most important row here is the one for machine_start_gcode. It’s empty. Read that again: there are zero context-injected variables for the Start G-code field. [layer_num] doesn’t work there. [layer_z] doesn’t work there. {max_layer_z} doesn’t work there. Anything that depends on knowing which layer you’re on is undefined at start-of-print time, because no layers have been emitted yet. This is the trap that gets the most people, and it’s why my Ender 3 sniffed the bed on that rainy Tuesday.
What you can reference in machine_start_gcode is the global config, set during print initialization in GCode.cpp around lines 2803 to 3000. There are roughly 70 of these. The ones you’ll actually use day to day are nozzle_temperature_initial_layer (a list, with the bare form auto-indexed to the active extruder), bed_temperature_initial_layer_single (a resolved single integer, this is the one most start scripts want), first_layer_temperature and first_layer_bed_temperature (SoftFever-added aliases that mirror PrusaSlicer’s naming for compatibility), current_extruder, current_hotend, initial_extruder, print_bed_size, max_print_height, z_offset, plate_name, and total_layer_count. The full list runs to about 70 entries and is documented inline in GCode.cpp.
Writing a clean Marlin start and end G-code
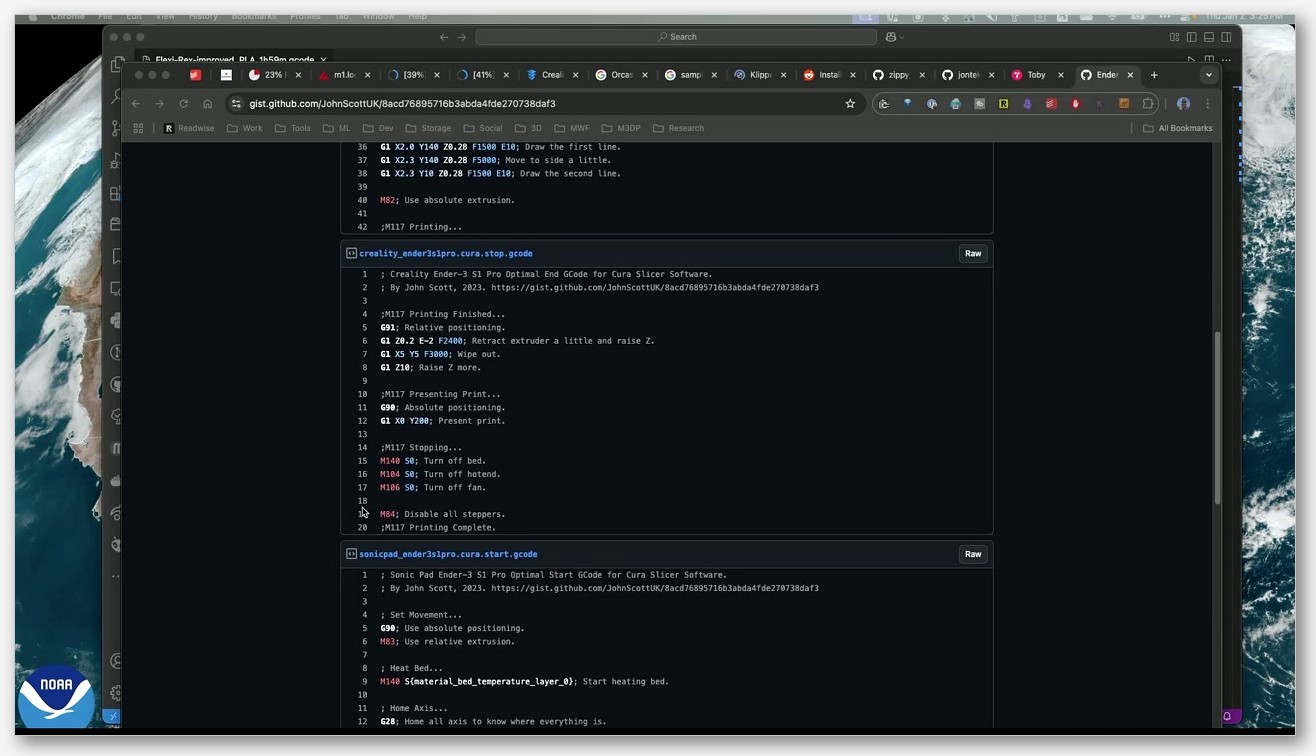
On a Marlin printer, the slicer has to do everything. There’s no printer-side macro layer, so the start block is your only chance to bring the machine from “just powered on” to “ready to extrude.” Here’s the sequence I use as a baseline on every Marlin rig I own, with each command’s behaviour pulled verbatim from the official Marlin docs.
; ---- OrcaSlicer Marlin Start G-code ----
M82                                          ; absolute extrusion
M140 S[bed_temperature_initial_layer_single] ; bed heat, do not wait
M104 S140                                    ; preheat nozzle to 140
G28                                          ; home all axes
G29                                          ; bed leveling (if equipped)
M190 S[bed_temperature_initial_layer_single] ; wait for bed
M109 S[nozzle_temperature_initial_layer]     ; wait for nozzle
G92 E0                                       ; reset extruder
G1 X0.1 Y20  Z0.3 F5000.0                    ; move to purge start
G1 X0.1 Y200 Z0.3 F1500.0 E15                ; draw purge line
G92 E0                                       ; reset extruder
G1 Z2.0 F3000                                ; lift before first move
The order matters. The Marlin docs describe M140 as “Set a new target temperature for the heated bed and continue without waiting.” Pairing that with M190 (“optionally sets a new target temperature for the heated bed and waits for the target temperature to be reached before proceeding”) lets the bed start heating while homing and meshing happen in parallel, then blocks at M190 only if the bed isn’t already at temperature. M104 (“Set a new target hot end temperature and continue without waiting”) preheats the nozzle to a soft 140 degrees so it can warm up during homing without oozing all over your purge line. M109 finally blocks waiting for the full print temperature once the bed is also up.
The two G commands worth knowing in detail are G28 (“When you first start up your machine it has no idea where the toolhead is positioned, so Marlin needs to use a procedure called ‘homing’ to establish a known position”) and G92 (“Set the current position to the values specified”). The G92 E0 after the purge line is non-negotiable. Without it, the next extrusion command starts from wherever the extruder happened to land, which is usually 15 millimetres past zero, so OrcaSlicer’s first wall move will look like a small toolpath plus a fifteen-millimetre retraction. The result is air printing for the first layer or two.
For end gcode, I keep it minimal:
; ---- OrcaSlicer Marlin End G-code ----
M140 S0                  ; bed off
M104 S0                  ; hotend off
G91                      ; relative positioning
G1 Z2 E-3 F3000          ; lift and retract
G90                      ; absolute positioning
G1 X0 Y200 F3000         ; park
M84                      ; disable motors
OrcaSlicer’s default end block (visible at PrintConfig.cpp:1947) does the heat-off and motor-disable but skips the explicit lift-and-park. I add those because brushing the toolhead against a still-warm print while moving to the rest position has cost me prints before.
Writing OrcaSlicer Start G-code for Klipper
Klipper inverts the responsibility. The heavy lifting (preheating sequence, bed mesh, purge line, optional chamber control) lives in a printer-side macro that you define in printer.cfg. The slicer’s job is just to call that macro with the right parameters. The official Klipper Slicers page describes the call pattern for Slic3r derivatives as START_PRINT EXTRUDER_TEMP=[first_layer_temperature] BED_TEMP=[first_layer_bed_temperature], and the Voron community’s PRINT_START guide shows the canonical variant: PRINT_START BED=[first_layer_bed_temperature] EXTRUDER={first_layer_temperature[initial_extruder]+extruder_temperature_offset[initial_extruder]} CHAMBER=[chamber_temperature].
Here’s my baseline OrcaSlicer Start G-code for a Klipper printer:
; ---- OrcaSlicer Klipper Start G-code ----
M140 S0
M104 S0
PRINT_START EXTRUDER=[nozzle_temperature_initial_layer] BED=[bed_temperature_initial_layer_single]
The two zero-target commands at the top exist for a specific reason. The Klipper Slicers doc explicitly recommends prefixing the macro call with M140 S0 and M104 S0 so the slicer’s auto-inserted heating commands don’t fight the macro you’re about to call. If you don’t do this and your printer profile has the gcode flavor set to anything other than Klipper, OrcaSlicer can sneak its own M104 and M109 in around your PRINT_START, which then races your macro’s own heat-up sequence. Issue #4443 is exactly that failure mode. For more on getting OrcaSlicer talking to Klipper correctly in the first place, my OrcaSlicer Klipper setup guide walks the gcode-flavor toggle in detail.
Inside printer.cfg the corresponding macro looks roughly like this:
[gcode_macro PRINT_START]
gcode:
    {% set bed_temp = params.BED|default(60)|float %}
    {% set extruder_temp = params.EXTRUDER|default(200)|float %}
    M140 S{bed_temp}
    M104 S150
    G28
    M190 S{bed_temp}
    BED_MESH_CALIBRATE
    G1 X10 Y10 Z5 F6000
    M109 S{extruder_temp}
    LINE_PURGE
And the corresponding End G-code in OrcaSlicer is just PRINT_END on a single line, with the macro definition in printer.cfg handling cool-down, park, and motor-disable.
This is the place where I have to repeat the warning loudest. The slicer’s {...} syntax and Klipper’s {...} syntax look identical but are different languages. The Klipper macro’s {params.BED|default(60)|float} is Jinja2 evaluated by Klipper at runtime, after the slicer has already finished its work. The slicer’s {bed_temperature_initial_layer_single} is OrcaSlicer’s placeholder parser, evaluated at slicing time. They never meet. Don’t try to use {params.X} in the OrcaSlicer field, and don’t try to put {layer_z} inside your printer.cfg macro. The two systems live on opposite sides of the SD card.
The Klipper Command Templates doc spells out the Jinja2 rules. Parameters are always uppercase, always passed as strings, and accessed via the params pseudo-variable. The { ... } form evaluates expressions at runtime, and {% ... %} handles control flow. A typical guard pattern is {% set bed_temp = params.TEMPERATURE|default(40)|float %}. That filter chain converts the string parameter to a default if missing and then casts to float, which protects your macro against being called from the printer UI without arguments.
Bambu printers: what you can and can’t change
Bambu printers are the third category, and they behave differently enough that they deserve their own mental model. When you start a print on an X1C, P1S, P1P, A1, or A1 mini, the firmware itself runs a long preparation sequence before your custom machine_start_gcode ever gets a chance to execute. That sequence includes bed heating, the lidar bed-mesh check, the purge line, vibration compensation, and AMS housekeeping. The community-extracted P1S start block on the Bambu Lab forum is the cleanest reference I know of for what actually lives in the default profile.
What you’ll find in that default Bambu block is mostly M-code commentary that drives the firmware sequence at a fine level. The community-documented ones to know are M1002 gcode_claim_action: (announces which print phase the UI should show), M620 and M621 (AMS toolchange begin and end), M970 through M975 (vibration and resonance compensation control), M981 (spaghetti detector toggle), M73 (progress report), M412 (filament runout sensor), and G29.1 (printer-side bed mesh load). The Marlin-style M104, M140, M109, M190 still work and mean the same thing they do everywhere else. M83 sets relative E mode, M211 toggles software endstops.
Two important caveats. First, the M-code semantics above are reverse-engineered by the community, not published by Bambu. The forum thread linked above is the best single source, but there is no official Bambu M-code reference page. If you’re not sure what an M-code does on your printer, omit it rather than guess. Second, the firmware will run its own preparation regardless of what you write. You cannot use the slicer’s start block to skip homing or skip the lidar mesh check. You can layer customisations on top (move the purge to a different X position, change a vibration-compensation order, send an M117 to the screen) but you cannot replace the firmware sequence. Trying to do so by deleting M-codes you don’t recognise is the fastest way to end up in a state where the printer either hangs or fights your script for the first thirty seconds of every print.
The other Bambu trap is M600. On Marlin printers with ADVANCED_PAUSE_FEATURE compiled in, M600 pauses the print, unloads filament, and prompts the user to swap. Bambu firmware does not implement Marlin-style M600 the same way. If you put M600 in machine_pause_gcode on a Bambu profile expecting the same behaviour you’d get on a Voyager or Prusa, the print will not pause cleanly. Bambu’s pause and resume go through the printer UI or through internal commands like M400 U1, and color or filament changes happen via the AMS or the G-code preview slider, not via M600. The OrcaSlicer Bambu cloud and LAN guide covers the broader Bambu workflow including how to push customised G-code to the printer in the first place.
Layer-change macros that actually work
The two layer-change hooks are where most users start adding their own G-code, because the use cases are immediately satisfying: layer counters, fan ramps, timelapse triggers, conditional speed adjustments. Both hooks get exactly three context-injected variables: layer_num (one-based integer, “Index of the current layer. One-based (i.e. first layer is number 1).”) , layer_z (float, “Height of the current layer above the print bed, measured to the top of the layer.”), and max_layer_z (float, “Height of the last layer above the print bed.”).
The simplest useful pattern is a layer progress display on the printer LCD. Drop this into layer_change_gcode:
M117 Layer [layer_num] / [total_layer_count]
Notice the mix: layer_num is the context-injected variable for this hook, and total_layer_count is a global set during print initialization, so it’s available everywhere. M117 prints the message to the LCD on Marlin printers; on Klipper you’d use M117 the same way or call a custom macro like UPDATE_DELAYED_GCODE.
A more interesting pattern is a first-layer speed override using a conditional. This one ramps the feed-rate factor up over the first few layers to give the bed adhesion a slightly slower start:
{if layer_num<3}M220 S70{else}M220 S100{endif}
M220 is described in the Marlin M220 doc as the feed-rate factor control, and the conditional uses the brace-form template syntax with the verbatim if and else and endif keywords from PlaceholderParser.cpp. On layers 1 and 2 the printer runs at 70 percent, and from layer 3 onwards it runs at 100 percent.
For Klipper users running a timelapse plugin, the pattern is to put the trigger call in layer_change_gcode (after the Z lift, so the toolhead is out of the frame):
TIMELAPSE_TAKE_FRAME
The timelapse_gcode field exists as a separate hook for slicers and post-processors that have their own dedicated timelapse pipeline, but on a stock Klipper setup with the moonraker-timelapse plugin, putting the call in layer_change_gcode is the more reliable pattern because you control exactly when in the layer cycle it fires.
The choice between before_layer_change_gcode and layer_change_gcode comes down to where the Z lift happens. The tooltip is verbatim: “before the Z lift” versus “after the Z lift.” For a camera shot, use the after version so the snapshot catches the toolhead at the new layer height. For a fan-speed change that should apply to the upcoming layer, use the before version so the speed is correct before the first move of the new layer.
Change Filament G-code and the toolchange context
The change_filament_gcode hook has the richest context of any custom G-code field in OrcaSlicer. Per the placeholder map, it gets layer info (layer_num, layer_z, max_layer_z), the extruders involved (next_extruder, previous_extruder), the toolchange counter (toolchange_count), feedrate and temperature for both the old and new filament (old_filament_e_feedrate, new_filament_e_feedrate, old_filament_temp, new_filament_temp), retract lengths for both (old_retract_length, new_retract_length, plus the toolchange variants), and a full set of travel-point and post-toolchange coordinates (travel_point_1_x through travel_point_3_y, plus x_after_toolchange, y_after_toolchange, z_after_toolchange). It also gets the flush volumes (first_flush_volume, second_flush_volume, flush_length_1 through flush_length_4) and a few less-used flags like relative_e_axis.
The variable definitions in PrintConfig.cpp around line 11048 are explicit. previous_extruder is “Index of the extruder that is being unloaded. The index is zero based (first extruder has index 0).” next_extruder is “Index of the extruder that is being loaded. The index is zero based (first extruder has index 0).” That zero-based indexing matters because if you write conditionals like {if next_extruder==1}T1 LOAD{endif}, you’re targeting the second physical slot, not the first.
The most common practical use I have for change_filament_gcode is a manual-filament-change prompt on single-extruder multi-color prints, which on Marlin looks like:
M600 X50 Y50 Z[layer_z] B0
That sends the toolhead to a known parking position, raises Z to the current layer (using the injected layer_z variable, which is available in this hook), and triggers the filament-change pause. On Klipper you’d replace it with a call to your own PAUSE_FOR_FILAMENT_SWAP macro. On Bambu, as discussed in the previous section, neither pattern applies cleanly because Bambu does not implement Marlin-style M600.
Common mistakes and how to avoid them
I’ve made every mistake on this list at least once. Most of them are documented in the OrcaSlicer GitHub issue tracker, which is the single best source for understanding what actually breaks in the wild.
Mistake 1: using [layer_z] in machine_start_gcode. This is the one that nuked my PEI sheet. Layer-aware variables are not injected into the start hook. They evaluate to nothing, your conditional silently fails, and the next move command can do something you didn’t intend. The fix is to use only global config variables in the start block (nozzle temps, bed temps, bed size) and reserve layer variables for layer-change, end, and toolchange hooks.
Mistake 2: forgetting G92 E0 before the purge line. OrcaSlicer’s default start block does not include a G92 E0 reset before its purge, and the parser does not insert one for you. If you copy-paste a start block from elsewhere and forget this line, your first extrusion command starts from the wrong E position and either over-extrudes a giant blob or under-extrudes by retracting through the wall.
Mistake 3: wrong extruder mode. OrcaSlicer’s gcode-flavor setting controls whether E is implicitly absolute or relative, but a custom start block can leave the printer in the wrong mode if you mix M82 and M83 commands without thinking about state. The safest pattern is to set the mode explicitly at the top of your start block and stick to one convention throughout.
Mistake 4: mixing slicer braces with Klipper Jinja2. See the long warning in the Klipper section above. The slicer’s {...} and Klipper’s {...} are different languages on different sides of the SD card. If you find yourself wanting to escape braces inside an OrcaSlicer field so they pass through to Klipper unevaluated, stop. Put the Jinja2 logic in your printer.cfg macro instead. There is no clean inline escape mechanism in OrcaSlicer’s placeholder field.
Mistake 5: using bare vector variables when you wanted a specific slot. Issue #2396 reports a “Not a variable name (activate_air_filtration)” parse error on filament_start_gcode. The root cause was that activate_air_filtration is a per-extruder bool that needs indexing as [activate_air_filtration[current_extruder]], not the bare form. Vector vars auto-index in some contexts and not others, and the strictness of that behaviour changed somewhere around 2.3.0.
Mistake 6: double-evaluated conditionals in filament_start_gcode. Issue #2673 documents a case where complex {if ...} conditional templates inside filament_start_gcode were doubly-evaluated in past versions, causing duplicated output. If you’re seeing duplicate lines in your sliced file, simplify the conditional or move the logic into the machine-profile field.
Mistake 7: leaving OrcaSlicer’s auto-heating around a Klipper macro call. Issue #4443 covers this. Make sure your printer profile’s gcode flavor is set to Klipper, and prefix the PRINT_START call with M140 S0 and M104 S0 to neutralise any auto-inserted heating commands. The OrcaSlicer troubleshooting master guide covers the broader category of “Klipper macro doesn’t behave the way I expected” symptoms.
Mistake 8: comment delimiter confusion. Klipper, Marlin, and Bambu all use ; as the line-comment delimiter. They do not accept # or //. If you see your custom block executing what should be a comment as if it were a command, check the delimiter.
Mistake 9: upgrading and finding configs broken. Issue #9364 reports “After updating to 2.3.0, my configs are broken: ‘Failed to generate G-code for invalid custom G-code’.” Users reported the parser became stricter post-2.3.0, so older PrusaSlicer-imported gcode that referenced undefined extruder-vector entries now throws. The fix is to walk every custom field, find the bare vector references, and either index them explicitly or use the SoftFever-added single-value aliases.
Mistake 10: assuming filename placeholders work everywhere. Issue #2720 documents that initial_filament_type is not available in the filename_format placeholder, because the filament context isn’t populated at the point filename formatting runs in the pipeline. This generalises: a variable being injected into one hook doesn’t mean it’s available in another.
Verifying your custom G-code before you print
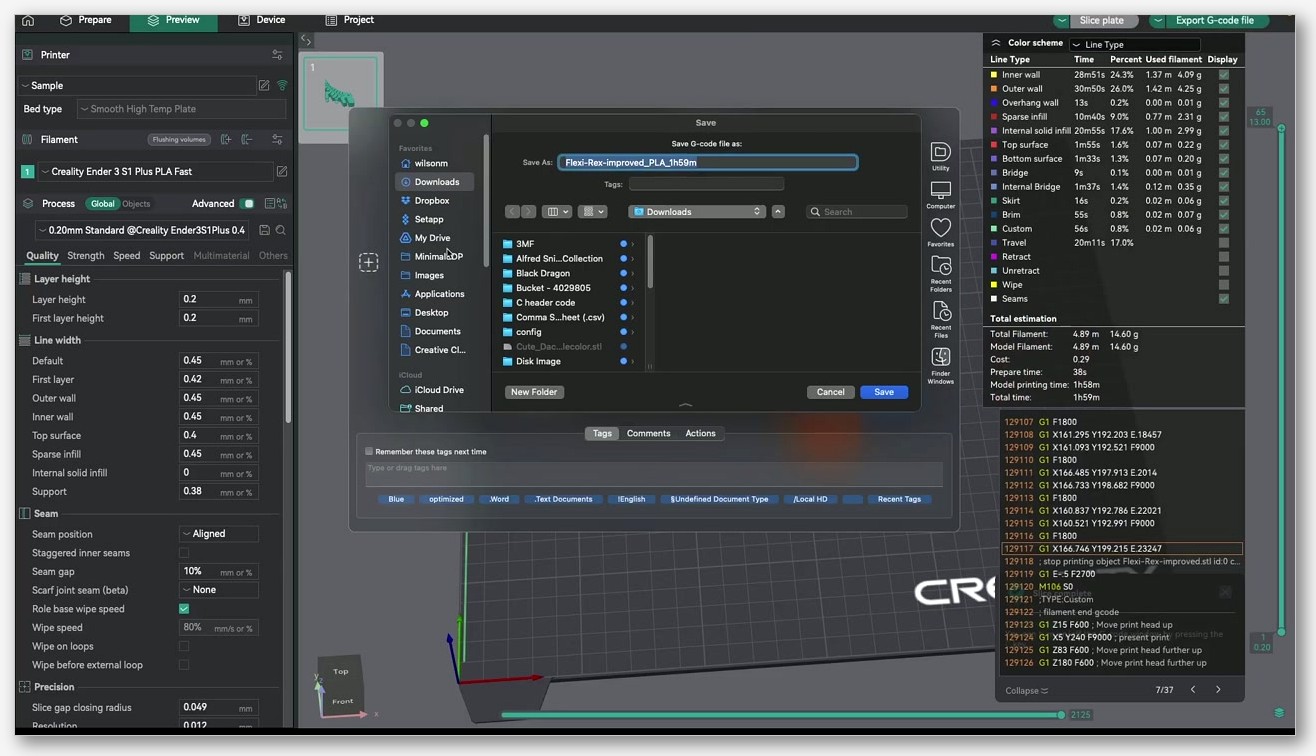
Never trust a custom block to “probably work.” OrcaSlicer’s G-code preview is the verification tool, and using it routinely is the difference between catching a typo at your desk and catching it via burned PEI. After slicing, switch to the Preview tab. The vertical slider on the right side lets you scrub through layers, and the layer-range filter lets you isolate the very first layer and the very last layer (where your start and end blocks live).
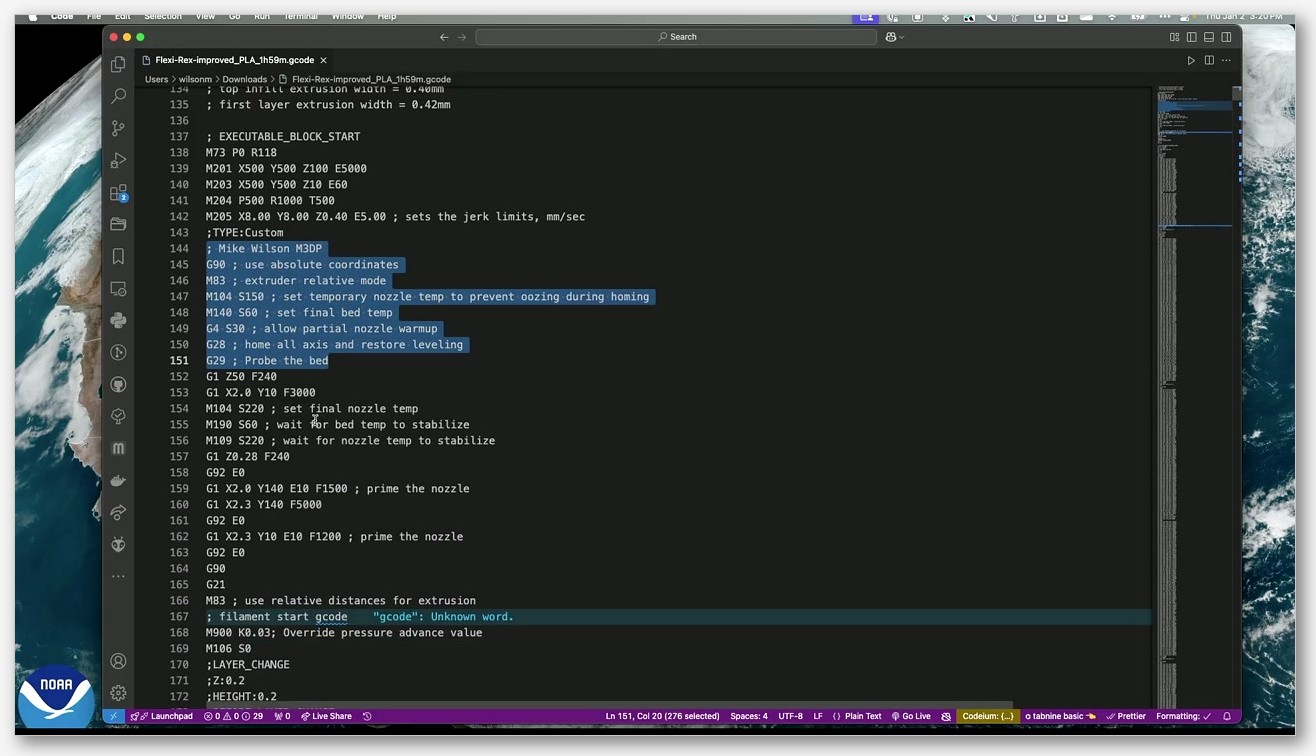
For a deeper inspection, export the gcode to file and open it in a text editor. Search for the comment markers OrcaSlicer adds around custom blocks (the slicer wraps your injected G-code with comment lines so you can find it in the stream). Look for any line where a placeholder didn’t substitute, which usually shows up as a malformed command with a missing value: M104 S or G1 Z F5000. Those are the smoking gun for an undefined variable.
OrcaSlicer 2.3.2 beta added an advanced G-code preview that surfaces additional metadata in the timeline. There’s a walkthrough of it on YouTube under the title “OrcaSlicer v2.3.2 Beta: How to Use the New Advanced G-Code Preview” if you want a visual tour. For day-to-day verification, the standard preview slider plus a text-editor export covers most issues.
FAQ
Does OrcaSlicer have a Color Change G-code field? No, there is no user-facing Color Change G-code editor in the Machine G-code tab. The color_change_gcode hook exists in the source (it’s invoked around line 4162 of GCode.cpp) but the validation line at GCode.cpp:1969 is commented out, which means no editor appears. To insert a color change, use the G-code preview’s vertical slider, right-click at the layer where you want the change, and use the menu options there. This differs from PrusaSlicer, which does expose the field.
Can I use [layer_z] or [layer_num] in Start G-code? No. The s_CustomGcodeSpecificPlaceholders map in PrintConfig.cpp lists zero context-injected variables for machine_start_gcode. Layer-aware variables are only available in before_layer_change_gcode, layer_change_gcode, timelapse_gcode, the toolchange and extrusion-role hooks, and the end hooks. Use global config variables (nozzle_temperature_initial_layer, bed_temperature_initial_layer_single, first_layer_temperature, first_layer_bed_temperature) for anything in the start block.
Why won’t M600 work on my Bambu printer? Bambu firmware does not implement Marlin-style M600 the same way the Marlin firmware does (Marlin’s M600 requires ADVANCED_PAUSE_FEATURE to be compiled in, per the Marlin M600 doc). Pause and resume on Bambu go through the printer UI or through internal commands. Color and filament changes happen through the AMS workflow or the G-code preview slider, not through M600.
Where do I put per-filament tweaks like a pressure-advance value or an air-filter activation? In Filament settings, not Printer settings. The per-filament Start G-code and End G-code fields are at filament_start_gcode and filament_end_gcode. Both are stored as a vector with one entry per filament slot, and only filament_extruder_id is injected as extra context.
How do I stop OrcaSlicer from inserting M104 and M109 around my Klipper PRINT_START call? Set the printer profile’s gcode flavor to Klipper, and prefix your PRINT_START call with M140 S0 and M104 S0. The Klipper Slicers doc spells this out explicitly, and issue #4443 covers the common failure mode where the slicer’s auto-heating fights the macro call.
Can I import PrusaSlicer custom G-code into OrcaSlicer as-is? Mostly, for basic [bracketed] substitutions. Complex conditional templates that worked in PrusaSlicer may parse-error in OrcaSlicer 2.3.x because the parser became stricter (see issues #2673 and #9364). If you’re migrating, walk every custom field, run a slicing pass, and inspect the exported file before printing. If something throws “Failed to generate G-code,” start by checking for bare vector references that need explicit indexing.
What’s the difference between Before Layer Change G-code and Layer Change G-code? The tooltips in PrintConfig.cpp are explicit. Before Layer Change G-code “is inserted at every layer change before the Z lift.” Layer Change G-code “is inserted at every layer change after the Z lift.” Use the before version for changes that should apply to the upcoming layer (fan speed, feedrate). Use the after version for things that depend on the toolhead being at the new layer height (camera triggers, M117 layer messages).
If your print is stopping mid-job because of a misbehaving pause or filament-change block, the companion guide on OrcaSlicer print stops mid-print covers the diagnostic flow in more depth, with the same source-cited approach used here. Custom G-code is one of the highest-leverage areas of the slicer, and a couple of hours spent understanding the placeholder context map pays back across every printer profile you’ll ever touch. When you’re ready to install the latest version, grab it from the canonical OrcaSlicer GitHub releases page.
Related OrcaSlicer guides
- OrcaSlicer for Beginners: Your First Print in 15 Minutes
- OrcaSlicer Webcam and Live View Setup for Remote Monitoring
- How to Send G-code Wirelessly From OrcaSlicer: Per-Printer Walkthrough
- OrcaSlicer Spiral Vase Mode: Single-Wall Vases Done Right
- OrcaSlicer for Creality CR-10 Series: Profiles and Setup Guide