An eight-hour print stopped at hour six. I came back to the workshop expecting to peel a finished benchy-cluster off the plate and instead found the toolhead parked over the front of the bed, the hotend cold, and a “Paused” notification glowing on the LCD. No error code. No filament jam. The spool still had three quarters of a kilo of PLA on it. I had no idea what halted the print, and I burned forty minutes scrolling through logs before I figured it out.
It was me. Or more accurately, it was a right-click I’d made in OrcaSlicer’s vertical layer slider three days earlier on a different project, and the pause marker had quietly survived into the sliced file I sent that morning. That’s the thing about mid-print stops: they look like firmware bugs, hardware failures, or cosmic rays, and most of the time they’re a setting you (or your slicer) inserted on purpose, then forgot about.
This guide walks the four layers where a mid-print halt can originate, in the triage order you should actually use. If you’re in the middle of a stopped print right now, jump to the triage section first and come back for the deeper stuff later.
Why prints stop mid-job: the four layers that can halt motion
A mid-print stop feels like one event, but it’s almost always one of four systems doing exactly what it was told to do. Name the layer that halted motion and you can fix the right thing instead of swapping parts or reinstalling firmware.
- The slicer (OrcaSlicer) inserts halt instructions into the gcode at slice time. M600, M0, M1, M25, custom pause macros, manual filament change markers, post-processing scripts. They’re you, your profile, or a script doing what you configured.
- The host (your PC running OrcaSlicer, a Pi running Mainsail or Fluidd, a Bambu cloud session, an OctoPrint instance) streams gcode to the printer. If the host crashes or the link drops, the printer stops moving.
- The firmware (Marlin, Klipper, Bambu’s stack, Prusa-Firmware) can decide on its own to halt. Thermal-runaway protection trips. M112 fires. Klipper logs an MCU shutdown. The firmware is protecting itself.
- The sensors and hardware (filament runout switch, AMS feeder, BLTouch, inductive probe, X1 chamber camera) can pull the cord. The firmware translates a sensor event into a halt, but the trigger is physical.
Every section below ladders back to one of those four layers. The first question when diagnosing is not “what broke” but “which layer fired first”.
Slicer-side halts
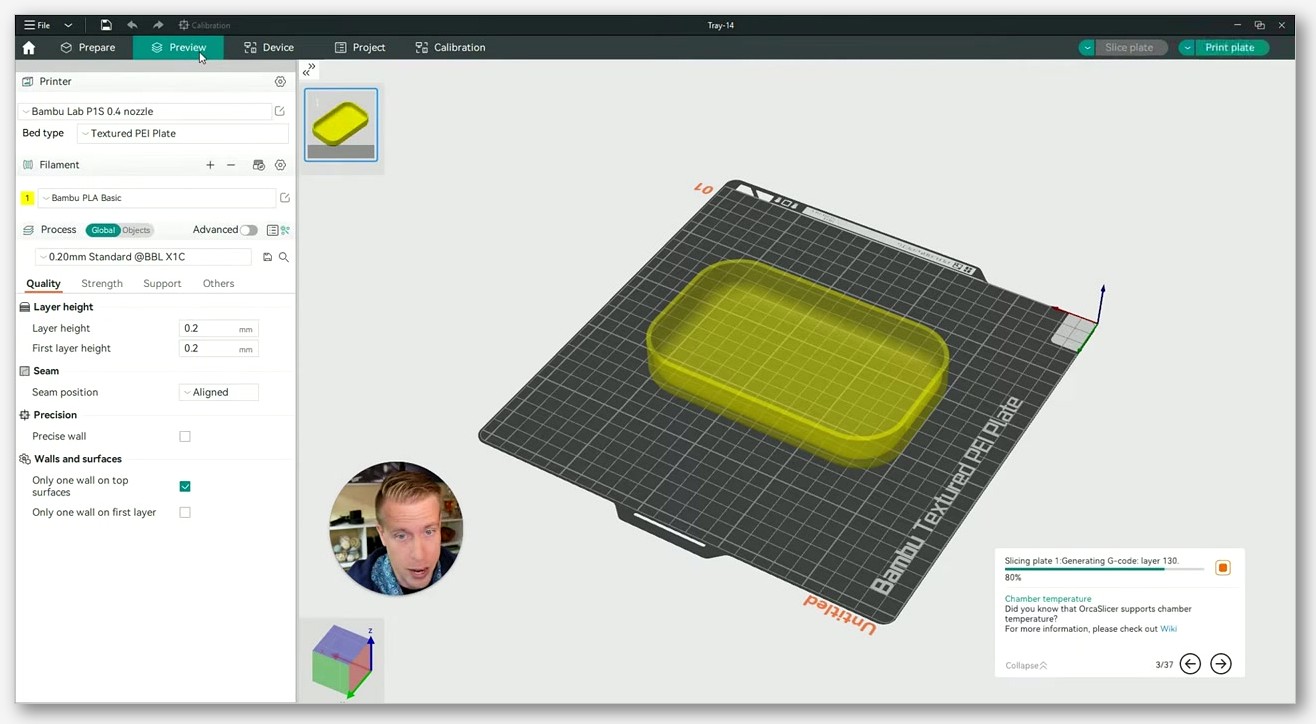
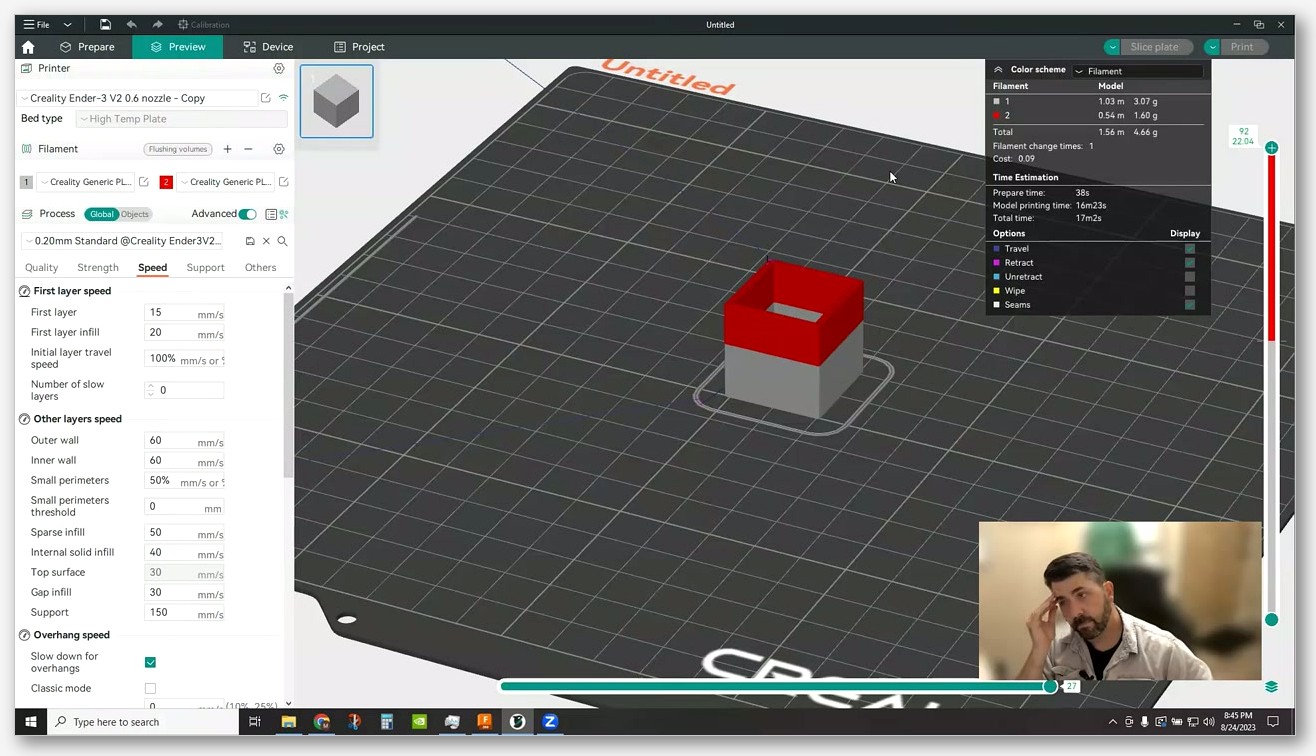
OrcaSlicer can put halt instructions into your gcode in five places. The right-click menu on the vertical layer slider in the Preview tab inserts pauses, change-filament markers, and custom gcode at a specific Z. The Change Filament G-Code field at Printer Settings > Machine G-Code writes whatever macro you’ve configured (usually M600 for Marlin, a PAUSE macro for Klipper). The Manual Filament Change toggle at Printer Settings > Multimaterial injects a pause at marked layers. Custom Before/After Layer Change G-Code fields run at every layer transition. And post-processing scripts under Process > Output Options can rewrite the file on its way out.
OrcaSlicer’s GitHub Discussion #477 spells out how the vertical slider menu inserts pause and M600 markers. Issue #6334 is the still-open enhancement request for adding pause on the horizontal (within-layer) slider, which currently does not support it. If someone told you “just pause anywhere in a layer in OrcaSlicer”, that’s wrong for 2.3.x stable.
Host-side halts
If the host is streaming gcode line-by-line over USB or LAN and the host crashes, the printer stops because no more lines are coming. Rare for Bambu users (the printer runs the file off its own storage) and rare for Klipper users with Mainsail or Fluidd. Not rare for OrcaSlicer users sending prints to a Marlin printer via the slicer’s send-to-printer feature, especially after 2.3.0. Crash reports under Issues #9081, #9026, #11814, and #7580 describe OrcaSlicer crashing on connection or send. Fix: update to the latest 2.3.x, or better, never stream from PC for long prints.
Firmware-side halts
The firmware aborts on its own when something exceeds a safety threshold. On Marlin, that’s thermal-runaway protection (temperature drifts further than the configured hysteresis for longer than the configured period, with Marlin upstream defaults around 4 degrees C and 40 seconds, though vendor forks change these). On Klipper, it’s an MCU shutdown logged in klippy.log, triggered by a missed timer, a thermistor out of range, a stepper driver overheating, or a host-MCU timeout. M112 is the explicit emergency-stop command. Per marlinfw.org/docs/gcode/M112.html, “M112 is NOT a safety-rated ‘Emergency Stop’ in the formal sense”; it’s a control stop that requires EMERGENCY_PARSER for instantaneous response.
Sensor and hardware halts
Physical inputs. A filament runout switch trips. An AMS feeder reports an empty slot. A BLTouch fails to deploy or retract during a mid-print probe (rare, only if a macro forced a re-home). On Bambu X1, the chamber camera plus AI model flags a high-confidence spaghetti event. The A1 doesn’t have this feature because it’s an open-frame printer without a chamber camera, so don’t blame “AI failure detection” if your A1 stopped on its own.
Triage in 60 seconds: read the printer screen first
The biggest mistake I see in 3D-printing forums is people opening the slicer first to debug a stopped print. The slicer wasn’t running when the print stopped. The printer was. Read the printer’s screen, or the web UI talking to the printer, before anything else.
Marlin LCD common messages
- Thermal Runaway / Heating Failed: the hotend or bed temperature didn’t track the setpoint within the configured window. The print is halted and heaters are off. Power-cycle to clear, but do not just retry. Marlin Thermal Runaway is almost always a hardware issue (loose thermistor, fan blowing on the heater block, a heater cartridge slipping out), not a false alarm.
- Probing Failed: a Z probe didn’t deploy, retract, or trigger. Far more common at start-of-print than mid-print. If you see it mid-print, look for a custom layer-change macro that called G28 or G29.
- Print Paused / Filament Change: M600 or M0/M1/M25 ran. Almost always an inserted pause or a runout sensor firing. Not a firmware fault.
Vendor LCDs (Creality, Anycubic, Elegoo) translate the same Marlin messages, sometimes badly. The underlying meaning is identical.
Klipper-driven UIs (Mainsail and Fluidd)
- Look at the top banner. A red bar with “MCU ‘mcu’ shutdown: Timer too close” or similar is a firmware abort. You cannot resume; restart.
- A yellow banner or “Paused” state means a PAUSE macro ran. You can usually resume from the UI button after fixing the trigger.
- If neither shows up but streaming stopped, the host (Pi or x86) may have died.
The file you want is klippy.log, usually at ~/printer_data/logs/klippy.log. The last hundred lines almost always include the trigger. Mainsail has a Logs section under Configuration; Fluidd has a similar panel. The Klipper community asks newcomers to upload klippy.log to a paste service when reporting a halt because the file contains the answer 90% of the time.
Bambu Lab HMS codes
Bambu’s stop messages are HMS codes (four groups of four hex digits, like HMS_0C00-0300-0003-0008). The wiki at wiki.bambulab.com lets you look up any code and get the documented cause and remedy. The 0C00-0300-0003-0008 code is AI spaghetti detection per wiki.bambulab.com/en/h2/troubleshooting/hmscode/0C00_0300_0003_0008. Filament runout and AMS feeder failures each have their own codes. The touchscreen shows the code with a Help button that links to the wiki page. Use it.
OrcaSlicer-side causes (and how to verify in the sliced gcode)
If the printer screen says “Paused” or “Filament Change” and there’s no hardware issue, the trigger is in your gcode. OrcaSlicer writes plain text gcode. Open the .gcode (or the .gcode portion of a .gcode.3mf, which 2.3.0 switched to as the default extension) in any text editor and search for halt commands.
M600: filament-change pauseM0,M1: unconditional stop, resume only on user inputM25: SD print pausePAUSE: Klipper PAUSE macro call; FILAMENT_CHANGEor similar Orca-injected comment markers
If any of those appear before the layer where your print stopped, that’s your halt. From there, either remove the marker and re-slice, or accept the pause and configure your printer to handle it gracefully.
The vertical layer slider’s right-click menu
This is the most common silent culprit. Right-click a layer marker on the vertical slider in the Preview tab (not the track itself, the marker arrow) and you get a context menu with Add Pause, Add Change Filament, and Add Custom Gcode. Click any of those and a small icon appears on the slider. The gcode for that pause or change is now baked into the file.
- Markers persist across slice operations. If you added a pause at layer 120 last week and re-slice today, the pause is still there. Right-click the marker and choose Delete to remove it.
- Markers don’t transfer between projects. They’re project-scoped.
- The Add Pause entry can appear greyed out depending on printer profile and loaded filament count, per the Bambu Lab forum thread “Add Pause in drop down greyed out” at forum.bambulab.com/t/add-pause-in-drop-down-greyed-out/36862. If you can’t insert a pause, check that at least one filament is loaded and your printer profile doesn’t disable pauses for the configured workflow.
For a deeper walkthrough of the M600 workflow, our full M600 manual filament change guide covers the slicer side and printer-side macros.
Manual Filament Change under Printer Settings > Multimaterial
The Manual Filament Change toggle changes how the layer slider’s filament-change marker is interpreted: instead of triggering an AMS tool change, the printer pauses for a manual swap. The OrcaSlicer wiki page printer_multimaterial_setup documents it, and Issue #3682 (“I don’t understand how to use Manual Filament Change”) has a user-side description.
This is the setting people enable for a one-off two-color print on a single-extruder printer, forget to disable, and then watch a normal print stop because the layer marker is being interpreted as a manual pause. Check this toggle before any important slice.
Change Filament G-Code field
At Printer Settings > Machine G-Code > Change Filament G-Code, OrcaSlicer inserts a code block every time it schedules a filament change. The wiki text verbatim: “This G-code is inserted when filament is changed, including T commands to trigger tool change.” For Marlin, the recommended value is M600. For Klipper, point at your PAUSE macro or a custom M600 macro; GitHub Issue #2230 (“Change filament feature (M600) macros for Klipper”) covers the consensus that bare M600 isn’t enough on Klipper because the stock M600 implementation is minimal. You want a PAUSE macro that handles park, temperature, idle timeout, and resume logic.
Before/after layer change gcode fields
These fields, on the same Machine G-Code page, are easy to misuse. Wiki wording verbatim: “Before layer change G-code” runs “at every layer change before the Z lift”; “Layer change G-code” runs “at every layer change after the Z lift”. These are not pause hooks. They’re for LED colors, beeps, or fan tweaks. Drop M0 in either field and your printer halts at every layer change for the rest of the print. I’ve seen people do this trying to inspect every five layers and then wonder why they press Resume thirty times an hour.
Custom post-processing scripts
Under Process > Output Options > Post-processing scripts, attached scripts rewrite the gcode after OrcaSlicer slices but before saving. The common one is kageurufu’s preprocess_cancellation, which adds Klipper exclude_object markers. Any script in that field rewrites your output. If you grabbed a borrowed config from a Reddit thread and there’s a script attached, it may be inserting pauses or markers you didn’t ask for. Check the list. If you don’t recognize what’s in it, remove it and re-slice.
Filament runout: how it actually works under the hood
Runout is the second most common mid-print stop cause after user-inserted pauses, and one of the most misunderstood. People say “my runout sensor fired” when the filament was fine and the sensor itself glitched. People also say “the runout didn’t fire” when the spool went empty and the sensor wasn’t even connected. Here’s how runout actually works on the three firmware ecosystems most OrcaSlicer users run.
Marlin M412 in detail
Marlin uses the M412 command to control filament-runout detection. Per the Marlin documentation at marlinfw.org/docs/gcode/M412.html, the parameters are:
S: Flag to enable or disable filament runout detection. If omitted, the current enabled state is reported.H: Flag to enable or disable host handling of a filament runout (requires HOST_ACTION_COMMANDS in firmware).D: For a filament sensor located in front of the extruder gears, sets the distance in mm from the runout sensor to the extruder gears (requires FILAMENT_RUNOUT_DISTANCE_MM).R: Flag to reset the filament runout sensor. Not needed if S is also provided.
Marlin docs: “When filament sensors are enabled, Marlin will respond to a filament runout by running the configured G-code (usually M600 Filament Change).” A runout trip is, by default, an M600 trip. If the printer pauses for filament when your spool is full, the sensor is glitching: a misaligned switch, a worn spring, or a sensor mounted too far from the extruder.
The D parameter is underused. If your sensor sits a meter from the extruder along the bowden, the firmware needs that distance to time M600 correctly because it has to keep extruding the filament already past the sensor before pausing. Set D, save with M500, and you’ll get cleaner pause timing.
Klipper filament_switch_sensor and runout_helper
Klipper handles runout through the [filament_switch_sensor] config section. The minimal block, straight from Ellis’ Print Tuning Guide (ellis3dp.com/Print-Tuning-Guide/articles/useful_macros/pause_resume_filament.html), looks like:
[filament_switch_sensor filament_sensor]
switch_pin: ^P1.24
pause_on_runout: True
The ^ in ^P1.24 is a pullup. It’s required to avoid false triggers from electrical noise. Skip it and the sensor fires randomly with no filament involvement. I’ve watched people debug this for hours, swapping switches, when the fix was one character of config.
The standard Klipper PAUSE macro Ellis documents does much more than stop the toolhead. It Z-hops, parks (front-center is common), disables the filament sensor with SET_FILAMENT_SENSOR SENSOR=filament_sensor ENABLE=0, turns the hotend off with M104 S0, and extends idle timeout with SET_IDLE_TIMEOUT TIMEOUT=43200 (12 hours). RESUME re-enables the sensor, reheats with M109 S{etemp}, primes, and returns to the print location. If your Klipper printer pauses but doesn’t park, doesn’t cool, or times out in 15 minutes, your PAUSE macro is missing these pieces.
Pointing OrcaSlicer’s Change Filament G-Code at a bare M600 on Klipper is a frequent mistake. Klipper’s M600, if defined at all, may lack the park/cool/timeout logic PAUSE has. Better: define PAUSE properly, then make M600 a one-line macro that calls PAUSE.
Bambu Lab AMS auto-switch
Bambu’s AMS is the only consumer system I know of that actively tries to recover from runout instead of just pausing. The Bambu wiki page “AMS main functions and workflow introduction” at wiki.bambulab.com/en/ams/manual/ams-function-introduction documents the workflow: when a spool runs empty, the AMS attempts to switch to another loaded slot containing the same filament. The community-confirmed behavior, per forum.bambulab.com/t/automatically-switching-slots-when-filament-is-out/62227, is that AMS only switches if a second slot is preloaded with the same filament type and color mapping set at slice time. It doesn’t pick a “close enough” PLA. With one slot loaded, the AMS pauses and prompts.
For X1 without AMS, the printer pauses for manual filament insertion just like a Marlin M600. The forum thread “Resuming from Filament runout on X1 without AMS” at forum.bambulab.com/t/resuming-from-filament-runout-on-x1-without-aoms/7901 has the workflow.
For more on configuring the AMS in OrcaSlicer specifically, our Bambu AMS setup guide covers slot mapping.
Recovering a print after runout
On Marlin, after M600 fires and you’ve loaded new filament, the LCD prompts to continue. The hotend re-heats to the resume temperature (set by M600’s R parameter), the toolhead returns, and printing resumes.
On Klipper, the RESUME command (console, UI button, or macro) re-enables the sensor, reheats, and primes. The standard primer squirts a couple of mm of filament into a wipe area before returning. Skip the primer and you’ll get under-extrusion on the first lines after resume.
On Bambu, the touchscreen guides you. Insert the new spool, confirm, the printer purges, you confirm clean, and printing resumes.
One flag: runout pauses get misdiagnosed when the real issue is under-extrusion. Filament grinding in the extruder gears can trip the sensor from slack. Our under-extrusion troubleshooting article covers the symptoms if you’re not sure.
M600 filament change: the deliberate stop
M600 is the gcode for a planned filament-change pause: the deliberate cousin of a runout stop. You scheduled it, the printer obliged, and now the toolhead is parked waiting for you to swap filament.
How OrcaSlicer schedules an M600
Two paths: the vertical slider menu (right-click a layer, choose Add Change Filament; OrcaSlicer inserts the Change Filament G-Code block, typically M600 for Marlin or a PAUSE call for Klipper), and the Manual Filament Change workflow at Printer Settings > Multimaterial.
The Change Filament G-Code block is also called whenever OrcaSlicer schedules a multi-material tool change in a project with two or more filaments mapped. So if you’ve got a two-color print and the printer pauses between colors, that’s the M600 firing on schedule.
M600 parameters that matter for hobbyists
Per the Marlin docs at marlinfw.org/docs/gcode/M600.html:
B: number of beeps before pausingE: retract length before park (negative; default PAUSE_PARK_RETRACT_LENGTH)L: load length (negative; longer values for bowden printers)U: unload length (negative)X,Y: park positionZ: park lift (relative)R: resume temperatureT: target extruder, multi-tool only
For most users running OrcaSlicer with a Marlin printer, the only parameters worth setting are L (load length, important for bowden setups so new filament reaches the nozzle), U (unload length, set just longer than the distance from extruder to hot zone), and R (resume temperature, so you don’t have to hit Resume Hot from the LCD).
Klipper users: why bare M600 isn’t enough
Klipper’s stock M600 is minimal compared to Marlin’s. The community convention is to define M600 as a thin wrapper that calls PAUSE and let PAUSE do the heavy lifting (park, cool, idle-extend). GitHub Issue #2230 has community-shared macros. Set OrcaSlicer’s Change Filament G-Code to PAUSE if you have a robust PAUSE macro, or M600 if you’ve wired M600 to call PAUSE.
Single-extruder color changes versus AMS
On a single-extruder printer (most Ender variants, Prusa MK4 without MMU, Bambu A1 mini without AMS), color changes are M600 pauses you walk up to and swap filament for. OrcaSlicer’s color-painting feature maps per-region colors that share one extruder, with M600s scheduled at transition layers. Our OrcaSlicer color painting walkthrough covers the workflow.
With AMS or a multi-material unit, OrcaSlicer maps each filament to a slot and schedules a tool change. The big trap: leftover Manual Filament Change enabled from a previous project turns what should be an automatic AMS swap into a manual pause.
One thing about long pauses: filament oozing can leave blobs on the print. Retract more aggressively in the pause script if you see this.
Thermal runaway and other firmware aborts
Thermal runaway is the most-serious-sounding stop reason and the one least likely to be the slicer’s fault. It’s firmware protecting your house from a fire.
What thermal runaway protection actually does
Marlin’s logic monitors hotend, heated bed, heated chamber, and laser cooler, and trips a halt if measured temperature drifts more than the configured hysteresis from setpoint for longer than the configured period. Marlin upstream defaults per marlinfw.org/docs/configuration/configuration.html are roughly 4 degrees C and 40 seconds, but vendor forks (Creality, Anycubic) change these. Read your printer’s Configuration.h for exact values.
When the trigger fires, Marlin halts, disables heaters, and parks. The LCD shows “Thermal Runaway” or “Heating Failed”. Power-cycle to clear in most builds.
Common false triggers
- Loose thermistor: reports colder than actual block, firmware overcompensates with power, thermistor finally seats, firmware sees a sudden jump, protection trips.
- Part-cooling fan blowing on the heater block: fan cools the block faster than the heater compensates, temperature drifts below setpoint, protection trips.
- Drafty enclosure or open window: sudden draft across the hotend. Less common but documented.
- Heater cartridge slipping out of the block: cartridge slides back when the sock isn’t tight, the heater is heating air, eventually the cartridge cooks itself or protection trips.
The fix is always physical: tighten the thermistor, redirect the fan, snug the sock, replace the cartridge. Don’t disable thermal-runaway protection. Any “disable to test” step is a momentary, attended diagnostic only.
M112 emergency stop
Per Marlin docs, “M112 is NOT a safety-rated ‘Emergency Stop’ in the formal sense… This is functionally a control stop… Enable EMERGENCY_PARSER for an instantaneous M112 command.” With EMERGENCY_PARSER it executes immediately; without it, it queues. OrcaSlicer’s send-emergency-stop button, over USB or LAN, sends M112.
Firmware-triggered M112 is rare. Some heater-failure paths in Marlin emit it internally. If you see M112 in your log without pressing an emergency-stop button, treat it as a firmware fault and inspect heater wiring before re-running.
Klipper MCU shutdown
The Klipper equivalent. Common reasons logged in klippy.log:
- Timer too close: host couldn’t send a command in time, usually Pi overload or SD card I/O issues.
- Lost communication with MCU: USB cable, hub, or power problem. Common on Pi 4 with cheap cables.
- Heater not heating at expected rate: Klipper’s verify_heater trips, equivalent to Marlin thermal runaway. Configurable under
[verify_heater]. - ADC out of range: thermistor wire broke or shorted.
klippy.log is the answer. Find the last “MCU ‘mcu’ shutdown” line, read the reason. Klipper does not let you resume from MCU shutdown; you must restart.
Probe and re-home failures mid-print
Probe and re-home failures are mostly start-of-print problems. They happen mid-print only if something invokes the probe mid-job.
Three situations I’ve seen in the wild: a custom Layer Change G-Code calling G28 or G29 (rare; some people add these thinking they correct thermal drift, they don’t); a power-loss recovery resume that issues G28 before resuming and the probe fails to deploy; a user-triggered leveling macro from the touchscreen or web UI during the print.
BLTouch failures are loud: clicking sound, flashing red LED, firmware reporting “Probing Failed” (Marlin) or “BLTouch did not deploy/stow” (Klipper). Recovery: power-cycle the BLTouch from gcode (M280 P0 S160 to reset, S90 deploy, S10 stow) and inspect the pin physically. Bent pin won’t deploy. Sticky pin won’t stow. Loose connector breaks signal mid-print.
Inductive probes have no moving parts so they don’t deploy-fail, but they can mis-trigger on non-ferrous patches or if mounted too high. Bed-mesh stops are start-of-print; mid-print bed-mesh refresh isn’t standard.
Host and network drops: the silent killers
If OrcaSlicer is your host (streaming gcode line-by-line over LAN or USB to a Marlin printer), a slicer crash kills the print. OrcaSlicer should not be the host for long prints.
Streaming versus uploading
- Bambu printers: file uploads to the printer’s internal storage and the printer runs the print off its own controller. OrcaSlicer can close, the PC can sleep, the print continues. OrcaSlicer 2.3.0’s release notes called out a Bambu upload speed fix.
- Marlin/Klipper via OctoPrint or Moonraker: most setups upload the file to the host and run from there. OrcaSlicer monitors but doesn’t stream line-by-line.
- Direct USB streaming: OrcaSlicer holds the connection and sends one line at a time. The dangerous mode. A crash, USB wobble, or Windows update notification stealing focus breaks the print.
Uploading to the printer’s storage removes the network from the critical path. Once the file is on the printer, only printer-side failures matter; power-cycle your router and the printer keeps printing. For Marlin printers without Klipper or OctoPrint, SD card is the safe path. Old way. Bulletproof.
OrcaSlicer 2.3.0 known crashes
OrcaSlicer 2.3.0, released in 2025, had confirmed crash reports when connecting to printer IPs. Issues #9081, #9026, #11814, and #7580 document these. Symptoms: Devices tab crashes, entering a printer IP crashes, sending a print crashes after upload progress appears. Fix: update to 2.3.2 from github.com/OrcaSlicer/OrcaSlicer/releases (several connection crashes were fixed in 2.3.1 and 2.3.2), or back up your profiles and reset OrcaSlicer’s user data directory (Windows: %APPDATA%\OrcaSlicer). 2.3.0 added profile backup on upgrade so check the backup folder before deleting anything.
Recovering without restarting: pause-and-resume the right way
A clean pause-and-resume on a healthy printer is one of the most useful tools in your kit. A bad one ruins more prints than it saves.
OrcaSlicer’s pause UI: re-slice before sending
For a planned pause at a specific layer, do it before slicing. Right-click the vertical layer slider, choose Add Pause, re-slice, verify the gcode (search for M600 or M0), send. Don’t try to add a pause to an already-running print. OrcaSlicer has no mid-print injection feature, and sending M0 over the host link to a running print can desync state.
Resume from Z-height on Marlin
If a Marlin print stopped (power loss, accidental disconnect) and the printer’s in some sane state, you can sometimes resume from a specific Z:
- Note the Z where it stopped, from the LCD or the last successfully-executed gcode line.
- Edit a copy of the file in a text editor. Delete everything before the matching Z height move.
- Re-add the start-of-print block (heat hotend and bed, home) to the top.
- Save, transfer to SD, print.
Works only if first-layer adhesion held during the interruption. Bed cooled and part popped loose? You don’t have a print to resume. Marlin’s power-loss recovery (PSR) automates a version of this, but only if enabled in firmware.
Resume on Klipper after PAUSE
Klipper’s PAUSE/RESUME pair is the cleanest mid-print recovery in consumer firmware. If the printer paused for runout or planned M600, RESUME (console, UI button, or macro) handles everything: re-enables the sensor, reheats with M109, runs the primer, returns.
It falls apart if PAUSE wasn’t called. MCU shutdown is not pausable. Power loss with the stock Klipper config is not resumable. Host-MCU network drops are treated as MCU shutdowns.
When you cannot resume
- Klipper MCU shutdown: not resumable by design.
- Marlin thermal runaway halt: not resumable in stock Marlin. Investigate before re-running.
- Power loss without PSR: the printer doesn’t remember where it was. Resume-from-Z-height only if first-layer adhesion held.
If the print stopped close enough to the start that you can re-print it faster than you can diagnose, re-print. Save diagnosis for after.
Skip a failed object instead of aborting the whole plate (Klipper exclude_object)
Printing a plate of twenty calibration cubes and one detaches into spaghetti? You don’t want to abort the whole plate. You want to skip that one object and let the other nineteen finish. That’s what Klipper’s exclude_object module does.
What exclude_object does and what it doesn’t
The Klipper docs at klipper3d.org/Exclude_Object.html state: the [exclude_object] module “allows Klipper to exclude objects while a print is in progress.” User-facing commands are EXCLUDE_OBJECT_DEFINE, EXCLUDE_OBJECT_START, EXCLUDE_OBJECT_END, and EXCLUDE_OBJECT NAME=. The first three are gcode markers present in the file before printing; the last skips a specific object.
Critically, the Klipper docs state: “this module requires that the file is processed before being sent to Klipper for printing.” The slicer (or a post-processing step) inserts the markers. Klipper doesn’t infer them.
OrcaSlicer plus preprocess_cancellation
OrcaSlicer 2.3.x does not natively emit exclude_object markers. Support is via post-processing, not built-in emission. The community-standard script is kageurufu’s preprocess_cancellation at github.com/kageurufu/preprocess_cancellation, which parses sliced gcode and adds markers based on object boundaries.
Setup: download preprocess_cancellation, unpack it somewhere stable, add the executable path under OrcaSlicer’s Process > Output Options > Post-processing scripts, slice as normal. Verify by opening the gcode and searching for EXCLUDE_OBJECT_DEFINE.
Excluding an object from Mainsail/Fluidd
Mainsail and Fluidd both expose an Exclude Objects panel once the gcode contains markers. Docs at docs.mainsail.xyz/features/exclude-objects/. During a print, open the status page, find the Exclude Objects panel (in Mainsail it’s usually under the gcode preview), click the failed object’s outline. The printer skips that object’s lines and keeps printing the others.
Bambu doesn’t have a community-standard equivalent. Marlin’s M486 is the gcode standard but requires slicer emission; PrusaSlicer and SuperSlicer emit M486. OrcaSlicer’s M486 emission status in 2.3.x isn’t verified in primary docs, so test in your own build before relying on it. Klipper’s M486 support is via a macro in sample-macros.cfg.
If you’re using exclude_object because parts keep failing off the plate, the underlying problem is bed adhesion, and that’s the real fix to chase.
Bambu Lab printers: specific stop and recovery paths
Bambu printers have a different stop-and-recovery vocabulary than Marlin or Klipper. HMS codes are how the printer communicates faults; the Bambu wiki is the primary reference.
A1 series
Open-frame. Filament runout at the extruder (single sensor for non-AMS Lite, per-slot for AMS Lite). AMS Lite auto-switch behavior similar to full AMS with the same same-material limitation. No chamber camera, therefore no AI spaghetti detection. If your A1 stops on its own, don’t blame “AI failure detection”; that feature doesn’t exist on this hardware. Same HMS code system as X1/P1.
P1 series
P1P and P1S sit between A1 and X1. Optional AMS support. No AI spaghetti detection (P1S has an enclosed chamber but the camera is a basic timelapse camera, not AI-capable). Same HMS codes.
X1 series
X1C and X1E have the full stack: AMS with same-material auto-switch, chamber camera plus on-board AI model for spaghetti detection. When the model flags a high-confidence failure, the printer surfaces an HMS code (example: HMS_0C00-0300-0003-0008, documented at wiki.bambulab.com/en/h2/troubleshooting/hmscode/0C00_0300_0003_0008) and asks the user to confirm continue or stop.
A clarification I see written wrong a lot: there is no documented “vibration sensor” on any Bambu printer that aborts prints. The “Vibration Compensation” feature on the X1 is input-shaping calibration at print start, not a runtime detector. If your X1 stopped mid-print and the screen shows an AI-related HMS code, that’s the chamber camera and model, not a vibration sensor.
Cloud/LAN-mode drops
Cloud mode (via Bambu Handy and the cloud relay) or LAN-only. Either way, the file is on the printer. If internet drops mid-print, the printer keeps printing. “Lost connection mid-print” means you can’t monitor or send commands; the print is still progressing. Don’t panic and don’t power-cycle; let it finish and the job will reconcile when the cloud reconnects.
Pre-flight checklist to stop mid-print stops happening at all
Most of the mid-print stops I’ve debugged for friends or coworkers came down to one of a small set of preventable misconfigurations. Run this checklist before any print over four hours. It takes about three minutes.
5 OrcaSlicer settings to audit before any long print
- Vertical slider markers: Open the Preview tab and scroll through the layer slider. Any pause icons, change-filament icons, or custom-gcode icons present? Are they intentional? If you don’t recognize them, right-click and delete.
- Manual Filament Change toggle: Printer Settings > Multimaterial > Manual Filament Change. Off unless you specifically need it for this project.
- Change Filament G-Code field: Printer Settings > Machine G-Code. Should be
M600for Marlin or your PAUSE-calling macro for Klipper. Should not contain anything custom you don’t remember adding. - Before/After Layer Change G-Code fields: same Machine G-Code page. Should be empty or contain only LED/beep/fan commands. Should NOT contain M0, M1, M25, or M600.
- Post-processing scripts: Process > Output Options. Either empty, or contains only scripts you put there intentionally. If a borrowed config dropped one in, remove it unless you know what it does.
5 firmware/hardware checks
- Filament runout sensor wiring: tug the switch wire gently. If it moves, re-seat the connector.
- Thermistor seating: the silicone sock should be snug. Push the cartridge and thermistor lightly into the heater block. If either wiggles, fix before printing.
- Bed temperature soak: let the bed soak at print temperature for at least 5 minutes before starting on glass or PEI. Skipping the soak doesn’t cause mid-print stops directly, but it does cause first-layer pops that can trigger downstream spaghetti.
- AMS spool count (Bambu): if you’re running an AMS-equipped multi-color print, confirm at least two slots are loaded with the same filament for runout auto-switch.
- USB/network cable: if you’re streaming over USB or LAN, give the cable a gentle wiggle test before pressing print. A flaky connection mid-print is a silent killer.
Two diagnostic gcode commands to keep in your back pocket
- M412: on Marlin, run M412 with no parameters to get the current runout-sensor state. The response tells you if the sensor is enabled and, if HOST_ACTION_COMMANDS is on, what the host-handling state is. If the sensor is disabled, that’s why nothing happened when filament ran out.
- QUERY_FILAMENT_SENSOR: on Klipper, this is the equivalent.
QUERY_FILAMENT_SENSOR SENSOR=filament_sensorreturns the current detected state (filament present or absent). If your config has a different sensor name, swap that in.
If you’re seeing layer shifts on resume (the print continues but offset by a few mm), that’s not the pause; that’s a stepper-driver or belt issue exposed by the toolhead returning.
When to stop and restart (and when not to)
Some stopped prints are worth saving. Most aren’t. Here’s the decision matrix I use after fifteen years of running these machines.
Restart if any of these are true:
- The print stopped because of thermal runaway, MCU shutdown, or any safety abort. The fault needs investigating before re-running. Resume risks a second abort or, worse, a fire.
- The first layer pulled up from the bed. Resume on a detached part means the print won’t bond to the rest of the model.
- The print stopped more than 12 hours ago and the part has been sitting on a cold bed. PETG, PLA, and ABS all shrink as they cool; resuming on a cold part produces a visible seam and often a delamination plane.
- You can’t identify why it stopped. Resuming a print whose halt cause is unknown is asking for a second halt at the same point.
If you restart and the first layer is the concern (a paused print’s first-layer integrity often suffers after a long cold soak), the first-layer problems guide walks through the surface prep and Z-offset adjustments for a clean re-print.
Resume if all of these are true:
- The stop was a clean PAUSE (planned M600, Klipper PAUSE macro, AMS runout).
- The bed never cooled below glass-transition for the loaded filament.
- The toolhead is still parked clear of the print.
- You’ve fixed whatever caused the pause (loaded new filament, replaced an AMS spool, confirmed a sensor is now reading correctly).
Two more practical points. First, if the print is the difference between a 30-minute restart and a 20-hour completion, the math favors trying to resume. The worst case is you waste 10 more minutes and then restart anyway. Second, if you’re not sure about resume vs restart, take a photo of the current state of the bed, write down the printer’s screen status, and post to the printer’s specific subreddit or Discord. The community will usually tell you within an hour whether your specific situation is recoverable.
FAQ
Why did my OrcaSlicer print pause on its own?
Almost always one of: a vertical-slider pause marker you forgot was there, an M600 from a runout sensor, a Manual Filament Change toggle left on from a previous project, or a custom Before/After Layer Change script with a stray M0/M1. Open the gcode in a text editor and search for M600, M0, M1, M25, and PAUSE. The first match before your stop layer is your culprit.
Why is “Add Pause” greyed out in OrcaSlicer?
The Bambu Lab forum thread “Add Pause in drop down greyed out” documents this. The pause option is conditional on printer profile and filament setup. Common causes: zero filaments loaded for the project, a printer profile that doesn’t support pauses for the current workflow, or a project type (like a calibration print) that has pauses disabled. Loading a filament and switching to a standard Process profile usually re-enables it.
Does OrcaSlicer have exclude_object?
Not natively. OrcaSlicer 2.3.x does not emit Klipper exclude_object markers on its own. The standard workaround is the kageurufu preprocess_cancellation post-processing script, attached at Process > Output Options > Post-processing scripts. With that script in place, OrcaSlicer’s output works with Mainsail/Fluidd’s Exclude Objects UI.
Can I disable thermal runaway protection?
You can, by editing Marlin’s Configuration.h and rebuilding firmware, but you should not. Thermal runaway is the protection between a stuck thermistor and a workshop fire. The right approach when thermal runaway keeps tripping is to find the physical cause: loose thermistor, drafty fan, slipping heater cartridge, sock not snugged. Frame “disable to test” only as a momentary, attended diagnostic, not a permanent setting.
Does Bambu’s AMS auto-switch colors when one runs out?
It auto-switches between slots loaded with the same material and the same color mapping you set at slice time. The Bambu wiki at wiki.bambulab.com/en/ams/manual/ams-function-introduction documents the same-material requirement; the forum thread “Automatically switching slots when filament is out” confirms community-verified behavior. It does not pick a “close enough” color or material. If you want AMS to keep printing through a runout, pre-load a second slot with the same spool.
What’s the safest way to send a long print to my Bambu printer?
Upload the file to the printer’s internal storage (or to an SD card slotted into the printer) and start from the touchscreen. The file lives on the printer; nothing in your house can interrupt the print over the network. OrcaSlicer 2.3.0 specifically improved Bambu upload speed, so the upload step is fast.
Can OrcaSlicer pause mid-layer?
Not in 2.3.x. The vertical slider supports pausing at layer transitions. The horizontal (mid-layer) slider does not currently support pause; GitHub Issue #6334 is open and labelled “enhancement” but has not been merged. If somebody tells you otherwise for current stable, they’re describing a different slicer or a different build.
My Bambu X1 stopped and the screen says spaghetti detection. Was it actually spaghetti?
The X1’s AI model is good but not perfect. It can false-positive on certain colors, geometries, and lighting conditions. The screen will show the camera frame the model flagged; look at the frame. If you can see actual spaghetti in the frame, the model was right. If the print looks fine, you can dismiss the alert and continue printing. The HMS code is logged either way.
My OrcaSlicer crashed when I tried to send a print. Now what?
If you’re on 2.3.0, update to 2.3.2 from the official releases page at github.com/OrcaSlicer/OrcaSlicer/releases. Several connection-related crashes were fixed in subsequent point releases. If updating doesn’t help, back up your profiles and reset the OrcaSlicer user data directory (Windows: %APPDATA%\OrcaSlicer). 2.3.0 added profile backup on upgrade specifically for this case, so check the backup folder before deleting anything.
One last thought. The reason mid-print stops feel so frustrating is that they happen at the moment you have the least patience for them, usually six hours into something you wanted to be hands-off. The fix isn’t to eliminate every possible cause; that’s impossible on consumer hardware. The fix is to run the pre-flight checklist, know which of the four layers can halt your printer, and have a clear decision rule for resume vs restart. After a few months of treating mid-print stops as a triage problem instead of a panic event, you’ll find the actual failures get rarer too, because most of them were avoidable settings the whole time.
If you came here in the middle of a stopped print, I hope you got back to printing. If you came here because you’re tired of these stops happening, run the pre-flight checklist on your next slice and watch how many vertical-slider markers you’ve been carrying around without noticing.
Related OrcaSlicer guides
- OrcaSlicer Troubleshooting: Master Index of Every Common Fix
- OrcaSlicer Under-Extrusion: Diagnosis & Real Fixes (2026)
- OrcaSlicer Over-Extrusion, Blobs & Zits: How to Fix Them (2026)
- OrcaSlicer Z-Wobble & Z-Banding: Diagnose and Fix (2026)
- How Often Should You Recalibrate OrcaSlicer? 2026 Maintenance Schedule