I picked up a Creality K1 in late 2023, ran it on Creality Print for a couple of months, and switched to OrcaSlicer the day I tried to import a Voron profile and got nowhere. Six months later I added a K1 Max. Both have run OrcaSlicer ever since. The setup story has changed enough between the original K1 firmware, the K1C 2025 silent revision, and the newer K2 Plus that I keep getting asked the same questions. This is the one place I’m answering them all.
This guide covers the Creality K-series with OrcaSlicer: K1, K1 Max, K1C (original and 2025 revision), K1 SE, and K2 Plus. Setup, calibration, common gotchas. Written against OrcaSlicer v2.3.2 (current stable) and the Creality OS firmware as it sits today.
The big context before anything else: K-series printers ship with Creality OS, a fork of Klipper that diverged from mainline around mid-2022 and hasn’t been rebased. That means some Klipper features OrcaSlicer expects (KAMP adaptive bed mesh, EXCLUDE_OBJECT before firmware 1.3.6.0) aren’t present on stock K-series until you install the Helper Script. None of this is in the OrcaSlicer documentation. Almost all confusion about K-series setup traces back here.
K-series spec reference
| Spec | K1 | K1 SE | K1 Max | K1C | K2 Plus |
|---|---|---|---|---|---|
| Build volume | 220×220×250 | 220×220×250 | 300×300×300 | 220×220×250 | 350×350×350 |
| Motion | CoreXY rods | CoreXY rods | CoreXY rails Y / rods X | CoreXY rods | CoreXY rails all axes |
| Hotend max | 300°C ceramic 60W | 300°C | 300°C | 300°C “Unicorn” tri-metal | 350°C “Apus” all-metal DD |
| Stock nozzle | Brass 0.4mm | Hardened steel tip | Brass 0.4mm | Hardened “Unicorn” tip | Hardened tri-metal |
| Onboard accelerometer | MPU-6500 | MPU-6500 | MPU-6500 | MPU-6500 | Yes (newer) |
| Lidar | No | No | Yes (AI LiDAR fw 1.3.3.3+) | No | No (2× optical + strain gauge) |
| AI camera | Optional | No | Yes | Yes | Yes (dual) |
| Bed | PEI flex 100°C | Epoxy flex 100°C | PEI flex 100°C | PEI textured 100°C | PEI flex 120°C |
| Heated chamber | Passive only | Passive | Passive | Passive | Active 60°C |
| Default speed | 300 mm/s (max 600) | 600 mm/s | 300 (max 600) | 600 mm/s | 600 mm/s inner walls |
| Acceleration | 20,000 | 20,000 | 20,000 | 20,000 | 30,000 |
| AMS analog | None / CFS retrofit | None | None / CFS unofficial | CFS (orig only, NOT 2025 rev) | CFS official up to 4 / 16 colors |
The K1C 2025 silent revision (read this first)
Before any setup, you need to know about a hardware change Creality made silently in 2025. The K1C revision shipped a revised mainboard that:
- Removed local web UI on port 80
- Removed root SSH access
- Has firmware branch v1.0.0.x instead of v1.3.x.x
If you bought a K1C in 2025 or later, and the touchscreen Settings → About → Firmware version starts with 1.0.0, you have the revised hardware. The Helper Script community method below does NOT work on the 2025 revision. Connection setup uses Host Type “CrealityPrint” instead of “Klipper (Octo/Klipper)”.
Original K1C and all K1 / K1 Max / K1 SE / K2 Plus units use the standard Klipper-host setup.
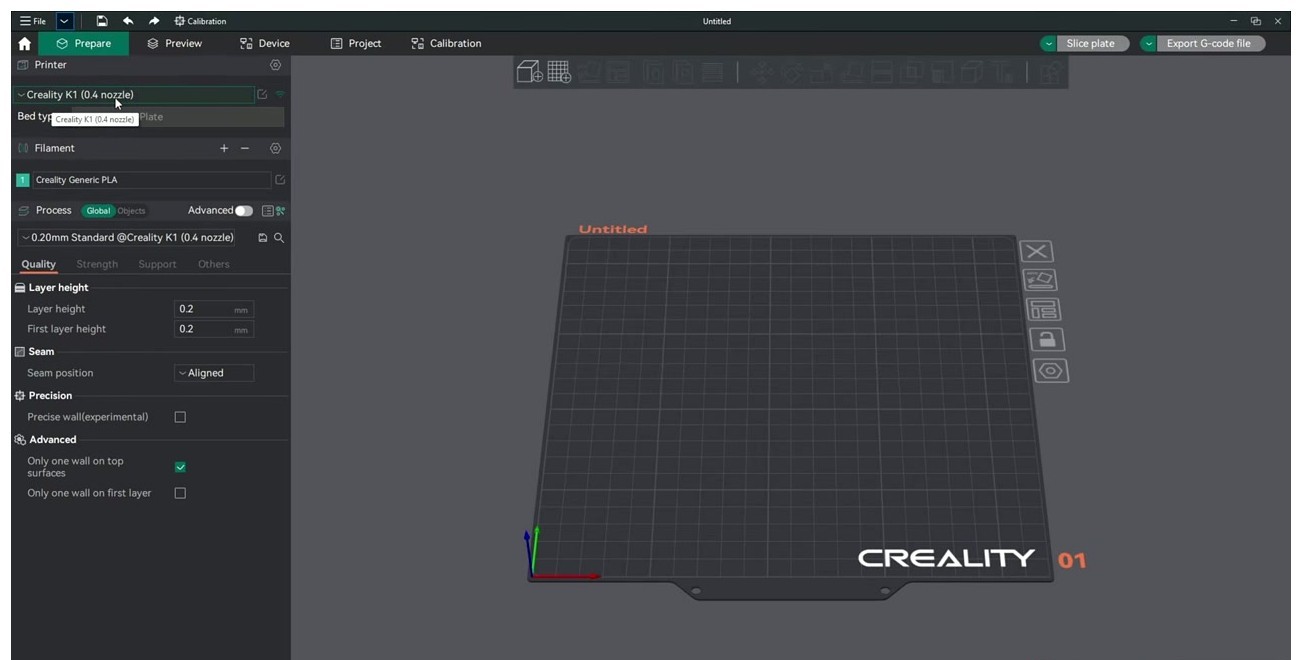
Connecting OrcaSlicer to a stock K-series
For K1 / K1 Max / K1 SE / K2 Plus / K1C original, the procedure:
- On the printer’s 4.3″ touchscreen, go to Settings → Network → Wi-Fi → connect to your SSID
- Settings → About → Network info, note the IPv4 address (e.g., 192.168.1.74)
- Open
http://<printer-ip>in a browser to confirm. On stock K-series (pre-2025) you’ll see the Creality web UI on port 80. K1C 2025 returns nothing on port 80 (expected, that’s the silent revision). - In OrcaSlicer, click the Printer Settings gear icon → Connection / Physical Printer
- Set Host Type to Klipper (Octo/Klipper)
- Hostname:
192.168.x.x:4408(the port suffix is mandatory; without it you get the misleading “Update OctoPrint to 1.1.0 or higher” error) - API Key: leave blank (Creality OS Moonraker has no auth by default)
- Click Test. Should return “Connection valid”. Save.
For K1C 2025 revision, set Host Type to CrealityPrint, hostname 192.168.x.x (no port). The Device tab will show 404, which is harmless; uploads still work via Creality’s API.
Port reference
K-series ports that matter:
- Port 80: Creality web UI (stock pre-2025)
- Port 4408: Fluidd via Creality nginx proxy. This is the OrcaSlicer connection port.
- Port 4409: Mainsail via Helper Script (after install)
- Port 7125: raw Moonraker. Often firewalled by Creality on stock firmware.
If port 4408 returns “Connection refused”, your firmware is too old (≤ v1.2.x) or you’ve installed Mainsail (which moves to 4409). Update firmware via touchscreen, install Helper Script, or point OrcaSlicer at the right port.
Common K-series connection errors
“Update OctoPrint to 1.1.0 or higher”
This is the most common K-series error message and it’s misleading. It means you forgot to append :4408 to the IP address. Add the port suffix and the error goes away.
HTTP 405 / OrcaSlicer crash after sending print
Active bug as of February 2026, GitHub issue #12340. Affects rooted K1 Max running vanilla Moonraker on OrcaSlicer 2.3.2-beta+. OrcaSlicer attempts a Creality Print legacy /upload/ endpoint after the Moonraker upload succeeds. Workaround: use OrcaSlicer 2.2.x stable until the fix ships, or disable “Send-and-print” and use “Send only” then start the print from Fluidd.
“Unauthorized” / 401 after installing Helper Script
Cause: Helper Script Mainsail/Fluidd has CORS lockdown enabled by default. Edit ~/printer_data/config/moonraker.conf on the printer and add:
[authorization]
cors_domains:
  *.local
  *://*
trusted_clients:
  192.168.0.0/16
  10.0.0.0/8
Then restart Moonraker. OrcaSlicer can talk to it after that.
“404” on file upload
Wrong port. Used 80 instead of 4408. Or installed Mainsail (4409) but pointing at 4408. Check what’s installed and align ports.
Device tab blank but slicing works
Expected on any K-series in stock config. The Device tab needs Mainsail or Fluidd installed via Helper Script for full live console. Without that, OrcaSlicer can send G-code but can’t show real-time temperatures, manual G-code commands, or bed mesh visualizer.
The Creality OS caveats vs mainline Klipper
Creality OS is a fork of Klipper that diverged from mainline mid-2022 and was never rebased. Things that affect OrcaSlicer behavior:
- No
EXCLUDE_OBJECTbefore firmware v1.3.6.0. OrcaSlicer’s “Skip Failed Objects” feature silently no-ops on older firmware. Fixed in newer firmware. - No
BED_MESH_CALIBRATE ADAPTIVE=1in stock builds. OrcaSlicer’s adaptive bed mesh checkbox does nothing unless KAMP is installed via Helper Script. SET_INPUT_SHAPERworks, but the printer reverts to defaults on next boot unlessSAVE_CONFIGis run. OrcaSlicer’s input-shaping start G-code injection is per-print, so values persist only for the current job.- Pressure Advance override on K1 Max: Creality runs PA = 0.04 by default and overrides slicer values via their own PA macro on K1 Max LiDAR firmware. To use OrcaSlicer-calibrated PA, untick “Enable Pressure Advance” in the filament profile, OR add
SET_PRESSURE_ADVANCE ADVANCE=0after the START_PRINT line. - Old Moonraker version (~0.7.1 era): some Orca features that need newer Moonraker endpoints (per-object cancel, thumbnail upload v2) silently fall back.
- Filament sensor / runout uses Creality’s binary GPIO, not Klipper’s
[filament_switch_sensor]syntax. Don’t try to override it through OrcaSlicer.
If you root the printer and install vanilla Klipper (the ballaswag mod is the most popular path on K1/K1 Max), all of the above goes away. But you also lose Creality’s AI features and the touchscreen UI. Most users keep stock firmware plus Helper Script and accept the trade-offs.
Calibration sequence for K-series
Order matters because some steps overwrite others:
Step 1: PID tune hotend and bed (one-time)
From Mainsail or Fluidd console:
PID_CALIBRATE HEATER=extruder TARGET=240
PID_CALIBRATE HEATER=heater_bed TARGET=70
SAVE_CONFIG
Stock Creality OS does this at first boot but values drift after a hotend swap. Re-run after any hotend change.
Step 2: Input shaping
The K-series has the MPU-6500 accelerometer wired to the toolhead. Two paths:
Path A (recommended for stock firmware): from the printer touchscreen, Settings → Self-test → Vibration compensation. This runs SHAPER_CALIBRATE automatically and Creality OS saves the values to printer.cfg. OrcaSlicer doesn’t need to do anything; the firmware applies the shaper values.
Path B (vanilla Klipper or advanced): use OrcaSlicer’s Calibration → Input Shaping. Print the tower test 15-110 Hz. Then add a custom line in Printer Settings → Machine G-code → Machine start G-code:
SET_INPUT_SHAPER SHAPER_TYPE=MZV SHAPER_FREQ_X=37.25 DAMPING_RATIO_X=0.16 SHAPER_FREQ_Y=37.5 DAMPING_RATIO_Y=0.06Typical K1 X frequencies: 35-45 Hz. K1 Y: 38-50 Hz. K1 Max Y is lower (~28-32 Hz) because of the heavier 300×300 bed. Damping 0.10-0.20.
Step 3: Flow rate
OrcaSlicer Calibration → Flow Rate → Pass 1 (modifier ±5%) then Pass 2 (±1%). Save into the filament profile, not the printer profile.
Step 4: Pressure advance
Run AFTER flow rate. Use the PA Tower for K1/K1 Max:
- Calibration → Pressure Advance → PA Tower
- Direct drive, 0.002/mm step starting from 0.0
- Best heights typically PA = 0.03-0.05 for stock Creality hotend
- 0.025-0.04 for the Unicorn (K1C)
- 0.02-0.035 for K2 Plus Apus extruder
Important gotcha for K1 Max: if LiDAR PA is enabled (firmware ≥1.3.3.3), the printer overrides slicer PA mid-print. Disable in printer Settings → AI → “AI PA” or untick Enable Pressure Advance in Orca’s filament profile.
Step 5: Temperature tower
Standard 5° step, 10 segments. Pick the lowest temp that still gives clean overhangs and proper layer adhesion. Stock K1 PLA target: 215-220°C. K1C with high-flow Unicorn hotend: 230-240°C. K2 Plus with Apus: same range.
Step 6: Max volumetric flow
Critical for high-speed K-series printing. Defaults that work:
- K1 stock hotend: 24 mm³/s
- K1 with CHT nozzle upgrade: 32 mm³/s
- K1C with Unicorn: 38 mm³/s
- K2 Plus with Apus: 40 mm³/s rated
Calibrate with OrcaSlicer’s MaxVolumetric Speed Test cube. Subtract a 10-20% safety margin before saving.
Step 7: Retraction
K1 stock direct drive: 0.8mm at 40 mm/s. Unicorn (K1C/K2 Plus): 0.5mm at 40 mm/s. Calibration → Retraction Test.
Filament settings dialog walkthrough
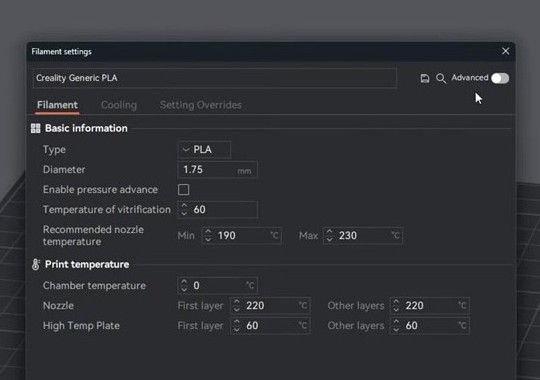
The fields that matter on K-series:
- Type: PLA, PETG, ABS, ASA, TPU, PA, PA-CF, PETG-CF, PC. Picking the right type sets default flow ratio, fan curves, and temperature ranges.
- Diameter: 1.75mm (always, on K-series).
- Enable pressure advance: leave UNCHECKED if you’re using stock Creality firmware on K1 Max with AI PA enabled. Otherwise check it and enter your calibrated value.
- Temperature of vitrification: glass transition temp. For PLA 60°C, PETG 75-80, ABS 105.
- Recommended nozzle temperature: min/max range. Set 190-230 for PLA.
- Print temperature: per-filament override. Nozzle first-layer 220 (a 5°C boost over the standard 215), nozzle other layers 215.
- Plate temperature: separate fields for Cool Plate, High Temp Plate, etc. K-series ships with PEI flex (use High Temp Plate first 60 / others 60 for PLA).
Per-filament profiles for K-series
Real numbers from Creality + community. All assume CoreXY direct drive. K-series excels at high-speed PLA; everything else is held back by the small build chamber (no active heat on K1/K1 Max/K1C).
| Filament | Nozzle | Bed | Speed (outer / inner) | Max vol | PA | Notes |
|---|---|---|---|---|---|---|
| Generic PLA | 215°C | 60°C | 200 / 300 mm/s | 24 mm³/s | 0.04 | K1 / Max default |
| Hyper PLA / High-Speed PLA | 230°C | 60°C | 300 / 600 mm/s | 32 mm³/s | 0.03 | Creality CR-PLA Hyper specifically tuned for K1; needs Unicorn or CHT |
| PETG | 245°C | 80°C | 150 / 200 mm/s | 18 mm³/s | 0.05 | Cooling fan to 30%; bed 80°C minimum |
| ABS / ASA | 255°C | 100°C | 150 / 250 mm/s | 22 mm³/s | 0.04 | Enclosure mandatory; door + top cover; chamber reaches ~45-50°C passively |
| TPU 95A | 230°C | 50°C | 30 / 60 mm/s | 6 mm³/s | 0.06 | Direct drive only (K-series direct drive is fine for this) |
| PA-CF | 285°C | 90°C | 100 / 200 mm/s | 18 mm³/s | 0.045 | Hardened steel mandatory (K1C / K1 Max with Unicorn / K2 Plus). Filament dried <15% RH |
| PLA-CF | 230°C | 60°C | 200 / 300 mm/s | 22 mm³/s | 0.035 | Hardened steel mandatory; brass nozzle dies in one spool |
| PET-CF (K2 Plus only) | 280°C | 90°C | 120 / 220 mm/s | 16 mm³/s | 0.04 | K2 Plus only (needs 350°C hotend + heated chamber for low warp) |
Wall thickness recommendation: 3 perimeters minimum at speeds at or above 300 mm/s. K1 has visible wall ringing at 2 perimeters even after input shaping calibration.
Slicing on the K-series: the Others tab and special modes
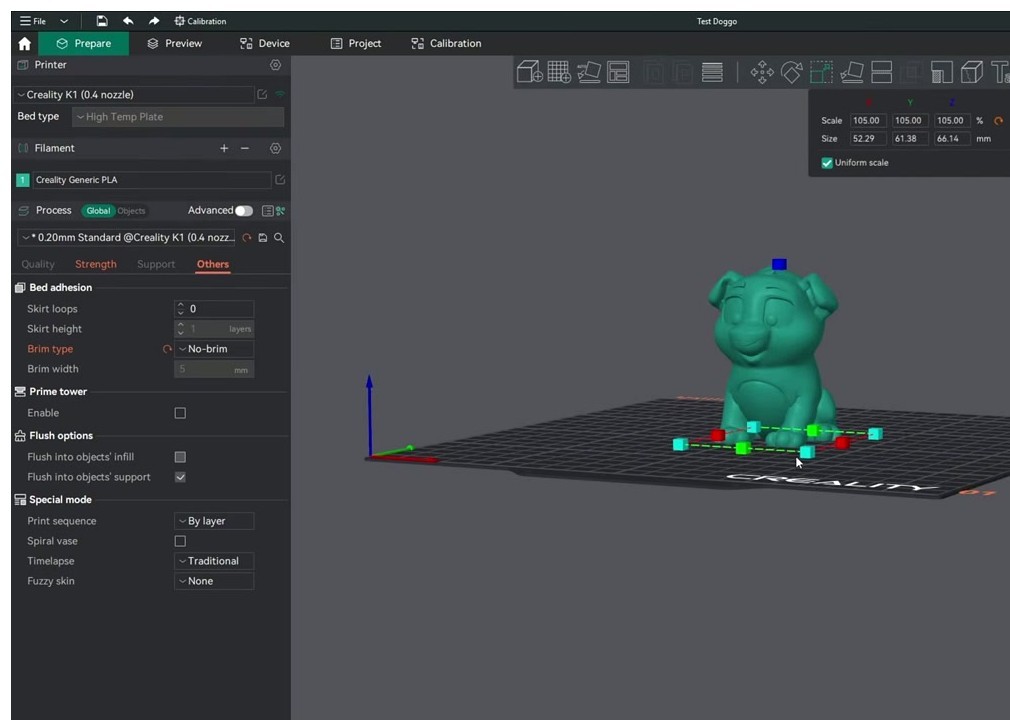
K-series-specific tips for the Others tab:
- Skirt loops 0 is fine on K-series because the printer auto-purges before each print via the START_PRINT macro. You don’t need a skirt for nozzle priming.
- Brim type: most prints don’t need a brim on K-series PEI plates; adhesion is excellent. Switch to “Mouse ears” only for parts wider than 100mm with sharp corners (warp risk).
- Prime tower: disabled by default. Only relevant if you’ve added a CFS for multi-color, in which case Orca configures it automatically.
- Print sequence By layer is the default and what you want. By-object only works for short objects that fit under the gantry.
- Spiral vase: K-series excels at vase mode prints because of the high default acceleration. Single-wall vases come out clean at 200 mm/s outer wall.
Common K-series issues with OrcaSlicer (full list)
K1 Max stops responding to OrcaSlicer after print finishes
Cause: Creality OS keeps the connection in a half-closed state because end-of-print triggers AI image upload. Fix: in End G-code, add a small delay after END_PRINT: M400 then M118 print done. Or update to firmware 1.3.6.0 or later.
“Connection refused” on port 4408
Cause: stock K1 firmware ≤ v1.2.x doesn’t expose Moonraker externally. Creality blocked it. Fix: update firmware via touchscreen, OR install Helper Script (which configures nginx to proxy 4408 → 7125), OR connect to port 80 with Host Type CrealityPrint.
K1C 2025 revision: Device tab 404, no web UI
Cause: Creality removed local web interface and root access on the silent revision. Fix: use Host Type CrealityPrint at port 80 (no port suffix), ignore the 404, uploads still go through Creality’s API. To get Fluidd, install it locally on a Pi pointing at the printer’s port 7125.
Stringing on PETG at 300 mm/s
Cause: pressure advance value inherited from PLA profile is too low; PETG bridges differently at speed. Fix: separate PETG filament profile with PA approximately 0.05 and 50% part-cooling fan.
K1 Max bed mesh shows huge corner deltas (>0.4mm)
Cause: stock 25-point mesh interpolates poorly on the 300×300 bed. Fix: increase mesh density to 9×9 by editing ~/printer_data/config/printer.cfg (probe_count: 9, 9), then re-run BED_MESH_CALIBRATE.
Filament profile changes don’t transfer between K1 and K1 Max
Cause: OrcaSlicer treats each printer as a separate scope. Fix: right-click filament profile → “Copy to other printer”. Or save profile as JSON via Filament Settings → Save current settings as preset → Export.
Adaptive Bed Mesh checkbox does nothing
Cause: stock Creality OS lacks KAMP. Fix: install Helper Script (the “Klipper Adaptive Meshing & Purging” option), then in OrcaSlicer set Host Type to Octo/Klipper with port 4408 and set bed mesh margin to 0 in printer settings.
First-layer LiDAR error overrides slicer settings (K1 Max)
Cause: Creality LiDAR re-runs PA per layer and ignores Orca’s calibrated value. Fix: untick “Enable Pressure Advance” in Orca filament settings, OR disable AI features on the printer.
Helper Script: when you actually need it
Guilouz’s Creality Helper Script is the de-facto community method for unlocking K-series capability. It installs Mainsail/Fluidd/KAMP/M600 onto stock K1, K1 Max, and K1C. It does NOT work on K1C 2025 revision (no root access).
You need Helper Script if you want:
- KAMP adaptive bed mesh (OrcaSlicer’s adaptive checkbox needs this)
- Filament runout pause / resume with M600
- EXCLUDE_OBJECT for “Skip Failed Objects” before firmware 1.3.6.0
- Mainsail web UI on port 4409 in addition to the stock Fluidd-equivalent
- Per-object cancel from OrcaSlicer’s Device tab
You don’t need Helper Script if you just want OrcaSlicer to send G-code and start prints. Stock K-series + OrcaSlicer at port 4408 covers basic printing.
Install instructions are at guilouz.github.io/Creality-Helper-Script-Wiki. Requires SSH access; on stock K1/K1 Max/K1C, default credentials are root / creality_2023.
K2 Plus differences worth knowing
The K2 Plus is the newest K-series flagship (2024-2025 release). It differs from the K1 family enough to mention separately:
- Doesn’t use LiDAR. Uses two optical Z-distance sensors plus a strain-gauge probe in the head. Different leveling architecture.
- Active heated chamber to 60°C. Enables PET-CF, ABS-GF, polycarbonate at full strength.
- Apus all-metal direct-drive extruder rated to 350°C. Compatible with everything PA-CF, PPS-CF, PEEK can throw at it.
- 30,000 mm/s² acceleration vs K1’s 20,000.
- Native CFS support up to 4 units (16 colors). K2 Plus is the only K-series with first-class multi-color hardware that’s officially supported and tuned.
- Setup uses the same port 4408 connection in OrcaSlicer with Host Type Klipper. K2 Plus profile is in OrcaSlicer 2.2+ as a separate built-in.
For multi-color 3D printing, the K2 Plus + CFS is genuinely competitive with Bambu’s AMS workflow, and OrcaSlicer handles both cleanly.
Vanilla Klipper as the nuclear option
If you’re a serious tinkerer, the third path is rooting the printer and replacing Creality OS with vanilla Klipper. The most popular guide is ballaswag’s creality_k1_klipper_mod repository on GitHub. The result:
- Mainline Klipper with all features (KAMP, EXCLUDE_OBJECT, latest input shapers, modern macros)
- Latest Moonraker (per-object cancel, thumbnail v2, full OrcaSlicer compatibility)
- Mainsail or Fluidd UI of your choice
- Full SSH access
The trade-offs:
- You lose Creality’s touchscreen UI (replaced with KlipperScreen, which is functional but ugly)
- You lose the AI camera features (object detection, time-lapse auto-trim)
- The lidar on K1 Max stops working unless you flash custom firmware that re-implements it
- If anything goes wrong, the recovery path is reflashing the SD card, which voids your “supported configuration” status with Creality
For a daily-driver printer, stock plus Helper Script is the right balance. For a tinkering printer, vanilla Klipper unlocks everything OrcaSlicer can do and matches the Voron/RatRig experience. Most users I know with multiple K1s keep one stock and one rooted.
Wrap-up
K-series with OrcaSlicer is excellent once you’ve cleared the firmware-and-port maze. Set Host Type to Klipper, IP plus :4408, leave API key blank. Use the printer’s Self-test → Vibration compensation for input shaping. Run OrcaSlicer’s flow rate, PA, and temp tower for each new filament. Don’t bother with Helper Script unless you specifically need KAMP, M600, or per-object cancel.
For the full calibration walkthrough, the OrcaSlicer calibration guide covers the nine-test suite. If you’re new to OrcaSlicer entirely, start with the beginners guide. Or grab the install from the download page.
Related OrcaSlicer guides
- OrcaSlicer Settings Master Guide: Every Setting Explained (2026)
- OrcaSlicer Cooling and Fan Curves Explained (2.3.x Guide)
- How to Update OrcaSlicer Without Losing Your Profiles (2026)
- OrcaSlicer for Voron 0.2 / 2.4 / Trident: Configuration Guide
- OrcaSlicer Modifier Meshes: Different Settings on One Model