
The first time I watched my X1C burn through a 14-color print using an AMS 2 Pro stacked with an AMS HT, I sat there with coffee getting cold because the H2D in the next room was doing the same trick with its own HT chain. I’d spent a weekend wiring up profiles in OrcaSlicer, and once the RFID hits and the slots light up with the right Bambu PLA Basic colors, the whole thing feels almost too easy. Then I plugged in a third-party eSun PLA spool, and the illusion broke.
That’s the AMS family in 2026. When it works, it’s the slickest filament-handling stack in consumer FDM. When it doesn’t, you’re poking at the Device tab pencil icon, wondering why your custom preset won’t stick, or staring at a printer that won’t talk to OrcaSlicer because the January 2025 firmware update flipped a switch nobody told you about. This guide covers how to use Bambu Lab AMS filaments with OrcaSlicer, every variant, every material, every gotcha.
Table of contents
- The four AMS variants in May 2026
- Which printer takes which AMS
- Material compatibility, variant by variant
- RFID auto-detection for Bambu spools
- Manual slot mapping for third-party spools
- OrcaSlicer Device tab walkthrough
- LAN Mode plus Developer Mode after firmware 01.08.03.00
- Multi-color setup and the Type 2 wipe tower
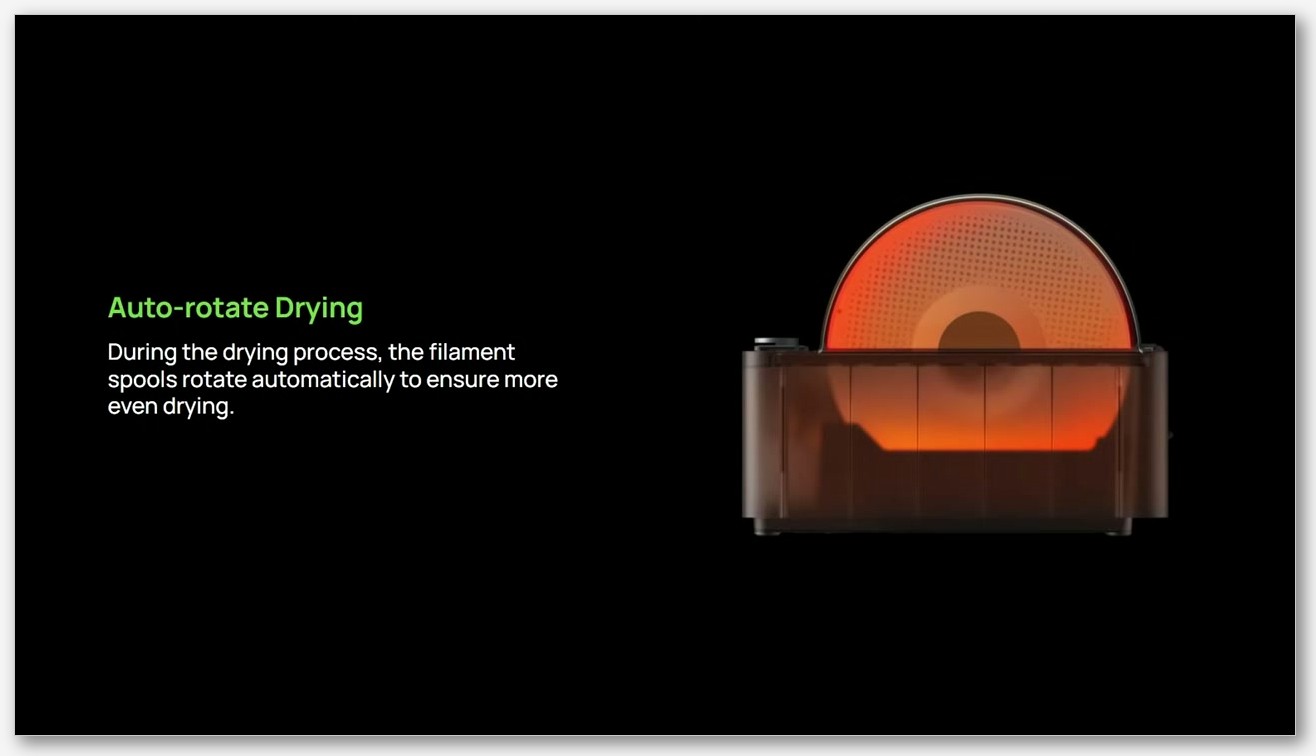
- Dry-while-print on HT and 2 Pro
- Common gotchas
- Spoolman, inventory, and what it does for Bambu owners
- FAQ
The four AMS variants in May 2026
If you’ve come to OrcaSlicer in the last six months, you’ve probably noticed that “AMS” is now a family, not a product. There are four distinct units shipping as of May 2026, and they don’t all do the same job. Two of them aren’t even the same shape.
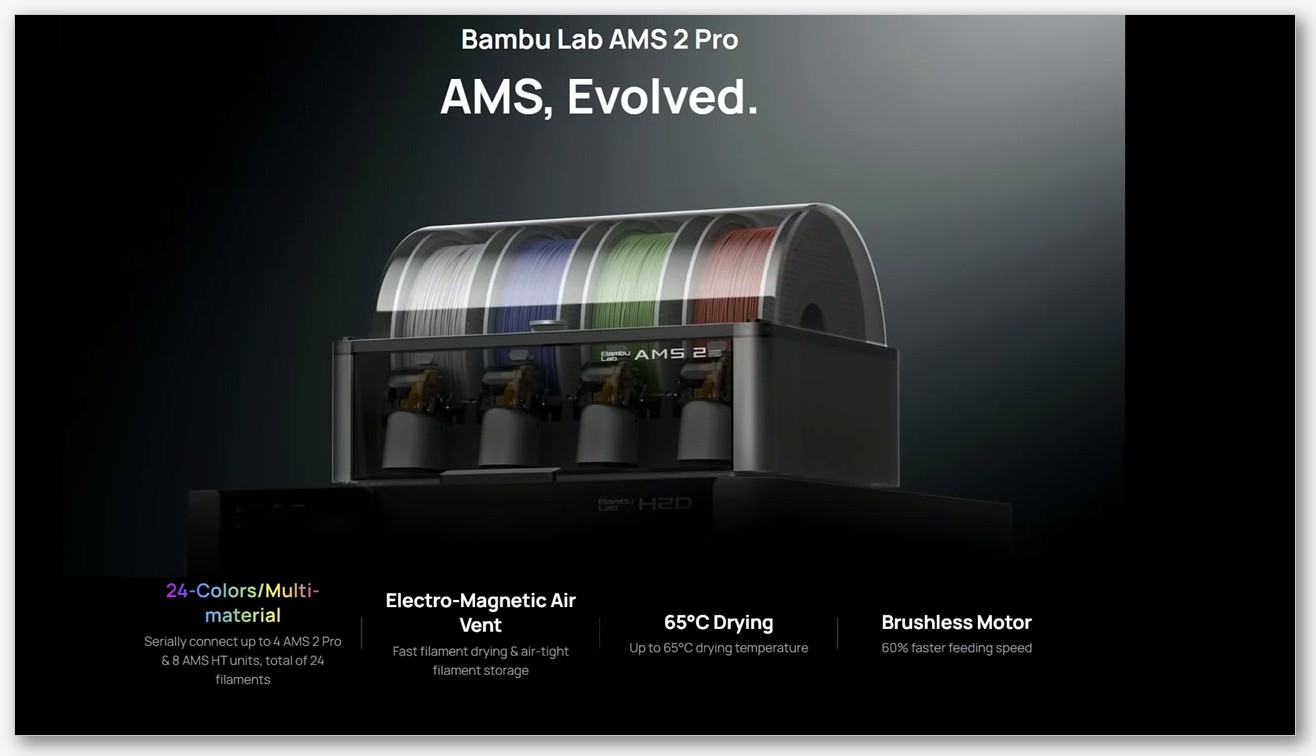
Here’s the rundown, with the specs you actually need to feed into OrcaSlicer’s filament configuration.
| Variant | Slots | Active drying | Max drying temp | Notes |
|---|---|---|---|---|
| Original AMS | 4 | No, desiccant compartments only | n/a | Sealed enclosure, RFID-equipped |
| AMS 2 Pro | 4 | Yes | 65 °C (only at ambient ≥25 °C) | Dynamic air ventilation, dry-while-print |
| AMS HT | 1 (single-spool) | Yes | 85 °C | 170W heater, requires external 220V supply |
| AMS Lite | 4 | No | n/a | Open structure, A1 and A1 mini only |
The detail that catches people out: AMS HT is a single-spool unit, not a 4-slot like the others. The product page over at the Bambu Lab AMS HT store listing confirms this, and so does every retailer carrying it. You don’t buy “an HT” and load four spools in it. You buy one HT per spool of PA-CF or PC you want hot-dried, and you chain multiple units together if you need more than one engineering filament loaded at once.
That chaining is how Bambu gets to the “up to 24 filaments in one print job” headline. Per Bambu Wiki, you can run up to 8 AMS HT single-spool units alongside 4 AMS 2 Pro modules on supported printers, totaling 24 filaments addressable. I’ve run 2 HT plus 1 AMS 2 Pro on an X1C and OrcaSlicer handled the slot mapping cleanly.
The AMS Lite is the odd one out. It’s open-frame, not sealed, and exclusive to the A1 series. Per the AMS Lite FAQ on Bambu Wiki, it “is not compatible with X1 and P1 series printers” and “cannot be combined with other AMS models.” You can’t bolt a Lite onto an A1 setup that already has another AMS.
Which printer takes which AMS
Here’s the cleanest mental model I’ve found for which AMS works with which printer.
- A1 and A1 mini: AMS Lite only. One unit, 4 colors max.
- P1P, P1S, X1C, X1E: original AMS, AMS 2 Pro, AMS HT. Up to 4 AMS HT can chain on X1/P1 series per the Bambu Wiki AMS HT connection guide.
- H2D: original AMS, AMS 2 Pro, AMS HT, and supports the heaviest chaining for that 24-filament number. H2D also gets a couple of OrcaSlicer features the other printers don’t, including the filament-grouping button (more on that in the multi-color section).
There is no scenario in May 2026 where the AMS Lite plays nicely with an H2D or an X1. I know it looks similar from across the room, but the feeder mechanism, the data protocol, and the printer’s filament-routing assumptions are all different.
Material compatibility, variant by variant
This is where most of my own troubleshooting time has gone. Bambu’s general AMS material guide says the sealed AMS family (original AMS, 2 Pro, HT) supports PLA, PETG, ABS, ASA, PET, PA, PC, PP, POM, HIPS, plus Bambu’s PLA-CF, PAHT-CF, and PETG-CF. The wiki is explicit that TPE, generic TPU, PVA, and most third-party carbon or glass fiber filaments are not compatible across the board. There’s one nuance: Bambu’s own “TPU for AMS” SKU is formulated specifically to feed through the sealed AMS variants. Generic flexible TPU still isn’t safe.
| Material | Original AMS | AMS 2 Pro | AMS HT | AMS Lite |
|---|---|---|---|---|
| PLA | Yes | Yes | Yes (overkill) | Yes |
| PETG | Yes | Yes | Yes | Yes |
| ABS / ASA | Yes | Yes | Yes | Yes (open-structure caveat) |
| PA (Nylon) | Feeds, can’t dry | Feeds, dries to 65 °C (incomplete) | Yes, dries to 85 °C | Not recommended |
| PC | Feeds, can’t dry | Feeds, drying incomplete | Yes, dries to 85 °C | Not recommended |
| PA-CF / PAHT-CF | Yes (Bambu) | Yes (Bambu) | Best choice | No, CF damages channel |
| TPU 95A (Bambu “for AMS” SKU) | Yes | Yes | Check Bambu wiki per SKU | No |
| Generic TPU / TPE | No | No | No | No |
| PVA | Yes (sealed) | Yes (sealed, can dry-print) | Yes | Not recommended (open structure) |
| BVOH | Yes | Yes | Yes | Not recommended |
The PA caveat bit me hardest. I bought an AMS 2 Pro thinking 65 °C was enough for nylon, and it isn’t. Per Bambu’s AMS 2 Pro/HT FAQ, PA and PC require higher drying temperature and the 2 Pro can’t dry them completely, so Bambu recommends the HT for these filaments. The 2 Pro will feed PA and dry it partially, but you’ll still get stringing and the surface finish of a damp spool.
PVA in the AMS Lite is the other gotcha. The Lite is open-frame, and per Bambu’s PVA guide, the open structure means PVA continues absorbing moisture during the print. Bambu’s own recommendation for PVA in the Lite is to keep prints under one hour. For long multi-day prints with PVA supports, you want a sealed AMS, ideally the 2 Pro so you can dry-print. Our printing PVA and BVOH supports guide goes deeper.
RFID auto-detection for Bambu spools
This is the magic part. Every Bambu-branded spool has RFID tags on both sides of the cardboard, and each AMS unit (including the HT and 2 Pro) has RFID readers built into the slot. Drop a Bambu PLA Basic spool in, and within a few seconds the slot in OrcaSlicer’s Device tab fills with the right filament profile, K-value, and color swatch. You don’t pick anything from a dropdown.
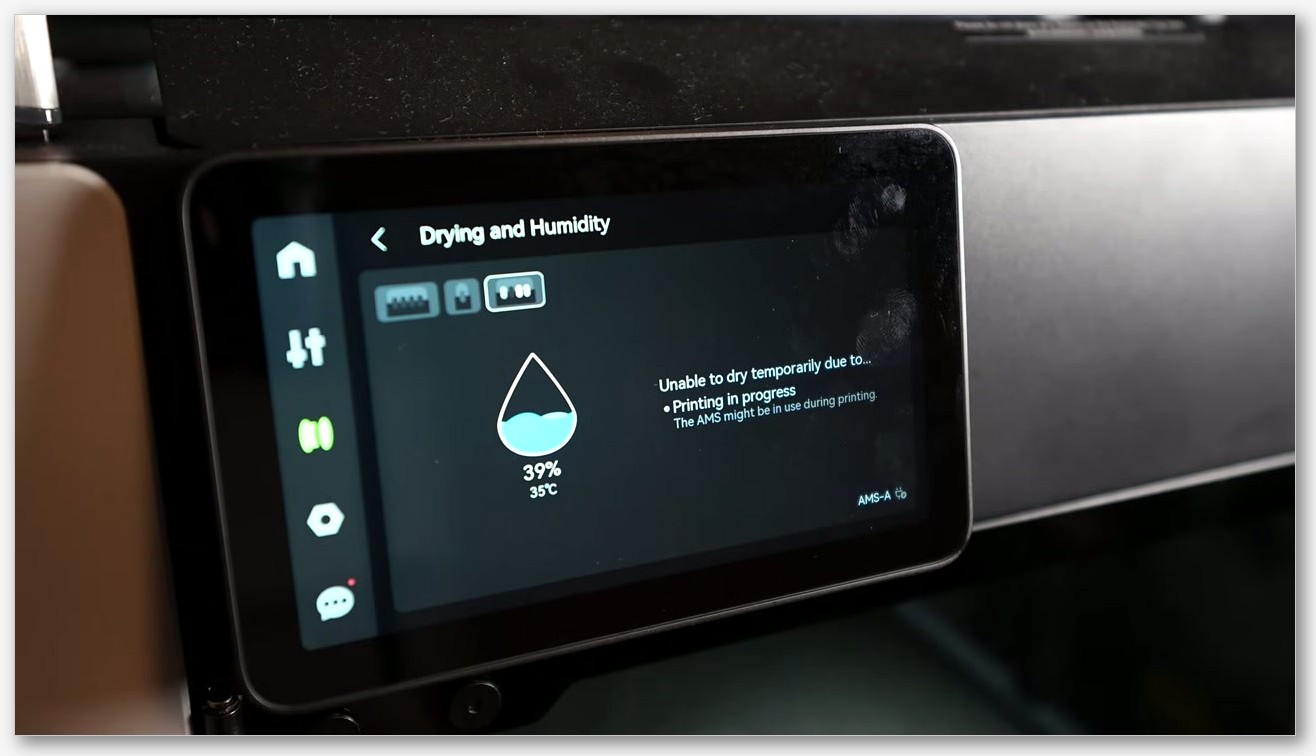
OrcaSlicer pulls this data straight from the printer over the local network. You get three modes to control the behavior, settable on the printer touchscreen: Read Filament on Insertion (reads when you slot a new spool), Read Filament on Startup (reads everything on power-on), and Manual Read (tap a slot to force a re-read).
I leave mine on Read on Insertion because I’m constantly swapping colors. If you mostly leave the same four colors loaded for weeks, Read on Startup is fine and a bit gentler on the readers. If RFID isn’t firing, check that the spool is seated flush against the back of the slot and try a manual read from the touchscreen.
Manual slot mapping for third-party spools
Now the part that costs me actual hours. Third-party spools don’t have Bambu RFID. eSun, Polymaker, Overture, Sunlu, doesn’t matter, you have to map each slot manually in OrcaSlicer’s Device tab. The workflow looks like this:
- Open OrcaSlicer and click the Device tab (it’s one of the four main tabs across the top).
- Find the AMS panel on the right side. Each slot has a little pencil icon in the corner.
- Click the pencil on the slot you want to edit.
- Choose the brand from the dropdown, then the material below it.
- Click Confirm.
That’s the official workflow. In practice, a few things go wrong often enough to know up front. OrcaSlicer issue #3874 documents the most common bug: custom filaments don’t persist after you click Confirm, the slot reverts. Workaround: save your custom preset at the system level (not session-only) before mapping. Even then, I’ve had to redo mapping after closing and reopening OrcaSlicer.
If the AMS list shows up empty, or a slot has no color when you know one is loaded, those are issues #1712 and #4017. Both usually clear if you toggle Sync from AMS off and back on. Issue #4431 covers custom filaments going missing from the AMS list, which happens when OrcaSlicer’s filament library and the printer’s stored list disagree.
This whole workflow is in our AMS setup walkthrough for Bambu printers. Short version: stick to Bambu spools when you can, and accept that third-party mapping is a 30-second-per-slot manual chore.
OrcaSlicer Device tab walkthrough
The Device tab is one of the four main tabs in OrcaSlicer 2.3.x, alongside Prepare, Preview, and Project. Once your printer is connected, it gives you a live view of loaded slots and printer status. The AMS panel sits on the right side and shows each connected AMS unit (a chained 2 Pro plus three HTs shows as four cards), with the individual slots, color swatches, and material labels. The pencil icons edit slot assignments. The sync button at the top pulls the current AMS state from the printer, useful when you’ve physically swapped a spool mid-session.
One thing the Device tab won’t do: change Bambu RFID data. If a spool reads as the wrong color (rare, happens with damaged tags), fix it on the printer touchscreen, not in OrcaSlicer.
LAN Mode plus Developer Mode after firmware 01.08.03.00
This is the wrinkle that sent the OrcaSlicer community sideways in early 2025 and still trips up new users. On January 17, 2025, Bambu released firmware 01.08.03.00 as a beta with the Authorization Control system. The change: third-party slicers like OrcaSlicer could no longer send print jobs to Bambu printers over the cloud unless those jobs routed through Bambu’s new “Bambu Connect” middleware app.
 Issue #8063 is still open, and the project’s position holds: no wrapper around a closed middleware layer. The legitimate, Bambu-supported path is to switch your printer into LAN Mode and enable Developer Mode, both toggles on the printer touchscreen.
Per OrcaSlicer Discussion #10464, the recipe is: from the printer display set your P1S to LAN mode and Developer mode, then connect directly from OrcaSlicer. Developer Mode disables Bambu Cloud entirely, so you’re working LAN-only.
The tradeoff is real: you lose Handy app cloud features, you can’t trigger prints from outside your home network, and you give up Bambu’s cloud-side print history. What you get back is direct OrcaSlicer-to-printer communication, AMS slot data, RFID reads, and the ability to start prints from OrcaSlicer without a separate app.
I’ve been running both X1C and H2D in LAN+Dev mode since February 2025 and it’s been fine. The only annoyance is that firmware updates still want to come through the Handy app, so once a month or so I toggle off Developer Mode, update, then flip it back on. There’s a good companion guide on switching Bambu printers between cloud and LAN mode that walks through the exact toggle paths on each printer model. This is not a bypass or a hack. It’s the path Bambu themselves point at for third-party slicer users in their own blog post on the firmware change.
Multi-color setup and the Type 2 wipe tower
Once your AMS is connected and the slots are mapped, multi-color is mostly a question of painting your model in OrcaSlicer’s Prepare tab and letting the wipe tower handle the purges. OrcaSlicer 2.3.2 made one change worth knowing about specifically because of how it interacts with AMS chains.
Per the OrcaSlicer 2.3.2 release notes, the slicer “adds a new printer-level setting to select the wipe tower type, instead of it being determined solely by the printer model. Type 2 is generally recommended for MMU, filament cutter, and tool changer setups.” For AMS multi-color on Bambu, the default behavior is still fine, but if you’re chaining multiple AMS units and the swaps feel sluggish, switching to Type 2 can reduce purge volume on tall multi-color jobs. You’ll find the setting under Printer Settings, with the wipe tower configuration.
The 2.3.2 release also added a “Disable filament grouping button on non-H2D printers” change. Filament grouping is currently H2D-only. If you’re on an X1C or P1S, you won’t see the grouping button at all, and that’s expected. The H2D’s filament grouping feature lets you tell OrcaSlicer to keep specific filaments on specific physical AMS units, which matters when you have a chain and want PA-CF always going through the HT instead of being randomly assigned. The full OrcaSlicer setup for the Bambu H2D guide covers grouping in more depth.
For the AMS-specific piece, just make sure the Device tab shows the right slot assignments before you slice, because OrcaSlicer maps painted colors to AMS slots in the order they appear in the filament panel.
Dry-while-print on HT and 2 Pro
This is the feature people buy the AMS 2 Pro and HT for. The original AMS has desiccant compartments only, no heater. The AMS Lite has no drying at all. The 2 Pro and HT both have real heaters, and both can dry while a print is running.
The numbers, per Bambu’s drying-function documentation:
- AMS 2 Pro: max 65 °C drying, with dynamic air ventilation. The 65 °C ceiling only applies when ambient room temperature is at or above 25 °C. Below 25 °C ambient, you can’t hit the max.
- AMS HT: max 85 °C drying, 170W heater. Bambu’s wiki says the HT can “stably heat and maintain the maximum 85°C drying temperature even in ambient conditions of 10°C to 25°C,” so it’s the unit you want for a cold garage. Critical detail: each AMS HT requires an external 220V power supply. It does not draw drying power from the printer.
Recommended per-material drying temperatures, also from Bambu’s filament drying guide:
- PLA: around 45 °C, 6 to 8 hours.
- PETG: around 55 °C.
- PA (Nylon): at least 75 °C. This is why the 2 Pro at 65 °C can’t fully dry PA. The HT can.
Here’s the chaining trick that surprised me: simultaneous-print-and-dry isn’t one AMS doing both at once with the same spool. It’s a chained setup where, say, your HT is drying PA-CF at 85 °C while your AMS 2 Pro is actively feeding PLA to the printer. The HT is single-spool, so it can’t dry one filament and feed another. When the print switches to PA-CF, the HT-dried spool is ready without a separate dry cycle. Our OrcaSlicer filament profile settings guide covers temperature config on the slicer side.
Common gotchas
A short list of things that have eaten my time in the last six months, with the relevant GitHub issues so you can check status.
- Custom filaments won’t save in the Device tab slot mapping. Issue #3874 (linked above). Save the custom preset as a system-level filament before trying to assign it to a slot.
- P1S freezes when printing from AMS HT. Issue #11498. Reported behavior is the printer locks up mid-print when the HT is feeding. Workaround on the thread is to load the same filament into the AMS 2 Pro chain and feed from there. Still open at the time of writing.
- Synchronize filament list from AMS broken on nightlies. Issue #13176, reported April 2026. If your AMS sync stopped working after a nightly update, this is probably it. Roll back to stable 2.3.2.
- AMS shows no color in Device tab. Issue #4017. Toggle Sync from AMS off then back on, or restart OrcaSlicer.
- AMS filament list shows empty. Issue #1712. Check that the printer is actually connected (Device tab will show a status indicator), then re-sync.
- Cloud-mode printing dead since fw 01.08.03.00. See the LAN+Dev Mode section above. Not a bug, it’s the Authorization Control system.
One I haven’t seen documented widely: if you swap an AMS 2 Pro spool while a print is paused, OrcaSlicer’s Device tab can show the old color until you trigger a manual RFID re-read from the printer touchscreen. Don’t rely on the slicer UI to catch a physical swap mid-print.
Spoolman, inventory, and what it does for Bambu owners
Worth being honest because this one gets oversold. OrcaSlicer added Spoolman integration in PR #4771. Spoolman is a separate self-hosted filament inventory app, and the integration was built primarily with Klipper plus Moonraker setups in mind.
For Bambu users specifically, the integration is less complete. OrcaSlicer can read filament definitions from Spoolman and use them to populate its filament library. What it doesn’t reliably do, in my experience, is push usage data back from a Bambu print job, because the Bambu print pipeline doesn’t expose post-print consumption data the way Moonraker does. So Spoolman, for a Bambu owner, is useful as an inventory and shopping-list app. It is not a replacement for AMS RFID. You keep RFID for the in-AMS slot data and Spoolman for the “do I need to reorder PLA Matte Black?” question.
FAQ
Does AMS Lite work on my H2D?
No. AMS Lite is exclusive to the A1 and A1 mini. The H2D, X1 series, and P1 series all use the sealed AMS family (original AMS, 2 Pro, HT). You can’t mix Lite with any of them.
Can I dry PA in an AMS 2 Pro?
Partially. The 2 Pro caps at 65 °C and PA needs at least 75 °C for a full dry. Bambu’s own FAQ recommends the AMS HT for PA, PC, and PA-CF. The 2 Pro will feed PA fine, but you’ll see stringing and surface defects from residual moisture.
Why won’t my custom third-party filament save in the Device tab?
Most likely issue #3874 (linked above). Save the custom preset at the system level (Filament Settings, save as new) before assigning it to a slot. Project-only custom presets often don’t persist after you click Confirm.
Do I need to install Bambu Connect to use OrcaSlicer with my X1C?
No, but you do need to enable LAN Mode and Developer Mode on the printer touchscreen. The OrcaSlicer team declined to integrate Bambu Connect (issue #8063 is still open), so LAN+Dev Mode is the supported path. You lose cloud features but get direct slicer-to-printer communication.
Which AMS should I buy for TPU?
If it’s Bambu’s “TPU for AMS” 95A SKU, the standard AMS or AMS 2 Pro works. Generic flexible TPU from any brand is not supported on any AMS variant, including the Lite. The Lite’s open structure is especially bad for TPU because the soft filament can stretch in the feeder.
How many AMS units can I chain on one printer?
Per Bambu, supported X1/P1/H2D setups can run up to 8 AMS HT single-spool units alongside up to 4 AMS 2 Pro units, totaling 24 filaments addressable in a single print job. A1-series printers using AMS Lite are capped at one Lite unit, 4 colors total.
Does OrcaSlicer push print data to Spoolman from Bambu prints?
Not reliably. The Spoolman integration was built for Klipper plus Moonraker setups. Bambu users can read filament definitions from Spoolman, but post-print consumption tracking from Bambu jobs isn’t supported in the same way it is on Klipper.
What’s the difference between wipe tower Type 1 and Type 2 in OrcaSlicer 2.3.2?
Type 2 is the variant recommended for MMU, filament-cutter, and tool-changer setups per the 2.3.2 release notes. For most AMS users on Bambu, the default is fine. If you’re running a long chained-AMS print with frequent swaps, Type 2 can reduce purge volume.
Pulling it together
The Bambu AMS family in 2026 is genuinely powerful, but it’s also more fragmented than people realize. The original AMS is a sealed 4-slot with no active drying. The AMS 2 Pro adds 65 °C drying, capped because of how the heater is designed. The AMS HT is a single-spool 85 °C unit you chain for engineering filaments. The AMS Lite is an A1-exclusive open-frame that won’t ever touch a P1, X1, or H2D. OrcaSlicer handles all four, with the catch that you need LAN Mode plus Developer Mode enabled on the printer since the January 2025 firmware change, and third-party spools require manual slot mapping.
If OrcaSlicer’s the missing piece, the canonical download lives at the OrcaSlicer GitHub releases page. Grab the latest stable build (2.3.2 at the time of writing) and skip the nightlies until you’ve got a working baseline.