
I bought a Bondtech CHT nozzle expecting to print PLA twice as fast and ate three failed Benchies before I figured out the problem wasn’t the nozzle. It was that my filament profile still had max volumetric speed set to the stock 14 mm³/s. The CHT could do 22 mm³/s easily, but the slicer was throttling me down to the V6 ceiling. One number changed and the prints came out clean.
That’s the trap with max volumetric speed (MVS). It’s a silent governor. You can crank print speed to 300 mm/s in your profile and OrcaSlicer will quietly cap the toolhead at whatever the filament’s MVS allows, never warning you, never highlighting anything red. The only clue is a print time estimate that doesn’t match the speed you typed, and prints that come out the same regardless of how aggressive your speed settings get. I’ve watched people buy faster printers and high-flow hot ends chasing speed gains they already had on paper, blocked by a single field buried in filament advanced settings.
This guide walks through OrcaSlicer’s built-in MVS calibration test end to end. I’ll show you exactly what the test prints, how to read the failure point, what number to enter in your filament profile, and where every hot end on the market actually lands compared to its marketing spec. The honest version, not the brochure version. If you’ve been chasing under-extrusion ghosts on a fast printer, this is probably your fix.
Table of contents
- What max volumetric speed actually means
- What to calibrate before the MVS test
- Running the OrcaSlicer max volumetric speed test
- Reading the printed test and doing the math
- Where to enter the result in OrcaSlicer
- Real hot end numbers: manufacturer claim vs measured
- How filament type changes your ceiling
- Temperature is the cheat code (within limits)
- Test gotchas and known OrcaSlicer bugs
- How MVS interacts with other calibrations
- FAQ
What max volumetric speed actually means
Max volumetric speed is the cubic millimetres per second of molten plastic your hot end can melt and push through the nozzle without falling behind. The unit is mm cubed per second, written mm³/s. I’ll use that shorter form from here on. It’s the single number that caps how fast you can print a given filament on a given hot end at a given temperature, and it doesn’t care what speed you typed in your slicer.
The formula every slicer uses is the same:
volumetric demand (mm³/s) = layer height (mm) × extrusion width (mm) × print speed (mm/s)
If I’m printing at 0.2 mm layer height with a 0.45 mm line width at 250 mm/s, the math comes out to 0.2 × 0.45 × 250 = 22.5 mm³/s of melt demand. If my hot end is rated for 18 mm³/s on that filament, the slicer silently drops my effective speed during slicing to around 200 mm/s so the demand stays at or below 18. You won’t see a warning. You’ll see a longer print time estimate than you expected, and that’s the only tell.
I think of it as the thermal ceiling of the hot end. Past that ceiling, filament enters the melt zone faster than the heater can deliver joules to fully melt it. Partially molten filament reaches the nozzle, the extruder gear grub-slips on the cold core inside the melt zone, and you get under-extrusion no matter how aggressive your speed settings are. The hot end isn’t broken. It just can’t melt that volume per second at that temperature.
One detail that catches people out: MVS is per filament, not per printer. The same Revo HF hot end will give you 23 mm³/s on PLA, around 8 mm³/s on PETG, and maybe 2 mm³/s on soft TPU. The slicer enforces the cap from the filament profile, which is why every filament you use seriously is worth its own MVS measurement.
What to calibrate before the MVS test
I’ve seen people skip straight to the MVS test and then complain it gave them a useless number. MVS isn’t a fix-everything calibration. It’s the ceiling test that runs after the rest of your printer is dialled in. If pressure advance is wrong, the test will fail at corners and you’ll think it’s a flow ceiling. If your filament is wet, you’ll measure the moisture limit, not the hot end limit. If you’ve got a partial clog, you’ll measure your clog.
Here’s what I run first, in order, before I bother with MVS. The full sequence lives in the OrcaSlicer calibration guide if you want the pillar overview, but the short version is:
- Flow rate (extrusion multiplier). Run the flow rate calibration so your extrusion multiplier is right. This is different from MVS. Flow rate corrects how much filament you’re pushing per unit length. MVS sets the upper ceiling. If your flow is wrong, the MVS test reads a hot end ceiling that’s not actually your hot end’s fault.
- Pressure advance. Run pressure advance first. A wrongly-tuned PA fakes under-extrusion at corners during the MVS test and you’ll bail out 5 mm³/s below your real ceiling. The MVS print is a continuous corkscrew of cornering, so PA matters more here than on a simple cube.
- Temperature tower. Pick the temperature you’ll actually print at. Higher temp buys more MVS (more on that below), but you need to lock the temp first so the MVS number you measure matches the conditions you’ll print at. Run the temp tower at the speed you intend to print and pick the highest temp where surface finish and overhangs still pass.
- Dry the filament. PETG, ABS, ASA, PA, TPU, and PC all soak moisture. A wet filament pops in the melt zone and the bubbles look like flow failure. If you haven’t dried, you’re measuring a damp filament’s ceiling, not your hot end’s.
- Check the nozzle. A partial clog drops your measured MVS by 30-50% silently. Cold pull, swap to a known-good nozzle, or do a quick atomic pull before the test.
I’ll be blunt: the MVS test only tells the truth if everything upstream is honest. Treat it as the last step in a calibration chain, not the first.
Running the OrcaSlicer max volumetric speed test
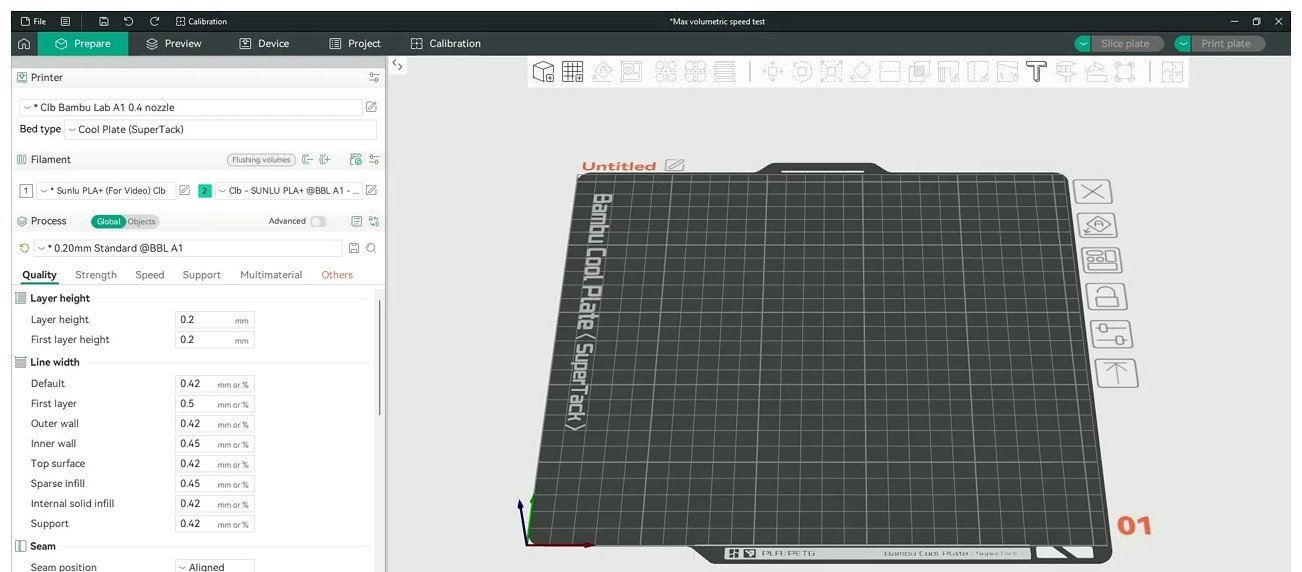
The test lives at Calibration > Max Volumetric Speed in the top menu. The exact submenu placement has moved between OrcaSlicer versions, so if it’s not where I described, check the Calibration menu for “Flow rate” or “Max Flowrate” depending on your build. Once you click it, OrcaSlicer drops a dialog with three values and loads the test object onto the bed.
The defaults you’ll see (verify these on your build, the project moves them occasionally):
- Start volumetric speed: 5 mm³/s
- End volumetric speed: 20 mm³/s
- Step: 0.5 mm³/s
That gives you a 30 mm tall tower (15 mm³/s range divided by 0.5 step) where each millimetre of Z adds 0.5 mm³/s of demand. Honest reality: those defaults are tuned for a stock E3D V6 class hot end. They’ll waste your time on anything modern.
Here’s how I set the dialog for the hot end I’m testing:
| Hot end class | Start | End | Step | Tower height |
|---|---|---|---|---|
| Stock V6, basic Ender / Prusa MK3 class | 5 | 20 | 0.5 | 30 mm |
| Bambu X1C / P1S stock, E3D Volcano | 5 | 30 | 1.0 | 25 mm |
| Revo standard, Mosquito | 5 | 25 | 0.5 | 40 mm |
| Revo HF, Rapido HF, Bondtech CHT, Mosquito Magnum | 10 | 40 | 1.0 | 30 mm |
| Rapido UHF, Bambu high-flow upgrade | 15 | 50 | 1.0 | 35 mm |
I always use a 1 mm³/s step on high-flow hot ends and a 0.5 step on stock hot ends. The 0.5 step gives more resolution but doubles the print time, and on a high-flow hot end the failure point is dramatic enough that 1 mm³/s steps are plenty granular. On a stock V6 you need the 0.5 step because the failure point is subtler.
What the test object is, in plain English
The print is a tall, slowly-rotating single-wall tower. Single perimeter, no infill, no top or bottom layers. As Z increases, the slicer ramps the requested volumetric flow linearly from start to end. The twist is there so any direction-dependent failure (which happens more than you’d think) shows up as a banding pattern around the print rather than only on one side.
Walls are a single perimeter on purpose. The moment the hot end can’t keep up with melt demand, the wall develops visible gaps. There’s no second perimeter to cover the failure, no infill to hide it. The print is essentially a flow rate seismograph in stop-motion.
Slicing and printing the test
Slice and send. A few things to watch:
- Don’t override temperature mid-print. The whole test is built around constant temp. If you bump the temperature partway up, you’re testing two variables and you’ll get junk data.
- First-layer adhesion matters. The tower is tall and thin. If it pops off at Z=15 the test is dead. Use a brim, or print on a clean PEI plate with fresh glue if you trust your bed less.
- Don’t watch the time estimate and panic. The test print is short. On a V6 it’s 15-20 minutes. On a high-flow setup it’s 8-12 minutes.
- Stay near the printer. The failure point is what you’re measuring. Watch the print live (or via a camera) and you’ll see the wall change quality before you measure it on the cooled part. The audible clicking from a slipping extruder is also a real-time tell.
One known weirdness: internally the test sets MVS to 200 mm³/s so the slicer doesn’t cap the test itself. That can jam TPU in the extruder gear during the test because TPU’s real ceiling is extruder grip, not melt rate. If you’re testing TPU, run a much narrower range (say start 1, end 5, step 0.2) so you don’t slam into a jam at the top of the tower. There’s an open issue about this on the OrcaSlicer GitHub (Issue #1888) noting the test’s hardcoded internal limit.
Reading the printed test and doing the math
Pull the test off the bed and look at the wall from bottom to top. The failure point is the first Z height where you see one or more of these:
- Gaps between adjacent passes. The single wall starts looking like wire mesh instead of a solid surface.
- Sudden roughness or banding. The wall goes from smooth to lumpy, often with periodicity that matches a Z step.
- Blob-like artefacts. The extruder is dropping behind, building back-pressure, then dumping when the load drops. The blobs are pressure releases.
- Audible extruder clicks during the print. The drive gear is slipping on a cold filament core. If you heard clicks at Z=22 mm during the print, that’s the data point.
Mark the first Z height where things go wrong. Measure with a ruler or callipers from the top of the brim or first solid layer up to the failure band. Round down rather than up. I’d rather underestimate the ceiling than push over it.
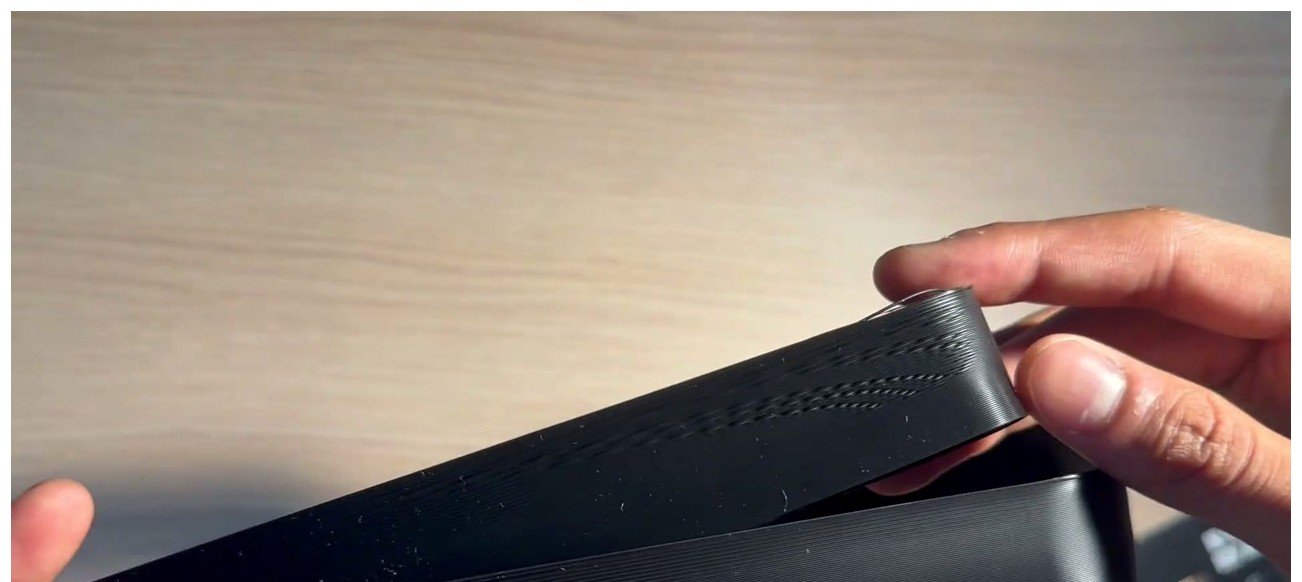
Then run the math. The OrcaSlicer wiki gives the formula as:
MVS at failure = start + (Z_failure × step)
Worked example: I printed with start=10, end=40, step=1. The wall went rough at Z=15 mm. So MVS at failure = 10 + (15 × 1) = 25 mm³/s.
Heads up: there’s a known documentation typo on the OrcaSlicer wiki page about this math, called out in Issue #8426. The version of the formula I just gave is the correct one (start plus Z times step). Some older versions of the wiki had it inverted. If you’ve seen a different formula online, trust the one I gave or rerun the test and check that the math matches what the failure looked like.
Now apply a safety margin. The number you measured is the absolute ceiling under perfect single-wall conditions, no retractions, no corners, constant temperature. Real prints have retractions, sharp corners, cooling fans ramping up and down, and ambient that drifts. I take 10-15% off the measured failure. So a measured 25 mm³/s becomes a profile value of 21-22 mm³/s.
That’s the number that goes into the filament profile.
Where to enter the result in OrcaSlicer
The MVS field hides in filament settings. Click the small gear icon next to the filament selector in the right-hand panel, which opens the filament profile. Then go to the Setting tab, scroll to the Advanced section, and you’ll see a field labelled Max volumetric speed (mm³/s). That’s where the result goes.
If you don’t see Advanced settings, change OrcaSlicer to Advanced mode under Application Preferences. Some users print for years on Simple mode and never see the field.
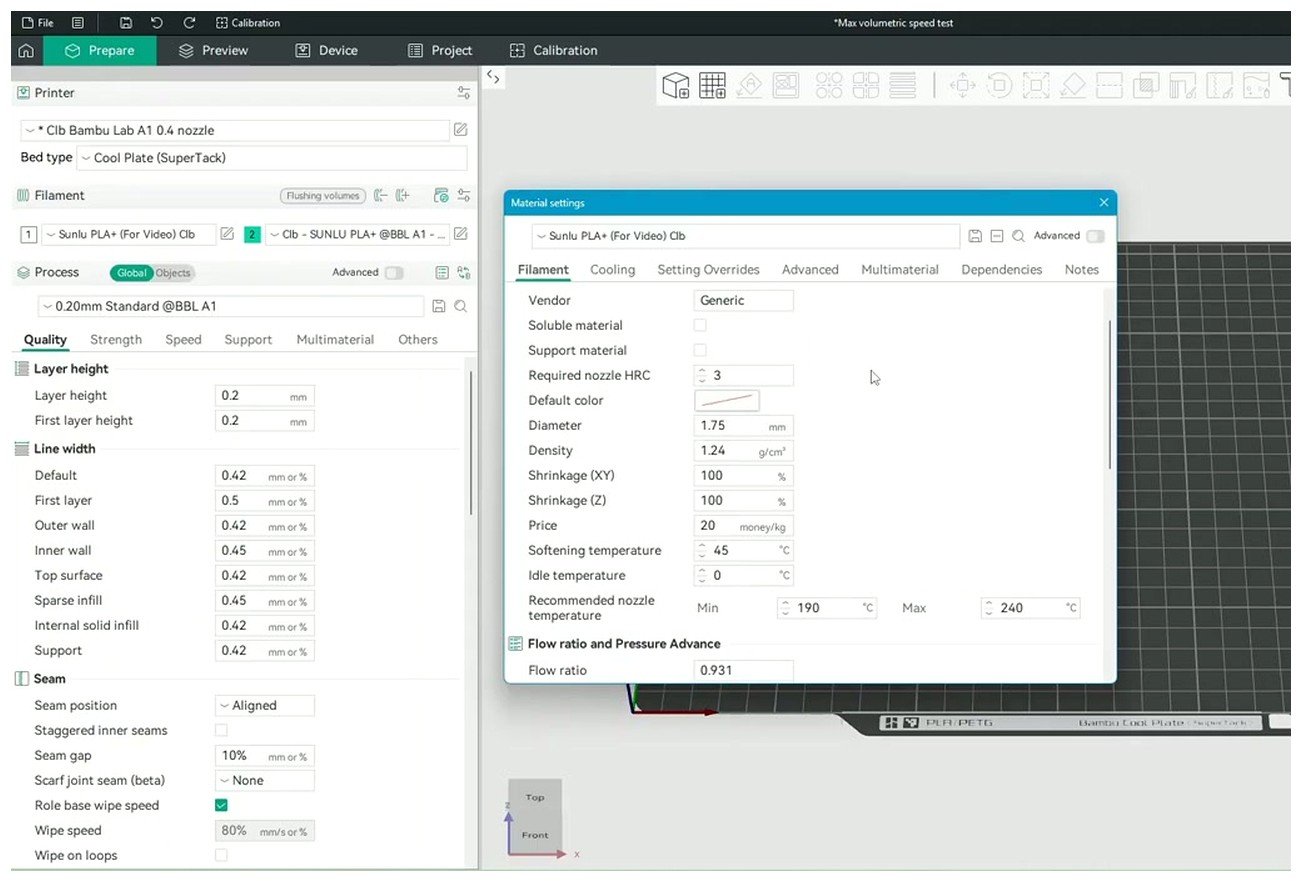
The internal variable name is filament_max_volumetric_speed. If you edit the profile JSON directly you’ll see it there. Don’t set it to zero. The OrcaSlicer wiki notes this value cannot be zero (PrusaSlicer accepts zero to disable; OrcaSlicer enforces a nonzero value). Setting it absurdly high (say 200) effectively disables the cap, but that’s a foot-gun and I’d avoid it.
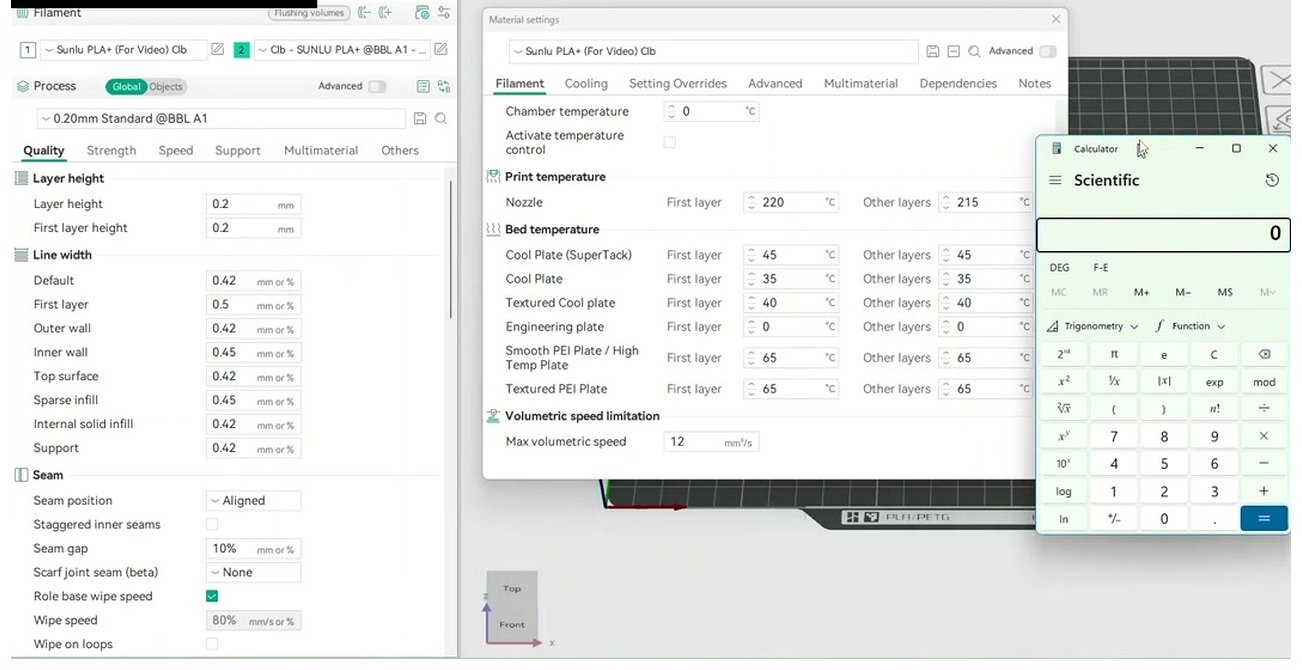
Save the profile. From now on, every print you slice with this filament respects that cap. The slicer reduces effective print speed silently during slicing so the volumetric demand never exceeds your value. You’ll see the consequence in the print time estimate, not in any speed setting. If you typed 300 mm/s in your speed settings but your MVS limits you to 200 mm/s effective, the speed setting still shows 300, but the time estimate (and the actual print) runs at 200.
For an overview of every field on the filament tab and what it controls, the filament settings reference covers the rest.
Real hot end numbers: manufacturer claim vs measured
Now the honest comparison. Every hot end manufacturer publishes a flow rate spec. Every one of those specs is best-case PLA at high temperature on a fresh hot end with a beefy extruder on a synthetic test. Add a real model with corners, slightly damp filament, an extruder that’s lost some grip, or a cooler ambient and you’ll measure 60-80% of the spec. CNC Kitchen’s flow rate benchmarking method is the canonical third-party reference and their measured numbers tend to be a lot closer to what users see in production.
| Hot end | Manufacturer claim | CNC Kitchen / community measured | Filament + temp |
|---|---|---|---|
| Stock E3D V6 (brass 0.4) | 11-15 mm³/s | 10-15 mm³/s | PLA 215 °C |
| E3D Volcano | 25-30 mm³/s (older claims) | 20-25 mm³/s typical | PLA 240 °C |
| E3D Revo standard | ~14 mm³/s | 14 mm³/s (CNC Kitchen) | PLA 220 °C, 0.4 nozzle |
| E3D Revo High Flow | up to ~30 mm³/s | 23.5 mm³/s (CNC Kitchen) | PLA 220 °C, 0.4 nozzle |
| Bondtech CHT (Revo adapter) | 22 mm³/s | 22 mm³/s (CNC Kitchen) | PLA 220 °C, 0.4 nozzle |
| Phaetus Rapido HF | 45 mm³/s peak / 24 mm³/s sustained | 15-20 mm³/s out of the box; 33 mm³/s after extruder current tuning (Voron forum) | ASA / ABS 260 °C |
| Phaetus Rapido UHF | 75 mm³/s peak / 30 mm³/s sustained | 30-40 mm³/s sustained (community) | PLA 230 °C |
| Slice Mosquito | ~35 mm³/s | 15-25 mm³/s typical (community) | PLA 230 °C |
| Slice Mosquito Magnum | ~40 mm³/s | 25-35 mm³/s (community) | PLA / ABS 240 °C |
| Bambu X1C stock hot end | ~32 mm³/s (Bambu) | 25-32 mm³/s sustained; Bambu PLA Basic profile defaults to 21 mm³/s, Generic PLA to 12 mm³/s | PLA 220 °C |
| Bambu X1C high-flow hot end (2024) | 40-50 mm³/s | not yet broadly measured by third parties | PLA 220 °C |
The Revo numbers come from CNC Kitchen’s May 2023 Revo HF review using Stefan’s scale-and-weight method, PLA at 220 °C with a 0.4 nozzle on a Voron 2.4. The Mosquito and Magnum specs come from Slice Engineering’s official support article. The Rapido HF “33 mm³/s after tuning” comes from a long-running Voron forum thread where users reported their extruder motor current was the actual ceiling, not the hot end. They bumped current up and the measured flow climbed from 15-16 mm³/s to the 30s.
That Rapido thread is the goldmine if you’re chasing the last few mm³/s on a Voron. The lesson generalises: on a fast hot end with a strong filament, you’ll often find the extruder gear is slipping before the hot end is actually thermally saturated. Higher motor current, fresh grub screws on the gear, or a stronger extruder (BMG, Galileo, Sherpa Mini) opens up MVS without changing anything else.
The Bambu numbers are worth a special call-out. Generic PLA in OrcaSlicer’s Bambu profiles defaults to 12 mm³/s. Bambu PLA Basic defaults to 21 mm³/s. That’s not a hot end difference. Both filaments print on the same hot end. The 12 mm³/s default is a conservative ceiling for unknown filament and the 21 is what Bambu validated their own filament at. Plenty of generic PLA brands will hit 18-22 mm³/s on an X1C if you actually test them. The Bambu forum is full of users sharing crowdsourced MVS tables for various filament brands; that crowdsourced thread is worth a scan if you print a lot of one brand.
How filament type changes your ceiling
Same hot end, same temperature, very different MVS. The polymer is the variable.
| Filament | MVS as % of PLA at matched setup | Why |
|---|---|---|
| PLA | 100% (baseline) | Low viscosity at print temp, melts easily |
| PETG | 60-70% | Stickier melt, higher backpressure |
| ABS / ASA | 50-70% | Slow heat soak, higher print temp needed |
| TPU 95A | 30-50% | Compresses in extruder gear before it flows; the ceiling is gear slip not heat |
| TPU 85A (soft) | 10-25% | Worse compression; sometimes 1-2 mm³/s is the practical ceiling |
| PA / Nylon | 50-65% | High temp, hygroscopic, often moisture-limited |
| PC / Polycarbonate | 50-65% | Needs 270 °C+ for good melt; chamber heat helps |
| PLA-CF / PETG-CF / PA-CF | Matches base polymer | Carbon fibre doesn’t change melt rate but eats nozzles fast |
| High-flow PLA (Bambu Basic, Polymaker Hyper PLA, eSun ePLA-HS) | 130-170% of regular PLA | Modified rheology for faster melt |
| Soluble (PVA, BVOH) | 25-35% | Slow on purpose; Prusa defaults to 4 mm³/s |
Prusa publishes a clean set of baseline MVS defaults that are good “I don’t know this filament yet” starting points:
- PLA: 15 mm³/s
- ASA / ABS: 11 mm³/s
- PETG: 8 mm³/s
- BVOH / PVA: 4 mm³/s
- FLEX / TPU: 1-2.5 mm³/s
These are conservative. Modern high-flow PLA on a modern hot end blows past 15 mm³/s easily, and I’ve measured Bambu PLA Basic at 28 mm³/s on an X1C high-flow upgrade. But if you’ve got an unknown filament and you don’t want to run a full test, Prusa’s defaults are the safe first guess.
The TPU note matters: TPU MVS is almost never limited by the hot end. It’s limited by how much grip your extruder has on the squishy filament before the drive gear pushes it sideways instead of forward. A BMG with sharp grub screws on a fresh feed path will give you 2.5 mm³/s on 95A TPU all day. A worn, lightly-tensioned extruder will fail at 1.5. The MVS test on TPU is really a “what’s my extruder grip ceiling” test.
Carbon-fibre blends are also worth a moment: the carbon doesn’t change MVS because the base polymer melts the same way. But CF chews brass nozzles down in days. Hardened steel is mandatory, ruby is better. The first symptom of a CF-eaten nozzle isn’t dimensional drift, it’s measured MVS falling. The bore opens, line width gets sloppy, flow looks fine on paper but the print quality drops. If your MVS started at 22 and is now measuring 16, check the nozzle before you blame anything else.
Temperature is the cheat code (within limits)
This is the section most articles get wrong, so I’ll be careful. Raising nozzle temperature by 10 °C usually buys 20-30% more MVS on the same hot end and filament. CNC Kitchen’s 2020 V6 testing confirmed this empirically: the same V6 that lost steps at 15 mm³/s at 185 °C extruded fine at the same flow at 275 °C. Hotter filament has lower viscosity, melts faster, and lets the hot end keep up with higher volumetric demand.
The catch is the polymer degrades above a certain temperature. For PLA that’s roughly 235 °C on most blends, where you start smelling slightly burnt sugar and the prints turn brittle. PETG holds out to about 260 °C before serious degradation. ABS handles 265 °C. Past those ceilings you’re trading MVS for brittle parts and a stinky nozzle.
The practical workflow:
- Run a temperature tower at your usual print speeds. Pick the highest temp where surface finish still looks good and overhangs don’t sag.
- Lock that temperature in the filament profile.
- Then run the MVS test at that temperature.
- Save the MVS result with that temperature in the same profile.
If you later change temperature (different ambient, different model, different season), the MVS shifts with it. For filaments you print a lot, re-running the MVS test at a new temperature is worth the 15 minutes.
One more interaction: ambient and chamber temperature matter for ABS, ASA, PA, and PC. A heated chamber keeps the filament path warmer above the cold zone, which gives you a small MVS bump on engineering materials. It’s not huge, maybe 10-15% on a fully-enclosed chamber-heated build versus an open frame, but it’s real and consistent.
Test gotchas and known OrcaSlicer bugs
The MVS test isn’t perfect. I’ll walk through the known issues so you can read your results with the right amount of scepticism.
Extrusion Rate Smoothing must be off for the test. OrcaSlicer’s ERS feature smooths flow rate changes between features. During the MVS test it should be disabled because the test is itself a flow ramp. Issue #3736 documented that ERS wasn’t being reset for the MVS test in some 2.x builds, which made time estimates wrong and could blur the failure point. Closed as “stale” by the project, but worth checking. Open the test, slice, then check the g-code preview’s time estimate against the dialog’s expected duration. If they’re way off, ERS is probably leaking in. Set ERS to 0 in the filament profile temporarily.
0.6 mm nozzle starts under-extruded. Issue #8505 reports that the test object’s wall geometry doesn’t scale properly for larger nozzles, so a 0.6 mm nozzle starts the test with visible under-extrusion at the bottom of the tower. The number you measure on a 0.6 nozzle is still useful but the bottom 5-10 mm is noise. Look for where things go meaningfully worse, not the first imperfection.
Geometry-dependent failure. Discussion #1721 notes that on some hot ends (especially with PETG-CF), narrow sections of the tower fail earlier than long straight runs. The twisted geometry catches this because failures band around the print, but on borderline filaments the test can read 2-3 mm³/s lower than the real ceiling. If your result feels low compared to others with the same hot end, re-run with a wider step and look at the actual flow ramp.
The test internally sets MVS to 200. So the slicer doesn’t cap the test itself. Per Issue #1888, this can jam TPU because TPU’s real ceiling is extruder grip and a 200 mm³/s demand will absolutely strip the gear. If you’re testing TPU, set a narrow range and a small step so you never hit numbers your extruder can’t physically push.
Open consistency issue (#12296). Some users have reported the test giving different results across the same object’s geometry on 2.3.x. If your result looks wildly off, run a second test with different start/end/step and see if the failure Z scales as expected. If the two tests disagree, take the lower number.
Print speed inconsistency across the test object. Related to the above. The test isn’t perfectly linear in flow across all Z heights. The error is small (typically <1 mm³/s) but if you’re tuning to within a few percent it matters.
None of these break the test. They’re worth knowing because they explain why your number might differ from a friend’s, or from a YouTube review running the same hot end. The troubleshooting master guide covers the broader under-extrusion debug tree if your test results don’t make sense.
How MVS interacts with other calibrations
MVS doesn’t live alone. A few interactions worth understanding:
Pressure advance comes before MVS. A wrong PA value fakes corner under-extrusion that looks like MVS failure. Run pressure advance first, lock it in the profile, then run MVS. If you change PA later, you don’t have to re-run MVS, but the order on first calibration matters.
Flow rate is different from MVS, despite the similar name. Flow rate (extrusion multiplier) corrects how much filament you’re pushing per unit length, full stop. MVS sets the upper ceiling on how fast you can push it. Flow rate calibration happens first because if your flow rate is off by 5%, your measured MVS is off in the same direction.
Temperature interacts directly. Higher temp, higher MVS, until the polymer degrades. Always pair a temp tower with an MVS test.
Input shaper doesn’t change MVS. But it lets you actually achieve the speeds MVS permits without ghosting. If your MVS allows 200 mm/s effective speed but your printer rings like a bell at anything over 120, you need input shaper tuned before MVS gives you real-world speed gains. Otherwise MVS is paper money.
Cornering calibration matters for the test itself. The twisted tower is all corners. If your cornering / jerk values are way off, the test prints differently than a real model. Default cornering values are fine for the test, but if you’ve been tweaking aggressively, set them back to defaults before testing.
Retraction can hide as MVS failure. A bad retraction setting leaves a pressure spike at the start of each new extrusion move. The MVS test has few retractions, so it’ll measure higher than your real-world prints. If you measure 22 mm³/s on the test but real prints fail at 18, retraction is a candidate. Run a retraction test and see if there’s pressure leftover after the retract.
Tolerance and fit don’t interact with MVS. Different domain entirely, but if you’ve never run the tolerance fit test, your dimensional accuracy is unrelated to your flow ceiling. Just noting it because people sometimes ask.
FAQ
Does a larger nozzle give me more MVS?
Yes, usually significantly. A larger nozzle widens the melt zone in some hot ends (Volcano, Rapido HF, Bambu high-flow) and lets more filament melt per second. Going from a 0.4 to a 0.6 nozzle on a Volcano-class hot end can move MVS from 22 mm³/s to 35+ mm³/s on PLA. On a V6 the gain is smaller because the melt zone doesn’t change with nozzle. Always re-test MVS when you change nozzle diameter.
Why is my measured MVS so much lower than the spec sheet?
Because the spec sheet is best case. Manufacturer numbers assume their preferred filament at their preferred temperature on a fresh hot end with a strong extruder on a synthetic test with no retractions or corners. Real-world MVS lands at 60-80% of spec for most hot ends. CNC Kitchen’s measured numbers are usually closer to what you’ll see. There’s nothing wrong with your setup.
Should I just set MVS to a huge number and disable the limit?
No. Silent under-extrusion is the worst kind of print failure because you don’t notice until 5 hours in. MVS isn’t a tax; it’s a safety rail. Measure it properly, add a margin, and let the slicer do the math. The honest performance gain from raising MVS by 30% is much bigger than from disabling it and burning through failures.
Do I need to re-run for every filament brand?
For filaments you print a lot of, yes. The MVS of two PLA brands can easily differ by 30%. For casual one-off prints with random PLA, Prusa’s 15 mm³/s default is a safe baseline. For PETG, ABS, and engineering materials, brand-level variation is bigger, and re-testing per spool is worth the 15 minutes if you’re pushing speed.
Does input shaper change MVS?
No, MVS is a thermal limit and input shaper is a motion-resonance compensation. But input shaper lets you actually use the speeds MVS allows without ringing on the surface. The two are complementary. Tune both, in either order.
Why does Bambu cap generic PLA at 12 mm³/s when the hot end can do more?
It’s a conservative default for unknown filament. The Bambu hot end can move plenty more than 12 mm³/s on a decent generic PLA. The Bambu PLA Basic profile sits at 21 because Bambu measured their own filament. You can change generic PLA’s MVS yourself after running the test. The 12 default isn’t a hardware limit, it’s a “we don’t know what you loaded” default.
Can I run the MVS test at a different temperature than my filament’s default?
Yes, just change the filament profile’s nozzle temperature before running the test. The test uses whatever temp is currently set in the active filament. If you want to measure MVS at 220 °C and 230 °C for the same filament, run the test twice with the temp changed in between. Note the temperature alongside the MVS value when you save the profile.
What if my measured MVS keeps falling over time?
Three usual suspects, in order: nozzle wear (especially on CF blends), partial clog, or extruder gear wear. Swap nozzles or do an atomic pull, check the extruder gear teeth for filament dust packed into the grooves, and re-test. If MVS is still down, your hot end might have lost thermal performance (heater cartridge fading, thermistor drift). It’s rare but it happens.
Wrapping up
Max volumetric speed is the truth your slicer was hiding from you. Once you measure it, the rest of speed tuning gets a lot more rational. You stop chasing speed settings that the slicer is quietly ignoring, and you start making decisions about temperature, nozzle, and filament with real numbers instead of marketing brochures.
The three-step recap, if you take nothing else from this:
- Run the test at Calibration > Max Volumetric Speed with start, end, and step sized to your hot end class.
- Find the Z height where the single wall first fails, do the math (MVS = start + Z × step), take 10-15% off as a safety margin.
- Paste the result into Filament settings > Advanced > Max volumetric speed.
From there, you’ve got a real ceiling per filament. If you’re working through the full speed-tuning stack, the OrcaSlicer calibration guide covers the whole order, from flow rate through input shaper to cornering. Run them in order, save the values per filament, and you’ll get a printer that prints as fast as it physically can without lying to you about what speed it’s actually moving at.
Related OrcaSlicer guides
- The Complete OrcaSlicer Calibration Guide (Order Matters)
- OrcaSlicer Tolerance & Fit Test: Functional Parts (2026 Guide)
- OrcaSlicer VFA Test: Diagnose Vertical Fine Artifacts (2026 Guide)
- OrcaSlicer PA Line vs PA Pattern vs PA Tower: Which Pressure Advance Test (2026)
- OrcaSlicer Won’t Open or Won’t Launch: Windows, Mac, Linux Fixes