
The first PVA spool I loaded into an MMU2S sat on a shelf for nine months before I tried it, and the first layer foamed like a soda can the second the nozzle hit temperature. I ran it through a 45 degree dryer for twelve hours, reloaded, and watched the same spool lay down a perfect dense interface against a PLA shell that came off the bed free of witness marks. That gap between wet brick and clean release is the whole story of soluble supports, and it's why I've spent more time tuning PVA and BVOH in OrcaSlicer than any other filament category.
This guide pins every temperature, drying spec, and dissolution warning to the vendor datasheet it came from. PVA and BVOH are the materials where vendor specs differ the most, and a single "typical PVA range" recommendation will get someone's nozzle clogged. So we're going per-brand on every number.
Table of contents
- When soluble supports earn their keep
- PVA vs BVOH chemistry and price
- OrcaSlicer's PVA and BVOH profiles
- Print temps, bed, and speeds per brand
- Drying specs and the AMS HT advantage
- Configuring OrcaSlicer's support settings
- Printer, AMS, and MMU compatibility
- Water-bath dissolution: temperature, time, agitation
- Common failure modes
- FAQ
When soluble supports earn their keep
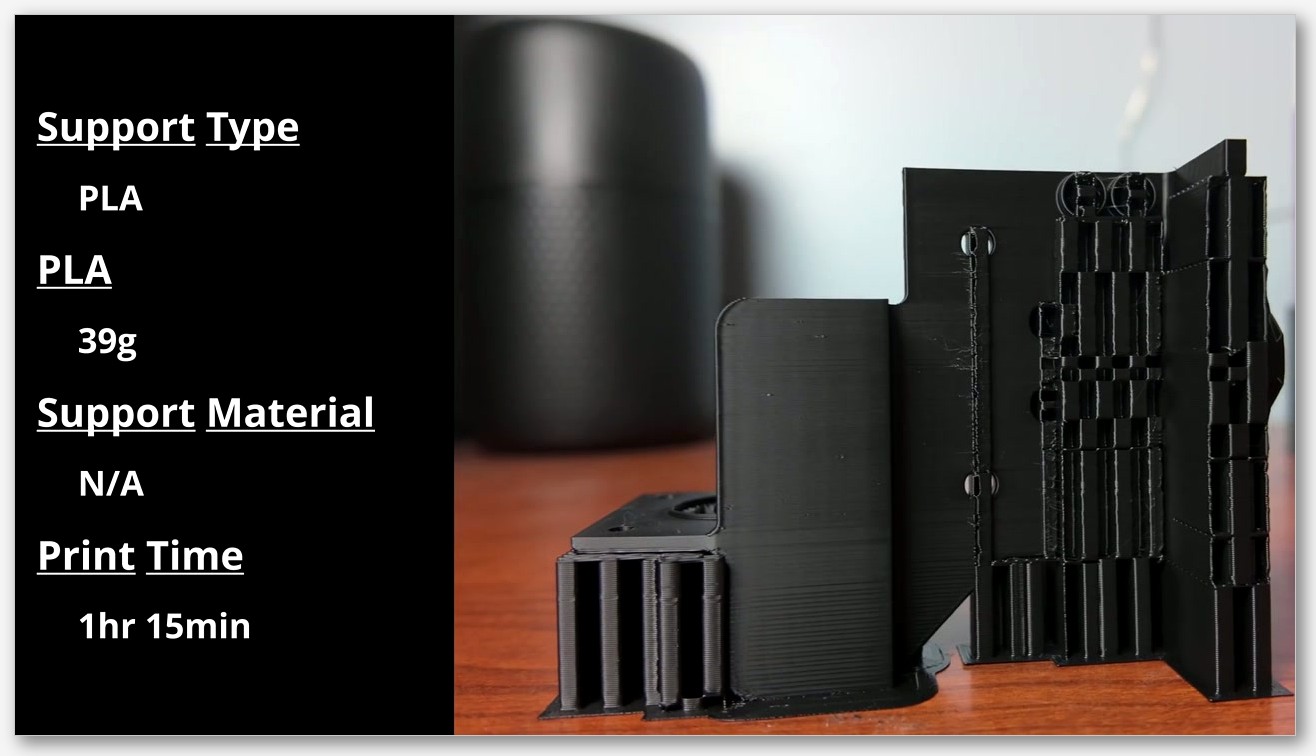
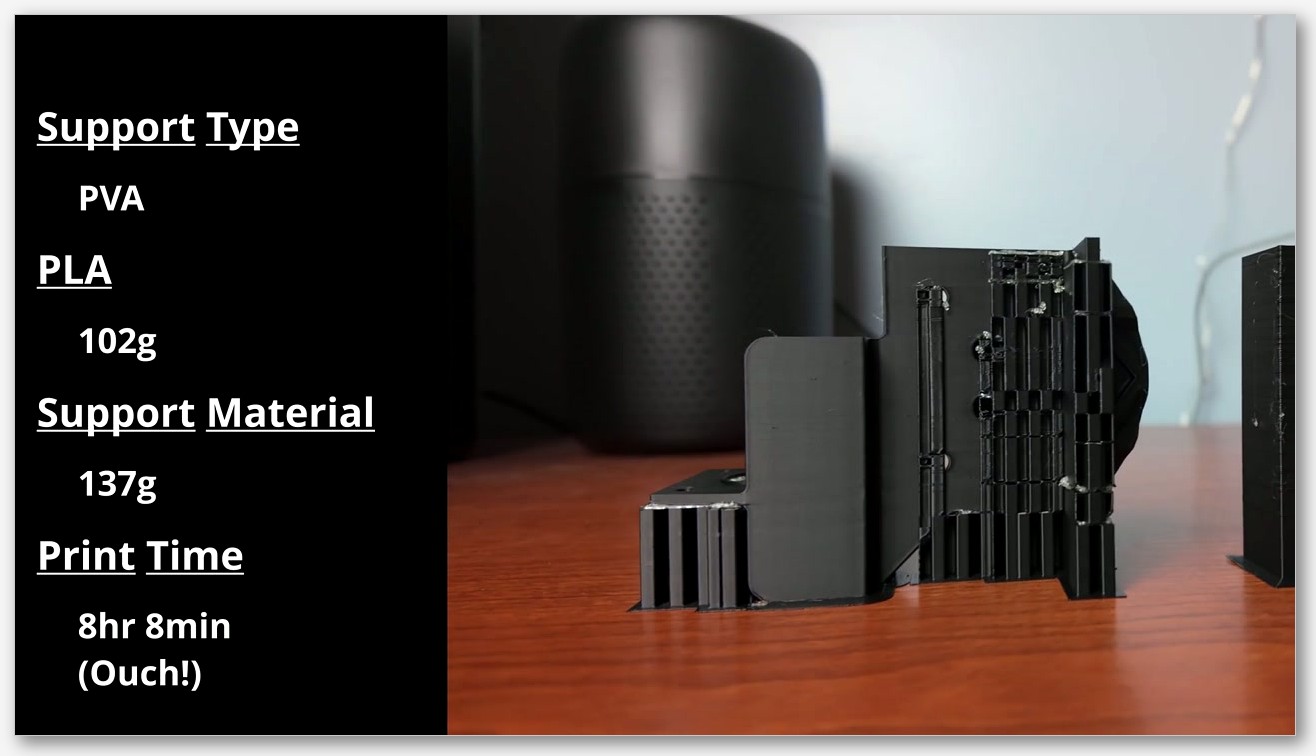
I don't reach for PVA on every print. Tree supports in OrcaSlicer are good enough now that for 80% of overhangs I just toggle them on and accept a 30-second cleanup. But there are jobs where rigid supports physically cannot work: deep sealed cavities, lattice interiors, undercut hooks that wrap back on themselves, and any downward face where a witness mark would ruin the part. That's where soluble shines. You print the model in your usual material, print the interface layer (and optionally the body) in PVA or BVOH, then drop the whole thing in warm water and walk away.
The catch is hardware. You can't do this on a single-extruder printer. You need an IDEX rig like the Snapmaker J1, a tool-changer like the Prusa XL, an MMU like the MMU2S or MMU3, or a Bambu AMS. The slicer needs to assign the soluble material to the support interface layers only, because PVA costs five to ten times what PLA does and you do not want a 200-gram support tower made of the expensive stuff. If you're still picking your approach, my tree supports guide and the normal vs tree comparison are the cheaper starting point.
PVA vs BVOH chemistry and price
PVA is polyvinyl alcohol, a water-soluble synthetic polymer with the idealized formula [CH2CH(OH)]n. Unlike most vinyl polymers, it's prepared by hydrolysis of polyvinyl acetate rather than direct monomer polymerization. That hydrolysis route matters because every spool of PVA you buy is a slightly different blend, which is why eSUN, Polymaker, and Bambu publish wildly different print temperatures for material that nominally has the same chemistry.
BVOH is butenediol vinyl alcohol co-polymer. Verbatim's product page lists density at 1.14 g/cm3 and flags the spool as light and UV sensitive, which lines up with my experience: BVOH stored in clear bags by a window goes brittle faster than PVA does. Prusa's knowledge base is the cleanest comparison I've found. Quoting their water-soluble materials article directly: "The main difference between BVOH and PVA is in their printability and price. PVA is usually cheaper, but it's more prone to nozzle clogging" and "BVOH sticks a little bit better than PVA." They go further elsewhere: "PVA+ and BVOH are similar in many ways, but BVOH is absolutely the better (but more expensive) option. It is stiffer and will behave much better than PVA+ when printed."
I don't love giving people a multiplier on how much faster BVOH dissolves, because no vendor publishes one. From running both, BVOH strings less, clogs less, and dissolves faster in the same water bath, but the spool is roughly double the price. If you print soluble once a month, get cheap eSUN PVA, dry it religiously, and accept the stringing. If you're printing weekly or running PETG models that push 240C, the BVOH premium pays for itself.
Both materials are water-soluble, not biodegradable. PVA is sometimes mislabelled as "compostable" in marketing copy. It's not. It dissolves in water and that's the disposal route.
OrcaSlicer's PVA and BVOH profiles
Honest take: OrcaSlicer's out-of-box soluble coverage is thin. There are exactly two soluble JSONs in the OrcaFilamentLibrary, Generic PVA @System.json and Generic BVOH @System.json, and both are stubs. The PVA file declares "inherits": "fdm_filament_pva" with setting ID OGFSA04; the BVOH file declares "inherits": "fdm_filament_bvoh" with setting ID OGFSS97_00. The actual default temperatures live in compiled C++ inside PrintConfig.cpp, not the JSON, so you can't open the file and read what nozzle temp Generic PVA will use. Better to ignore the generic preset entirely and use the vendor datasheet for whatever spool you bought.
There are no vendor-specific Polymaker, eSUN, or Verbatim soluble presets in the OrcaFilamentLibrary at the moment. Polymaker maintains its own profile import guide on their wiki. For everyone else the workflow is the same as any custom filament: copy the Generic preset, rename it, plug in vendor numbers from the table below, then flip the filament_soluble flag to true in Advanced mode. Once that flag is on, OrcaSlicer treats the filament as a support material in the support-tab dropdowns. My filament settings walkthrough covers the rest of the per-filament tuning that applies to PVA and BVOH just like it does PLA.
Print temps, bed, and speeds per brand
This is the table I wish I'd had on day one. Every number is from the vendor's own datasheet or product page, verbatim. Don't average these. eSUN's upper limit (230C) overlaps Bambu's lower limit (240C), and a 215C setting that works for PolyDissolve will under-extrude eSUN at the same throughput.
| Spool | Nozzle | Bed | Fan | Speed |
|---|---|---|---|---|
| eSUN PVA (TDS V4.0) | 180-230°C | 45-60°C | 100% | 20-50 mm/s |
| Verbatim BVOH (product page) | 210±10°C | 60°C | n/a | n/a |
| Polymaker PolyDissolve S1 (TDS V5.1) | 215-225°C | 25-60°C | ON | 30-40 mm/s |
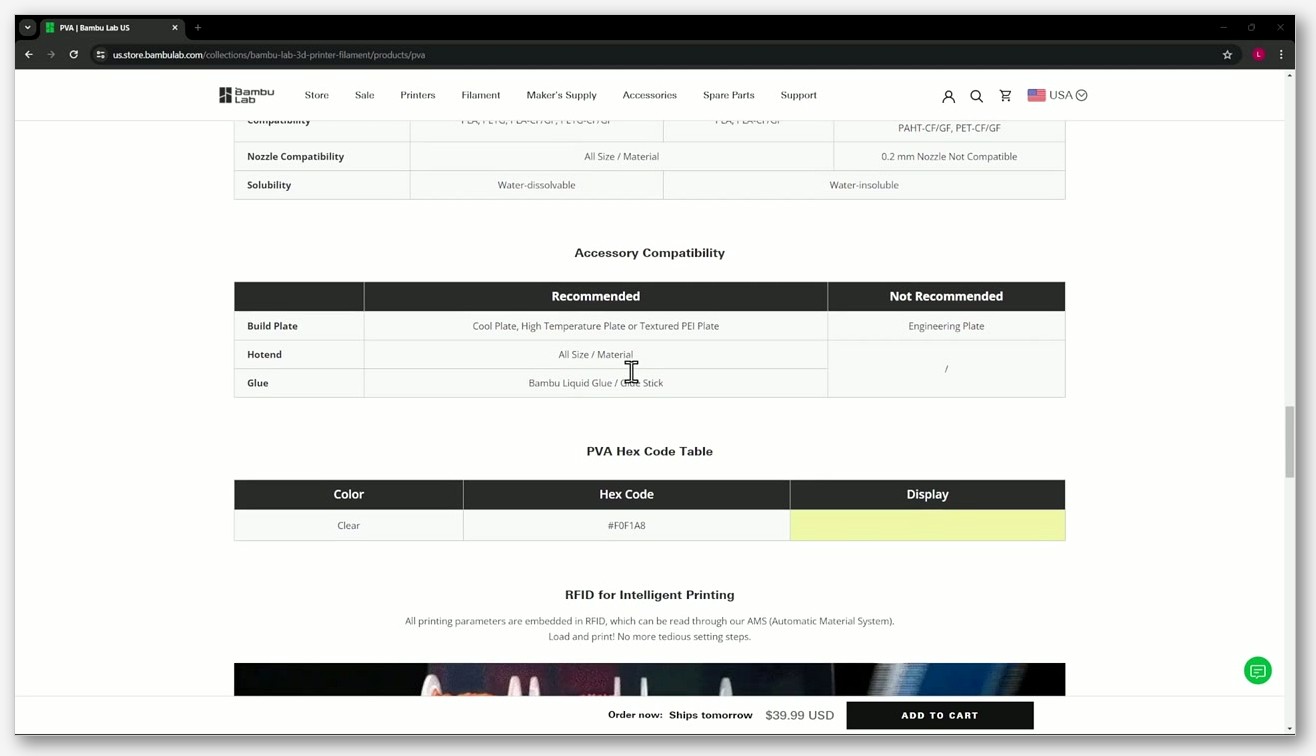
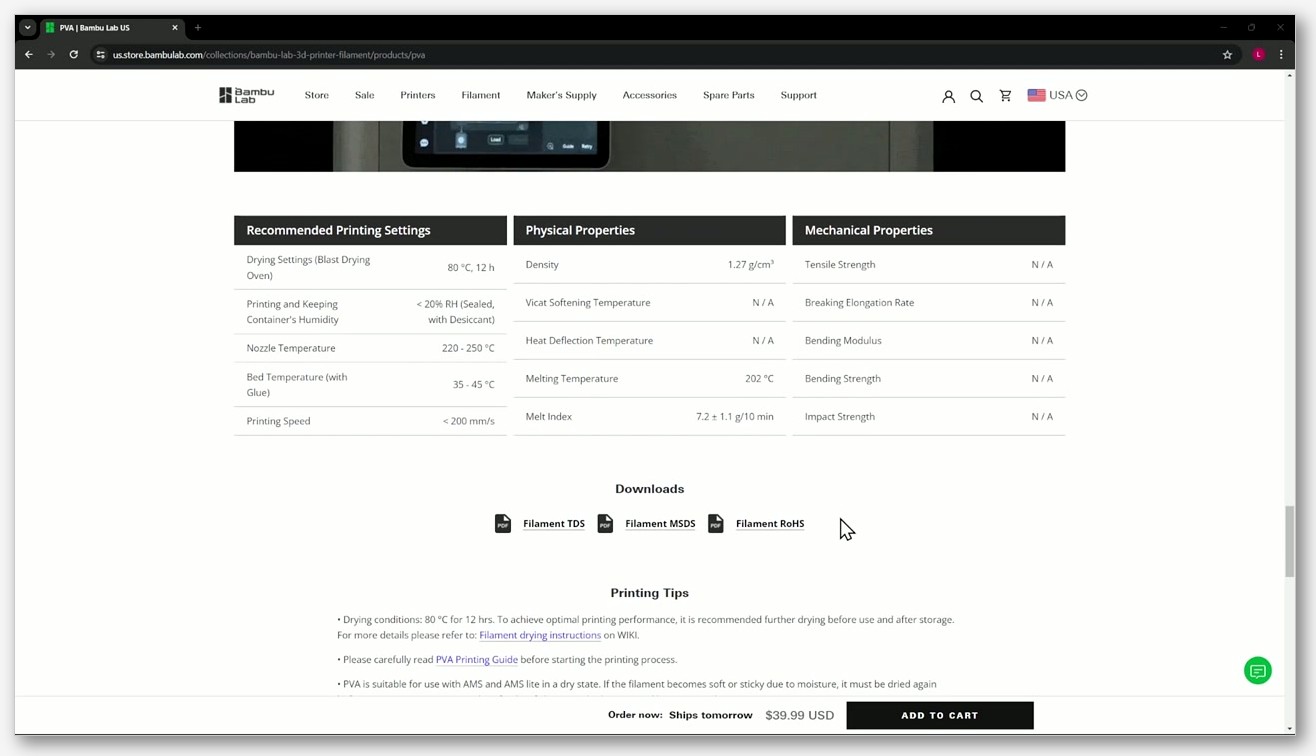
| Bambu Lab PVA (Bambu wiki) | 240-250°C | varies | n/a | n/a |
A few things worth calling out. The eSUN PVA TDS V4.0 recommends "set the distance between the support and the model to 0, slow down and turn off the fan for the first layer to bond well with the main material." That maps onto OrcaSlicer's support Z-distance set to 0 and a slowed first layer. eSUN also rates density at 1.25 g/cm3, heavier than BVOH and PolyDissolve, which matters when estimating spool consumption.
The Polymaker PolyDissolve S1 TDS V5.1 gives the tightest spec: 215-225C nozzle, 25-60C bed, 30-40 mm/s, retraction at 1mm/20mm/s. Polymaker also recommends running the spool out of a PolyBox or sealed bag during printing, because equilibrium water absorption hits 10.21% at 70%RH / 23C. Of the three datasheets, the Polymaker one is the most usable starting point if you're cloning a profile.
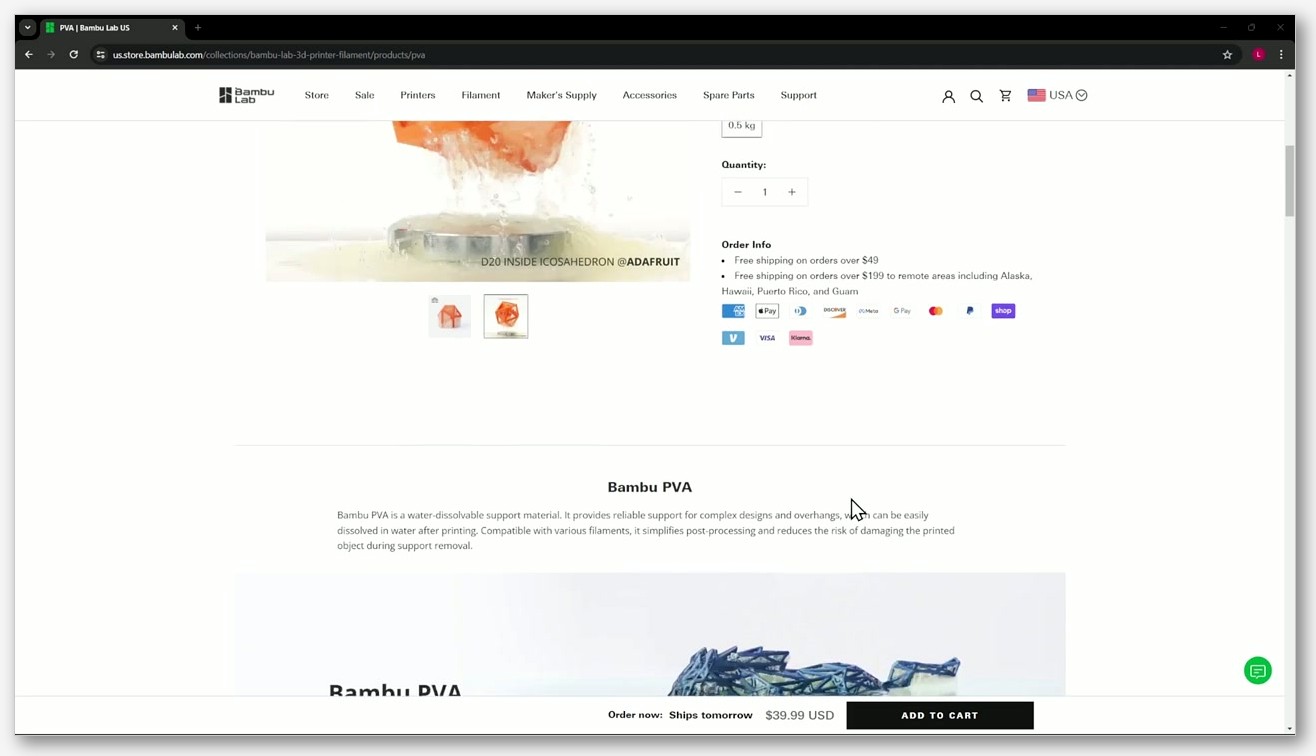
Bambu's own PVA spool runs hot. Their wiki recommends 240-250C, well into PETG territory. That's deliberate; their formulation is tuned for X1C/P1S hot ends and pairs with PETG model materials where eSUN PVA would risk softening from radiated heat. If you're running a Bambu printer with a Bambu PVA spool, use Bambu's numbers from the Bambu PVA printing guide, not the generic preset.
Drying specs and the AMS HT advantage
If you read nothing else in this article, read this section. Wet PVA does not just print badly. It actively damages your nozzle, because the moisture flashes to steam inside the melt zone and pushes molten polymer back up the bowden or filament path, where it cools and clogs. The eSUN TDS is blunt: "Suggest to dry the material before printing (45℃/>10H) to get perfect printing effect."
Drying conditions are vendor-specific. Don't use one number for all spools:
| Spool | Drying temp | Drying time |
|---|---|---|
| eSUN PVA | 45°C | >10 hours |
| Polymaker PolyDissolve S1 | 80°C | 12 hours |
| Bambu Lab PVA (via AMS HT) | 80°C | 12 hours |
The 35-degree gap between eSUN and Polymaker isn't a margin-of-error situation. eSUN's PVA blend will start to soften and tack together inside the spool if you push it to 80C, and Polymaker's sets the bar higher because their formulation tolerates and benefits from a hotter drying cycle. Pull the temp from whoever made your spool.
Here's the gotcha that bit me on my first Polymaker test: the Polymaker TDS V5.1 publishes a moisture absorption curve showing equilibrium water uptake of 10.21% at 70%RH / 23C. That equilibrium is reached over days, not hours. If you leave a fresh Polymaker spool unsealed on your desk for a week in a humid room, you're looking at roughly 6% water content by the 6-8 day mark and 10% if you forget about it for two weeks. That's why every vendor pushes for sealed storage with desiccant. Bambu's wiki specifically recommends calcium chloride desiccant over silica gel for PVA, because silica gel reaches its absorption ceiling much earlier and stops pulling moisture.
Now the AMS situation. Bambu sells four AMS variants and they handle PVA very differently:
- AMS HT: 85C max drying, 170W heater. This is Bambu's explicit recommendation for PVA. It hits the 80C/12h target the wiki specifies.
- AMS 2 Pro: 65C max drying. That's enough to keep PVA dry once it's dry, but it's under the 80C target if you're trying to revive a wet spool.
- Original AMS: no active drying. It's a sealed box with desiccant, which is fine for PLA but won't pull water out of a PVA spool that's already absorbed it.
- AMS Lite: explicitly not recommended for PVA. Bambu's own AMS Lite FAQ states that the open structure exposes filament to air, leading to moisture reabsorption during printing, and warns to keep PVA prints under 1 hour. In practice that means A1 owners need an external dryer.
The honest reading: if you're on a Bambu printer and you print PVA more than occasionally, the AMS HT pays back. For the wider AMS feature comparison, see my OrcaSlicer with Bambu AMS guide.
Configuring OrcaSlicer's support settings
OrcaSlicer's soluble workflow lives in three settings in the Support tab. I'm pulling these verbatim from the support_settings_filament wiki page because the naming and the per-feature toggles matter:
- Base (variable
support_filament): "Filament to print support base and raft. 'Default' means no specific filament for support and current filament is used." - Interface (variable
support_interface_filament): "Filament to print support interface. 'Default' means no specific filament for support interface and current filament is used." - Avoid interface filament for base (variable
support_interface_not_for_body): "Avoid using support interface filament to print support base if possible."
The combination I use for every PVA job goes like this. Set Base to the model material (PLA, PETG, whatever you're actually printing). Set Interface to the PVA or BVOH filament. Toggle "Avoid interface filament for base" ON. That keeps the bulk of the support tower printed in cheap material and only the contact layer in soluble. On the PVA preset itself, flip filament_soluble to true under Advanced mode. The slicer uses that flag to determine which filaments show up as candidates in the support dropdowns and to apply soluble-appropriate flow defaults.
One workflow note from the eSUN TDS I've found genuinely helpful: support Z-distance set to 0, first layer slowed, fan off. That sounds wrong until you remember it's only the interface layer touching the model, the model bottom face will dissolve clean, and the zero gap is what gives you a glass-smooth release surface. With a normal breakaway support, zero Z-distance welds the support to the model and ruins both. With a soluble interface it just gives you the cleanest possible witness-mark-free finish.
Printer, AMS, and MMU compatibility
Hardware first. You need a multi-material capable system. The options I see in the wild break down into four families.
Bambu AMS systems (covered above). AMS HT for PVA-heavy use, AMS 2 Pro as a competent compromise, original AMS only if you're drying externally first, AMS Lite explicitly not recommended for PVA. For the multi-material side of the conversation that isn't soluble-specific, my multi-colour guide covers the same AMS plumbing.
Prusa MMU and XL. The MMU2S, MMU3, and the XL tool-changer all support PVA and BVOH. Prusa's knowledge base walks through the workflow on PrusaSlicer, and OrcaSlicer's soluble structure mirrors it almost field for field thanks to the shared Slic3r heritage. The only new thing is OrcaSlicer's separate Base and Interface dropdowns; PrusaSlicer combines them.
Snapmaker J1 and J1s IDEX. The J1 was added to OrcaSlicer in version 1.6.2-beta and is the most accessible IDEX option for soluble work. With two truly independent toolheads you don't get any oozing from a parked second nozzle, which removes one of the most annoying PVA failure modes on AMS-style single-toolhead systems. There's an open GitHub issue (#2935) tracking specific Snapmaker J1 multi-extruder edge cases, so check that before you commit to a long print. For broader J1 setup, see my OrcaSlicer with Snapmaker writeup.
Model material compatibility matters more than the printer. The Polymaker PolyDissolve S1 TDS V5.1 publishes a compatibility table that rates pairings from "++" (very well supported) to "–" (not supported). PLA, PVB, TPU, and Nylon all rate ++. PETG rates +. ABS and PC both rate –. That last one matters because there's a recurring forum suggestion that PVA does fine with ABS because the ABS chamber dries the PVA mid-print. Polymaker's own data contradicts that for their formulation, and in my own testing ABS chamber temps and ABS-range nozzle temps degrade PVA visibly within a few hours of dwell. If you need supports inside an ABS print, look at HIPS or breakaway, not PVA. eSUN's TDS lists their PVA as working with "PLA, TPU, PA(nylon) and other consumables materials," which lines up with Polymaker's ratings.
Water-bath dissolution: temperature, time, agitation
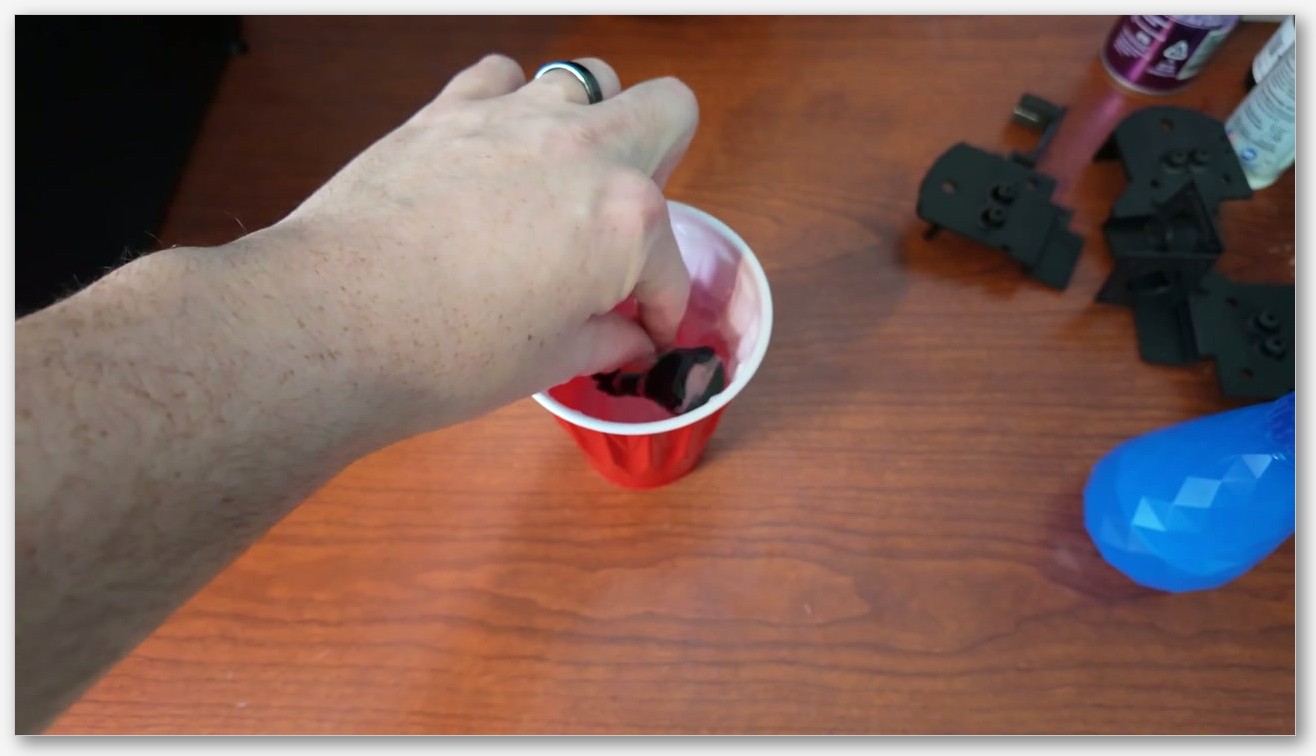
People overthink this. Drop the print in a tub of warm water, leave it for a few hours, come back, lift it out, rinse it under the tap. Done. The nuances are mostly about not warping your model material.
Water temperature first. The Bambu PVA printing guide is explicit: "If the model is made of low-heat-resistant PLA, the water temperature should not exceed 50°C to prevent deformation." PLA's glass transition sits around 55-60C, so you have a narrow buffer. Stay at or under 50C with PLA models. The Prusa MMU2S article is even more conservative: "immerse it in warm water (maximum 45 °C) and leave it there for a few hours to overnight." I run 45-50C with PLA and 60-65C with PETG models, and I haven't had a warping issue at those numbers.
Time is geometry-dependent, not vendor-dependent. The Bambu wiki estimates "a few hours to a dozen hours." Real numbers from my bench: thin interface layers on a 50mm-tall PLA model dissolve in 2-3 hours at 45C with no agitation. A dense soluble core inside a sealed cavity took 12 hours and a water change. Plan for overnight by default.
Agitation helps. Polymaker's wiki notes dissolution speeds up with higher water temperature, regular water changes, or added water movement. I use a $30 jewellery ultrasonic bath for fiddly prints; bigger parts go on a slow-spin magnetic stirrer. Both make a noticeable difference, but I won't quote a multiplier because no vendor publishes one.
Burr cleanup. Even after full dissolution there will usually be a thin film or beads of residue at the contact surfaces. Prusa's MMU article recommends "immerse it in hot water again for 10-20 minutes and then brush it to remove the residual debris." A soft toothbrush works fine. Don't skip this step; it's the difference between a print that looks dissolved and a print that looks finished.
Disposal note from Verbatim: at least 20cc of water per 1g of BVOH before tipping it down the drain. Diluted PVA is fine for home plumbing; concentrated slurry builds up.
Common failure modes
Wet filament foaming and clogging. The single most common PVA failure. If your filament hisses, pops, or extrudes with visible bubbles, it's wet. Dry it. The eSUN TDS warns directly that drying is needed for "perfect printing effect" and that working with a filament dryer during printing is recommended. Bambu's wiki uses the phrase "loading failures, stringing, extruder clogging, and nozzle clogging caused by damp filaments." All four happen and all four are caused by skipping the dryer.
Stringing. PVA and BVOH string more than PLA, full stop. Multiple open OrcaSlicer issues surface this (#4004 general stringing, #3150 can't get rid of stringing) and PVA users show up in both threads. The fix is the standard retraction calibration plus a slightly longer travel-coast. Don't crank retraction past 2mm on direct drive or you'll grind the filament; PVA is softer than PLA and the extruder gear teeth bite differently.
PETG-PVA pairing heat exposure. PETG prints at 230-250C. eSUN PVA tops out at 230C and starts visibly charring above that. If you're running PETG models, use either BVOH (which tolerates the higher temps better) or Bambu's own PVA (which is formulated for 240-250C). Don't use cheap PVA with PETG; you'll get scorched brown blobs in your interface layer.
Soluble bleeding into the support body. If you forget to toggle support_interface_not_for_body, OrcaSlicer will use the interface filament for the support base as well, and you'll burn through a $60 PVA spool on a single print. A related OrcaSlicer issue (#3170) tracks interface material being flushed into support and infill on AMS systems; if you see PVA flecks in your model infill, that's the one to follow.
Prime tower waste on AMS. The prime tower with PVA filament feature request (#995) is still open. Every AMS swap between model material and PVA dumps a flush onto the prime tower, and on PVA-heavy prints that flush can consume more soluble than the actual interface does. Mitigation: minimise filament changes per layer (use PVA only on layers that need it), and consider a wipe-into-object strategy on parts where the interior is hollow.
Tree supports plus soluble interface bug. Open issue #10763 reports raft and interface being applied incorrectly when combining tree supports with a soluble interface. If you're mixing the two, sanity-check the slice preview before you commit to a long print.
FAQ
Can I use AMS Lite for PVA prints? Not for anything serious. Bambu's own AMS Lite FAQ says the open structure exposes filament to air and causes moisture reabsorption, with a recommended max print duration of about 1 hour. For a small jewellery piece you might get away with it. For a 12-hour print on the A1, dry the spool externally and accept that it's rehydrating during the print.
Why does my PVA bubble out of the nozzle? It's wet. Run it through a dryer at the vendor's recommended temp (45C for eSUN, 80C for Polymaker and Bambu) for at least the recommended duration. If it still bubbles, your spool is probably saturated past the point where a single dry cycle recovers it; replace it.
Does dissolved PVA hurt drains? Diluted PVA is fine for residential plumbing in small quantities. Verbatim recommends at least 20cc of water per gram of BVOH for disposal, and the same dilution ratio is a reasonable rule of thumb for PVA. If you dissolve hundreds of grams a week, run the water through a strainer first to catch any undissolved chunks.
How do I stop wasting PVA on the support body? Three settings in the OrcaSlicer Support tab. Set support_filament to your model material, set support_interface_filament to your soluble, and toggle support_interface_not_for_body ON. That last toggle is the one people miss.
Why is BVOH so much more expensive than PVA? The butenediol vinyl alcohol copolymer is more complex to manufacture, and BVOH is sold in lower volumes by fewer suppliers, so per-spool overhead is higher. Per Prusa, BVOH "will behave much better than PVA+ when printed." You're paying for fewer clogs and faster dissolution.
Do I need to dry every spool before every print? If the spool has stayed sealed with active desiccant since you last printed, you can skip drying for a short job. For anything over a couple of hours, or any spool that's been on an open shelf, dry first. The 10.21% equilibrium absorption figure from the Polymaker TDS is reached over days, but you only need 2-3% water content to get visible foaming.
Wrap-up
PVA and BVOH aren't set-and-forget filaments. They reward the operator who dries religiously, picks the right vendor for the model material, and uses the three OrcaSlicer support settings to keep the expensive stuff on the interface layer only. Get those right and parts come out of the water bath looking like they were CNC machined. Get them wrong and you burn through expensive filament producing brown stringy chaos.
If you're still calibrating your base filament profile, work through my OrcaSlicer filament settings guide first. Soluble tuning is a multiplier on solid base filament tuning, not a replacement. The latest OrcaSlicer build is on the official GitHub releases page.
Related OrcaSlicer guides
- Best OrcaSlicer Filament Settings: All Materials Cheatsheet
- How to Use Bambu Lab AMS Filaments with OrcaSlicer (2026 Guide)
- OrcaSlicer Filament Drying Guide: When and How to Dry It
- OrcaSlicer Polycarbonate (PC) Settings – Strong Functional Parts (2026 Guide)
- OrcaSlicer VFA Test: Diagnose Vertical Fine Artifacts (2026 Guide)