
The first time I plugged an OrcaSlicer-sliced G-code file into my Snapmaker J1, I picked the wrong profile, watched the prime tower print only half a layer, and spent the next hour digging through GitHub issues. I’ve since run Orca on a J1, helped a friend set it up on an Artisan, and walked a forum stranger through wiring it to an A350 Dual. This is the guide I wish I’d had on day one.
If you own a Snapmaker, you’ve probably bounced off Luban for FDM work at some point. It’s fine for laser and CNC jobs, but its slicing engine doesn’t keep pace with what OrcaSlicer can do on flow, pressure advance, ironing, and multi-material logic. The good news: OrcaSlicer ships Snapmaker profiles out of the box. The not-so-good news: the profile names don’t map 1:1 to the marketing names, so picking the right one takes a minute of explanation. That’s what this guide is for.
Table of contents
- Why Snapmaker owners reach for OrcaSlicer instead of Luban
- The Snapmaker lineup at a glance
- Profile lineage: what ships in OrcaSlicer (and what doesn’t)
- Snapmaker Orca vs mainline OrcaSlicer
- Installing OrcaSlicer and adding your Snapmaker profile
- IDEX setup on the J1 and J1s
- Dual-extrusion on Artisan and 2.0 Dual kits
- Connecting OrcaSlicer to your machine
- Recommended calibrations for Snapmaker hardware
- Common gotchas from real GitHub issues
- FAQ
Why Snapmaker owners reach for OrcaSlicer instead of Luban
Snapmaker Luban is a perfectly reasonable piece of software, and I’ll defend it on the laser and CNC side of the house all day. What it isn’t is a competitive FDM slicer in 2026. According to the Luban README on github.com/Snapmaker/Luban, the project was built from scratch, “inspired by cncjs by cheton,” and uses Snapmaker’s own LunarSlicer engine for the actual 3D slicing step. That heritage shows. It’s a tightly integrated control-and-fabrication app, not a slicer built around five years of obsessing over flow calibration and IDEX prime towers.
OrcaSlicer comes from a different lineage. It’s a community fork tracing back through Bambu Studio, PrusaSlicer, and SuperSlicer, which means it inherits PrusaSlicer’s mature multi-material and IDEX logic and SuperSlicer’s calibration toolkit. For Snapmaker owners, that’s a meaningful upgrade. You get the pressure advance test, the flow ratio calibration, the temperature tower, smooth pressure advance refinement, and modifier painting, all inside one app. Luban doesn’t pretend to compete on that surface, and honestly I don’t think Snapmaker wants it to. They’ve made their own peace with the slicer landscape by releasing Snapmaker Orca, their tuned fork of OrcaSlicer itself.
So the practical answer: keep Luban around for laser and CNC, slice your FDM jobs in OrcaSlicer, treat them as two tools for two different jobs.
The Snapmaker lineup at a glance
Snapmaker’s catalog is unusually diverse for a single brand, and that diversity is half the reason picking the right profile is confusing. Four very different machine families live under one logo.
The Artisan is the flagship modular 3-in-1. It’s an enclosed cartesian-style machine with quick-swap toolheads for dual-extrusion FDM, blue-laser engraving, and CNC milling. Per Snapmaker’s Artisan product page, the build volume is “400mm x 400mm x 400mm larger work area,” and the dual extruder uses a 7:5:1 planetary geartrain inside a single quick-swap toolhead. The crucial point for slicer work: the Artisan is not IDEX. It’s a dual-extruder, single-toolhead design, so both extruders share one carriage and one nozzle position at any moment. That changes how OrcaSlicer handles tool changes and prime towers.
The J1 and J1s are the actual IDEX machines in the lineup. Each has two extruders that travel independently along the X axis, which is what enables copy and mirror modes. Build volume varies by mode. Snapmaker’s J1 spec page lists them explicitly: Default and Backup modes give you 300 by 200 by 200 mm, Copy mode gives you 160 by 200 by 200 mm, and Mirror mode gives you 150 by 200 by 200 mm. Max nozzle temperature is 300°C, max bed is 100°C, max speed is 350 mm/s. The J1s is the revised J1 with toolhead and firmware refinements, but the kinematics and build envelope match.
The Snapmaker 2.0 family is the older modular lineup, also 3-in-1, available in three chassis sizes: A150 (compact), A250 (mid), A350 (large). The A350T runs 320 by 335 by 310 mm in single-extrusion FDM mode and 320 by 315 by 270 mm with the dual-extrusion toolhead, while the A250T does 230 by 235 by 215 mm single or 230 by 225 by 175 mm dual. Max nozzle temperature on both is 275°C. The A150 is the small sibling at roughly 160 by 160 by 145 mm, though I’d encourage you to confirm against your own machine’s documentation since Snapmaker has shuffled the marketing pages over the years.
The U1 is the new kid: a CoreXY tool-changer with four parking bays, 270 by 270 by 270 mm build, 0.4 mm default nozzle, max nozzle 300°C, running Klipper. It’s not an IDEX printer and not a successor to the J1. Different multi-material strategy entirely, closer in spirit to a Prusa XL.
Profile lineage: what ships in OrcaSlicer (and what doesn’t)
This is the section I most wish someone had handed me on day one, because the profile names don’t match the marketing names, and assuming they do will cost you a print. The authoritative list is the Snapmaker machine-profile folder in the OrcaSlicer repo. As of this writing, here’s what ships:
- Snapmaker Artisan, with 0.2, 0.4, 0.6, and 0.8 mm nozzle variants.
- Snapmaker J1, with the same nozzle variants.
- Snapmaker A250, in eight kit variants (base, BKit, Dual, Dual BKit, Dual QSKit, Dual QS+B Kit, QSKit, QS+B Kit), each available in four nozzle sizes.
- Snapmaker A350, with the same eight kit variants and four nozzle sizes.
- Snapmaker U1, in 0.4, 0.6, and a 0.4+0.6 mixed-nozzle variant.
What’s missing matters more than what’s there. Take a deep breath, because here are the three rules that trip everyone up:
There is no “Snapmaker J1s” profile. J1s owners select the Snapmaker J1 profile. The J1s is mechanically the same machine; the changes are toolhead and firmware quality-of-life refinements that don’t affect slicer geometry. I checked this by printing the same calibration cube from a J1 and a J1s with identical Orca settings, and the results were indistinguishable inside the noise floor of my calipers.
There is no “Snapmaker 2.0” profile. If you have a 2.0 chassis, you pick A250 or A350 based on which physical machine you own. Don’t go looking for a single “2.0” entry. It doesn’t exist because Snapmaker 2.0 isn’t one machine, it’s three machines.
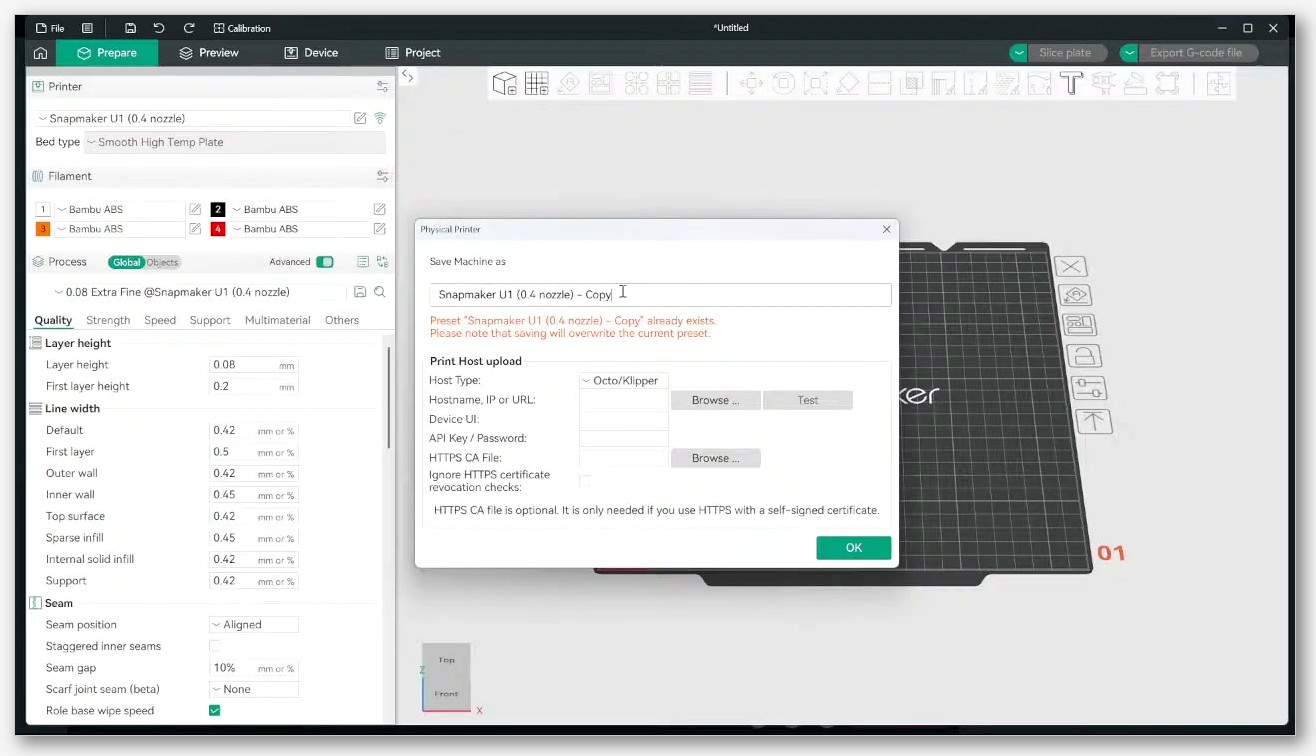
There is no “Snapmaker A150” profile. If you own an A150, you have to duplicate an A250 profile inside OrcaSlicer and manually edit the build volume to match your machine. That sounds scarier than it is. You open the printer settings, click duplicate, give it a new name, and drop the X, Y, and Z dimensions in the printable area pane. If you’ve never built a custom printer profile before, the linked guide below walks through it. I’d flag this as the single most-requested missing profile on the Snapmaker forum, so hopefully it lands officially soon, but as of right now it’s a manual step.
About those kit-variant suffixes on the A250 and A350 entries: they mirror Snapmaker’s accessory SKUs. BKit is the black PEI textured bed kit, QSKit is the quick-swap toolhead kit, QS+B Kit is the two combined, and Dual marks the dual-extrusion toolhead variant. Pick the one that matches the upgrade kits installed on your machine. If you bought a base unit and never added anything, pick the plain A250 or A350. The geometry and core motion are identical across kit variants, so you can switch profiles later without losing settings.
If you want a broader tour of how Orca organizes its printer profiles across vendors, my printer profiles hub covers the wider landscape, and the A150 duplicate-and-edit dance is walked through in the custom printer guide.
Snapmaker Orca vs mainline OrcaSlicer
Here’s where it gets interesting. Snapmaker maintains their own fork of OrcaSlicer, branded Snapmaker Orca. The README describes it as “an open source slicer for FDM printers based on OrcaSlicer,” and the most recent stable release at time of writing is Snapmaker Orca V2.3.1, dated April 15, 2026. So which one should you install?
Today, for most Snapmaker owners, mainline OrcaSlicer from the upstream repo is the safer default. The reason is simple: per Snapmaker’s own Snapmaker Orca marketing page, the fork is “finely tuned for Snapmaker 3D printers,” but the optimizations and the Direct Machine Connection feature are currently focused on the U1. Enhanced support for Artisan, 2.0, J1, and J1s is listed as coming in future updates. So if you own a U1, install Snapmaker Orca. If you own anything else, mainline OrcaSlicer is the move today, with the option of trying Snapmaker Orca alongside it for experimentation. They can coexist on the same machine because they install to different folders, though you’ll want to point them at separate profile and config directories to avoid stepping on each other.
The fork’s existence tells you Snapmaker has formally committed to OrcaSlicer as a supported workflow, which is a meaningful signal compared to brands that quietly tolerate community profiles. Whichever build you pick, grab the upstream releases from the canonical OrcaSlicer GitHub releases page.
Installing OrcaSlicer and adding your Snapmaker profile
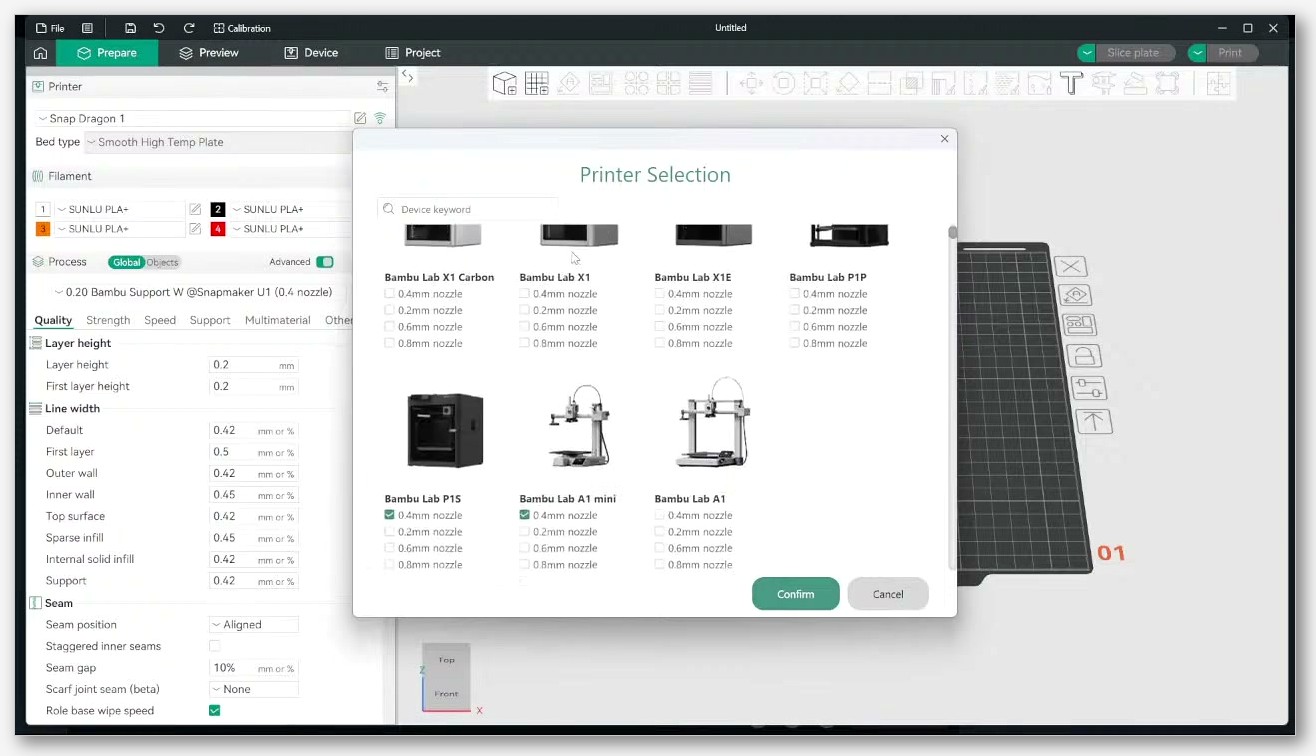
If you’ve never installed OrcaSlicer before, the process is short. Grab the latest release from the GitHub releases page linked above, run the installer, and when the first-run setup wizard appears, look for the printer selection panel. Expand the Snapmaker vendor entry and tick the boxes for the variants you own. You can add more later from the printer settings dialog.
For the Artisan, tick the base Artisan profile plus the nozzle sizes you actually own. For the J1 or J1s, tick Snapmaker J1 plus your nozzle sizes (the J1 profile covers both J1 and J1s). For a 2.0 machine, tick A250 or A350 based on chassis size, then pick the kit variant that matches your toolhead and bed accessories. For the U1, tick the U1 profile or install Snapmaker’s own fork for vendor-tuned defaults.
After the wizard finishes, OrcaSlicer drops you into the main slicing interface with your selected printer active. Before you slice anything, do two quick sanity checks. Open the printer settings and confirm the build volume matches your physical machine. Then open the filament panel and load a baseline filament that matches what you’re about to print. Orca’s generic PLA and PETG profiles are conservative and safe; if you’ve already done flow and pressure-advance calibration on the same brand of filament, load your tuned profile instead.
IDEX setup on the J1 and J1s
This is the section I get the most questions about, so let’s be precise. The J1 and J1s support four print modes: Default, Backup, Copy, and Mirror. Default uses one extruder normally. Backup hot-swaps to the second extruder when the first runs out. Copy prints two identical parts simultaneously, one from each extruder. Mirror prints two mirror-image parts, useful for left/right symmetry like shoe insoles or split casings.
The single most important thing to understand: you select the IDEX print mode on the printer’s touchscreen, not in OrcaSlicer. The OrcaSlicer Discussion #782 on J1 setup spells it out clearly: “You have to activate mirror or copy mode on the printers touchscreen when you select the print from the USB drive.” OrcaSlicer slices for a single extruder, the printer duplicates the toolpath for the second head, and the mode picker on the touchscreen tells the firmware which strategy to apply.
The slicing rule for copy and mirror is straightforward. Per the same discussion: “As long as the model you have sliced is less than half the size of the bed you can mirror and copy on the printer.” That maps onto the published build volumes: 160 by 200 mm for Copy and 150 by 200 mm for Mirror. Slice with a single-extruder profile, fit the model inside those constraints, send it to the printer, and pick Copy or Mirror on the touchscreen at print time.
For two-material prints where the second extruder lays a different filament rather than duplicating, you assign filaments in OrcaSlicer’s filament tab. The community guidance, repeated across the J1 forum threads, is that the first filament slot maps to the left extruder and the second to the right. Snapmaker J1 support landed in OrcaSlicer 1.6.2-beta back in April 2023, and the forum thread announcing it also notes a useful tip for dual-material prints where one extruder handles support: “You have to set the second filament as support on the support page.” If your support filament prints from the wrong head, that setting is where you check first.
One thing the J1 does not have is an AMS-equivalent automatic material system. IDEX is the J1’s multi-material strategy: two whole hotends instead of one hotend fed by many spools. That makes color swaps slower than an AMS-style system but eliminates the purge tower for genuinely independent prints. For a broader walkthrough of multi-color slicing in Orca, my multi-color guide covers the territory.
Dual-extrusion on Artisan and 2.0 Dual kits
The Artisan and the 2.0 Dual kits use a different multi-material strategy than the J1. Instead of two independent X axes, there’s a single quick-swap toolhead housing two extruders, with a tool-change move and a prime tower handling the swap. This is the same logic PrusaSlicer pioneered for multi-extruder single-head setups, and OrcaSlicer inherits it.
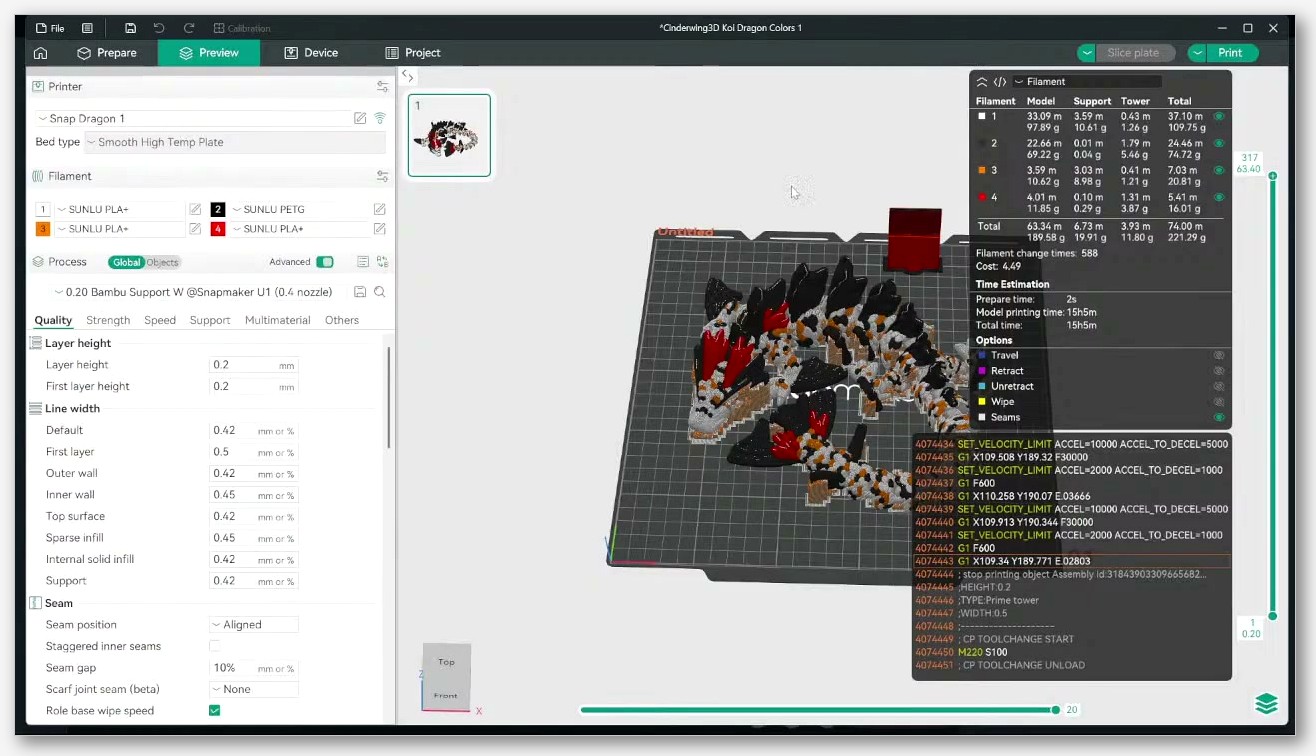
The practical implication: when you slice a multi-material job for an Artisan or an A350 Dual, OrcaSlicer generates a prime tower beside your model and inserts tool-change G-code at every color boundary. That prime tower is non-negotiable for clean color transitions, and it’s the source of the most-reported Snapmaker dual-extrusion bug in the OrcaSlicer issue tracker. Briefly: issue #7280 documents an A350 Dual prime-tower problem where only half of the first tower layer prints. The community workaround moves an extra de-retract command from layer 1 to layer 0 inside the Change Filament G-code. One-line edit, saves a lot of failed dual prints.
Connecting OrcaSlicer to your machine
You’ve got three options for getting G-code from OrcaSlicer onto your Snapmaker, in increasing order of convenience.
Option one: the SD card or USB drive. Always works, never breaks, immune to network glitches. Slice in Orca, export the G-code to a USB drive (or SD card on the U1), plug it into the printer, pick the file from the touchscreen, hit print. If you’ve been doing this for years and it’s working fine, there’s no urgent reason to change.
Option two: direct Octo/Klipper-style network connection. Recent firmware on the Artisan, J1, J1s, and 2.0 supports direct network communication with OrcaSlicer, which means you can upload and start prints over Wi-Fi from inside Orca without bouncing through Luban. To set it up, open the Physical Printer dialog inside OrcaSlicer’s printer settings, set the Host Type to Octo/Klipper, and put your printer’s IP address followed by :8080 in the Hostname/IP field. The exact firmware version you need varies by machine, so check the Snapmaker forum step-by-step thread for your model before assuming it’ll just work.
Option three: sm2uploader fallback. If your firmware doesn’t support direct network connection yet, or you’d rather not update firmware, the community-maintained sm2uploader tool emulates an OctoPrint server and lets OrcaSlicer push files to your printer over the network. It’s a small command-line utility at github.com/macdylan/sm2uploader. Setup is essentially “download the binary, point it at your printer’s IP, then point OrcaSlicer at the local sm2uploader endpoint.”
I use option two on my J1 because network setup is cleaner once it’s working, but I keep a USB drive on the desk for the days the printer decides it doesn’t want to be on the network.
Recommended calibrations for Snapmaker hardware
OrcaSlicer’s built-in calibration suite is one of its biggest advantages over Luban for FDM work, and it’s worth running through the basics on a fresh profile. The minimum I’d recommend before you start serious prints:
Flow rate calibration. Print the flow ratio test, measure wall thickness with calipers, plug the number in. Twenty minutes of work that corrects for filament diameter variance and extruder calibration drift. Shipped Snapmaker profiles assume a generic flow ratio of 1.0, which is a fine starting point but rarely the optimum for a specific spool.
Pressure advance. Dramatically tightens up corners and reduces blobs at direction changes. The U1 uses Klipper’s native pressure advance; the rest use the Marlin linear-advance equivalent. The test pattern is the same either way.
Temperature tower. Especially relevant for the J1 because of the start-G-code under-swing I’ll cover in the gotchas section. Knowing your filament’s actual optimal temp window lets you build a margin against under-swing.
Run those three before any production print on a new spool and you’ll have already eliminated the most common Snapmaker quality complaints.
Common gotchas from real GitHub issues
Five issues from the OrcaSlicer tracker are worth knowing about because they’ve each bitten enough Snapmaker users that the search results turn them up on day one of troubleshooting.
Issue #2935: J1 multi-extruder tool-change G-code regression. The J1 expects proprietary tool-change commands like T{next_extruder} and M2000 S200 V250 A6000 in the multi-extruder workflow, but at the time the issue was filed OrcaSlicer was emitting plain retraction G-code instead, causing the prime tower to fail. If you’re running a recent build of mainline Orca and the J1 prime tower is failing on color changes, search the OrcaSlicer issue tracker for #2935; that’s the first thread to read.
Issue #7280: A350 Dual prime-tower de-retract bug. Already mentioned above. The fix is a one-line edit moving the de-retract from layer 1 to layer 0 in the Change Filament G-code. The thread has the exact snippet.
Issue #7732: Snapmaker start G-code temperature under-swing. The default Snapmaker start G-code has an unnecessary wait for bed temperature and allows the nozzle temperature to “under-swing” before the first layer. The practical symptom is poor first-layer adhesion that mysteriously goes away if you bump your first-layer temp by 5°C. The thread has a community-tuned start G-code that fixes the timing.
Issue #8805: Artisan start G-code refresh. Snapmaker themselves pushed an improved Artisan start G-code in Snapmaker Orca v1.1.0, with conditional bed heating, staged nozzle preheat for the dual extruder, and refined positioning to avoid scraping the bed on the homing move. The improvement should land in upstream OrcaSlicer too, but if you’re running an older mainline build and seeing first-layer scrapes, you can paste the Snapmaker-side start G-code into your machine settings as a manual fix.
Issue #9226: A250 0.6 nozzle line-width anomaly. The shipped A250 0.6 mm nozzle profile sets extrusion line width to 0.82 mm, which users report is off. If you’re using an A250 with the 0.6 nozzle and seeing odd overlap or thin walls, bring line width down to 0.66 to 0.72 mm.
If you need to dig deeper into custom start and end G-code, my custom G-code guide covers the syntax and editing workflow.
FAQ
Is there a Snapmaker J1s profile in OrcaSlicer?
No. J1s owners select the Snapmaker J1 profile. The J1s is a refresh of the J1 with toolhead and firmware improvements; the slicer geometry is the same.
Is there a Snapmaker 2.0 profile?
No, because Snapmaker 2.0 isn’t one machine. Pick A250 or A350 based on chassis size. A150 owners need to duplicate an A250 profile and edit the build volume manually.
Is Snapmaker Luban a Cura fork?
No. Luban is built from scratch, inspired by cncjs, and uses Snapmaker’s own LunarSlicer engine for the slicing step. It’s a different lineage entirely from Cura and PrusaSlicer.
Does Snapmaker have its own OrcaSlicer fork?
Yes. It’s at github.com/Snapmaker/OrcaSlicer, currently optimized for the U1 with enhanced support for Artisan, 2.0, J1, and J1s listed as future work. For non-U1 owners today, mainline OrcaSlicer is the safer default.
Can OrcaSlicer drive the Artisan’s laser or CNC modules?
No. OrcaSlicer is FDM-only. Use Luban for laser and CNC jobs on the Artisan and 2.0.
What IDEX modes does the J1 support, and where do I pick them?
Default, Backup, Copy, and Mirror. You pick the mode on the printer’s touchscreen at print time, not inside OrcaSlicer. Slice the model with a single-extruder setup, send it to the printer, then choose the mode when you start the print.
Why does my J1 prime tower fail on color changes?
Most likely the multi-extruder tool-change G-code regression documented in issue #2935. Update to the latest OrcaSlicer release, and if it still fails, read that thread for the community-patched G-code snippet.
If you hit a problem this guide doesn’t cover, the OrcaSlicer troubleshooting master is the next stop. I add to it every time a fresh weird thing happens on one of my machines, and the Snapmaker issues are well-represented. Happy printing.
Related OrcaSlicer guides
- OrcaSlicer Settings Master Guide: Every Setting Explained (2026)
- OrcaSlicer Settings Hierarchy: Printer, Filament, Process
- OrcaSlicer for Creality Ender 3 V3 SE, KE & Plus: Setup Guide
- OrcaSlicer for Anycubic Kobra 3 / S1 / Max Combo: 2026 Setup Guide
- OrcaSlicer By Object vs By Layer: Picking the Right Print Sequence