
The first time I tried OrcaSlicer’s ironing setting on a 100mm flat sign I printed for my desk, it added 45 minutes to a 90-minute print and the surface came out worse than no ironing at all. Brown discoloration, ridges, the whole disaster. Three months and a stack of test cubes later I’ve got ironing dialed in for PLA and PETG, and the trick is that almost every default in OrcaSlicer is wrong for it, or at least wrong for the kind of plaque-and-sign work most of us actually want this feature for.
I’m going to walk through every ironing parameter OrcaSlicer exposes, what each one does in plain language, what numbers to start with for the common materials, and the failure modes I kept running into so you don’t have to repeat them. This is the long version because ironing has more knobs than people think, and getting one of them wrong wastes a print. If you’re new to OrcaSlicer’s process settings in general, the OrcaSlicer settings master guide is the broader pillar that this article sits under.
Table of contents
- What ironing actually does to your top layer
- When to use ironing, and when to skip it
- Every ironing setting in OrcaSlicer, explained
- The base settings that decide whether ironing even works
- How to tune ironing on your printer (step by step)
- Recommended starting points by material
- When ironing goes wrong: common fixes
- Ironing on multi-color and multi-material prints
- Frequently asked questions
- Wrap up
What ironing actually does to your top layer
Ironing is an extra pass the nozzle makes across your freshly printed top solid layer at the same Z height. The nozzle moves slow, extrudes a tiny trickle of fresh filament (something like a tenth of normal flow), and the hot tip glides over the still warm surface. The heat re-melts the existing plastic and surface tension drags it across the ridges between the previous extrusion lines. The trickle of new filament fills the micro gaps. It’s literally an iron, in the same way you’d iron a shirt, except the shirt is made of warm PLA and the iron is your hotend.
If you look at a normal top solid layer under a desk lamp tilted at a low angle, what you see as “layer texture” on a flat top isn’t actually the layer height. It’s the ridges where adjacent extrusion lines on the top layer almost touch but don’t quite, and the valleys catch the light. Ironing flattens those into a single smoother sheet because the molten plastic redistributes when you sweep across it.
The technique came out of PrusaSlicer 2.3 back in 2021. OrcaSlicer inherited it through the Bambu Studio fork, and the implementation across all three slicers is nearly identical. The one big addition Orca tacked on later is the Inset parameter, which landed in early 2025 via PR #7969 after a long community thread (Discussion #2778). I’ll get to why that one matters in the settings section.
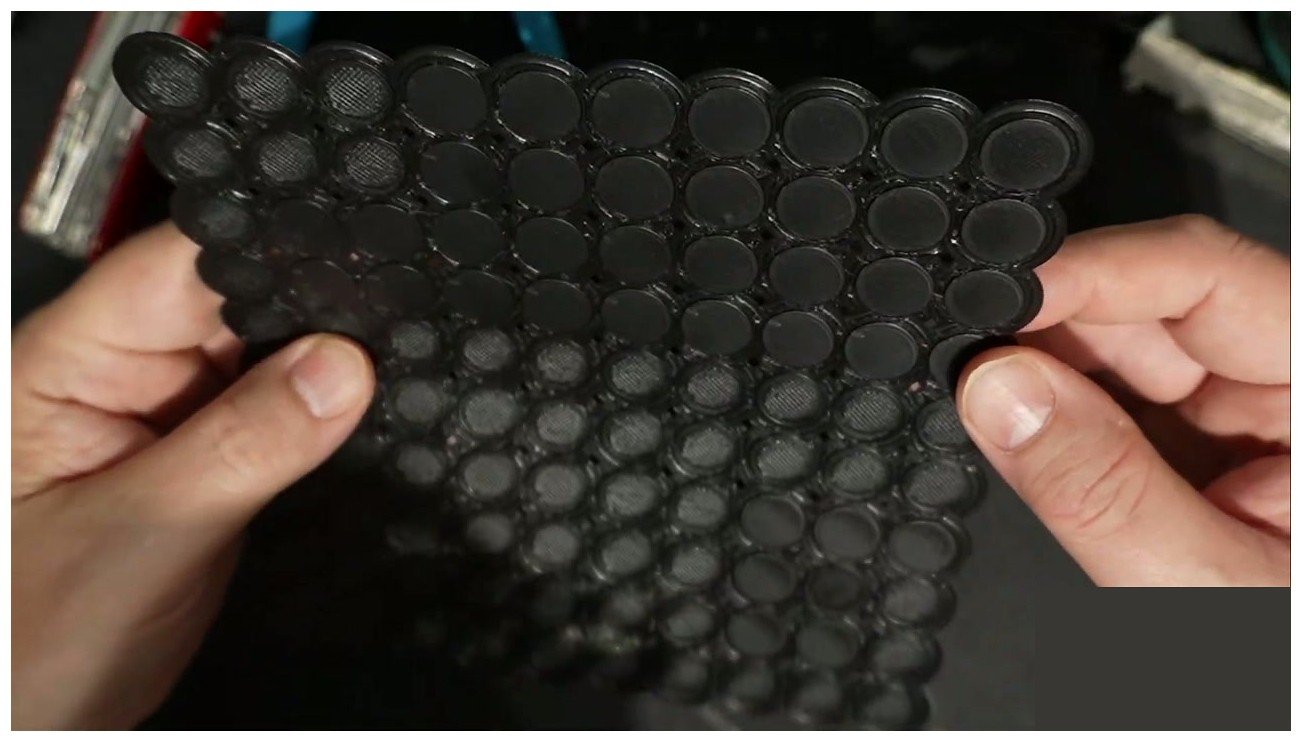
Here’s the honest part. Ironing isn’t magic. It only works on flat, horizontal, top-facing surfaces. It adds time to your print (anywhere from a couple of minutes for one small flat top to twenty or thirty percent on a print that’s mostly stacked flat panels). It exposes every flaw in the layers underneath it, which means you actually have to get top shell layers, top surface pattern, and your flow rate calibration right first or the iron pass will just make a bad surface shinier.
When to use ironing, and when to skip it
Use ironing when your model has a flat, horizontal, top-facing surface that someone is actually going to look at. The classic candidates: maker plaques, name signs, badges, base plates for assemblies, decorative panels, coasters, the lid of a parametric box, signage prints, dashboards. Anywhere you want a finish that reads as “manufactured” rather than “additive manufactured”, ironing is the cheapest single thing you can do in software to get there.
Also use ironing when you’re going to glue something. Prusa’s documentation calls this out and it’s true. Two flat ironed surfaces sit closer together than two ridged ones, so adhesion on glued assemblies improves noticeably.
Skip it when:
- The top is curved, angled, or organic. Ironing only flattens flat. It does nothing useful on a sphere, a face, a terrain tile, a miniature, anything sloped.
- You’re printing a vase or a single-wall ornament. There’s no top solid surface to iron.
- You’re printing TPU or soft TPU. The material doesn’t melt smooth, surface tension doesn’t behave the same way, and the iron pass either does nothing or makes the surface rougher because the nozzle drags. Don’t waste the time.
- You’re printing wood-filled, metal-filled, or particle-loaded filaments. The particles don’t re-melt cleanly. Prusa’s documentation calls these “generally unsuccessful” with ironing and that matches what I’ve seen.
- You’re printing PLA-CF, PETG-CF, or any carbon-fiber loaded filament. The fibers prevent the smoothing effect. The 3DBite guide calls this out specifically and the result is that you get a still-rough surface plus all the time penalty of ironing for nothing.
- The top surface is tiny. Ironing’s acceleration and deceleration penalty makes a 5mm square not worth the time.
- You’re doing a multi-color print where pigment bleed at color boundaries would be visible. The iron pass drags a small amount of plastic horizontally and on a sharp two-color logo that smear shows.
The five second rule: is the top of your part flat and visible? If yes, iron. If no, don’t.
Every ironing setting in OrcaSlicer, explained
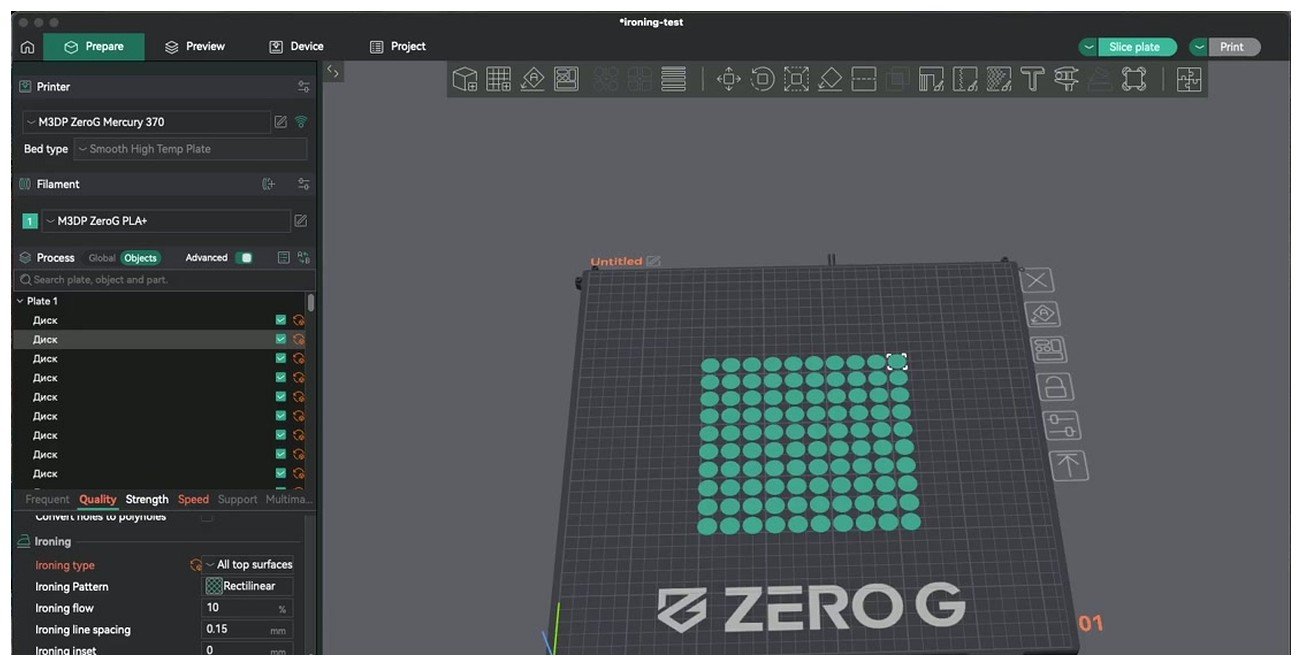
Menu path: Process settings > Quality > Ironing. All these settings are tagged Advanced mode in the OrcaSlicer UI, so if you’re in Simple mode you won’t see most of them. Switch to Advanced or Expert mode in the top right of the process panel.
Type (ironing_type)
Four options here, and getting this one right saves you a lot of print time. The internal enum in the OrcaSlicer source confirms there are exactly four:
- No ironing: feature off. This is the default, and ironing is something you opt into rather than the other way around.
- All top surfaces: irons every top-facing surface on the model, including the step tops on multi-tier shapes like terraced bases or stepped pyramids. This is what you want when the model has more than one flat plane the viewer will see.
- Topmost surface only: irons only the absolute final top layer of the print. Faster than “All top surfaces” because it skips intermediate flat planes. Use this when only the very top of the model matters and you don’t care about ironing the lower steps.
- All solid surfaces: irons every solid layer including internal ones. Niche. People use this for translucent display pieces printed at 100% infill where every internal layer is going to be visible. Massive time penalty, don’t enable casually.
For 90% of plaque, sign, and base-plate work, “Topmost surface only” is the right choice. It’s faster than “All top surfaces” and the result is identical for single-tier flat tops. I switch to “All top surfaces” only when I have stepped or multi-tier geometry.
Pattern (ironing_pattern)
Two options. Only two. I’m spelling this out because there’s a persistent myth in forum threads that there’s a third option for the iron pattern itself. There isn’t. The Monotonic option you’ve seen in OrcaSlicer is a Top Surface Pattern (different setting, different menu, different effect on the print). For the iron pass itself, OrcaSlicer gives you exactly:
- Concentric: the iron path follows the outer shape of the surface inward in rings. Good for round, oval, or irregular curved shapes because there’s no diagonal pattern crossing the curve.
- Rectilinear: parallel straight lines back and forth across the surface. Good for square plaques, rectangular plates, signs, anything with hard corners. Faster than the ring pattern on these shapes and there’s no center artifact where rings collapse to a point.
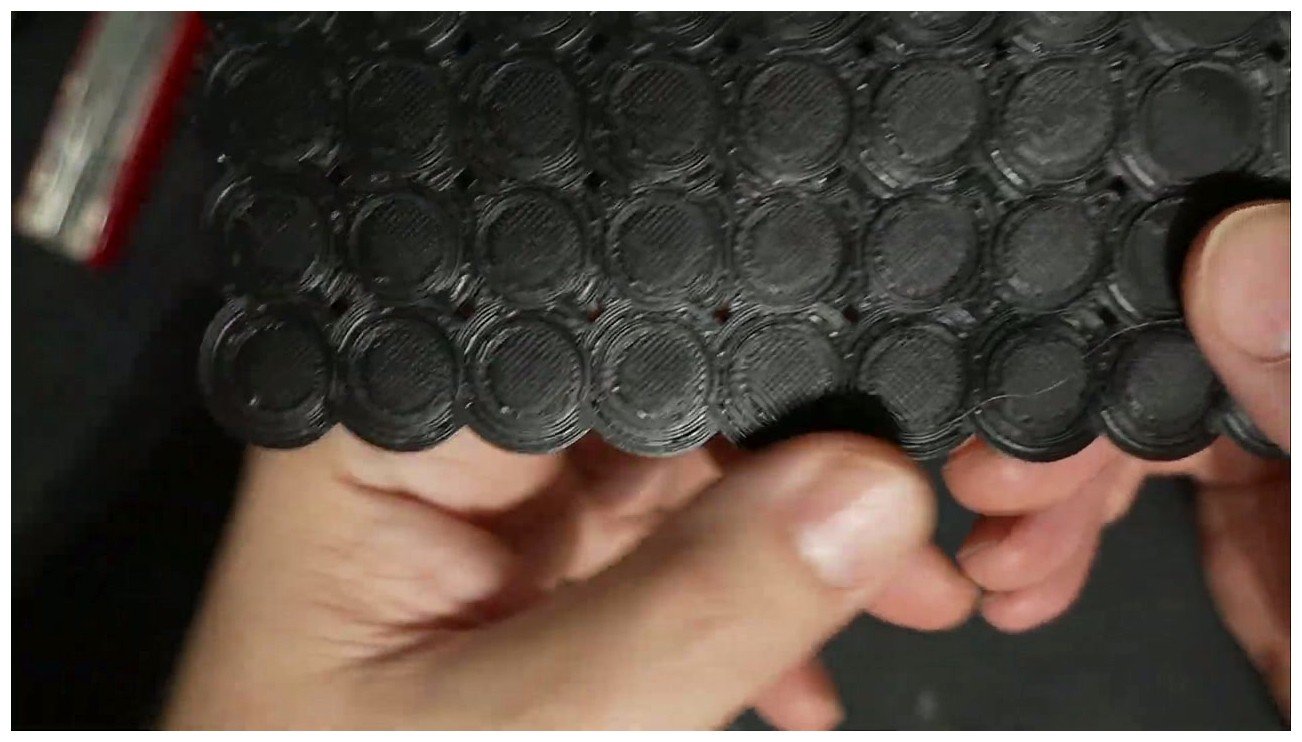
One thing the rectilinear pattern can do that the concentric pattern can’t: feather material slightly past the edge of the model on the back-and-forth strokes. That feathering is the exact problem the Inset setting was added to fix. More on that below.
Flow (ironing_flow)
The percentage of normal flow used during the iron pass. This is the single most important value to tune, and the one that breaks the result if you get it wrong. Community starting points and the third-party docs converge on around 10% for PLA, with some users going as high as 15%. Bambu Studio’s default for PLA on the A1 is 15% per the 3DBite guide. OrcaSlicer’s actual factory default isn’t published in the official wiki, so I’d treat the number you see when you first open the Ironing panel as a starting hint rather than a recommendation.
What the value does in practice: too high, you get over-extrusion blobs and ridges instead of smoothness. Too low, you get bald grooves where the nozzle skipped over without depositing fresh material to fill the gaps. The sweet spot for most PLA is somewhere between 8% and 12%. PETG sits lower because PETG already runs warmer and stickier, so 5% to 10% is usually right. Silk PLA wants to be on the low end of standard PLA because the silky filaments tend to be slightly over-flowy by formulation.
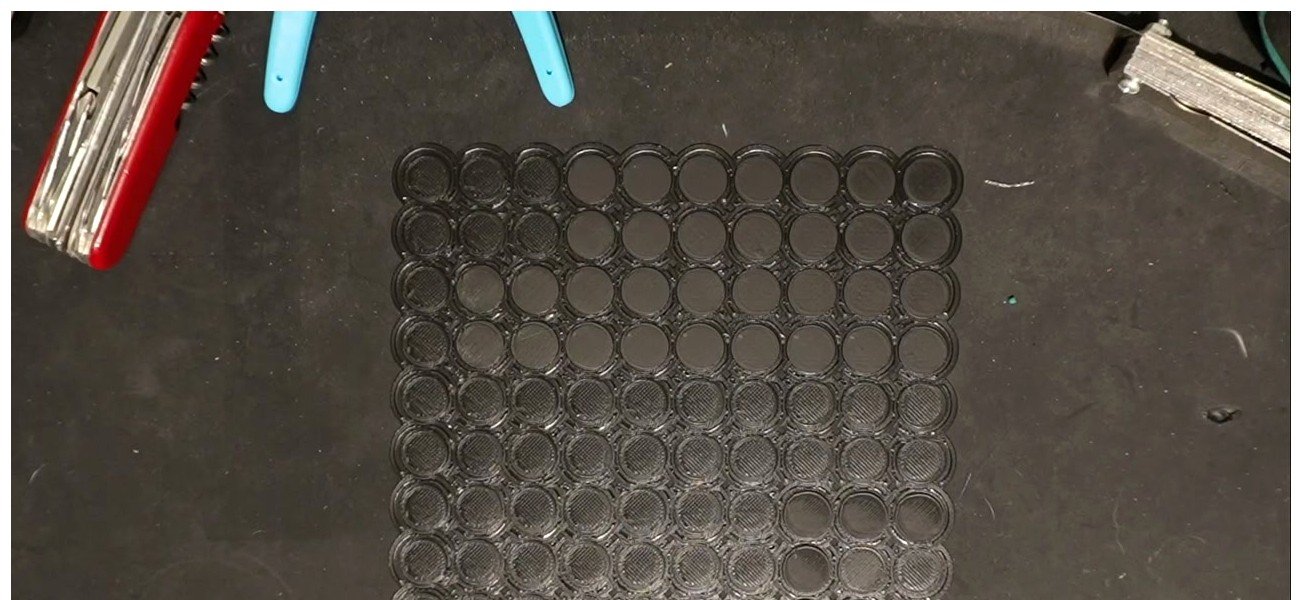
If you do nothing else from this article, run a flow test print with ironing on at 5%, 10%, 15%, and 20% on the same plate. Pick the cleanest square. That’s your number for that filament.
Speed (ironing_speed)
The mm/s the nozzle moves during the iron pass. The official wiki doesn’t publish the factory default, and there was a real regression in OrcaSlicer 2.3.1 where the speed selector went missing entirely (Issue #10584, August 2025). Users on that release had to either roll back to 2.3.0 or update to a newer build that restored it. If you’re on 2.3.1 and don’t see a speed input under Ironing, that’s why. Update.
Practical ranges:
- PLA: 20 to 25 mm/s
- PETG: 15 to 20 mm/s
- ASA / ABS: 20 to 25 mm/s
Slower is smoother because the nozzle has more time to re-melt the surface and let surface tension do the work. But slower also compounds heat creep risk on PLA (the filament sits in the hot zone longer, which is bad for the region above the heat break). The OrcaSlicer wiki explicitly warns about this. So I don’t recommend dropping below 15 mm/s on PLA unless you’ve got a good hotend cooling fan and you’ve actually seen the surface improve at the slower speed in a test.
Line spacing (ironing_spacing)
The distance between the parallel passes of the iron path on a rectilinear pattern, or between the rings on a concentric pattern. The wiki guidance is to set this equal to or less than your nozzle diameter. For a 0.4mm nozzle, that means somewhere between 0.10mm and 0.15mm in practice. Community defaults seem to land around 0.15mm.
Smaller spacing means smoother result but more iron passes and more time. Larger spacing means visible gaps between iron tracks and a striped finish. I leave mine at 0.15mm for everyday work and only drop to 0.10mm when the part is going on display under direct light and I want to extract every bit of finish quality. The time difference between 0.10 and 0.15 on a hand-sized plaque is significant. Don’t pay it unless you have to.
Inset (ironing_inset)
This is the 2025 addition I keep mentioning. Default is 0, which means the iron path runs all the way out to the model perimeter. The setting pulls the iron path back from the edge by the distance you set. Set it to around 0.2mm and the iron stops short of the perimeter wall.
Why this matters: with rectilinear iron passes at Inset 0, the back-and-forth strokes can drag a tiny smear of plastic past the edge of the model and you end up with a feathered, fuzzy, slightly-wider-than-it-should-be top edge. On a sharp engineering part this looks like a defect. On a name plate it’s slightly less noticeable but still there if you look. The inset solves it cleanly. If you’re seeing material draped over the edge of your ironed parts, this is the setting.
Angle (ironing_angle)
The angle, in degrees, of the iron passes relative to the top surface fill direction underneath. Default is 0, which means iron parallel to the top fill lines. Common alternative values are 45 and 90.
Why you’d change it: the iron pass works best when it’s crossing the ridges of the underlying top fill rather than running parallel to them. Crossing flattens the ridges. Running parallel just glides over the same valleys. So setting Angle to 45 (the iron passes go diagonally across the top fill direction) often gives a more uniform finish than the default 0.
I do this on display prints. For everyday work it’s fine to leave at 0 because the result is already pretty good and the angle change is a marginal improvement. Worth knowing about, not worth obsessing over.
Fixed Angle (ironing_angle_fixed)
A boolean toggle. When off (default), the iron angle is offset from each surface’s individual top fill direction. So if your model has two top surfaces with different fill orientations, the iron pass on each one is at a different absolute angle. When on, the iron is at the same absolute angle across the entire print regardless of the underlying fill direction.
Why this matters: the alternating-direction sheen is what people call “tiger striping”. You see it when you tilt a print under raking light and one stripe of the surface looks shiny while the next one looks dull, alternating across the part. It’s because adjacent top surfaces had their iron passes at slightly different directions and they catch the light differently. Toggling Fixed Angle on and setting Angle to 45 usually fixes it because the entire iron pattern is now uniform across the model.
Why there’s no temperature offset for ironing (yet)
People ask for this constantly. A separate temperature for the iron pass would let you run a hotter or cooler nozzle just during ironing without affecting the rest of the top layer. Discussion #2055 has been open for this feature since 2023 and it still isn’t in the slicer as of mid 2026. If you really need a different temp for the iron pass, your options are:
- Bump the entire top-layer temperature in filament settings. This affects the underlying top solid lines too, not just the iron, so it’s a compromise.
- Inject an M104 in custom G-code around the iron block. Advanced and fragile because the G-code structure changes between releases.
For most users the answer is “live without it”. Ironing at the same temperature as your normal top layer is fine if your filament temperature is dialed in. If you want to dial that part in first, the OrcaSlicer temperature tower walkthrough is the place to start.
The base settings that decide whether ironing even works
Ironing exposes everything underneath it. If your top layer isn’t 100% solid before the iron pass, ironing makes the gaps shinier. If your top fill pattern leaves pockets the iron can’t reach, those pockets stay rough. If your flow ratio is off, every line of the top layer is the wrong width and ironing can’t compensate. The single biggest mistake people make with this feature is enabling it before fixing the layers it operates on.
The base settings to check, in order of importance:
Top shell layers. Process > Strength > Top/Bottom Shells > Top shell layers. Set this to 4 minimum for ironing to look clean. Three is the absolute floor and even three risks gaps in the top layer that the iron pass can’t fix. I run 5 on parts where the surface really matters. The reason is that with sparse infill underneath, each top layer has to bridge the infill gaps, and only by the third or fourth layer is the top truly flat and gap-free. Iron a layer that still has bridging artifacts and the bridges show through.
Top surface pattern. Same menu, different option. Set this to Monotonic Line. The Monotonic Line pattern lays down parallel lines that all run in the same direction, which gives the iron pass a uniform surface to flatten. Honeycomb, Hilbert curve, and 3D-honeycomb patterns leave irregular gaps and ridge directions that the iron pass can’t iron out cleanly. This is the one base setting most beginners miss. If your top surface pattern is anything other than a monotonic-style line pattern, change it before turning ironing on.
Yes, this is confusing. There’s a Monotonic option as a top surface pattern, and there’s the separate ironing pattern (Concentric or Rectilinear) for the iron pass itself. Two different settings, two different parameter slots, similar-sounding names. Don’t conflate them.
Top surface flow ratio. If your overall flow ratio calibration is off, the underlying top layer either has gaps (flow too low) or is over-extruded with proud ridges (flow too high). Either way the iron pass can’t save you. Calibrate flow on your filament first, ironing second.
Infill density. Below about 15%, the top solid layers sag slightly between the infill walls because there isn’t enough underneath to support them. Ironing then exaggerates the dimples because the molten surface follows the sag. 15% infill minimum is a safe floor for ironed parts. 20% if you want to be sure.
Pressure advance. If your pressure advance is wrong, every direction change on the top layer leaves a subtle blob or a thin spot, and ironing turns those into shiny spots and dull spots. Calibrate PA before tuning ironing or you’ll end up chasing a ghost.
How to tune ironing on your printer (step by step)
Here’s the recipe I use now. Every step exists because I skipped it once and wasted a print.
Step 0: prerequisites. Calibrate flow ratio for your filament. Run pressure advance. Confirm your top surface pattern is set to a monotonic line pattern and top shell layers is at least 4. Don’t skip this. Ironing is the last calibration, not the first.
Step 1: print a small flat test. A 50x50x5mm cube with a flat top is ideal. Or use one of the community ironing test prints (the MakerWorld “Ironing Recommended Settings Calibration Test” or the Printables test_ironing model are both good). They print multiple flow values side by side with embedded labels so you can read the result directly.
Step 2: read the surface in raking light. Tilt the printed part under a desk lamp at a low angle. Don’t look at it under overhead light. Raking light is what makes the texture visible. Diagnose what you see:
- Tiny parallel ridges, dull finish: flow too low or spacing too wide. Bump flow by 2 to 3 percentage points.
- Shiny patches with bald grooves between them: flow too low. Fresh material isn’t filling the gaps. Bump flow.
- Glossy finish but with visible blobs or rough texture: flow too high. Drop by 2 points.
- Material smeared past the edge of the model: set Inset to 0.2mm.
- Brown or yellow scorching on the surface: nozzle is dwelling too long. Raise iron speed, or lower filament temperature slightly.
- Stringing across the top: enable Z-hop on retraction or reduce iron speed where direction reversals happen.
- Half ironed and half not: top shell layers too few. The underlying solid layer wasn’t 100% solid yet. Bump top shell layers and infill density.
- Tiger striping (alternating shine under raking light): enable Fixed Angle and set Angle to 45.
Step 3: lock the flow, tune speed. Once you’ve found a flow value that gives a clean surface, try the same print at 15 mm/s vs 25 mm/s. If the result is equivalent (it usually is in that range), keep the faster one. Print time matters and slower iron speeds compound heat creep risk.
Step 4: tighten spacing only for hero prints. Drop spacing to 0.10mm only if the part is going on display under direct light. Otherwise 0.15mm is fine and the time you save adds up across multiple prints.
Step 5: optional, the angle tweak. If you still see tiger striping with a monotonic top fill, set Angle to 45 and toggle Fixed Angle on. This is the polish step. It makes a noticeable difference on display parts and almost no difference on parts you’ll glue or hide.
Step 6: save the profile. Once you’ve got a good combination for one filament, save it as a process or filament-linked profile in OrcaSlicer so you don’t have to re-tune for the next print.
Recommended starting points by material
These are starting points for tuning, not factory defaults. The OrcaSlicer wiki doesn’t publish factory defaults for the ironing parameters, and the community-cited numbers below are consistent across the third-party guides (3DBite, Prusa KB, Bambu Lab wiki). Use them as the first value to load into a test print, not as a final answer.
| Material | Flow start | Speed start | Spacing | Notes |
|---|---|---|---|---|
| PLA | ~10% (some go 15%) | 20-25 mm/s | 0.10-0.15 mm | Heat creep is the real risk. Keep your hotend fan running and don’t drop speed below 15. |
| Silk PLA | 8-10% | ~25 mm/s | 0.10 mm | Silk filaments tend to over-flow already. Drop the start point below standard PLA. |
| PETG | 5-10% | 15-20 mm/s | ~0.15 mm | Watch for blobs around the nozzle and stringing between passes. Lower flow than PLA. |
| ASA | ~10% | 20-25 mm/s | 0.10-0.15 mm | Prusa’s docs call ASA the cleanest ironing material. Worth running it. |
| ABS | ~10% | ~25 mm/s | 0.10-0.15 mm | Works inside an enclosure. Without one, top temperature is inconsistent and the result varies. |
| TPU / soft TPU | Don’t iron | – | – | Material doesn’t smooth. Skip the feature entirely. |
| Wood-filled | Don’t iron | – | – | Particles don’t re-melt cleanly. Skip. |
| PLA-CF / PETG-CF | Don’t iron | – | – | Carbon fiber loading prevents smoothing. You’ll spend the time and get nothing. |
The non-iron materials are the ones I want to flag clearly. I’ve seen too many forum threads where someone wonders why their TPU or wood-PLA print didn’t smooth out. It’s not a settings problem. It’s a material constraint. Move on.
When ironing goes wrong: common fixes
This is the section that earns its keep on search traffic because everyone hits one of these the first time they enable ironing. Use the table to map symptom to cause to fix.
| Symptom | Most likely cause | Fix |
|---|---|---|
| Surface rougher with ironing than without | Flow too high, material building up | Drop flow by 3-5 percentage points |
| Visible parallel ridges remain | Flow too low or spacing too wide | Raise flow 2 points; drop spacing to 0.10 mm |
| Tiger striping (alternating shine and dull stripes) | Iron direction varies between top surfaces | Enable Fixed Angle; set Angle to 45 |
| Stringing across the top surface | Speed too fast at direction reversals or insufficient retraction | Reduce iron speed and enable Z-hop on retraction |
| Brown or yellow scorching | Nozzle dwelling too long, temperature too high | Raise iron speed, lower filament temp slightly |
| Half top ironed, half not | Underlying top layer had gaps | Increase top shell layers to 4+, raise infill density to 15%+ |
| Material dragged over the model edge | Rectilinear iron pass extending past the perimeter | Set Inset to 0.2 mm |
| Concentric “bullseye” on a square part | Wrong pattern choice | Switch from Concentric to Rectilinear |
| Color bleed on multi-material print | Iron drags pigment horizontally across boundaries | Use “Topmost surface only” on the dominant top color, or skip ironing for the multi-color pass |
| Mid-print clog after enabling ironing | Heat creep from slow iron speed | Verify hotend cooling fan, raise iron speed, lower chamber temperature if enclosed |
| Ironing speed selector missing in 2.3.1 | Known regression, Issue #10584 | Roll back to 2.3.0 or update to a release that has restored it |
| Ironing inset option missing | On a release before PR #7969 merged in early 2025 | Update to a current OrcaSlicer build |
If your problem isn’t on this table and it doesn’t fit any of the patterns, the broader OrcaSlicer troubleshooting guide is the place to look next.
Ironing on multi-color and multi-material prints
This is where I usually turn ironing off. The iron pass drags a small amount of plastic horizontally across whatever it touches. On a single-color print that’s invisible. On a multi-color top with a sharp boundary between, say, white and black, the iron drags a smudge of one color across the boundary into the other and what was a sharp line becomes a fuzzy gradient. Looks bad.
If you want to keep ironing for multi-color, two things help. First, set Type to “Topmost surface only” so only the very last top layer gets ironed and lower top layers under it stay sharp. Second, use the Concentric ironing pattern instead of Rectilinear if your color boundaries are linear so the iron passes don’t run perpendicular to them. Third, accept that the boundary between colors will be slightly less sharp than without ironing and decide if you can live with that on a particular design.
For multi-material parts where two filaments meet at the top (a logo embedded in a different color), I usually disable ironing entirely on those prints. The tradeoff isn’t worth it. Where the seam matters, get your seam placement right and skip the iron pass.
Frequently asked questions
Does ironing add a lot of print time?
Depends on how much flat top your model has. A small plaque might add 5 to 10 minutes. A large flat panel can add 20 to 30 percent of the original print time because line spacing on the iron pass is tighter than normal infill and the speed is slower. If your print is mostly flat tops, expect a meaningful time penalty. If only one small face is flat, the cost is small.
Can I iron PETG?
Yes, but at a lower flow than PLA. Start at 5 to 7% flow and 15 to 20 mm/s speed. PETG is stickier and warmer than PLA, so if you use PLA flow values you’ll get blobs and stringing on the top surface. Drop the flow.
Does ironing wear my nozzle out faster?
Marginally, because the nozzle is in contact with re-melting filament for longer per layer. On a brass nozzle with non-abrasive filament it’s not a meaningful concern. On a brass nozzle with abrasive filament you shouldn’t be ironing in the first place.
Why is the ironing speed slider missing in my OrcaSlicer?
If you’re on 2.3.1 specifically, this is a known regression (Issue #10584). The fix is to update to a more recent release where it’s been restored. If you can’t update for some reason, rolling back to 2.3.0 also exposes the slider.
Should I iron the bottom layer too?
No, ironing only operates on top surfaces and there’s no equivalent for the bottom. The bottom of your print is shaped by the build plate, so its smoothness depends on the plate texture (smooth PEI, textured PEI, glass, etc.), not on slicer settings.
What’s the difference between Quality > Ironing and Support Ironing?
Different feature, different menu. Quality > Ironing is what this article covers. Support Ironing is a setting under Process > Support that smooths the top surface of your support interface so the support layer pulls away cleaner from your part. If you’re working with the support side of things, the tree supports article covers the broader picture there.
Is there a calibration test for ironing?
Not built into OrcaSlicer. Issue #5411 requested one and it was rejected as not-planned by maintainers. The community uses third-party test models for this (the MakerWorld “Ironing Recommended Settings Calibration Test” and the Printables test_ironing model are the two I see referenced most). They print multiple flow values side by side so you can pick the cleanest one visually.
Does ironing fix under-extrusion or warping?
No. Ironing operates on the surface level. If you have under-extrusion in your top layer, ironing makes the gaps shinier rather than filling them. If you have warping, ironing doesn’t touch geometry. Fix the underlying issue first. The troubleshooting master guide covers both.
Can I iron with a 0.6mm nozzle?
Yes, but watch the spacing. The wiki guidance is to keep ironing spacing equal to or less than nozzle diameter, so a 0.6mm nozzle gives you more room (0.20-0.30mm spacing is reasonable). Issue #3808 reported jagged edges with the 0.6mm nozzle on rectilinear ironing before the Inset feature existed; with Inset set to about 0.3mm now, that’s largely solved.
Should I change my infill pattern for ironed parts?
Not the pattern, just the density. Any common infill pattern (gyroid, grid, cubic) is fine underneath an ironed top as long as the top shell layers count is high enough (4+) to bridge the gaps cleanly before the iron pass. Density at 15-20% minimum is what matters.
Wrap up
Ironing in OrcaSlicer is one of the highest-value process settings if you print flat plaques, signs, or base plates, and one of the most wasteful if you turn it on for the wrong shape or wrong material. Get the prerequisites right (4+ top shell layers, monotonic line top surface pattern, calibrated flow and pressure advance, 15%+ infill), pick “Topmost surface only” or “All top surfaces” depending on geometry, start at around 10% flow and 20 mm/s for PLA or 5-7% flow and 15-20 mm/s for PETG, and run one test print before trusting the result on anything you actually care about.
The rest is tuning. Read the surface under raking light, adjust flow first, then speed, then spacing, then angle. Save the profile when it works. Move on.
For the broader OrcaSlicer setting picture, the settings master guide ties this article into every other process and filament tweak that affects top surface quality. Sibling articles you might want next: tree supports, seam placement, and infill patterns.
Related OrcaSlicer guides
- OrcaSlicer Settings Master Guide: Every Setting Explained (2026)
- OrcaSlicer UI Tour: Prepare, Preview & Device Tabs Explained (2026)
- OrcaSlicer Fuzzy Skin: Add Texture to Any Print (2026 Settings Guide)
- OrcaSlicer for Anycubic Kobra 2 / Neo / Plus / Max: Setup and Best Settings (2026)
- OrcaSlicer Modifier Meshes: Different Settings on One Model