I still remember the first time the Test button finally went green. An old Ender 3 V2 on the bench, a Pi 3B+ underneath running OctoPi 1.10, OrcaSlicer freshly installed on the laptop next to it. I’d pasted the IP wrong twice, forgotten the protocol once, and grabbed the API key with a trailing newline before catching it. On the fourth try, that little green checkmark popped up with “OctoPrint 1.10.3 detected,” and the rest of the afternoon felt smooth.
This guide is the version of that afternoon I wish I’d read first. I’ll walk you through wiring OrcaSlicer to an OctoPrint instance on a Raspberry Pi, where the API key actually lives in current OctoPrint (not where the older guides say), what the Octo/Klipper Host Type really means, and the error strings you’re most likely to see if something goes sideways. If your problem is part of a wider OrcaSlicer issue, the OrcaSlicer troubleshooting master covers the bigger map. This article zeroes in on OctoPrint.
Quick honesty pass: OctoPrint is the right answer for an Ender 3 family machine, an SV06, an MK3S+, a CR-10, a Voron with caveats. It’s the wrong answer for a Bambu Lab printer, a Creality K1, a V3 KE, an MK4, or a Core One. I’ll cover that in the per-printer section. If you’re not on the latest OrcaSlicer, the download page is worth a stop first; the Print Host integration improved a lot since 2.0.
Why OctoPrint plus OrcaSlicer is still a good combo in 2026
OctoPrint turns 13 this year. It still runs on a humble Pi 3B+ with 1GB of RAM, still accepts G-code over a small REST API, and still gives you a webcam stream, plugins, and a job queue without a cloud subscription. For the Marlin-based bedslinger crowd, nothing else gets close on cost-per-feature.
OrcaSlicer’s contribution is the upload pipe. When you click Print or Send, OrcaSlicer hits OctoPrint’s REST API on `/api/files/local` with an `X-Api-Key` header and (if you used Print) tells OctoPrint to start the job. No proprietary protocol, no telemetry, no slicer-side websocket. The Device tab is a Chromium webview pointed at OctoPrint’s own UI, which is why it shows the same temperatures and webcam feed as a regular browser tab.
The reason this combo is still relevant in 2026, honestly, is the alternatives haven’t replaced it for the older-machine crowd. Klipper plus Mainsail is faster and prettier, but it’s a config-file-and-flash-the-MCU lift not every Ender 3 owner wants to take on. PrusaLink is great if you have a Prusa, useless if you don’t. So OctoPrint keeps doing the job.
Before you start: OctoPi, IP or mDNS, and the Application Keys plugin
Five things need to be true:
- OctoPi (or a manually installed OctoPrint) is up and serving its web UI. You can open it in a browser from the machine you’ll run OrcaSlicer on.
- The Pi has a stable address. Either `octopi.local` resolves over Bonjour/mDNS, or you’ve pinned the Pi to a static lease in your router’s DHCP table.
- Access Control is enabled in OctoPrint (default since 1.4), and you have an admin user.
- OctoPrint is at least 1.5, ideally 1.10.x. I tested the steps below against 1.10.3.
- Your printer is one OctoPrint supports. If you’re on a Bambu, K1, or MK4, skip to the per-printer section first.
On the address question, `octopi.local` works on Mac and Linux out of the box, and on Windows 10/11 if Bonjour Print Services is installed. On guest WiFi or a managed network, mDNS is often blocked, in which case you need the actual IP. The cleanest way to find it: open your router’s admin page, look at the DHCP table, find the device whose vendor MAC starts with “Raspberry Pi Trading.”
Set a DHCP reservation for it. I cannot stress this enough. If the Pi grabs a new IP after a router reboot, OrcaSlicer will silently fail and you’ll waste 20 minutes thinking the API key got revoked.
The 60-second version
If you’ve done this before on PrusaSlicer or Cura and you just need the OrcaSlicer-specific bits, here’s the compressed version:
- OctoPrint browser tab open. Wrench icon (Settings) > Application Keys > Generate new application key, name it `OrcaSlicer`, click Generate, copy the string.
- OrcaSlicer top-right, click the small WiFi icon next to the printer name in the printer dropdown. The Physical Printer dialog opens.
- Host Type: Octo/Klipper. Hostname: `http://octopi.local:5000` or `http://192.168.1.42:5000`. API Key / Password: paste the key.
- Click Test. Green check, OctoPrint version string. Click OK.
- Slice. Click the dropdown next to Print, pick Send (uploads only) or Print (uploads and starts).
If that worked, you’re done. If it didn’t, keep reading; the failure modes are the meat of this article.
Generate the API key in OctoPrint
This is where the older guides are wrong, so be careful. There are two API key concepts in OctoPrint and the difference matters.
The legacy one is the global API key under Settings > API. It grants full account access to whatever user it’s tied to. It still works. The docs recommend against it now, because if it leaks you’ve handed over the printer farm.
The modern one is the Application Keys plugin, bundled with OctoPrint since 1.5. It lets you mint per-app, per-user keys with names, so you can revoke just OrcaSlicer’s key without breaking anything else. This is what you want.
To generate one: open OctoPrint, log in, click the wrench (Settings), then click the Application Keys entry in OctoPrint’s Settings sidebar. In “Generate new application key,” type `OrcaSlicer` and click Generate. A long alphanumeric string appears with a copy button. Use the copy button. Don’t triple-click and copy by hand; that’s how trailing whitespace sneaks in, and whitespace silently fails with a 403.
One upgrade for any rig that lives on the home network long term: under Settings > Access Control, create a dedicated `slicer` user with only three permissions (Status, File Upload, Print), then generate the Application Key against that user. If the key leaks, the worst someone can do is upload a benchy and start it.
Add the printer in OrcaSlicer (Host Type: Octo/Klipper)
Now hop over to OrcaSlicer. The connection settings live deeper than you’d expect; they’re not in the main Preferences panel.
The fastest entry point is the WiFi icon to the right of the printer name in the printer dropdown at the top of OrcaSlicer’s right sidebar. It’s small, about 16 pixels wide on a 1080p monitor. Click it and the Physical Printer dialog opens.
Fill it like this:
- Host Type: Octo/Klipper. Yes, that name is deliberate. The Octo/Klipper option covers both OctoPrint and Moonraker (Klipper’s API server), because Moonraker ships an `octoprint_compat` shim that speaks enough of OctoPrint’s REST API for slicer integrations to work.
- Hostname, IP or URL: full URL with protocol. `http://octopi.local:5000` is the standard. With a static IP, `http://192.168.1.42:5000`. Don’t omit the `http://`; OrcaSlicer is strict about it.
- API Key / Password: paste the application key. Verify no leading or trailing space.
- Use HTTPS: leave unchecked unless you’ve set up a reverse proxy with a real cert. Self-signed certs will fail OrcaSlicer’s bundled curl validation.
- HTTP Authorization (Username / Password): leave blank. These are for HTTP Basic auth from a reverse proxy, not OctoPrint’s own login.
Click Test. A green check with “OctoPrint 1.10.x detected” means you’re done; click OK. A red “Connection refused” or “curl: (7)” usually means the port-80-vs-5000 question (try the other one). A red 403 or 401 means the network reached OctoPrint but the key was rejected (or a reverse proxy intercepted first); see the error decoder below.
About port 5000 vs port 80: OctoPrint itself always serves on 5000. OctoPi used to put HAProxy in front on port 80, so `http://octopi.local` would just work. Newer OctoPi images sometimes ship without HAProxy, in which case you need `:5000` explicitly. If your browser opens `http://octopi.local` fine but OrcaSlicer’s Test fails with Connection refused, add `:5000`. That single change fixes a quarter of the connection-refused reports on GitHub, including issue #10696.
Slice and send your first job
With the connection live, the actual workflow is short. Load a model, set up your filament and process, and slice as normal.
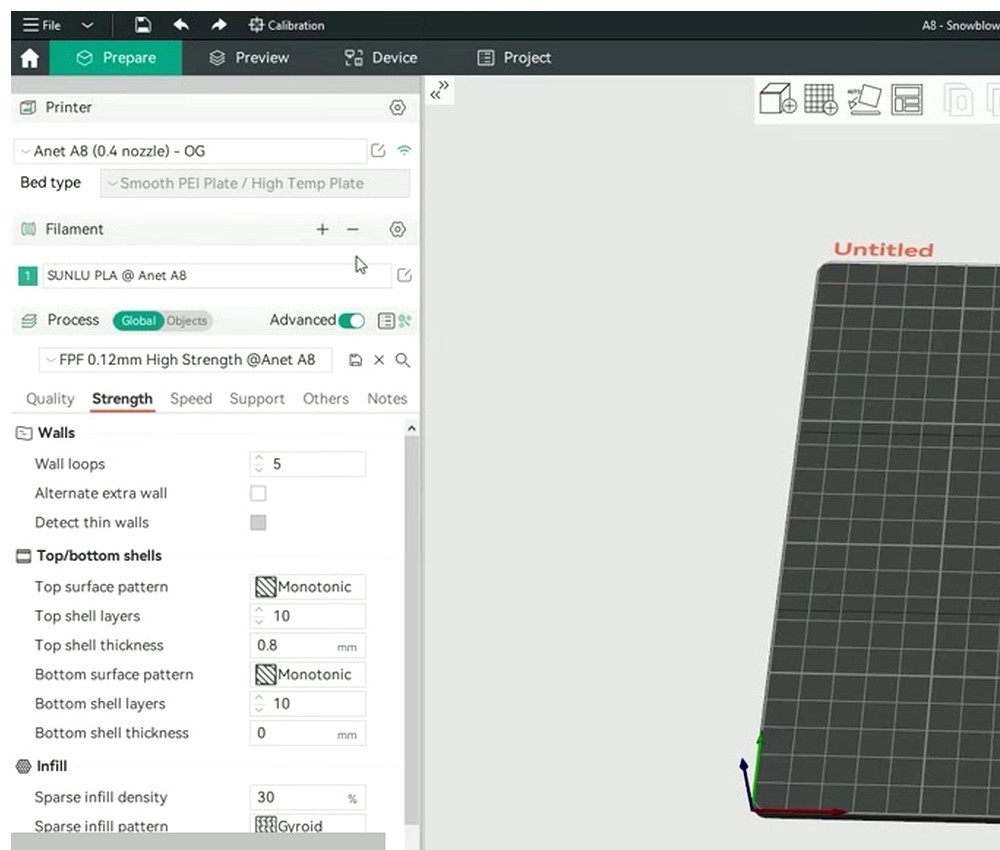
Slice the file with the Slice button. OrcaSlicer flips you into the Preview tab, where you can scrub through layers and check the toolpath, the cost estimate, and the time estimate.
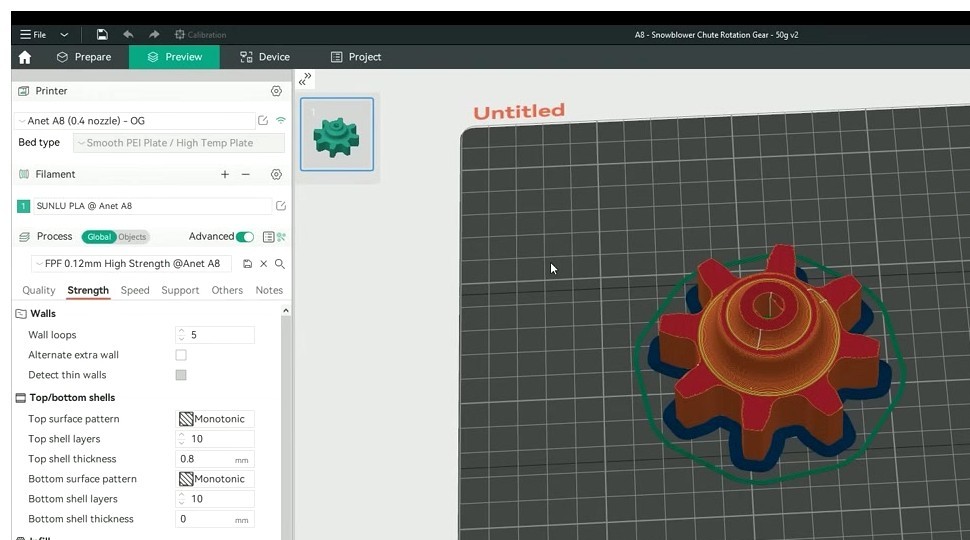
Now look at the bottom-right of the screen. There’s a Print button and, next to it, a small dropdown arrow. Click the arrow. You’ll see three options:
- Print: uploads the file to OctoPrint and immediately tells the printer to start the job. The printer needs to already be connected in OctoPrint (the State panel shows “Operational”); otherwise the start command silently fails and you have a file uploaded but no job running.
- Print and Send (or just Send, depending on your build): uploads only. The file lands in OctoPrint’s Files panel. You can hit Print on the OctoPrint UI when you’re ready.
- Export G-code: the local export, no network involved. This is what you use to copy to an SD card.
For the first run, I always pick Send rather than Print. Two reasons: if anything goes wrong with the upload, you find out before the printer is heating, and you get a chance to verify the file in OctoPrint’s UI before committing to the print. Once you trust the link, switch to Print for the convenience.
One thing worth knowing: OrcaSlicer hard-codes the upload destination as OctoPrint’s `local/` storage root. There’s no folder selector in the slicer dialog. If your OctoPrint has a tidy folder structure (Calibration, Toys, Functional, etc.), the file will land in the root and you’ll have to move it inside OctoPrint after the fact. This is a known limitation, discussed at length on the OctoPrint forum (thread #57944) and not on the OrcaSlicer roadmap as of late 2025. The workaround is the AutoOrganize plugin in OctoPrint, which can move newly-uploaded files into folders based on filename rules.
And about auto-start: OrcaSlicer’s “Print” option does request `start=true` in the upload API call. But if the printer isn’t already connected in OctoPrint, the start command is silently ignored. Issue #2367 tracks the feature request to make this more robust (auto-connect the printer, then start). It hasn’t shipped yet. So before relying on the Print option, glance at OctoPrint’s State panel and confirm the printer says “Operational”.
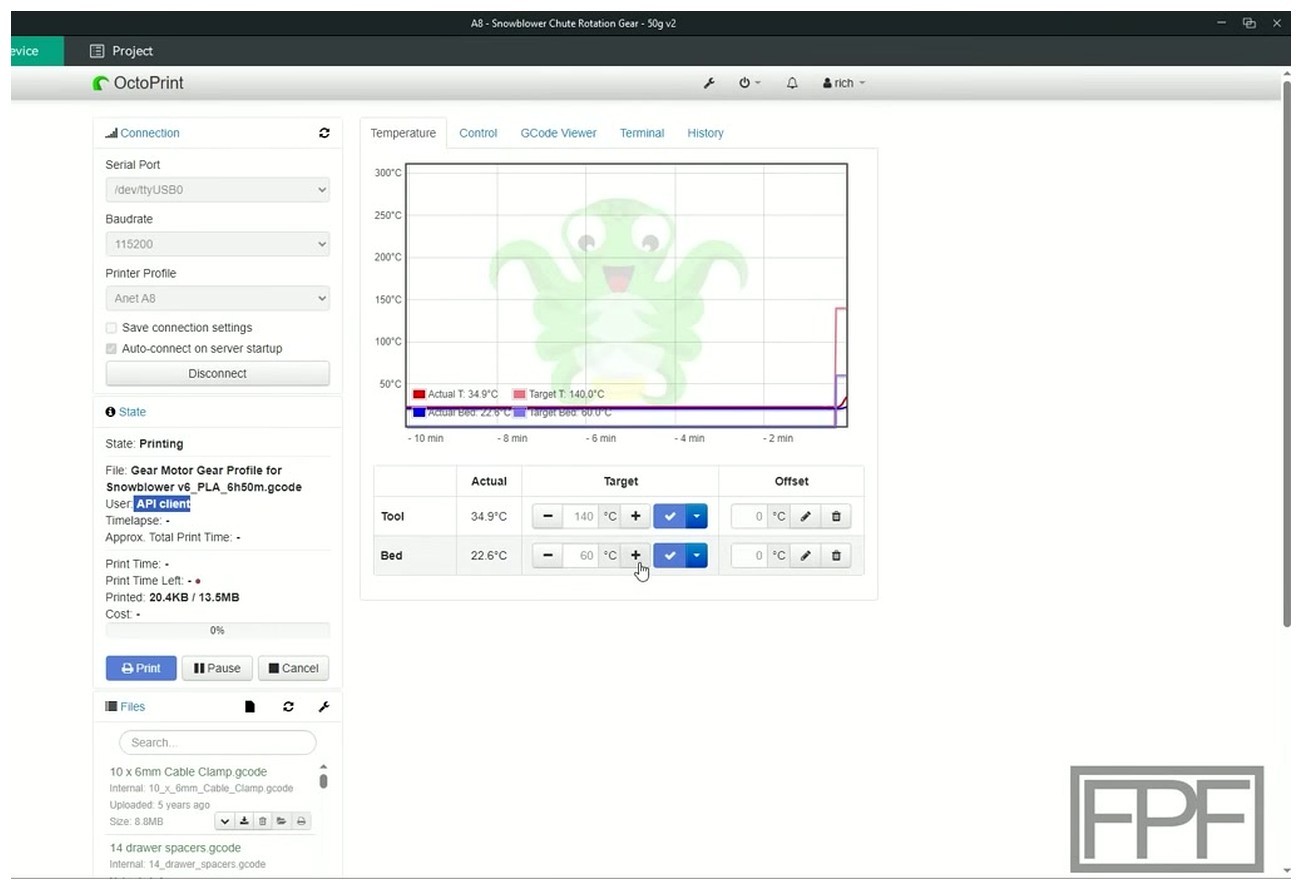
Verify the upload arrived (the “User: API client” check)
This is the moment of truth. Open OctoPrint in a browser tab. Look at the bottom-right of the page; there’s a Files panel listing everything in `local/` storage.
Two things to check:
- Your file shows up in the Files list with the name OrcaSlicer assigned (something like `gear_PLA_2h35m.gcode` if you use OrcaSlicer’s default naming).
- The State panel (top-left) shows the printer connected and, if you used the Print option, the job loaded with an estimated time and a starting temperature.
The third detail, easy to miss but diagnostically useful: when you hover over the print job in OctoPrint’s history or look at the active job’s info, you’ll see a “User: API client” tag. That’s OctoPrint logging that the request came in via the REST API rather than through the web UI. If you see “User: api” or “User: API client” against your job, the API key authentication round-tripped successfully. If you see nothing logged, or you see a 403 in the OctoPrint server log (`octoprint.log`, viewable under Settings > Logs), the key didn’t authenticate and the file didn’t actually upload.
If you click the Device tab inside OrcaSlicer instead of opening a browser, you should see the OctoPrint UI embedded in a webview. Same dashboard, same temperatures, same webcam if you have one. If the Device tab loads as a blank white page but uploads still work, that’s issue #9928, common on macOS after a system update where the bundled webview cache gets corrupted. Right-click in the tab and pick Reload, or restart OrcaSlicer entirely. If that doesn’t fix it, reinstall OrcaSlicer; the webview cache lives in the app’s support directory and a clean reinstall clears it.
Per-printer support: who can use OctoPrint, who can’t
Not every printer in OrcaSlicer’s profile list works with OctoPrint. The list below is what I’ve personally verified or what the community has documented in writing. If your printer isn’t here, the rule of thumb is: Marlin firmware over USB to a Pi works fine; Klipper printers should use the Klipper host type instead of OctoPrint; closed-ecosystem printers (Bambu, K1, V3 KE, Anycubic Kobra 3+) don’t work at all.
| Printer | OctoPrint? | Notes |
|---|---|---|
| Creality Ender 3 / V2 / Pro / S1 | Yes | Classic OctoPi-on-USB setup. You may want the “Creality 2x temperature reporting fix” plugin so OctoPrint doesn’t see duplicate temps in the log. |
| Creality Ender 3 V3 / V3 SE | Yes | Marlin-derived, OctoPrint over USB works. See the dedicated Ender 3 V3 setup notes. |
| Creality Ender 3 V3 KE | Use Creality’s own HTTP host instead | The V3 KE ships with a Creality-flavored OS. OrcaSlicer talks to it over its built-in HTTP API, not OctoPrint. |
| Creality CR-10 / CR-10S | Yes | Vanilla Marlin, USB to Pi, no surprises. |
| Creality K1 / K1 Max | No, use Mainsail/Fluidd | Ships with Klipper plus a Creality fork of Fluidd. OrcaSlicer talks to it via the Klipper/Moonraker host, not OctoPrint. See the K1 setup article. |
| Voron 0 / 2.4 / Trident | Technically yes, not recommended | Vorons run Klipper, and the community standard is Mainsail or Fluidd via Moonraker. OctoPrint adds an unnecessary layer. See the Klipper setup article. |
| Prusa MK3S+ | Yes, but PrusaLink is an alternative | OctoPrint over a Pi Zero W still works fine. PrusaLink is the Prusa-supported option that doesn’t need a Pi. |
| Prusa MK4 / MK4S / Core One | Use PrusaLink | These ship with PrusaLink built in. OctoPrint over USB is possible but actively unsupported by Prusa. |
| Sovol SV06 / SV06 Plus | Yes | Marlin firmware, USB to Pi, works. If you’ve flashed the Klipper mod, switch to the Klipper host type. |
| Sovol SV07 | Use Klipper host | Klipper out of the box. OctoPrint isn’t the right tool. |
| Anycubic Kobra (gen 1, Go, Plus, Max, 2) | Yes with effort | Stock firmware doesn’t expose OctoPrint. You attach a Pi over USB and it behaves like an Ender clone. |
| Anycubic Kobra 3 / S1 | No | Closed Anycubic cloud / ACE protocol. OrcaSlicer connects through Anycubic’s own integration, not OctoPrint. |
| Bambu Lab A1 / P1 / X1 / H2D | No | Bambu printers don’t accept streamed G-code on a serial port. Use Bambu’s cloud or LAN-only mode. See the Bambu cloud and LAN article. |
| FlashForge Adventurer 5M / Pro | Use Klipper host | Klipper-based. Some Adventurer 5M owners run a Klipper mod that exposes Moonraker on port 7125. |
| Older Tronxy / Artillery | Yes | Marlin-based, USB to Pi, no different from an Ender 3. |
When to use PrusaLink, Mainsail, or native Bambu instead
If you got a “no” or a “use this instead” in the table above, this section is for you. The short version: OctoPrint isn’t always the answer, and pretending it is just because it’s the well-known option will frustrate you.
PrusaLink for current Prusa machines. The MK4, MK4S, MK3.9, and Core One all ship with PrusaLink built into the printer’s own firmware. There’s a small web server running on the printer itself, and OrcaSlicer’s PrusaLink Host Type talks to it directly over the LAN. No Pi, no USB, no extra device. Performance is fine for the upload workflow OrcaSlicer cares about. The MK3S+ also supports PrusaLink, though many MK3S+ owners stick with OctoPrint because they’ve already invested in plugins. Either is reasonable on the MK3S+; on the MK4 onwards, PrusaLink is what Prusa supports and OctoPrint over USB is actively discouraged.
Mainsail or Fluidd for Klipper printers. If your printer runs Klipper natively (Voron, K1, K1 Max, SV07, FlashForge Adventurer 5M), OctoPrint is a layer you don’t need. Mainsail and Fluidd both speak directly to Moonraker (Klipper’s HTTP/WebSocket server on port 7125), and OrcaSlicer’s Klipper host integration goes straight to Moonraker too. You skip OctoPrint entirely, save the RAM, and get a UI that’s actually designed for Klipper’s input shaper, pressure advance, and macro system. The Klipper setup guide walks through the connection.
Native Bambu for Bambu printers. Bambu’s printers don’t expose a serial G-code interface in the way Marlin or RepRap printers do. There’s no point at which you can stream G-code line-by-line over a USB or socket connection; the X1 and P1 series want a complete sliced file delivered through Bambu’s own protocol (cloud or LAN-only). OrcaSlicer ships with native Bambu integration that handles this. If you want to get away from the cloud entirely, LAN-Only / Developer mode lets OrcaSlicer talk to the printer over the local network without phoning home. The Bambu cloud and LAN article is the one to read here.
None of these options has anything to do with OctoPrint. So if you’re on a Bambu, an MK4, or a K1, close this tab, open the relevant sibling article, and save yourself the rabbit hole.
Common errors during setup
If your Test button isn’t going green, you’re seeing one of a small list of error strings. I’ll walk through each one with the actual cause and fix. For deeper rabbit-hole stuff (DNS issues, custom reverse proxies, weird OS interactions), the dedicated OctoPrint troubleshooting article goes further than I’ll go here.
“curl: (7) Failed to connect to … port 80: Connection refused [Error 7]”
This is the most common one. The slicer reached the IP, but nothing was listening on port 80. Cause: some OctoPi setups, especially manual installs or stripped images, ship without HAProxy on port 80, so port 80 is closed; OctoPrint itself is on port 5000.
Fix: change the URL in OrcaSlicer from `http://octopi.local` to `http://octopi.local:5000`. Or, if you want HAProxy back, SSH into the Pi and run `sudo systemctl status haproxy` to see why it’s not running. Both fixes are documented in issue #10696.
“Connection timed out”
Different from “refused.” Refused means the network reached the IP but the port was closed. Timed out means the network never got there at all. Causes: wrong subnet, guest WiFi network isolation (a feature of most consumer routers, where guest devices can’t see each other or the LAN), the Pi’s `ufw` firewall blocking your machine’s IP, or the Pi just being off.
Fix: ping the Pi from the same machine you’re running OrcaSlicer on. If ping fails, the slicer never had a chance. Move both machines to the same SSID, the same VLAN, and turn off guest network isolation. If ping succeeds but OrcaSlicer still times out, check `ufw status` on the Pi.
“403 Forbidden” on Test or upload
The network reached OctoPrint, but OctoPrint rejected the API key. Causes: the key is wrong, the key has whitespace around it, the key was revoked, or the user behind the key lacks the File Upload permission.
Fix: regenerate the application key. Don’t hand-copy; use the copy button in the OctoPrint UI. If you set up a dedicated `slicer` user, double-check it has Status, File Upload, and Print permissions ticked under Settings > Access Control. OctoPrint returns 403 in practice for bad keys; the docs say 401, but the server has long returned 403 (per issue #2706).
“401 Unauthorized” (this one is interesting)
If you’re seeing a 401, OctoPrint itself didn’t generate that response. Modern OctoPrint always returns 403 for bad keys. A 401 almost certainly means a reverse proxy (nginx, HAProxy, Caddy) is sitting in front of OctoPrint and asking for HTTP Basic auth before the request even reaches OctoPrint’s API.
Fix: either populate the User Name / Password fields in OrcaSlicer’s connection dialog (these are the HTTP Basic auth fields, not OctoPrint’s own login), or remove the Basic auth requirement for the `/api/` path in your proxy config. If you didn’t intentionally set up a reverse proxy with Basic auth, this most often means the OctoPi image you used has one configured by default that you forgot about. SSH in and look at the HAProxy or nginx config.
This 401-vs-403 nuance is actually a useful diagnostic. If your slicer pops a 401, you’ve narrowed the problem to “something in front of OctoPrint.” That’s a much smaller search space than “is OctoPrint broken.”
“curl Error 52 – Empty reply from server” or “Error 55 – Send failure”
These show up mid-upload. The Test button might pass, but when you actually send the G-code, the upload fails partway through. Causes: a reverse proxy buffering and timing out on a large file, the OctoPi disk full, or USB-attached storage out of space.
Fix: check `df -h` on the Pi. Free space if needed. If you’re behind nginx, set `client_max_body_size 0;` and `proxy_request_buffering off;` for the `/api/files/local` location block. The reverse proxy thread on the OctoPrint forum has the canonical config. Issue #7011 tracks this on the OrcaSlicer side, and it’s a curl behavior, not a slicer bug; the fix lives on the OctoPrint or proxy side.
“SSL certificate verification failed”
Self-signed cert in front of OctoPrint. OrcaSlicer’s bundled curl refuses by default. Fix: install a real Let’s Encrypt cert via DNS-01 challenge (the only ACME challenge that works on a private LAN), or just turn off HTTPS on the LAN side and use plain HTTP. For a printer that lives on your home network and isn’t exposed to the internet, plain HTTP is fine.
SpoolManager or Octolapse plugin rejects the file
Specific to OctoPrint plugins, not OrcaSlicer itself. OrcaSlicer writes some metadata blocks (filament density, filament diameter) twice in the G-code header, which confuses regex parsers in older versions of SpoolManager and Octolapse. Issue #4020 documents it.
Fix: update both plugins to current versions; most have a fix as of late 2024. If you’re stuck on an old OctoPrint, edit OrcaSlicer’s start G-code template to remove the duplicate metadata block.
Cura or Slic3r plugin in OctoPrint refuses the upload
The Cura and Slic3r plugins in OctoPrint are designed to receive STL files and re-slice them on the Pi. If you upload pre-sliced G-code through OrcaSlicer with these plugins enabled, they may try to re-process the file and fail.
Fix: disable those plugins in OctoPrint under Settings > Plugin Manager. They’re a niche use case for the Pi-as-slicer workflow; with OrcaSlicer doing the slicing, you don’t need them.
After it works: camera, Obico, OctoEverywhere
Assuming the green check appeared and the file uploaded cleanly, you’ve got the core working. Here are the three additions that turn a basic OctoPrint setup into something genuinely useful.
A webcam. A cheap USB webcam plugged into the Pi, plus the Camera Streamer plugin (which has replaced the older mjpg-streamer in current OctoPi images), gets you a live video feed inside both OctoPrint’s UI and the OrcaSlicer Device tab. For around $25 you can watch your prints from the couch and catch the inevitable spaghetti hour two without walking back to the printer. Position the camera to see the nozzle tip and the first layer; that’s where most failures show up.
OctoEverywhere. This is the canonical free remote-access option for OctoPrint. You install the plugin, it sets up a tunnel to OctoEverywhere’s relay servers, and now you can hit your OctoPrint UI from outside the home network without opening any ports on your router. They have an AI-based failure detector that can pause the print if it sees a print failure. There’s a free tier that covers personal use; the paid tier adds longer-history webcam recording and Telegram/Discord notifications. I’ve used it for two years on a couple of printers without complaint.
Obico. Similar idea: remote access plus AI failure detection. Open-source, can be self-hosted if you want full control, has a strong mobile app. The free tier on their hosted service is more limited than OctoEverywhere’s, but the self-host option is real, not vaporware. If you’re privacy-minded or just like running your own infrastructure, Obico is the pick.
Avoid ngrok for this use case. It works, but the free tier rotates URLs every restart, so OrcaSlicer’s saved Print Host URL goes stale weekly. Use OctoEverywhere or Obico for remote access; use Tailscale if you want a flat virtual network across all your devices and access OctoPrint by its Tailscale IP.
Oh, and once your prints are flowing cleanly, calibrate. Pressure advance, flow rate, max volumetric speed, retraction tuning. The OrcaSlicer calibration guide walks through the whole stack. There’s no point sending perfectly-uploaded G-code to a printer that’s overextruding by 8%.
Frequently asked questions
How do I find my OctoPrint API key in OrcaSlicer?
You don’t find it in OrcaSlicer; you generate it in OctoPrint and paste it into OrcaSlicer. Open OctoPrint in a browser, click the wrench icon for Settings, click the Application Keys entry in OctoPrint’s Settings sidebar, type `OrcaSlicer` as the application name, click Generate, copy the resulting string, then paste it into OrcaSlicer’s API Key / Password field in the Physical Printer dialog (which you reach via the WiFi icon next to the printer name).
What port does OctoPrint use with OrcaSlicer?
Port 5000 by default. OctoPi images sometimes also expose port 80 if HAProxy is running in front, in which case you can use either. If port 80 returns “Connection refused” but port 5000 works, your OctoPi doesn’t have HAProxy active. Use `:5000` explicitly in the URL.
Why does OrcaSlicer say “connection refused” when connecting to OctoPrint?
The slicer reached the network address, but nothing was listening on the port you specified. Almost always this is the port-80-vs-5000 question. Try `http://octopi.local:5000` (or `http://192.168.1.42:5000` with your actual IP). The OrcaSlicer GitHub thread #10696 has dozens of users who hit exactly this and resolved it by adding the explicit port.
Can I send G-code from OrcaSlicer to OctoPrint and start the print automatically?
Yes, with the Print option in the dropdown next to the slice button. OrcaSlicer adds `start=true` to the upload API call, so OctoPrint starts the job immediately. One catch: the printer needs to already be connected in OctoPrint (State panel says “Operational”). If it’s at “Disconnected,” the start command silently fails. The feature request in OrcaSlicer issue #2367 tracks making this more robust by auto-connecting first.
Does OrcaSlicer work with Bambu Lab printers through OctoPrint?
No. Bambu Lab printers don’t accept streamed G-code over a serial port; they want a complete sliced file delivered through Bambu’s own protocol. OctoPrint cannot bridge that gap. Use OrcaSlicer’s native Bambu integration (cloud or LAN-Only mode) instead.
What is the Octo/Klipper host type in OrcaSlicer?
It’s a single Host Type option that covers both OctoPrint and Klipper’s Moonraker. Moonraker (Klipper’s HTTP API server) ships an `octoprint_compat` shim that speaks enough of OctoPrint’s REST API for slicer integrations to work, so OrcaSlicer treats them as the same dropdown choice. Pick Octo/Klipper whether you’re on OctoPrint or Klipper.
How do I fix “401 Unauthorized” between OrcaSlicer and OctoPrint?
A 401 from OrcaSlicer almost always means a reverse proxy (nginx, HAProxy, Caddy) sits in front of OctoPrint and is asking for HTTP Basic auth before the request reaches OctoPrint’s API. Either populate the Username / Password fields in OrcaSlicer’s connection dialog with the proxy’s credentials, or remove the Basic auth layer for the `/api/` path in your proxy config. Modern OctoPrint never returns 401 itself; it returns 403 for bad keys.
Can OrcaSlicer upload to a specific OctoPrint folder?
No, not natively. The slicer hard-codes the upload target as OctoPrint’s `local/` storage root with no folder selector. The OctoPrint community forum has a long-running thread documenting this. The workaround is to install OctoPrint’s AutoOrganize or PrintScheduler plugin, which can move files into folders post-upload based on filename rules.
Why is the OrcaSlicer Device tab blank?
If uploads work but the Device tab shows a white screen, OrcaSlicer’s embedded webview cached an old session, common on macOS after a system update. Right-click in the Device tab and pick Reload, or restart OrcaSlicer. If neither works, a clean reinstall clears the webview cache and fixes it. Issue #9928 tracks this.
Do I need an API key if I disabled Access Control in OctoPrint?
Technically no, but you absolutely should not disable Access Control. With ACL off, anyone who reaches your OctoPrint instance over the network can drive your printer, including starting jobs and changing settings. On a home LAN this is risky enough; on any setup with remote access enabled, it’s reckless. Leave ACL on, generate an Application Key, paste it into OrcaSlicer.
Is OctoPrint better than Klipper or Moonraker for OrcaSlicer?
Different question than people usually ask. For Marlin printers, OctoPrint is the right answer because there’s no Klipper to compare to. For printers running Klipper natively, Moonraker via the Klipper host type is a thinner, faster option than wrapping OctoPrint around it. OrcaSlicer’s integration is similarly clean for both. The decision is really about what’s running on your printer’s MCU, not which slicer host is “better.”
Wrap-up
If your Test went green, you’re in the easy 80% of users. The setup is mostly a one-time thing; once OrcaSlicer remembers the URL and key for that printer, sending a job is a single button click. If your Test didn’t go green, work the error string from the table above; nine out of ten times it’s port 5000 vs port 80, a whitespace-padded API key, or a forgotten reverse proxy. The deeper troubleshooting article covers the long tail of the remaining 10%.
Now that the print pipeline is clean, the next question is whether your slices are actually dialed in. Fast upload times are wasted if pressure advance is off and every print has corner bulges. The calibration guide walks through the full stack. And if your wider OrcaSlicer experience has other rough edges, the troubleshooting master is the broader map.