
I was halfway through a sign that needed white letters on a red background, single-extruder Ender 3, no AMS, no MMU, no fancy four-color setup. The plan was simple in my head: print the base in red, pause at layer 22, swap to white, finish the top, peel a clean two-color part off the bed. The execution was less simple. My first attempt didn’t pause at all because I had the wrong G-code in the Machine settings. My second attempt paused, but the nozzle just sat where it was and oozed a fat blob onto the top layer. The third attempt finally worked, and that’s the run that taught me what M600 actually is, what OrcaSlicer is actually emitting when you right-click that little slider in Preview, and why the same workflow behaves three different ways on Marlin, Klipper, and Bambu firmware.
This is the guide I wish I’d had open on a second monitor that night. I’m going to walk through the whole pause-for-color flow in OrcaSlicer 2.2.x and 2.3.x, but I’m also going to drag the curtain back on the firmware side so you understand why the same slicer button does very different things depending on what board is running your printer. If you’ve ever sliced a print, clicked “Add color change” in Preview, hit go, and watched the printer cheerfully ignore your pause, this article is going to make a lot more sense of that than the official wiki ever did.
Table of contents
- What M600 actually is (and why it isn’t universal)
- Where the “Add color change” button lives in OrcaSlicer
- The full workflow: prepare to print, layer by layer
- Marlin specifics: ADVANCED_PAUSE_FEATURE and the lengths that matter
- Klipper specifics: the M600 macro you have to write yourself
- Bambu specifics: why it doesn’t run M600 at all
- Common mistakes I see (and have made)
- Tips for clean swaps
- FAQ
What M600 actually is (and why it isn’t universal)
M600 has a clean Wikipedia-style definition that’s basically useless once you sit in front of an actual printer. The clean version is: “M600 is the Filament Change G-code command. It parks the head, retracts the old filament, waits for the user to swap, primes the new filament, then resumes.” The messy version, the one you need to know, is that M600 is firmware-defined, not standard. The slicer can emit the three characters M, 6, 0, 0 into your file all day long, and what happens at the printer end depends entirely on whether the firmware on the board has any idea what to do with them.
Here’s how the three big firmware families actually handle it.
Marlin: built-in, but locked behind a compile flag
Marlin has M600 as a real, first-class G-code, but the catch is that the entire pause-for-filament-change subsystem lives behind a compile-time flag called ADVANCED_PAUSE_FEATURE in Configuration_adv.h. If the person who built your firmware didn’t enable that flag before flashing, M600 is unknown to the board. Your slicer can ship a beautifully formatted file with M600 at layer 22 and the printer will treat it as a comment, blow right past it, and finish the print in whatever color started the job.
The flag itself has a small history that’s worth knowing because it changes what version-checking advice you take seriously. It used to be called FILAMENT_CHANGE_FEATURE. It was renamed to ADVANCED_PAUSE_FEATURE in Marlin pull request #6407, which was merged into the bugfix-1.1.x branch on May 26, 2017. From the 1.1.x line forward and throughout the entire 2.x series, ADVANCED_PAUSE_FEATURE is the gate. Anyone telling you “it works on Marlin X.Y.Z” without checking that flag is guessing. The version doesn’t gate it; the build does.
When M600 fires on a properly compiled Marlin board, the sequence is: park the head at NOZZLE_PARK_POINT, retract by PAUSE_PARK_RETRACT_LENGTH (2 mm default), unload by FILAMENT_CHANGE_UNLOAD_LENGTH (100 mm default, but you’ll want about 600 mm on a Bowden Ender 3), beep, wait for the user to confirm at the LCD, fast-load the new filament by FILAMENT_CHANGE_FAST_LOAD_LENGTH, slow-prime by FILAMENT_CHANGE_SLOW_LOAD_LENGTH, optionally continue-purge with ADVANCED_PAUSE_PURGE_LENGTH (50 mm default), then resume.
The full Marlin reference for M600’s inline parameters is at marlinfw.org/docs/gcode/M600.html, and the companion commands are M701 (load filament), M702 (unload filament), and M603 (set the defaults persistently, savable with M500 to EEPROM). Don’t try to remember every parameter. The ones you’ll actually touch are E (initial retract), L (load length), U (unload length), X, Y, Z (park position), and R (resume temperature).
Klipper: not built-in, you write the macro
This is the one that catches more people out, because they read “Klipper has every G-code you could ever want” online and then send a file with M600 in it and watch their printer do absolutely nothing. Klipper does not have M600 built in. M600 doesn’t exist until you define it as a [gcode_macro M600] in printer.cfg (or in an included file).
The canonical sample, the one that lives in Klipper’s own repository at klipper/config/sample-macros.cfg, looks like this:
[gcode_macro M600]
gcode:
  {% set X = params.X|default(50)|float %}
  {% set Y = params.Y|default(0)|float %}
  {% set Z = params.Z|default(10)|float %}
  SAVE_GCODE_STATE NAME=M600_state
  PAUSE
  G91
  G1 E-.8 F2700
  G1 Z{Z}
  G90
  G1 X{X} Y{Y} F3000
  G91
  G1 E-50 F1000
  RESTORE_GCODE_STATE NAME=M600_state
For that to work you also need [pause_resume] declared in your config, otherwise the PAUSE and RESUME commands themselves don’t exist. A common pattern from Ellis’ Print Tuning Guide is to make M600 a one-line alias that delegates to a heavyweight custom PAUSE macro:
[gcode_macro M600]
gcode:
  PAUSE
Ellis’ PAUSE saves state, parks the nozzle near the front-left corner, lifts Z, can either cool the hotend or keep it at target, extends the idle timeout to 12 hours so the heater doesn’t shut off while you fight a stuck spool, and disables the runout sensor for the duration. His RESUME re-heats with M109 S{etemp|int}, restores position, and continues. If you want to copy a known-good pattern instead of reinventing one, his version is the cleanest I’ve found and the source is at ellis3dp.com.
One thing that bites Klipper users specifically: Klipper does NOT automatically purge on resume. After the swap, you have to either extrude manually from the Mainsail or Fluidd extruder panel (the little plus button with a length field, usually pre-set to 5 or 10 mm) or call a LOAD_FILAMENT macro if you’ve defined one. If you just click RESUME, Klipper will move straight back to your print path and start drawing with whatever’s currently in the nozzle, bleed-through and all.
Bambu Lab: doesn’t run M600 at all
This is the one that surprises Bambu owners who came over from a Creality or Voron background. Bambu Lab firmware on the X1C, X1E, P1S, P1P, A1, and A1 Mini does not execute M600. The Bambu firmware has its own pause-and-change-filament command set internally, and the M600 line in a sliced file simply does nothing.
When you slice a model in OrcaSlicer with a Bambu printer profile selected and you right-click the layer slider to add a color change, OrcaSlicer does not actually emit M600. It emits the Bambu pause sequence that’s configured in that profile’s “Change filament G-code” field (usually an M400 U1-style command that the Bambu firmware recognizes as “stop and prompt the user”). The printer then halts at the layer and a “filament has run out” or “change filament” dialog appears on the touchscreen.
The community-verified critical step here is: when that prompt appears, you should NOT tap “Resume Printing” first. Tap X or Back to dismiss the prompt, navigate to the Filament menu on the touchscreen, run Unload, swap the spool manually, run Load, purge until the color runs clean (on the X1C you can purge directly into the poop chute), and only then return to the paused screen and tap Resume. The whole flow is documented in the long-running Bambu forum thread at forum.bambulab.com/t/filament-change-without-ams-mid-print/2589, which is worth scrolling through if you’re new to it because there are dozens of contributors describing what works on each model.
The A1 and A1 Mini without AMS Lite had an extra wrinkle: an early-firmware bug where the pause prompt didn’t surface a clean filament-swap option, and the workaround was the same dismiss-and-use-the-menu sequence (thread here).
None of this means you can’t do a manual two-color print on a Bambu without an AMS. You absolutely can. But you have to know that M600 is not the mechanism, the slicer pause sequence is, and the touchscreen workflow is different from anything you’d see on Marlin or Klipper. That’s the whole reason this article isn’t called “How to send M600 to your printer,” because that framing is wrong for one third of the audience reading it. For deeper context on Bambu hardware specifically, our OrcaSlicer + Bambu P1S/P1P guide covers profile setup and our Bambu AMS setup walkthrough covers what an AMS actually buys you over this manual flow.
Where the “Add color change” button lives in OrcaSlicer
This is the section where the screenshots earn their keep, because OrcaSlicer’s color-change UI is one of those features that’s perfectly intuitive once you’ve used it and completely invisible the first time you go looking for it. There’s no big button labelled “Pause for color.” It’s a right-click on a slider, which is a discoverability disaster, but it’s also where it lives.
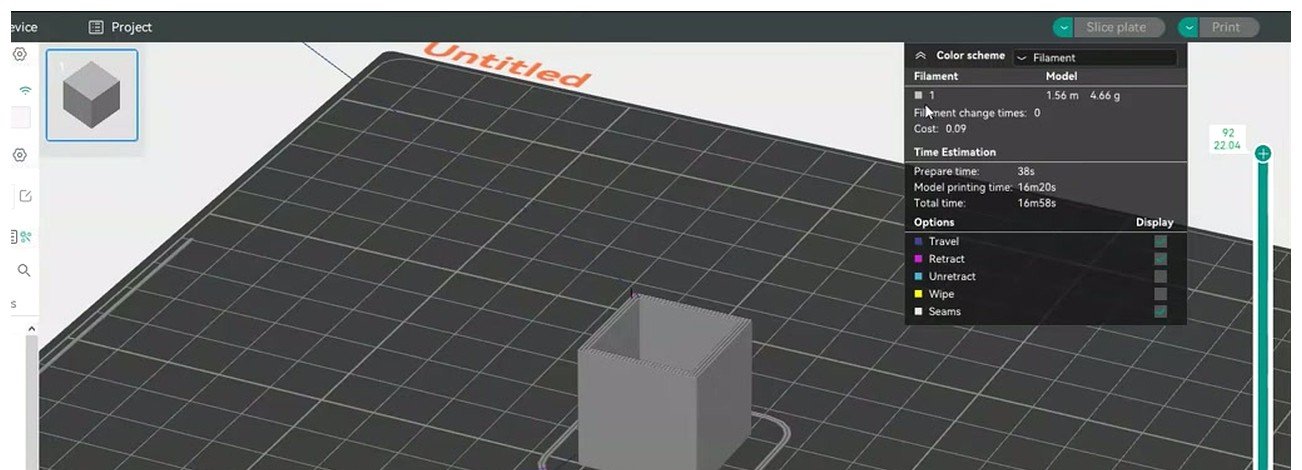
The path is: open your project in Prepare, configure print settings, then click Slice plate (Ctrl+R). Once the slice finishes, switch to the Preview tab. On the right-hand side of the 3D viewport there’s a thin vertical slider running from the bottom of the model to the top. That slider represents layer height, with layer 1 at the bottom and the final layer at the top. Drag the thumb (the small handle) to the layer where you want the swap to happen. The model preview will update to show that layer’s geometry, and the layer number is shown in the small box above the slider.
Once you’re on the layer you want, right-click the slider at that position. A small context menu opens with three relevant options:
- Add color change (sometimes labelled “Change filament”). Inserts the Change Filament G-code defined in your Printer Settings.
- Add pause. Inserts the Pause G-code defined in your Printer Settings.
- Add custom G-code. Lets you paste in any G-code to inject at that layer.
After you click, a small coloured marker appears on the slider at that layer, and the preview repaints so the upper portion of the model shows in the second filament’s colour. That repaint is your visual confirmation the change registered.
The greyed-out gotcha that catches everyone
“Add color change” is greyed out unless you have more than one filament loaded in the Prepare tab. This is the #1 confusion point I see in OrcaSlicer’s GitHub issues and on Reddit. The thread at SoftFever/OrcaSlicer discussions #977 and the writeup at 3dism.org/why-is-change-filament-greyed-out-in-orca both spell it out: the slicer treats “color change” as a multi-filament operation, so if your project only has one filament configured, the option simply isn’t available.
The workaround is dead simple. In Prepare, click the + icon next to Filament to add a second slot. Pick any filament for slot 2 (it can literally be the same one as slot 1 if all you want is a manual swap, the slicer doesn’t care what’s physically loaded). Now go back to Preview, right-click the slider, and “Add color change” is available.
If you don’t want to bother adding a second filament for a single-extruder manual swap, the equivalent option is “Add pause” instead. On Marlin and Klipper that fires a different G-code (M601 / PAUSE rather than M600), but functionally for a manual swap they do the same job: halt the print and wait for you to confirm. The only practical difference is that “Add color change” on Marlin gives you the proper retract-park-purge dance, while “Add pause” just stops where it is, so for a real filament swap on Marlin you really do want color change rather than pause. On Klipper it depends on what your macros do.
What G-code OrcaSlicer actually inserts
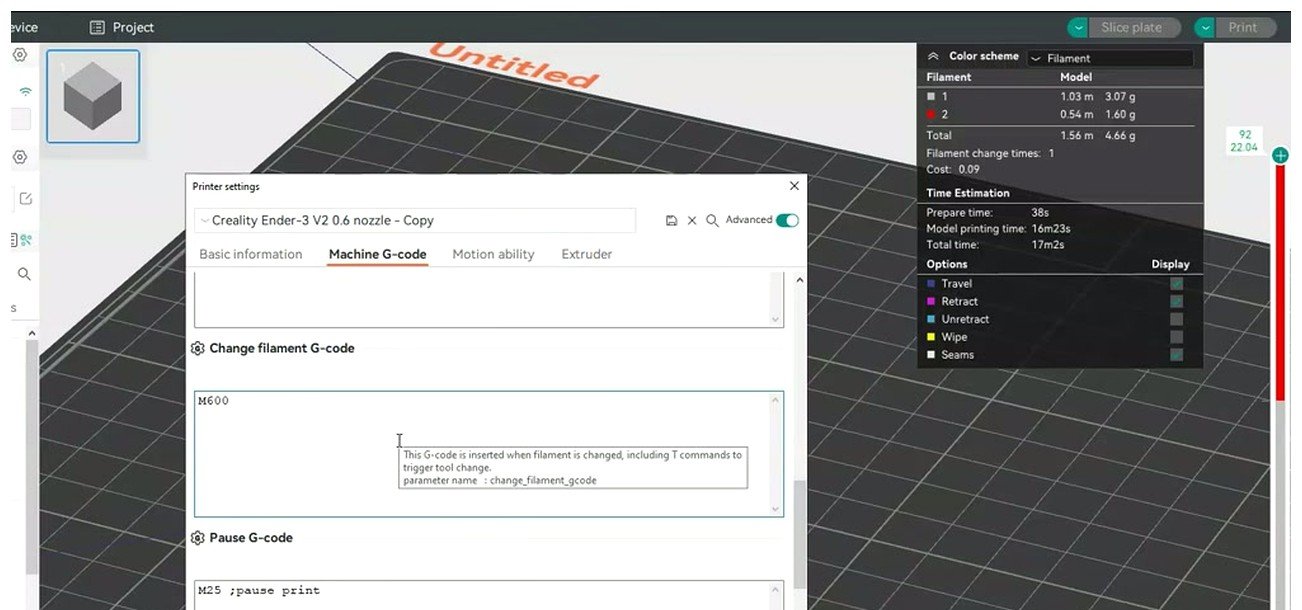
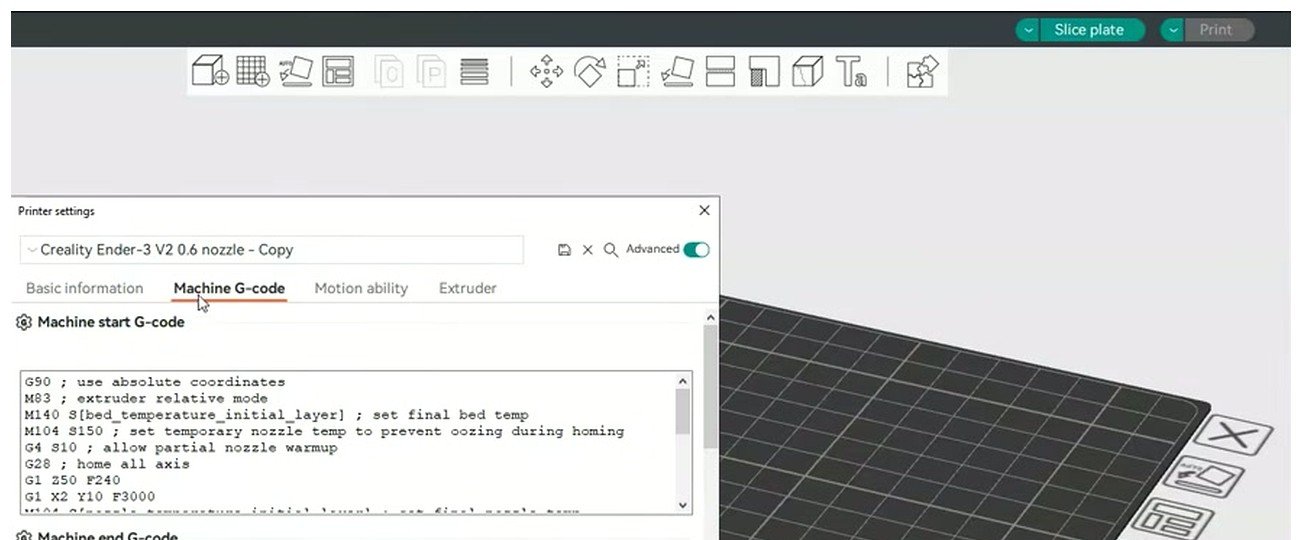
The actual G-code that lands at the marker layer is the value of the field at Printer Settings → Machine G-code → Change filament G-code. On generic Marlin and Klipper profiles the default value is literally the three characters M600. On Bambu profiles the default is the Bambu pause sequence. The OrcaSlicer wiki documents this field as change_filament_gcode in the printer-settings reference at github.com/OrcaSlicer/OrcaSlicer/wiki/printer_machine_gcode.
If you’re a custom Klipper user with a macro called something like MANUAL_FILAMENT_CHANGE or PAUSE, you can replace M600 in that field with whatever macro name you actually want fired. The slicer doesn’t care what’s in there, it just dumps the contents at the marked layer.
Similarly, the “Pause G-code” field (used when you click “Add pause” rather than “Add color change”) defaults to M601 on Marlin and PAUSE on Klipper. Same logic: edit it once, and every “Add pause” in every future slice will use whatever you put there.
The full workflow: prepare to print, layer by layer
Let’s run through the whole thing in order, soup to nuts, the way I’d do it if I sat down right now to print a two-color sign.
- Load the model in the Prepare tab. Configure print settings as you normally would: process, layer height, infill, supports.
- Add a second filament slot in Prepare (click the + next to Filament). This is required to unlock “Add color change.” If you don’t actually have a second different filament, just pick the same one as slot 1, it’s only there to satisfy the UI.
- Click Slice plate (or hit Ctrl+R). Wait for the slice to complete.
- Switch to Preview. The button is at the top of the screen next to Prepare.
- Drag the right-side vertical slider to the target layer. The layer number shows in the small readout above the slider. For a typical 0.2 mm print at layer 22 you’re aiming at roughly Z 4.4 mm, which you can confirm visually because the model preview updates as you drag.
- Right-click the slider at that layer.
- Pick “Add color change” (or “Add pause” if your firmware doesn’t have M600 wired up).
- A coloured marker appears on the slider, the preview repaints with the upper portion in the second filament colour, and OrcaSlicer does a quick re-slice (typically under two seconds). No second manual slice is needed.
- Optional: repeat at additional layers for more swaps.
- Export G-code or send directly to the printer over WiFi, LAN, Bambu Cloud, or via the network plug-in for your firmware of choice.
- Start the print.
- When the printer hits the marked layer, it executes the Change Filament G-code. What happens next depends on firmware:
- Marlin: nozzle parks at
NOZZLE_PARK_POINT, retracts the configured unload length, beeps, waits at the LCD. Insert new filament, press the encoder to fast-load, watch for clean colour out of the nozzle, press the encoder again to continue. - Klipper: PAUSE fires, head parks where your PAUSE macro tells it to, hotend either stays at temp or cools depending on the macro. From Mainsail or Fluidd, manually unload, load the new filament, purge from the extruder panel until clean, then click RESUME.
- Bambu: touchscreen prompt appears. Dismiss it with X/Back, go to Filament menu, Unload, Load, Purge, then back to the paused screen and tap Resume.
- Marlin: nozzle parks at
- After resume, the print continues. The first new-colour extrusion often needs an extra small purge (5 to 10 mm) before pressing resume on Marlin/Klipper to clear any remaining old colour from the melt zone.
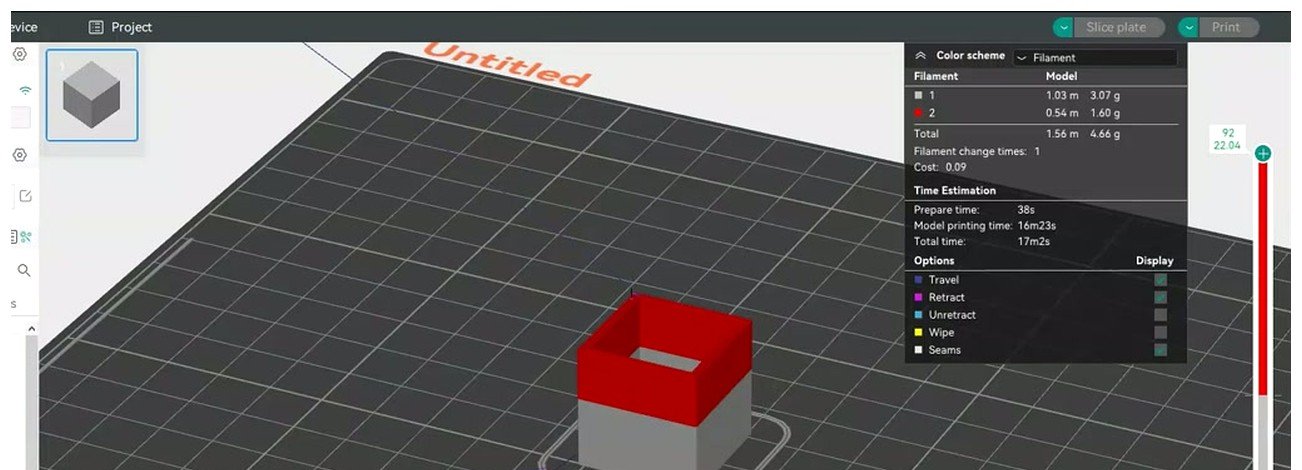
That right-panel readout, Filament change times, is the easiest sanity check that your marker actually landed. If you right-clicked and added a change but the counter still says 0 and the preview is monochrome, something didn’t register and you should retry the right-click. The counter ticking up to 1 is your green light.
Marlin specifics: ADVANCED_PAUSE_FEATURE and the lengths that matter
If you’re on a Creality, an Anycubic running stock-ish Marlin, a Voron flashed with Marlin (rare but it happens), or any custom Marlin build, the prep work is firmware-side. You need three things in Configuration_adv.h:
#define ADVANCED_PAUSE_FEATURE#define NOZZLE_PARK_FEATUREwith a sensibleNOZZLE_PARK_POINTlike{ (X_MIN_POS + 10), (Y_MAX_POS - 10), 20 }#define EEPROM_SETTINGSso you can persist M603-set values
If you have a filament runout sensor wired up, FILAMENT_RUNOUT_SENSOR ties into the same M600 plumbing and gives you automatic pauses when the spool runs dry, which is a nice side benefit even if you’re only doing manual swaps.
The length defaults that ship in stock Marlin 2.x are tuned for a generic short-Bowden direct-drive setup, which is to say wrong for most actual printers. The defaults are:
PAUSE_PARK_RETRACT_LENGTH2 mmFILAMENT_CHANGE_UNLOAD_LENGTH100 mmFILAMENT_CHANGE_SLOW_LOAD_LENGTH0 mmFILAMENT_CHANGE_FAST_LOAD_LENGTH0 mmADVANCED_PAUSE_PURGE_LENGTH50 mmFILAMENT_UNLOAD_PURGE_RETRACT13 mmFILAMENT_UNLOAD_PURGE_DELAY5000 ms
For a Bowden Ender 3 you want roughly 600 mm of unload length and around 580 mm of fast-load length (slightly less than unload so the new filament doesn’t punch past the extruder gears). For a direct-drive printer, 50 to 100 mm of unload is plenty. After editing and re-flashing, run M502 then M500 once to reload defaults and save them to EEPROM. Without that step the EEPROM still holds your old values and the new firmware defaults never apply.
You don’t have to recompile to tune lengths after the fact. M603 sets them at runtime: M603 T0 U600 L580 followed by M500 saves a 600 mm unload and 580 mm load for tool 0. That’s the cleanest way to dial in a Bowden setup once and never touch the firmware source again. Full reference at marlinfw.org/docs/gcode/M603.html.
M701 and M702 are the load and unload companions you’ll use from the LCD when you’re not in a print. M701 [T] [L] loads filament for the given tool at the given length; M702 [T] [U] unloads. They share the same length defaults as M600, so once you’ve got the unload length right, all three commands behave consistently.
One quirk: if you’re tuning hot-end temperature alongside filament changes (and you should be, especially if you’re swapping between PLA and PETG mid-print), the temperature work belongs in a calibration pass first. Our OrcaSlicer temperature tower guide covers that on the slicer side, and the M600 R[temp] parameter is what tells Marlin to hold a specific temperature during the pause if you want to step temp between colours.
Klipper specifics: the M600 macro you have to write yourself
I’ve already laid out the canonical sample-macros.cfg M600 above. Let me cover the bits around it that actually matter when you sit down to make this work on your own printer.
Step one: confirm [pause_resume] is in your printer.cfg. If it isn’t, PAUSE will throw an error and the print will keep going. The line is literally:
[pause_resume]No further configuration needed. Once it’s in and you’ve restarted Klipper, the PAUSE and RESUME G-codes exist.
Step two: drop in the M600 macro. The sample-macros.cfg version is fine for most setups, and Klipper’s own repo at github.com/Klipper3d/klipper/blob/master/config/sample-macros.cfg has it ready to copy. If you want something more aggressive (idle-timeout extension, hotend hold logic, sensor handling), use Ellis’ pattern.
Step three: if you want the pause to fire at the start of the next layer rather than mid-layer, look at SET_PAUSE_NEXT_LAYER ENABLE=1 MACRO=M600, which is documented in jschuh’s klipper-macros and Mainsail’s config bundle. It requires the slicer to emit per-layer markers in the “Layer change G-code” field, typically SET_PRINT_STATS_INFO CURRENT_LAYER={layer_num}. With that in place, you can SET_PAUSE_NEXT_LAYER from the web UI without re-slicing, which is a nice escape hatch for prints already in progress.
Step four: mind the no-auto-purge thing. When Klipper hits PAUSE, the gantry parks, the print is suspended, and the printer waits. There is no built-in beep, no built-in retract beyond what your macro does, and absolutely no automatic purge on RESUME. Your manual workflow is: pause fires, gantry parks, then you go to the Mainsail/Fluidd extruder panel, set length to something like 100 mm and click Extrude to unload, physically swap the filament, click Extrude again to load, keep extruding 5 to 25 mm at a time until the colour runs clean, click RESUME in the web UI, printer carries on. If you want a one-click experience, define UNLOAD_FILAMENT and LOAD_FILAMENT macros and call them from the web UI’s macro panel rather than the raw extrude buttons.
The Klipper community thread at klipper.discourse.group/t/m600-command-how-to-purge/6519 is the canonical “why isn’t my M600 purging” discussion and the answers there boil down to: because Klipper isn’t going to do it for you, write the macro or use the extruder panel.
One Klipper-on-OrcaSlicer pitfall I want to flag specifically: the GitHub issue at OrcaSlicer/OrcaSlicer issues/2230 documents that if your Klipper config doesn’t have M600 defined and you trigger “Add color change,” the printer silently ignores the line. There’s no error, no toast notification, nothing. The fix is on your end (define M600), but it’s worth knowing why the fix is needed. If you’re new to Klipper on OrcaSlicer, our Klipper setup guide walks through the wider config story including [pause_resume], virtual SD, and how the slicer hands files to Moonraker.
Bambu specifics: why it doesn’t run M600 at all
I covered the high-level Bambu situation in the firmware section but it deserves its own dedicated walkthrough because the touchscreen flow is genuinely different from anything you’d see on a Marlin or Klipper LCD.
Here’s the verified workflow for X1C, P1S, and P1P without an AMS:
- Select a Bambu printer profile in OrcaSlicer. Slice the model.
- In Preview, right-click the layer slider at the target layer. Pick “Add pause” or “Add color change.” OrcaSlicer inserts the Bambu pause command, not M600.
- Send to printer (LAN or Bambu Cloud, your call).
- The printer prints to the marked layer, then halts. The touchscreen shows a “filament has run out” / “change filament” prompt.
- Critical: do NOT tap “Resume Printing” at this point. Tap the X or Back to dismiss the prompt.
- Navigate to Filament on the main touchscreen.
- Tap Unload. The printer will heat to its previous extruder temp and back the old filament out. Pull the spool off, swap in the new one, feed it into the extruder.
- Tap Load. The printer pulls the new filament through and primes.
- Tap Purge (or extrude manually) until the colour out of the nozzle is clean and matches the new spool. On the X1C this purges directly into the poop chute, which is why the X1C is genuinely lovely for manual swaps and the P1P/P1S require a bit more care because you’ll need a small purge bin or just let it ooze onto a corner of the bed.
- Return to the paused-print screen and tap Resume. Print continues.
The A1 and A1 Mini follow the same logic but the touchscreen layout is different and historically had a bug where the pause prompt didn’t surface a swap option in firmware revisions before mid-2024. The workaround was identical: dismiss, use the Filament menu, then Resume.
Limitations to be aware of:
- No automatic purge tower unless you’ve actually configured a multi-filament print in the slicer with a prime tower enabled. For a single-extruder Bambu without AMS, the prime tower setting in OrcaSlicer’s “Others” / Multi-filament options does nothing because you only have one filament loaded.
- Layer-shift complaints exist when the pause is long and the gantry cools unevenly. The thread at forum.bambulab.com/t/layershift-after-pause-change-filament-resume/7773 is the canonical writeup. Keep pauses short (under a few minutes) if you can, and on a P1P specifically be aware the open frame loses heat fast.
For multi-color flows that do use the AMS rather than this manual approach, our Bambu AMS overview covers the slicer side and our color painting guide covers face-by-face colour assignment, which is the prettier workflow if you have an AMS to back it up.
Common mistakes I see (and have made)
If I sat next to ten different people trying this for the first time, eight of them would hit at least one of these.
Picking a layer too early. If you swap within the first two or three layers, the bottom of the print isn’t well anchored. The retract-and-load action can yank a thin first layer off the bed, especially on textured PEI or a freshly-cleaned smooth PEI sheet. Wait until at least layer 3 or 4 with a few outer walls down. For tall thin parts I’d push that to layer 5 or 6.
Not purging enough. Dark-to-light transitions are the worst offenders. Going from black PLA to white PLA, 5 mm of purge is laughable. 30 to 50 mm is more realistic. You’ll see the white come out streaky at first, then cloudy, then properly opaque. The “properly opaque” point is when you can resume. Don’t trust your first impression; if you see any grey in the extrusion, keep going.
Swapping incompatible materials without re-heating. PLA at 210 °C won’t push PETG cleanly because PETG wants 240+. If you’re swapping between materials with different temp requirements, set the target temp before resuming. On Marlin, M600’s R[temp] parameter handles this. On Klipper you set SET_HEATER_TEMPERATURE HEATER=extruder TARGET=240 in the web UI before clicking RESUME. On Bambu, change the filament profile from the touchscreen so the new temp takes effect.
Z-bobble or no-park. Some Marlin builds ship without NOZZLE_PARK_FEATURE defined, which means M600 retracts but doesn’t move the head. The nozzle sits at temp directly over your print and oozes. You’ll see a fat blob right where the swap happened. Either enable NOZZLE_PARK_FEATURE in Configuration_adv.h and reflash, or add an explicit park to your “Change filament G-code” field in OrcaSlicer like G91\nG1 Z5 F600\nG90\nG1 X10 Y10 F3000\nM600 so the head moves regardless of firmware settings.
Long pause, cold layer. If the print sits paused for ten or fifteen minutes with the nozzle parked at temp, the already-printed layer cools to ambient. The next layer doesn’t bond properly and you’ll see delamination right at the swap line. Either keep pauses short, use an enclosed printer with chamber heat, or accept that the swap line will be the weakest layer in the part.
OrcaSlicer inserts M600 at the start of the print. This is a real, documented bug seen in OrcaSlicer issues #2893 and #6089. If you ever see an unexpected M600 immediately after the start G-code in your sliced file, check that you don’t have a stale “Add color change” marker at layer 1 from a previous session. Open the slider in Preview, right-click any layer-1 marker, and remove it. Re-slice. Problem should disappear.
Confusing Pause with Filament Change. “Add pause” on Marlin emits M601, which only halts. No retract, no park, no temp management. “Add color change” emits M600, which does all of those things. For a real filament swap on Marlin you want color change, not pause. On Klipper the difference depends entirely on what your PAUSE and M600 macros do, so it’s worth being explicit and using whichever one is wired to retract.
Klipper without [pause_resume]. If you forget to add [pause_resume] to printer.cfg, PAUSE errors out and the print just keeps going. Confirm it’s in the config and you’ve restarted Klipper after adding it.
Bambu user taps “Resume Printing” too early. On the touchscreen prompt, “Resume Printing” is the obvious-looking button, but on most Bambu models it doesn’t take you into the unload/load flow first. It just tries to continue with whatever filament is currently in the nozzle. Dismiss with X, use the Filament menu, then resume.
Tips for clean swaps
Cut the leading edge of the new filament at a sharp diagonal. Not square, not a quick snip with side cutters that mashes the end flat. A clean diagonal slice with a hobby knife. The leading edge has to slide past any residual nub of the old colour at the hot-end inlet without snagging. Snags cause skipped extruder steps, which cause under-extrusion for the first few layers after the swap.
Hold hotend at print temp during the entire pause. On Marlin this is the default behavior. On Klipper it depends on your PAUSE macro. Ellis’ default actually turns the hotend off, which is fine for long pauses (filament runout overnight) but bad for fast manual colour swaps. Edit the macro if needed.
30 to 50 mm purge for dark-to-light. 5 to 10 mm for similar shades. You will not regret over-purging. You will absolutely regret under-purging because that grey streak in the first layer of the new colour is permanent.
Wipe the nozzle with a brass brush or folded paper towel before clicking Resume. Especially if the prior colour sat at temp for more than a minute or two and formed a skin. The first new-colour extrusion picks up whatever’s on the outside of the nozzle and smears it across the part.
Use “Add pause” with a custom park G-code if you want full control. Some users prefer to skip M600 entirely and write their own park-and-wait sequence in the Pause G-code field. Something like G91\nG1 E-5 F300\nG1 Z10 F600\nG90\nG1 X10 Y10 F3000\nM0 gives you a controlled retract, lift, park, and indefinite hold. Resume from the LCD when you’re done.
Slow down the first one or two layers after the swap. If you’re comfortable editing process G-code, drop print speed to 50% for the layers immediately after the change so the new filament has time to bond. OrcaSlicer doesn’t have a clean “speed multiplier at layer N” toggle, but you can inject M220 S50 at the swap layer (via Add custom G-code on a layer just after the change) and M220 S100 a couple of layers later to restore.
Park over a purge bucket if your printer has one. Bambu X1C has the poop chute. Voron Trident with Happy Hare has the purge bucket. If you’ve got one, configure your park location to be over it.
If you’re doing two-colour prints regularly, consider a prime tower. Even for manual swaps, a prime tower flushes the old colour through during normal printing rather than asking you to purge by hand. Our wipe and prime tower guide covers the OrcaSlicer settings for that, though it’s mainly useful when you have multiple physical filaments loaded rather than a single-extruder swap.
For broader multi-color strategy without an AMS, the pillar piece is our OrcaSlicer multi-color guide, which covers when manual M600 makes sense versus when face-painting or an upgrade to an AMS is the better call.
FAQ
Why is “Add color change” greyed out in OrcaSlicer?
Because you only have one filament loaded in the Prepare tab. The option only appears when there are two or more filaments configured for the project. Click the + next to Filament in Prepare to add a second slot, then come back to Preview and right-click the slider. The option will be available. Alternatively, use “Add pause” instead, which works with a single filament and triggers a halt that you can use to swap manually.
Does M600 work on a Bambu Lab printer?
No. Bambu Lab firmware doesn’t execute M600 at all. When OrcaSlicer slices for a Bambu profile, it inserts the Bambu-specific pause sequence (not M600) at the marked layer. The printer pauses and the touchscreen prompts you. The flow is: dismiss the prompt with X/Back, go to Filament menu, Unload, Load, Purge, then Resume from the paused-print screen.
Does M600 work on Klipper?
Only if you’ve defined it as a [gcode_macro M600] in printer.cfg. Klipper has no built-in M600. The Klipper repo includes a canonical sample in config/sample-macros.cfg. You also need [pause_resume] in your config for PAUSE/RESUME to work.
What Marlin version do I need for M600?
It’s not a version question, it’s a build-flag question. M600 has been gated behind ADVANCED_PAUSE_FEATURE in Configuration_adv.h since the rename merged in PR #6407 on May 26, 2017 (shipped in the 1.1.x branch). If the flag is enabled in your build, M600 works. If it isn’t, it doesn’t, regardless of version number.
Why didn’t my Klipper printer purge after the swap?
Because Klipper does not auto-purge on RESUME. You have to manually extrude from the Mainsail or Fluidd extruder panel before clicking RESUME, or define a LOAD_FILAMENT macro that does the purge for you. The default behavior is: pause, you swap, RESUME, head goes back to the print path with whatever’s currently in the nozzle.
How much should I purge between colors?
5 to 10 mm for similar shades (red to orange, light grey to white). 30 to 50 mm for high-contrast swaps (black to white, dark red to yellow). When in doubt, watch the extrusion: when the colour out of the nozzle is consistent and matches the new spool, you’re done. Under-purging is far worse than over-purging.
Can I do multiple color changes in one print?
Yes. Right-click the slider at each target layer and add a marker. OrcaSlicer will insert the Change Filament G-code at every marker. The right-panel Filament change times counter ticks up so you can verify each one registered.
Should I use “Add color change” or “Add pause”?
On Marlin, use “Add color change” for a real filament swap because it fires M600 with the proper retract-park-purge dance. “Add pause” fires M601, which only halts. On Klipper, it depends on what your macros do. On Bambu, they’re functionally similar because the slicer inserts the same Bambu pause sequence for both anyway.
Does OrcaSlicer re-slice after I add a color change?
Yes, automatically. The slider edit triggers a light re-slice in current 2.2.x and 2.3.x builds, typically under two seconds, and the preview updates to show the colour split. You don’t need to click Slice plate again before exporting G-code.
Where is the actual G-code that gets inserted defined?
In Printer Settings → Machine G-code → Change filament G-code (for “Add color change”) and Pause G-code (for “Add pause”). The defaults are M600 / M601 on Marlin profiles, M600 / PAUSE on Klipper profiles, and Bambu-specific sequences on Bambu profiles. You can edit these fields to fire any G-code or macro you want.
The pause works but my nozzle just sits there and oozes. Why?
You’re on Marlin without NOZZLE_PARK_FEATURE compiled in. M600 retracts but doesn’t move the head. Either enable NOZZLE_PARK_FEATURE in Configuration_adv.h and reflash with a sensible NOZZLE_PARK_POINT, or add an explicit park move to your Change filament G-code field in OrcaSlicer.
Where to go next
That’s the manual filament change story end to end. The mental model worth keeping is this: OrcaSlicer is a text generator. It writes G-code into a file. What the printer does with that G-code is firmware territory, and the three big firmware families (Marlin, Klipper, Bambu) handle M600 in three genuinely different ways. Once that clicks, the slicer side becomes obvious: right-click the slider, pick “Add color change,” confirm the marker, export, print, swap when the printer halts. The firmware side is where the work is.
If you want to push further into multi-color, the next two stops in our guide series are the multi-color guide (decision tree for manual vs AMS vs face-painting) and the color painting walkthrough (face-by-face colour assignment in OrcaSlicer’s paint tool, which pairs beautifully with an AMS or MMU). If you’re calibrating before doing a tricky two-material swap, our temp tower and pressure advance guides will get your hot-end dialled.
OrcaSlicer is open-source, free, and downloaded from the official SoftFever GitHub releases page. We’re a third-party guide site, not the developer, so when you grab the slicer go to github.com/SoftFever/OrcaSlicer/releases for the actual builds. Happy swapping.
Related OrcaSlicer guides
- OrcaSlicer Settings Master Guide: Every Setting Explained (2026)
- OrcaSlicer for Sovol SV06 / SV07 / SV08: Setup and Best Settings (2026)
- OrcaSlicer Cooling and Fan Curves Explained (2.3.x Guide)
- OrcaSlicer for Voron 0.2 / 2.4 / Trident: Configuration Guide
- OrcaSlicer Wipe Tower & Prime Tower Settings: Multi-Color Guide (2026)