
PrusaSlicer is genuinely excellent for Prusa printers, and the only reason I switched my MK4 over to OrcaSlicer was the calibration test integration. Then I found a half-dozen other reasons to stay. Then I found out about the bgcode thing, which almost sent me back. Here’s the honest story of running OrcaSlicer on a Prusa MK4, MK4S, or Core One in 2026, written from someone who’s been bouncing between both slicers for the better part of a year.
I’ll cover the setup, the settings I actually override, the real pain points (network printing on Windows, MMU3 in Orca, the bgcode situation), and the spots where PrusaSlicer is still the smarter call. If you own a Prusa and you’ve never strayed, this is a useful map. If you already use OrcaSlicer for a Bambu or a Voron and you just bought a Core One, this is the shortcut that saves you a weekend of forum hopping.
Table of contents
- Should you actually switch from PrusaSlicer?
- What works in OrcaSlicer 2.3.2 with the MK4 family today
- MK4 vs MK4S vs Core One: which profile should you pick?
- Setting up OrcaSlicer for your Prusa, step by step
- Best settings to override on the MK4
- MK4S-specific tweaks
- Core One specific tweaks
- Multi-color (MMU3) in OrcaSlicer in 2026
- Calibration sequence for the MK4 family
- Common pain points and fixes
- When PrusaSlicer is still the right call
- Wrap-up
Should you actually switch from PrusaSlicer?
Let me be blunt before we get into the setup details. PrusaSlicer is excellent on Prusa hardware. It’s the official slicer, it gets Prusament profile updates first, the start G-code is maintained directly by Prusa engineers, and the MMU3 painting workflow is the most polished in the industry. If you only own Prusa printers and you don’t care about feature breadth, you don’t need OrcaSlicer.
That said, here’s why I keep Orca installed on every machine I run. The built-in calibration tools are the killer feature. Pressure Advance, flow rate, temperature tower, retraction tower, input shaper frequency sweeps, and junction deviation tests all live one click away in the Calibration menu. PrusaSlicer makes you generate these manually or rely on Prusa’s printer-side wizards. The OrcaSlicer fuzzy skin painting tool, the per-line speed control, the modifier mesh painting, and the Color Painting tool are all genuinely better than what ships in PrusaSlicer right now. If you’ve ever wanted to slow down just the front face of a part because the layer changes are showing, OrcaSlicer makes that trivial.
The flip side is real. You’re now responsible for syncing Prusament profile updates manually. When Prusa pushes a tweak to start G-code or a new filament profile, PrusaSlicer pulls it automatically. In Orca, you wait for the upstream profile maintainers to merge it, then you update the slicer, then you re-import. The MMU3 workflow in Orca is technically there but it’s nowhere near PrusaSlicer’s level of polish, and bgcode (the binary G-code format Prusa printers prefer for fast Wi-Fi uploads) is not native in OrcaSlicer at all. You’ll need a post-processing script, which I’ll cover below.
The realistic answer for most people I talk to: run both. Use OrcaSlicer for calibration, single-color jobs, and anything that benefits from its painting tools. Keep PrusaSlicer for MMU3 painted prints and for anything where you want the official, hands-off Prusa experience. We have a deeper PrusaSlicer vs OrcaSlicer comparison if you want to dig into the feature-by-feature breakdown.
What works in OrcaSlicer 2.3.2 with the MK4 family today
Here’s the state of play in May 2026. OrcaSlicer’s current stable is 2.3.2. The Prusa MK4, MK4S, MK4S HF (high-flow), and Core One profiles all ship in upstream Orca, sitting in the resources/profiles/Prusa/machine/ directory. Core One landed in 2.3.1 (released October 5, 2025), so anything older than that won’t see the printer at all. The Core One+ and Core One L variants are also in the upstream tree, paired with current Prusa Buddy firmware 6.5.3 on the printer side.
You don’t need a community profile pack to get started. Open the Configuration Wizard, expand Prusa Research, and check the boxes. That’s the supported path now, which wasn’t true even a year ago.
Network printing works through both PrusaLink (local LAN, no internet required) and Prusa Connect (cloud). PrusaLink is rock-solid on every OS I’ve tried it on. Prusa Connect through Orca works reliably on macOS but has some flakiness on Windows 11 (a “TEST passes but upload fails” pattern that several forum threads document). PrusaLink is the workaround if you hit it. Once paired, the OrcaSlicer Device tab embeds the PrusaLink web UI directly inside the slicer, so you can monitor temps, browse files, and start prints without opening a browser tab.
Pressure Advance is handled exactly like in PrusaSlicer, through M572 commands embedded in the start G-code conditional, with smoothing time W=0.04s baked in. Input Shaper is factory-calibrated by the printer firmware (introduced in Buddy 5.0.0 for the MK4, and refined since). OrcaSlicer doesn’t need to know anything about either of these, the slicer just sends G-code and the printer applies its own resonance compensation.
The bgcode caveat is the one ugly bit. Prusa printers prefer .bgcode (binary, compressed) for faster Wi-Fi uploads, especially on chunky multi-color jobs. OrcaSlicer doesn’t export bgcode natively. The workaround is the orca_bgcode post-processing script from the bwees GitHub repo, which we’ll add in the setup section. Plain .gcode still prints fine, it just uploads slower.
MK4 vs MK4S vs Core One: which profile should you pick?
If you’ve upgraded an MK4 to an MK4S, this matters. The MK4 profile in OrcaSlicer ships with conservative volumetric speed limits matching the original V1 nozzle. The MK4S profile loosens those limits to match the high-flow CHT nozzle. Picking the wrong profile caps your real-world throughput by roughly 50% on PLA, even if everything else looks fine.
Here’s the spec comparison that drives the choice.
| Spec | Prusa MK4 (V1) | Prusa MK4S | Prusa CORE One |
|---|---|---|---|
| Architecture | Cartesian bedslinger | Cartesian bedslinger | CoreXY, fully enclosed |
| Build volume | 250 x 210 x 220 mm | 250 x 210 x 220 mm | 250 x 220 x 270 mm |
| Hot end | Nextruder + Prusa Nozzle V1 | Nextruder + High-flow CHT 0.4 | Nextruder + High-flow CHT, quick-swap |
| Max nozzle temp | 290 °C | 290 °C | 290 °C (400 °C with HT upgrade) |
| Max bed temp | 120 °C | 120 °C | 120 °C |
| Active chamber | None | None (optional Enclosure) | Yes, up to 55 °C |
| Volumetric flow ceiling (PLA) | ~16 mm³/s | ~24 mm³/s | ~24 mm³/s and up |
| Machine max travel speed | up to 200 mm/s | up to 300 mm/s | up to 600 mm/s |
| Machine max accel (X/Y) | 4000 mm/s² | 4000 mm/s² | higher (CoreXY) |
| Native firmware | Buddy 6.5.3 | Buddy 6.5.3 | Buddy 6.5.3 |
| Input Shaper | Yes (factory calibrated) | Yes (factory calibrated) | Yes + phase stepping |
| OrcaSlicer profile | Yes (pre-2.3.x) | Yes + HF variants | Yes (since 2.3.1) |
The decision tree is simple. Original V1 hot end? Pick the Prusa MK4 profile. V2 CHT after the $99 upgrade? Switch to Prusa MK4S. Bought the optional higher-flow CHT-HF nozzle separately? Use Prusa MK4S HF. CoreXY enclosed? Pick Prusa CORE One. The Core One L variant has its own profile if you got the larger build version.
One thing I want to flag: OrcaSlicer ships separate JSON files for each nozzle size (0.25, 0.3, 0.4, 0.5, 0.6, 0.8 mm) under each printer family. Pick the size you actually have installed. The defaults in fdm_machine_common_mk4s.json assume a 250 x 210 build area, retraction 0.7 mm at 35 mm/s, machine max accel 4000 mm/s², and a profile-default acceleration of 2500 mm/s². If those numbers look familiar from PrusaSlicer, that’s because Orca’s profile is a faithful translation.
Setting up OrcaSlicer for your Prusa, step by step
Step 1: install OrcaSlicer 2.3.2 or newer
Grab the latest stable from the OrcaSlicer GitHub releases page. Windows, macOS, and Linux builds are all there. Don’t bother with anything older than 2.3.1, you’ll miss the Core One profile, the upgraded calibration tools, and a handful of Prusa-family fixes. Install it like a normal application. If you’re running OrcaSlicer alongside PrusaSlicer, they don’t conflict, they keep their own config directories.
Step 2: add the printer in the Configuration Wizard
On first launch, OrcaSlicer pops the Configuration Wizard. Scroll the brand list to “Prusa Research”, expand it, and check the boxes for the printers you own (MK4, MK4S, Core One). Each gets a dropdown for nozzle size. Pick the size you’ve actually got installed. If you skip the wizard or want to add a printer later, the printer dropdown in the top bar has a “Select / remove printers (system presets)” option that re-opens the picker.
It’s worth picking up the right starting layer-height profile here too. For the MK4S 0.4 nozzle, OrcaSlicer ships 0.07 (DETAIL), 0.10, 0.15 (QUALITY), 0.20 (SPEED), 0.25, and 0.30 (DRAFT). I default to 0.20 SPEED for general work, drop to 0.15 QUALITY for visible parts, and only reach for 0.30 DRAFT when I’m prototyping something I don’t care about.
Step 3: import your PrusaSlicer config (optional but recommended)
If you’ve already calibrated in PrusaSlicer and built up custom filament profiles, don’t redo all that work. In PrusaSlicer go to File → Export → Export Config Bundle, then in OrcaSlicer use File → Import → Import Configs. This carries over MMU3 setups, your tweaked Prusament filament values, and any pressure-advance tweaks you committed.
This is the path I follow on every fresh Orca install. It saves hours.
Step 4: connect via PrusaLink (local LAN)
Open Printer Settings, click the “Physical Printer” pencil icon at the top of the printer dropdown. Set the Host type to PrusaLink. Enter the printer’s IP address (find it on the printer LCD under Settings → Network → Wi-Fi or check your router’s DHCP table). Username is maker, password is shown on the printer screen. Click Test. Green check means you’re good. The Device tab will now embed PrusaLink’s web UI directly inside Orca.
Step 5: connect via Prusa Connect (cloud, optional)
If you want cloud monitoring, set Host type to PrusaConnect, then go to connect.prusa3d.com → your printer → Settings → API keys and generate a key. Paste it into the API Key field in Orca. Hostname autofills. Hit Test.
Heads up: this works reliably on macOS. On Windows 11 some users hit a pattern where the test passes but actual print uploads fail. I’ve seen it myself on a Windows 11 Pro box with no obvious firewall issue. If you hit it, fall back to PrusaLink for uploads and use Prusa Connect just for monitoring.
Step 6: add the orca_bgcode post-processing script
OrcaSlicer doesn’t export .bgcode natively. To get the smaller, faster-uploading binary G-code Prusa printers prefer, you install the orca_bgcode helper from the bwees GitHub repo and add it as a post-processing script in your Process settings. The reference setup looks roughly like this in the Process settings under “Post-processing scripts”:
# Windows example
"C:\Tools\orca_bgcode\orca_bgcode.exe";

# macOS / Linux example
/usr/local/bin/orca_bgcode;
After slicing, the .gcode is converted to .bgcode in place. PrusaLink uploads it as a normal print job, and the binary format cuts upload time by roughly 60-70% on large slicer files. If you don’t add this script, plain .gcode still works fine, you just sit through longer Wi-Fi transfers on big prints.
Best settings to override on the MK4
The shipped Orca profile for the MK4 family is conservative on purpose. It mirrors PrusaSlicer’s defaults, which Prusa keeps tame to maximize success rate on factory-fresh hardware. Here’s where I push them, with caveats.
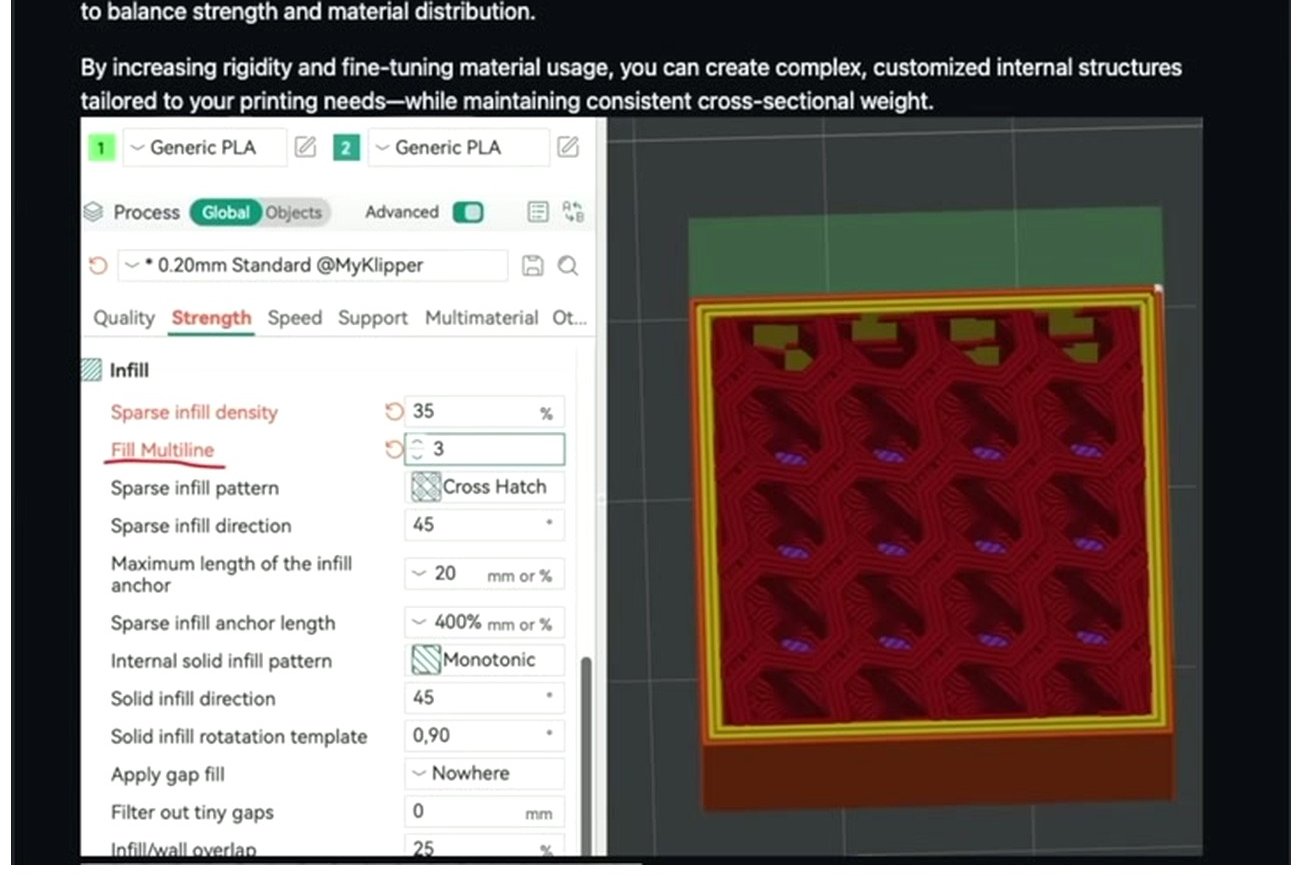
The Process settings Strength tab is where most of the real tuning happens. The defaults are conservative; bumping infill, wall count, and acceleration here changes both speed and finish more than fiddling with raw mm/s values.
Print speed and acceleration sweet spots
Default profile is “0.20mm SPEED @MK4S 0.4” which sets things conservatively. Owners pushing speed dial outer wall to 80-120 mm/s, inner wall 150-200 mm/s, and infill 200-300 mm/s. Past about 150 mm/s outer wall, surface finish degrades on Prusament PLA at 0.2 mm layer height. The real cap is volumetric flow, not raw mm/s. The MK4 with V1 nozzle tops out around 16 mm³/s on Prusament PLA. The MK4S CHT pushes that to 24 mm³/s. Orca enforces this through the filament profile’s max volumetric speed field.
Acceleration is more interesting. The Orca MK4S profile uses 4000 mm/s² as the machine max with a 2500 mm/s² printing default. That’s conservative. Bumping outer-wall accel to 1500 mm/s² and inner-wall to 3500 mm/s² is the standard “fast but quality” tweak you’ll see all over the Prusa forum. I’ve found that’s the sweet spot on a Prusament PLA + 0.4 nozzle combo.
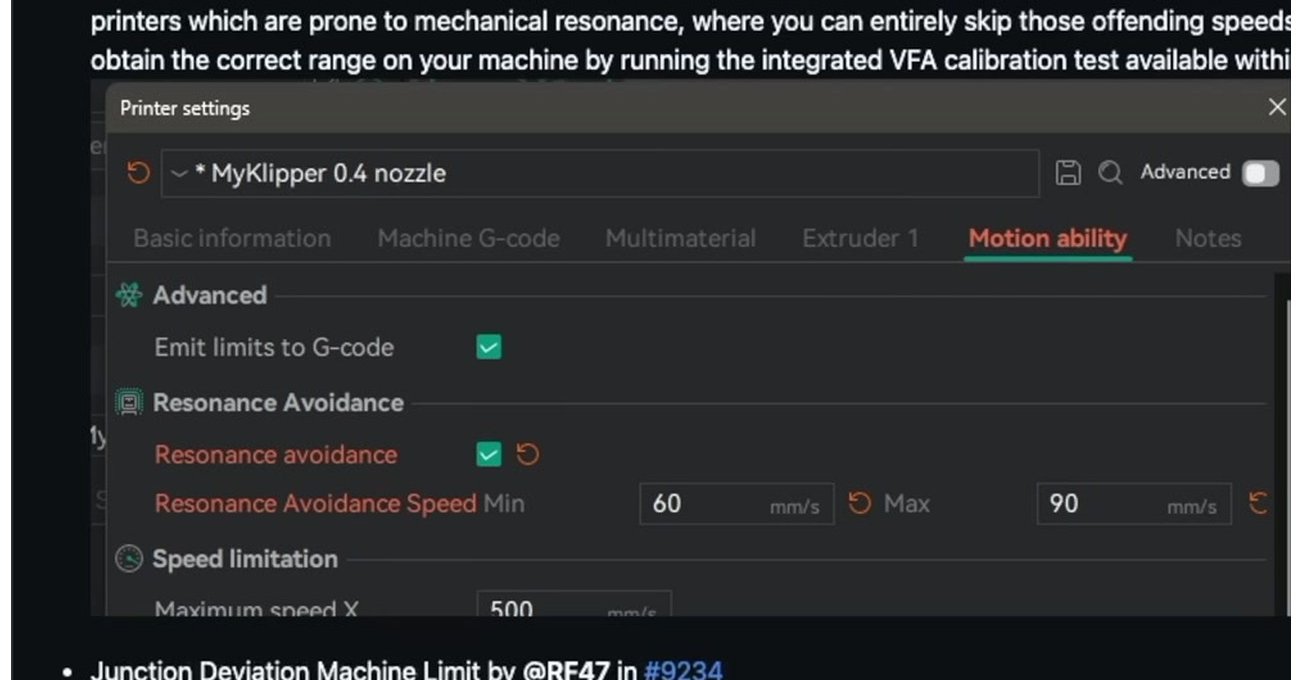
The Motion ability tab in Printer Settings is where the machine-side caps live. The Resonance Avoidance fields are useful if you’re pushing acceleration on an MK4 without re-running input shaper.
Pressure Advance: stock vs community-calibrated values
Orca inherits PrusaSlicer’s M572 conditional G-code, with PA set per filament per nozzle. Stock value for Prusament PLA on the MK4S CHT nozzle is around 0.036. Community testing on the Prusa forum lands around 0.053-0.054 for the same combination, which is a meaningful gap. Run the Orca PA Line test (Calibration → Pressure Advance → PA Line) and override the value in your filament profile. We’ve covered the full procedure in pressure advance calibration for direct drive.
Smoothing time (W parameter on M572) defaults to 0.04 seconds. Don’t change it unless you really know why. That value is set by Prusa’s own testing on the Nextruder.
Retraction: leave it alone unless you swapped nozzles
Verified from the JSON: retraction is 0.7 mm length at 35 mm/s, with min travel of 1.5 mm. The Nextruder is direct drive. These short retractions are correct. Do not crank them to Bowden-style 4-6 mm or you’ll grind filament. If you swapped to a CHT or HF nozzle and start seeing stringing, tweak length in 0.1 mm steps from 0.7. The retraction tower walkthrough covers the testing procedure.
Layer height presets and when to use each
OrcaSlicer ships 0.07-0.30 layer heights for the 0.4 nozzle. My picks:
- 0.30 DRAFT for prototype iteration where surface finish doesn’t matter
- 0.20 SPEED for general functional parts (this is where I default)
- 0.15 QUALITY for visible cosmetic prints
- 0.10 or 0.07 only when I genuinely need fine detail (figurines, mechanical fits with tight tolerance)
The 0.07 mm layer height is technically supported but it doubles print time for marginal visual gain on most parts. Reserve it for specific use cases.
MK4S-specific tweaks
If you upgraded from MK4 to MK4S using the $99 kit, the single most important thing is switching profiles. The MK4S profile family has volumetric flow ceilings, pressure advance defaults, and fan settings calibrated for the V2 CHT hot end and the new wraparound 360-degree nozzle fan.
If you didn’t upgrade and ordered the optional standalone CHT-HF nozzle, switch to the “Prusa MK4S HF” profile family. The HF variants exist because the optional nozzle pushes flow even higher than stock MK4S. Most owners don’t have these. If you’re not sure whether you bought the HF nozzle, you almost certainly didn’t, and the standard MK4S profile is the right pick.
The 360-degree nozzle fan moves more air than the original MK4’s setup, which means you can drop part-cooling fan speed by 20-40% for ASA, ABS, and PC inside an enclosure without losing temperature control. I’ve found dialing fan to 60-80% (instead of stock 100%) reduces warping on enclosed materials without compromising bridging. Test this on your own filament before treating it as gospel.
NFC Wi-Fi pairing is a nice MK4S quality-of-life feature. It happens at the printer level. Nothing in OrcaSlicer changes for it to work, you just tap your phone to the printer to push Wi-Fi credentials.
Core One specific tweaks
The Core One brings three slicing-relevant changes over the MK4S: CoreXY motion, an actively heated chamber up to 55 °C, and slightly more build volume (250 x 220 x 270 mm versus 250 x 210 x 220 mm). The Orca profile (Prusa CORE One) accounts for all of this with higher acceleration headroom and chamber-friendly defaults.
CoreXY changes the math on acceleration. There’s no bed-slinger inertia on the Y axis, so you can push outer-wall speeds of 150 mm/s and accelerations of 8000-10000 mm/s² with input shaper enabled. Don’t just crank these on day one. Start with Orca defaults, slice a calibration cube and a ringing tower, see how it looks, then push. Phase stepping (Buddy 6.5.x firmware) helps with VFA artifacts but it’s printer-side, Orca needs no awareness of it.
The active chamber is the genuinely novel feature. PLA still prints fine with the door closed because Prusa designed the airflow to handle it, which is unusual for an enclosed printer. My settings:
- PLA: chamber off or 30-35 °C
- PETG: 45 °C
- ABS / ASA: 50-55 °C
- PC / PA: 55 °C with the printer’s HT upgrade
Pressure advance on the Core One inherits MK4 family values. Recalibrate it if you see corner bulging at higher acceleration, which becomes more visible once you start pushing the CoreXY ceiling. The PA Line test in OrcaSlicer takes about 20 minutes and the difference is obvious.
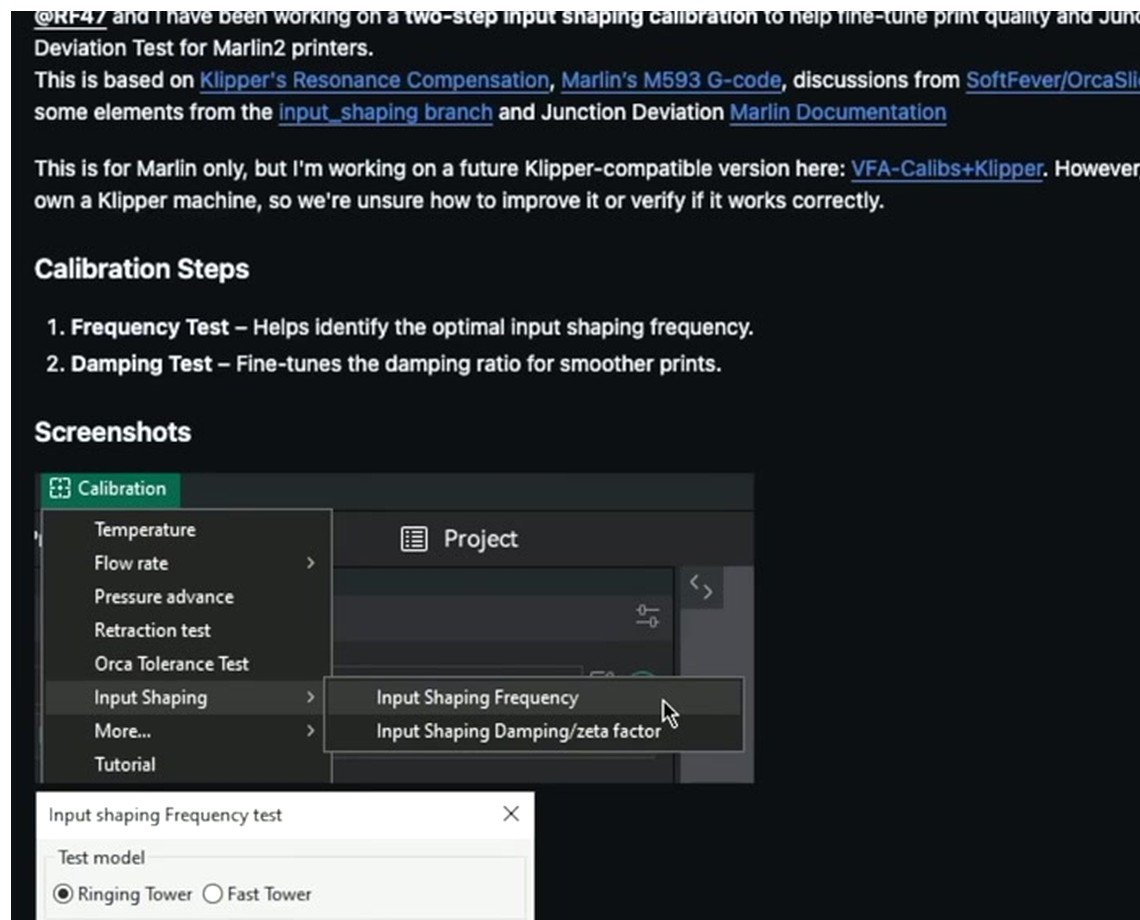
Input Shaping calibration in OrcaSlicer 2.3.1+ exposes Frequency and Damping sweeps. The Core One’s input shaper is factory calibrated, so you only need this if you’ve added gantry mods or ran a printer-side recalibration.
Input Shaper is factory calibrated. Re-run only if you mounted accessories on the gantry, swapped the print head, or did an accelerometer-based recalibration via the printer LCD. The Orca built-in test is convenient but for the Core One it’s almost always overkill. The input shaping primer we have for Klipper users explains the underlying frequency-domain concept if you want to understand what these tests are actually doing.
Multi-color (MMU3) in OrcaSlicer in 2026
I’ll be straight with you: MMU3 in OrcaSlicer is not where it needs to be. It’s there. It works. It’s nowhere near PrusaSlicer’s polish, and if your primary use case is multi-color painted prints with five filaments, PrusaSlicer is still the right tool.
The two practical paths people take:
- Use PrusaSlicer for MMU3 jobs. Color-paint, slice, send via PrusaLink. Use OrcaSlicer for single-color jobs and calibration. This is what I do.
- Import a community OrcaSlicer MMU3 profile. The two best maintained as of May 2026 are Sagy Rozenblat’s Core One + MMU3 profile on Printables (updated March 2026) and N0dr4C’s MK4S + MMU3 config (updated March 2025). Victor’s earlier MK4 MMU3 beta is no longer maintained, skip it.
Known caveats with the community MMU3 profiles in Orca: estimated flush amounts often run roughly 2x reality, so start with automatic flushing volume multiplier = 0.5 and dial up if you get color contamination. Ramming settings need testing per filament. Tool-change M600 prompts work but the slicer-side painting workflow is clunky compared to PrusaSlicer’s MMU painted preview.
If you’re new to multi-color in Orca generally, our full multi-color setup walkthrough covers the slicer side from scratch, and the M600 manual filament change guide is useful if you’re doing simple two-color prints by pause-and-swap rather than a full MMU3 setup.
Calibration sequence for the MK4 family
This is where OrcaSlicer earns its keep on Prusa hardware. Run calibrations in this order, which matches the OrcaSlicer wiki’s recommendation. Doing them out of order means later tests get polluted by earlier uncalibrated variables.
- Temperature tower (
Calibration → Temperature Calibration). Pick the right nozzle temp per filament. Most Prusament PLA lands at 215 °C and Prusament PETG at 240 °C, but verify per spool. Generic PLAs vary wildly. Walk through the procedure in our temperature tower guide. - Flow rate (
Calibration → Flow Rate → Pass 1, thenPass 2). Tighten extrusion multiplier so top surfaces look uniform. Or use the new objective flow calibration introduced in 2.3.1 if you don’t trust your eyeballs. Detailed steps are in the flow rate calibration writeup. - Pressure Advance (
Calibration → Pressure Advance → PA Linefor direct-drive, which is all three printers we’re discussing). Expect values around 0.030-0.060 for PLA depending on speed, nozzle wear, and CHT versus non-CHT. - Input Shaper / Junction Deviation (built-in 2.3.1 and later). Only run if you customized firmware values or modified the gantry. Factory-calibrated values from Buddy firmware are accurate for stock hardware.
- Retraction tower (optional). Nextruder rarely needs adjustment, but if you swapped a CHT or HF nozzle and see stringing, tweak length in 0.1 mm steps from the 0.7 mm baseline.
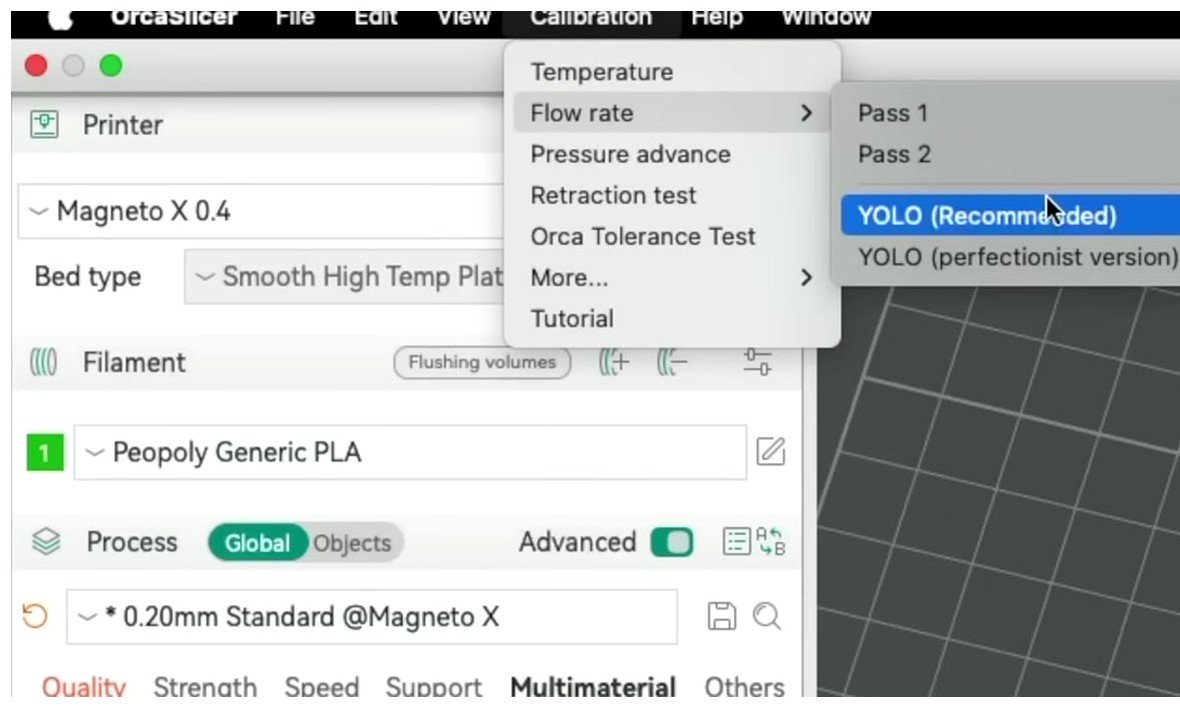
The Calibration menu’s Flow Rate path with Pass 1, Pass 2, and the YOLO option. Run Pass 1 first for the coarse adjustment, then Pass 2 to refine. The YOLO option is the single-pass version for people who already know roughly where their flow lands.
One small thing that catches new Orca users on a Prusa: when you slice a calibration test, double-check that the preview matches your printer profile. The total estimation panel in the bottom right shows time and filament use. If those numbers look way off, you’ve likely got the wrong nozzle profile selected.
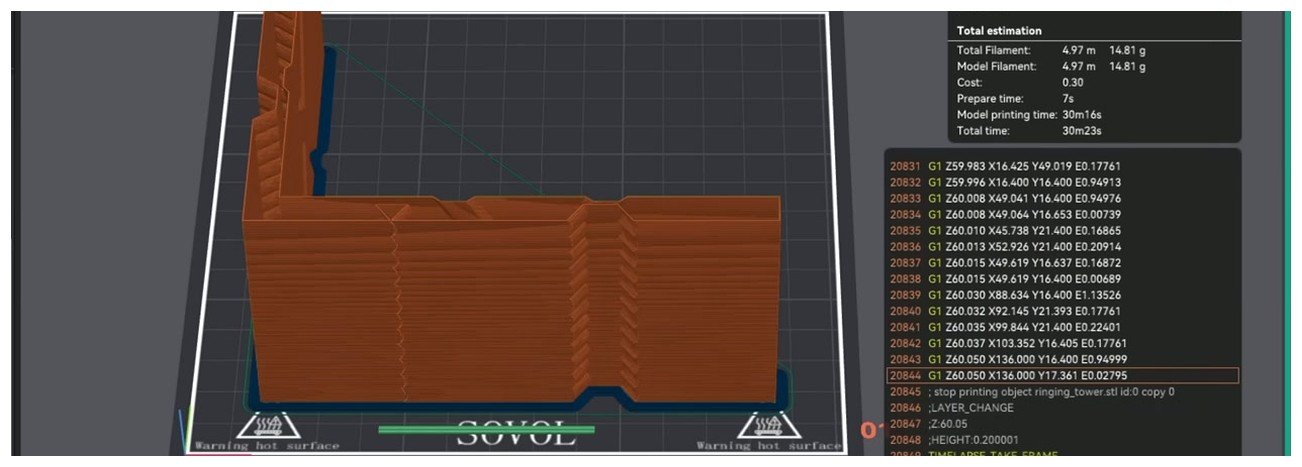
The sliced preview of a ringing tower with the G-code layer list and total time estimate panel. Verify these numbers before sending to the printer; an obviously-wrong time estimate usually means the wrong profile is loaded.
For the broader picture and tools we haven’t covered (resonance, line-width, max volumetric flow), the OrcaSlicer calibration guide covers each test in depth. If you want to go even deeper into per-material settings, the filament profile fundamentals writeup covers volumetric flow and per-material PA values that interact with what we’ve discussed here.
Common pain points and fixes
These are the questions I see show up over and over on the Prusa forum and the OrcaSlicer GitHub issues. Quick-hit answers based on the most-recent forum threads.
“Should I switch from PrusaSlicer entirely?” No, run both. Orca for calibration and feature breadth, PrusaSlicer for MMU3 painted prints and Prusament profile auto-sync. Almost no Prusa power users I know have ditched PrusaSlicer outright.
“Prusa Connect upload from Orca fails on Windows 11.” Known issue. The Test button passes but actual file upload hangs. Workaround: use PrusaLink directly for uploads, keep Prusa Connect for monitoring only. macOS doesn’t have this problem.
“Where’s the Core One profile?” Built into 2.3.1 and later. If you don’t see it, you’re on an old build. Update to 2.3.2.
“PrusaLink uploads stall at 0%.” Update both Orca and the printer firmware. This was a real bug in older builds and is resolved in current 2.3.x.
“Pressure advance default for MK4S CHT looks wrong.” Stock is around 0.036 for PLA. Community-calibrated value is 0.053-0.054. Run the PA Line test, override the value in your filament profile.
“There’s no MK3.9 profile.” Workaround is to use the MK4 profile in non-input-shaper mode. No separate MK3.9 profile yet in upstream.
“MMU3 in OrcaSlicer is rough.” Yes. Use PrusaSlicer for painted MMU3 prints. Or import a community profile (Sagy or N0dr4C, see the MMU3 section above) and accept that the workflow isn’t as polished.
“Mesh bed leveling stopped working after I customized the start G-code.” The Orca MK4 profile already includes Prusa’s mesh bed leveling sequence (G29/G80) in start G-code. Don’t strip it out. If you customize, keep that block intact.
“My MK4S isn’t in the printer dropdown after install.” You’re probably on a stale build. Current upstream has all MK4S variants including HF.
“Profiles look different between PrusaSlicer and Orca.” They are. Orca’s are translations, not live-synced. When Prusa pushes a profile update, you wait for the upstream Orca maintainers to merge it and ship a new release. If you can’t wait, edit your local profile manually.
For more Prusa-adjacent gotchas (first-layer issues, bed adhesion, filament-specific quirks), the troubleshooting master guide is the catch-all reference.
When PrusaSlicer is still the right call
I want to close honestly because I’d rather you trust this article than feel like I sold you something. PrusaSlicer remains the right pick if any of these apply to you:
- You only own Prusa printers and you don’t want to maintain a second slicer.
- You print MMU3 painted multi-color jobs as your primary use case.
- You want Prusament filament profile updates the day Prusa releases them.
- You’ve never enjoyed editing slicer settings and you just want something that works.
- You’re running large MMU3 jobs (10+ filament changes) where ramming and flush settings are dialed in for you.
OrcaSlicer is worth adding to your toolkit if you want broader filament profile customization, the calibration test integration, the painting tools, or you have a multi-printer household where you’d rather run one slicer for a Bambu, a Voron, and your Prusa side by side. The combined approach (both slicers installed, Orca for single-color and calibration, PrusaSlicer for MMU3 and Prusament-day-one profile updates) is what most experienced Prusa owners I know are doing. None of them have completely abandoned either side.
Wrap-up
OrcaSlicer 2.3.2 on a Prusa MK4, MK4S, or Core One is a smooth experience now in a way it wasn’t 18 months ago. The profiles are upstream, network printing works, the calibration tools genuinely help dial in the Nextruder + CHT combo, and the Core One has first-class support since 2.3.1. The bgcode workaround is a small wart, MMU3 is rough, and Prusa Connect on Windows 11 has its quirks. Those are the honest tradeoffs.
If you’re setting this up for the first time, install Orca, run the wizard, import your PrusaSlicer config, hook up PrusaLink, and run the calibration sequence in order (temperature, flow, PA, optionally input shaper, optionally retraction). That’s a Saturday morning’s worth of work and you’ll have a printer setup that’s tuned beyond what either slicer ships out of the box.
For more Prusa-family setups and the rest of our printer-specific guides, head to the OrcaSlicer printer profiles hub. The full settings reference is at the OrcaSlicer settings master guide if you want to go deeper on any individual parameter.