
I clicked through OrcaSlicer’s setup wizard twice in three months and got it wrong both times. The Region picker is the silent trap: pick the wrong one and Bambu users land on the Chinese cloud server, but the wizard explains none of this. Here’s what each option actually does, and how to recover when you realize you picked wrong.
This guide walks through every screen of the v2.3.2 wizard in order, with the actual screen names pulled from ConfigWizard.cpp in the OrcaSlicer source. I’ll tell you what to pick, when it matters, and when it absolutely doesn’t. If you’re brand new and you also need the install steps that come before this, the Windows install guide and the macOS install guide cover that, and the download page is a step earlier still. Once you finish the wizard, the natural next stop is the beginner’s first print walkthrough.
Table of contents
- What the setup wizard actually is
- From installer to first launch
- Screen 1: Get Started
- Screen 2: Region (the one everyone gets wrong)
- Screen 3: Printer Selection
- Screen 4: Filament Selection
- Optional: Bambu Network Plug-in and login
- What happens after you click Finish
- Re-running the wizard later
- Common wizard pitfalls and fixes
- FAQ
What the setup wizard actually is
The setup wizard is a single modal window that pops the first time you launch OrcaSlicer. It’s mandatory. There’s no skip button, and there hasn’t been one for years. Issue #10187 on GitHub asked for a skip option and it was closed as “not planned,” and the older issue #4458 confirms the same. So you’re going to walk through it whether you want to or not. The good news: it takes 60 to 120 seconds, and you can re-run it any time from Help → Setup Wizard if you mess up.
The wizard has five screens in v2.3.2: Get Started, Region, Printer Selection, Filament Selection, and an optional Bambu Network Plug-in step that only shows up if you ticked a Bambu Lab printer. I’ve cross-referenced these against the source file src/slic3r/GUI/ConfigWizard.cpp and the v2.3.1 macOS issue thread #10970, which lists the live screen names exactly. The Help menu entry is the literal string _L("Setup Wizard") from MainFrame.cpp, in case anyone tells you it’s called “Configuration Wizard” (that was the old PrusaSlicer-era name).
One thing I want to defuse up front: nothing you pick in this wizard is permanent. You’re not signing a contract. New selections later are additive, and there’s a checkbox to wipe and reset profiles if it ever gets weird.
From installer to first launch
Before the wizard shows up, you’ve got to actually install OrcaSlicer. On Windows the installer asks where to drop the binaries, and I leave it at the default path under Program Files unless I’m specifically setting up a portable copy on a thumb drive.
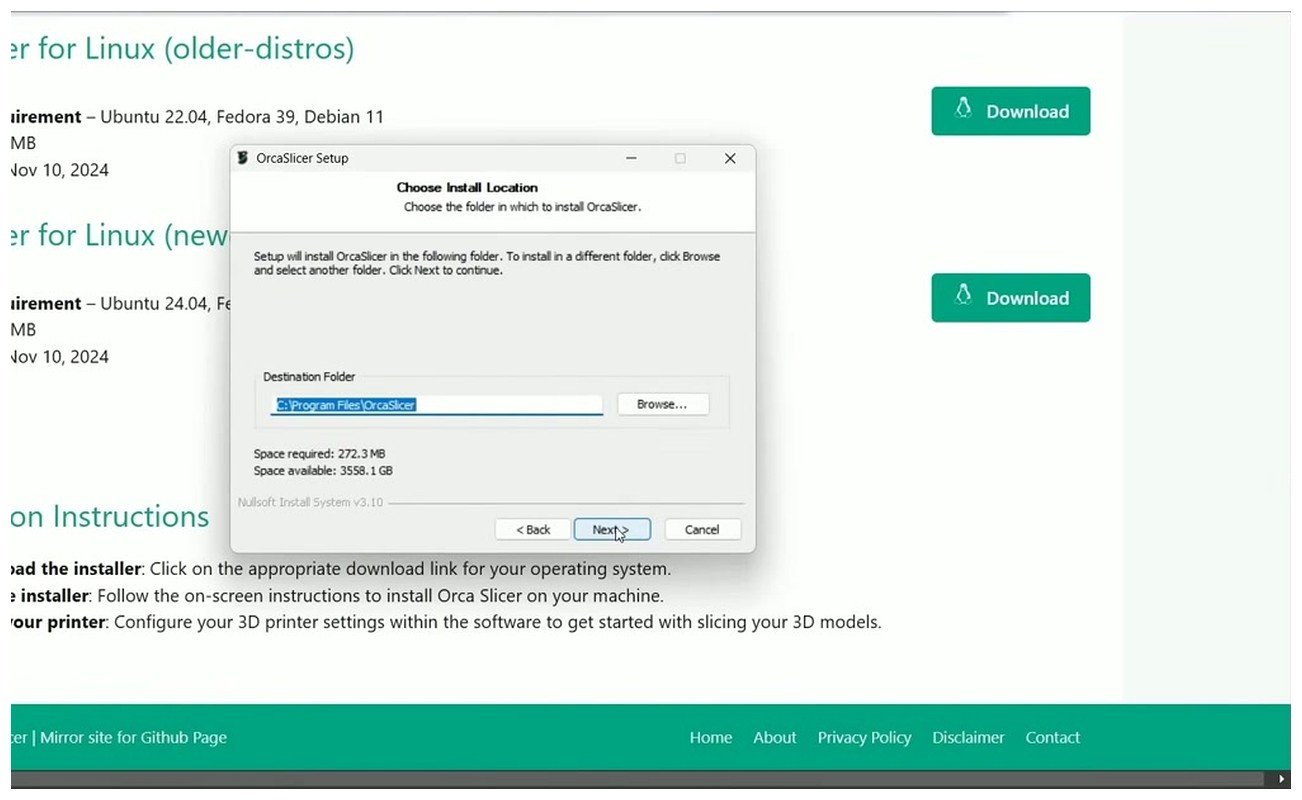
Default install location on Windows. Leave this alone unless you’ve got a reason not to.
The installer is a standard NSIS-style wizard. It runs in maybe 15 seconds on an SSD. The “Choose Install Location” dialog you see above is the only screen most people actually need to read; everything else is Next-Next-Finish. If you’re on macOS you’re dragging the app to /Applications and there’s no installer step at all, and Linux is whatever your distro’s flavor of AppImage or .deb gives you.
When the installer finishes, you’ll get the Completing OrcaSlicer Setup dialog with a “Run OrcaSlicer” checkbox usually ticked by default. Click Finish.
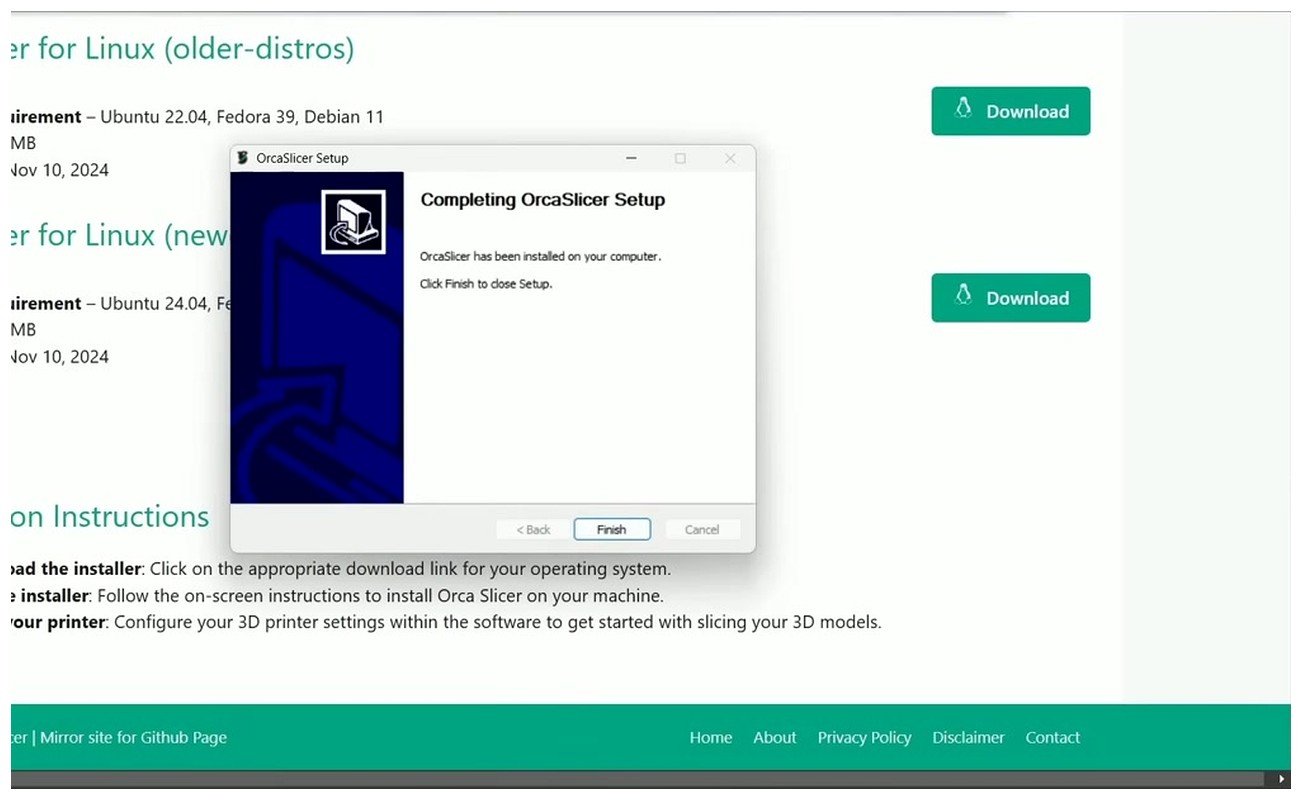
Hit Finish and OrcaSlicer launches straight into the wizard.
That’s the handoff. The instant the app opens, the configuration wizard takes the foreground and blocks the main window. You can’t get to the slicing canvas until you finish.
Screen 1: Get Started
The first screen is called “Get Started” and the title bar reads “Welcome to the OrcaSlicer Configuration Wizard.” It’s mostly a language picker. There’s a dropdown defaulting to English, and on Linux you’ll also see a checkbox labeled “Perform desktop integration (Sets this binary to be searchable by the system)” which I always tick on a fresh Ubuntu box. On Windows and macOS that checkbox isn’t there.
What to do: pick your language if you don’t want English, leave everything else alone, click Next. That’s it. This screen takes five seconds.
One landmine to know about: if you’re on Linux running Wayland with integrated AMD graphics, the wizard window can come up totally blank. I’ve seen this reported in issues #4935 and PR #12159. The fix is launching with WEBKIT_DISABLE_COMPOSITING_MODE=1 as an environment variable. If you’re on Windows or Mac this doesn’t apply.
If you ever previously installed OrcaSlicer and you’re reinstalling onto the same user account, the Get Started screen also shows a “Remove user profiles (a snapshot will be taken beforehand)” checkbox. On a true first install it’s hidden. Leave it unchecked unless your old profiles are corrupted and you specifically want a clean slate.
Screen 2: Region (the one everyone gets wrong)
Here’s the screen I came here for. The Region picker shows five cards: China, Asia-Pacific, Europe, North America, and Others. The wizard doesn’t tell you what they actually control. Most published guides hand-wave through it. I’ll be blunt.
The honest version: this screen primarily controls Bambu Lab cloud routing. If you don’t own a Bambu Lab printer, this screen is functionally meaningless. Pick whatever’s geographically closest and move on. If you do own a Bambu, it matters a lot, because the wrong pick breaks cloud binding silently.
What each region option actually does
| Region | Bambu cloud endpoint | MakerWorld URL | What changes if you pick it |
|---|---|---|---|
| China | bambulab.cn | makerworld.com.cn | China-only API gateway. Required for printers bought in mainland China. |
| North America | bambulab.com | makerworld.com | Default global endpoints, US/Canada CDN. |
| Europe | bambulab.com | makerworld.com | Same as NA, mild EU CDN routing difference. |
| Asia-Pacific | bambulab.com | makerworld.com | Same as NA, APAC CDN routing. |
| Others | bambulab.com | makerworld.com | Catch-all bucket, functionally identical to NA. |
If you own a Bambu Lab printer
Pick the region that matches the country where you bought the printer, not where you live right now. If you imported an X1C from China and you’re in the US, you may still need to pick China to bind to the original cloud account it was registered to. China users especially: pick China or Bambu cloud login fails with no useful error. I’ve seen people spend an hour troubleshooting “wrong cloud account” errors that were just a wrong wizard pick.
If you’re on a global X1 Carbon, A1, A1 mini, P1S, or P1P bought from a Western retailer, North America or Europe is correct. For more on what happens after this when you’re choosing between cloud and LAN-only mode, the Bambu Cloud vs LAN guide covers the actual networking implications.
If you own anything else
Creality, Prusa, Anycubic, Elegoo, Voron, Sovol, Qidi, Snapmaker, Flashforge, Raise3D, BIQU, Ratrig, anything that’s not a Bambu Lab box: pick the region closest to your continent and don’t think about it again. It changes essentially nothing for you. The Obico walkthrough confirms this bluntly, stating the region “is only relevant to those machines” (Bambu). Most published tutorials make this screen sound life-or-death. It isn’t for 80% of users.
Can I change it later?
Yes. Two ways: re-run the wizard from Help → Setup Wizard, or open Edit → Preferences and change the Login Region directly. The preferences route doesn’t reset anything else, and it doesn’t touch your printer or filament profiles. So if you realize a week from now you picked wrong, fix it in 10 seconds.
Screen 3: Printer Selection
This is the screen that actually matters. You’re looking at a grid of vendor brand cards, and OrcaSlicer v2.3.2 ships with 67 vendor brands baked in. I counted by listing the resources/profiles/ folder on the main branch. That includes Bambu Lab (filed under BBL in the source folder), Creality, Prusa, Anycubic, Elegoo, Voron, Sovol, Qidi, Flashforge, Snapmaker, FLSun, Raise3D, Artillery, BIQU, Ratrig, Vzbot, Kingroon, Anet, Tronxy, Tiertime, Cubicon, Wanhao, Voxelab, LONGER, M3D, and a long tail of smaller names like Geeetech, Eryone, Folgertech, TwoTrees, WEMAKE3D, and Volumic.
How the brand card grid works
- Click a brand card on the left (say, “Creality”).
- The right pane fills with that brand’s model list: K1, K1C, K1 Max, K2 Plus, Ender-3 V3 KE, Ender-3 V3 SE, CR-10, and so on.
- Each model has nozzle size checkboxes: 0.2, 0.4, 0.6, and 0.8 mm. Tick the model plus the nozzles you actually own. If you only have a 0.4mm nozzle (you probably do), just tick that one.
- Repeat for any other brands if you own multiple printers.
The wizard uses one PrinterPicker widget per vendor and aggregates everything you tick into the install set. That’s confirmed in ConfigWizard_private.hpp where printer_pickers is a std::vector. Translation: multi-printer, multi-nozzle selection is fully supported. Tick everything you own in one pass.
What if your printer isn’t in the wizard
It happens. Anycubic owners get the worst of it. The Kobra 2 Plus, Kobra 3, Kobra 3 Max, Kobra S1, and Kobra X have all been missing from various OrcaSlicer releases, tracked in issues #4210, #6269, #9507, #7961, and #12376. If you’re one of those owners, you’ve got two reasonable paths:
- Use Anycubic’s own OrcaSlicer fork (Anycubic Slicer Next or Anycubic Slicer Beta), which has the Kobra profiles pre-loaded.
- Pick the closest match in the wizard (any FDM cartesian or core-XY of similar build volume), finish the wizard, then add your printer manually via Printer Settings → Add Printer. The custom printer guide walks through that flow in detail, and the profiles hub has a directory of profiles people have shared for unsupported machines. You can also import a profile someone else exported, which is usually the fastest path.
There’s also a “Custom” entry inside the wizard that opens a fuller flow with pages for firmware type (Marlin, Klipper, RepRapFirmware), bed shape, nozzle and filament diameters, and default temperatures. It works, but the standalone Add Printer dialog after the wizard is a better experience. I’d skip the wizard’s custom path unless you really want it all in one shot.
How many printers should I tick?
Tick every printer you actually own. Don’t tick speculative future printers because each one adds entries to the Printer dropdown later, and the list gets cluttered fast. You can always add more from Printer Settings in the main app, so under-selecting now is fine.
Screen 4: Filament Selection
Filament Selection is screen four, source name PageMaterials. It’s a three-column UI: a printer filter on the left, a material type filter in the middle (PLA, PETG, ABS, ASA, TPU, PC, PVA, HIPS, PA/Nylon), and a vendor list on the right. Below that is the actual list of profiles you can tick.
Generic profiles always available
OrcaSlicer ships with a bunch of “Generic” filament profiles that work as safe-default starting points for any filament you don’t have a brand profile for:
- Generic PLA
- Generic PLA Silk
- Generic PETG
- Generic PETG HF (high flow)
- Generic ABS
- Generic ASA
- Generic TPU 95A
- Generic PC (polycarbonate)
- Generic PVA (water-soluble support)
- Generic HIPS
- Generic PA / Generic Nylon
- Generic PA-CF / Generic PET-CF (carbon-filled)
Brand-specific filament profiles
You’ll also see brand profiles tuned to the specific spools manufacturers sell. The common ones: Bambu Lab (PLA Basic, PLA Matte, PETG HF, ABS, ASA, PA-CF), Polymaker (PolyTerra PLA, PolyLite PLA, PolyMax Tough), Hatchbox, eSUN (PLA+, PETG, ABS+), Prusament (PLA, PETG, PC Blend, PA11-CF), Sunlu, Overture, Atomic Filament, MatterHackers, and Polylite. If you bought a spool of Bambu PLA Basic and you tick the Bambu PLA Basic profile, you get a print profile already tuned for Bambu hotends at 220C with the right retraction. It’s worth using.
What I tick on a fresh install
Always Generic PLA as a safety net. Then I add the brand profile that matches whatever spools I own. If you’re a Bambu user, also tick Bambu PETG HF and PLA Matte because they ship pre-tuned for Bambu nozzles. If you’re a Prusa user, tick Prusament PLA and PETG. Don’t over-tick; you can add more later from Filament Settings any time.
The “At least one filament” pop-up
If you try to click Next without ticking anything, you’ll get a dialog saying “At least one filament must be selected. Do you want to use default filament?” Click Yes and the wizard loads Generic PLA for you. There’s a known bug from issue #6319 where on broken installs both the Yes and No buttons do nothing. If that’s you, your config folder is corrupted; delete %AppData%\OrcaSlicer on Windows and reinstall.
Optional: Bambu Network Plug-in and login
If you ticked a Bambu Lab printer on the Printer Selection screen, the wizard will offer a Bambu Network Plug-in install step. This is a separate downloadable component that handles Bambu cloud communication for OrcaSlicer. It’s optional. You can skip it during the wizard and the slicer still works fine for slicing and SD-card workflows; you just won’t have direct cloud sending until you install the plugin later.
The Bambu account login isn’t a forced wizard step in v2.3.2 anymore. It’s handled post-wizard via the account icon in the top-right corner of the main window, and you can stay logged out forever if you want. Same with MakerWorld: optional, only matters if you want to push prints to the MakerWorld catalog from inside the slicer.
Honest take: skip every network step if you’re not sure. None of it is required to slice an STL and print from SD card. If and when you want LAN-only printing or cloud sending later, the Bambu cloud vs LAN setup guide covers it without the wizard pressure.
What happens after you click Finish
You drop straight onto the Prepare tab, which is the main slicing canvas. You’ll see an empty plate sized to whatever printer you listed first in the wizard, and the right-side panel will already have your selected printer in the Printer dropdown and your first filament in the Filament dropdown.
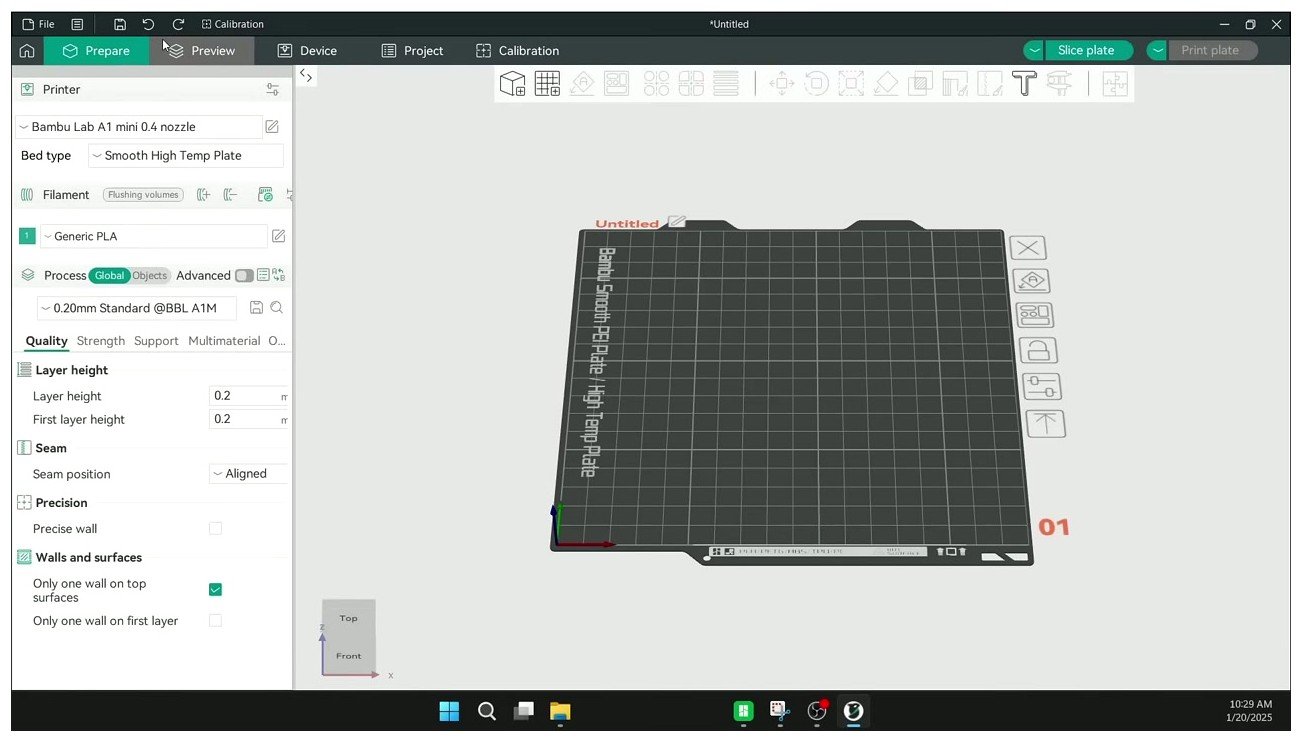
The Prepare tab landing right after wizard finish, with a Bambu Lab A1 mini selected as the active printer.
From here your next move is usually dragging an STL or 3MF file onto the canvas, clicking Slice, then Preview, then either sending to your printer or exporting G-code to SD card. If the layout’s confusing on first look, the OrcaSlicer UI tour walks through every panel. For an actual first print from scratch, the beginner’s first print guide is the pillar article that puts everything together.
Re-running the wizard later
The menu path is Help → Setup Wizard. The exact menu string is “Setup Wizard,” verified against MainFrame.cpp in the v2.3.2 source. Older versions and some forks may label it “Configuration Wizard,” but on current stable it’s “Setup Wizard.” Clicking it triggers wxGetApp().ShowUserGuide() which opens the same modal you saw on first launch.
I re-run the wizard when:
- I bought a new printer and need to add its brand and model.
- I moved regions and need to switch the Bambu cloud endpoint.
- I want to bulk-add a batch of filament profiles I missed first time.
- I’m troubleshooting profile corruption and want a clean reset.
Re-running does not wipe your existing custom profiles unless you tick the “Remove user profiles” checkbox on the Get Started screen. New selections are additive. So you can re-run the wizard 10 times and end up with everything you ever ticked still active.
You don’t actually have to re-run the wizard for most settings, by the way. Region in particular can be changed directly in Edit → Preferences under Login Region, alongside Language and Units. Same dialog, no wizard needed:
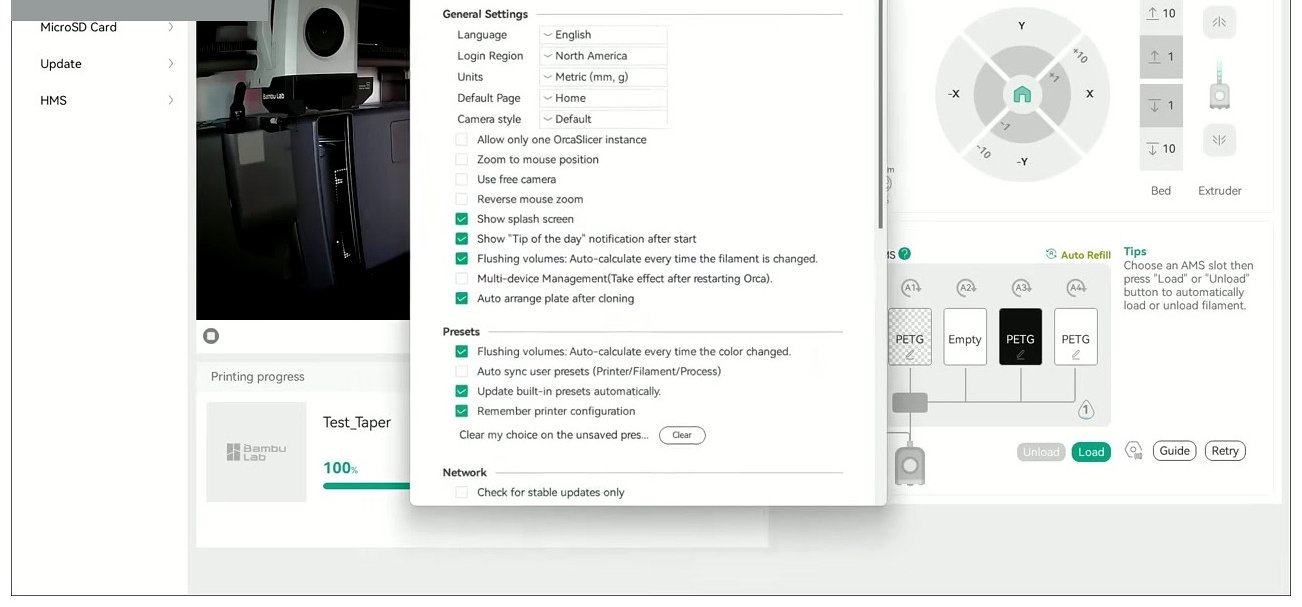
Preferences dialog with Login Region right there. You don’t need to re-run the wizard to change it.
Common wizard pitfalls and fixes
| Pitfall | Fix |
|---|---|
| Bambu user picked wrong region, cloud binding silently fails | Edit → Preferences → Login Region, or re-run Help → Setup Wizard |
| Anycubic Kobra model not listed | Use Anycubic Slicer Next, or finish wizard with closest match and add custom printer after |
| Empty printer list on first run (rare, broken install) | Reinstall OrcaSlicer; profiles folder didn’t unpack correctly |
| Blank wizard window on Linux/Wayland | Launch with WEBKIT_DISABLE_COMPOSITING_MODE=1 env var |
| Wizard cannot be closed on macOS Sequoia | Pick a placeholder printer, finish wizard, change later in settings |
| “At least one filament must be selected” dialog buttons do nothing | Delete %AppData%\OrcaSlicer on Windows or ~/Library/Application Support/OrcaSlicer on Mac, then reinstall |
| Hangs on splash with redirected AppData/Roaming (enterprise) | Redirect AppData to local disk, or use a portable install |
| Wizard re-runs every launch (settings not persisting) | Check user-data folder is writable; run once as admin on Windows |
| Skipped all filament profiles, prints look off vs MakerWorld profiles | Re-run wizard, tick correct brand filament for your spools |
If you’re hitting something not in this table, the troubleshooting master guide covers the broader set of first-launch errors.
FAQ
Can I skip the setup wizard?
No, not on first run. Issues #10187 and #4458 were both closed as “not planned.” Your only path forward is to walk through it. The minimum is: leave language as English, pick any region, tick one printer with one nozzle, tick Generic PLA. Done in about 45 seconds.
Does region matter for non-Bambu users?
Practically no. It affects Bambu cloud endpoint and MakerWorld URL routing. If you don’t have a Bambu printer and you don’t care about MakerWorld, it changes nothing functional. Pick whatever’s closest geographically.
Can I pick multiple printers at once?
Yes. The wizard supports multi-vendor, multi-model, and multi-nozzle selection in a single pass. Tick everything you own.
What if I picked the wrong region?
Two options: Edit → Preferences → Login Region (fastest), or Help → Setup Wizard to walk the whole flow again. Neither path wipes your printer or filament profiles.
Where does OrcaSlicer save my wizard settings?
On Windows it’s %AppData%\OrcaSlicer (which expands to C:\Users\YourName\AppData\Roaming\OrcaSlicer). On macOS it’s ~/Library/Application Support/OrcaSlicer. On Linux it’s ~/.config/OrcaSlicer. If the wizard re-runs every launch, that folder isn’t writable or got redirected by enterprise policy.
Is the Bambu Network Plug-in required?
No. It’s only needed for direct cloud sending to Bambu printers. You can slice, save G-code to SD card, and print fine without it. Install it later from the same Help menu if you want cloud features.
Will re-running the wizard delete my custom profiles?
Only if you tick the “Remove user profiles” checkbox on the Get Started screen. By default, re-running adds to your existing setup rather than replacing it.
How long should the whole wizard take?
Sixty to 120 seconds if you know what you’re picking. The first time, give yourself five minutes to read each screen properly. The Region screen alone is worth slowing down for.
Wrap-up
Five screens, two minutes, fully re-runnable, no permanent damage. The Region screen is the one to think about if you own a Bambu Lab printer; for everyone else it’s a shrug. The Printer Selection screen is where you actually want to slow down and tick the right model and nozzle, because the bed dimensions and start G-code attached to that profile are what you’ll use every print. The Filament Selection screen wants Generic PLA plus your brand of choice, and the rest can wait.
When you’re done with the wizard, your next stop is loading an STL and slicing it. The beginners first print walkthrough picks up exactly where this article ends. If you’re still finding your way around the UI, the UI tour is the other natural follow-up. Welcome to OrcaSlicer.
Related OrcaSlicer guides
- OrcaSlicer for Beginners: Your First Print in 15 Minutes
- How to Send G-code Wirelessly From OrcaSlicer: Per-Printer Walkthrough
- OrcaSlicer Spiral Vase Mode: Single-Wall Vases Done Right
- OrcaSlicer By Object vs By Layer: Picking the Right Print Sequence
- OrcaSlicer for Creality CR-10 Series: Profiles and Setup Guide