
Elegoo’s pitch on the Neptune 4 line was 500mm/s, and I bought one expecting that to mean something. It doesn’t, not for any print quality you’d actually accept, but the printer is genuinely good at 200mm/s once you’ve got OrcaSlicer dialed in and Klipper configured properly. Most Neptune 4 owners stop at the bundled Cura profile and never see what the printer can actually do.
This guide walks through the setup, the settings, and the calibration sequence I’d hand to a friend who just unboxed any of the four variants. I’ll be honest about where the upstream profiles still ship with footguns, where the Plus and Max differ from the standard model in ways no review tells you about, and which Klipper config edits you need to make before OrcaSlicer’s per-object features stop throwing errors. If you want the broader context, the OrcaSlicer printer profiles hub covers the whole vendor map; this article is the deep cut for the Neptune 4 family.
Table of contents
- The four printers at a glance
- Why pair OrcaSlicer with the Neptune 4
- Step-by-step setup
- Best settings to override out of the box
- Calibration order that actually works
- Pro vs Standard vs Plus vs Max: what to change
- Importing community and vendor profiles
- Common pain points and fixes
- Neptune 4 vs Centauri Carbon
- Wrap-up and next steps
The four printers at a glance
All four Neptune 4 printers share the same Klipper firmware base, the same 64-bit ARM SBC, and the same 300C hotend ceiling. They diverge on build volume, extruder, and how much gantry mass the motion system has to drag around. I’ve put the marketing claims and the practical numbers side by side because the gap between them is the whole story.
| Spec | Neptune 4 | Neptune 4 Pro | Neptune 4 Plus | Neptune 4 Max |
|---|---|---|---|---|
| Build volume (advertised) | 225 x 225 x 265 | 225 x 225 x 265 | 320 x 320 x 385 | 420 x 420 x 480 |
| Printable area in upstream Orca JSON | 225 x 225 | 235 x 230 | 320 x 320 | 420 x 420 |
| Stock extruder | Dual-gear direct drive | Dual-gear direct drive (hardened nozzle) | Single-gear, Bowden-style | Single-gear, Bowden-style |
| Marketed top speed | 500 mm/s | 500 mm/s | 500 mm/s | 500 mm/s |
| Practical quality speed | 150-200 mm/s | 150-250 mm/s | 120-200 mm/s | 80-150 mm/s |
| Max accel (upstream Orca config) | 10,000 mm/s2 | 10,000 mm/s2 | 10,000 mm/s2 | 10,000 mm/s2 |
| Hotend max | 300C | 300C | 300C | 300C |
| Bed | 110C single zone | 110C dual zone (100W + 150W) | 110C | 110C |
| Connectivity | USB / LAN | USB / LAN / Type-C | Wi-Fi / WLAN / USB | Wi-Fi / WLAN / USB |
Two things to flag here. The Neptune 4 Pro printable area is 235 x 230 in the upstream OrcaSlicer JSON, not 225 x 225 as the spec sheet says. That’s intentional in the profile but it’ll bite you if your physical printer was set up to home at the smaller envelope. Open the printer settings and reconcile that number with whatever your start g-code expects. The other one is the extruder. The standard Neptune 4 and the Pro both ship dual-gear direct drive out of the box. The Plus and the Max do not. Elegoo sells the dual-gear direct-drive kit as a separate upgrade for those two models, and that one fact changes your retraction defaults, your stringing behavior, and what filament you should bother trying first.
The 500 mm/s headline is a kinematic ceiling, not a print speed. I’ve never seen a Neptune 4 produce acceptable surface quality above ~250 mm/s on outer walls, and the Max especially struggles at speed because it’s lugging a much larger gantry. If you bought one of these expecting half a meter per second of usable print speed, recalibrate your expectations now. They’re still excellent printers at honest speeds.
Why pair OrcaSlicer with the Neptune 4
The Neptune 4 line ships with Klipper firmware on a Linux SBC daughterboard. That’s the unlock. OrcaSlicer talks Klipper natively through Moonraker, sends per-object cancellation data, ships built-in calibration test patterns that target Klipper-specific tuning (pressure advance, input shaper coefficients), and lets you push gcode straight to the printer over LAN without dragging a USB stick around. Cura can do some of this with plugins, but Orca’s the one that was built around the workflow.
You also get organic profile support upstream. Every variant (4, Pro, Plus, Max) lives in resources/profiles/Elegoo/machine/EN4SERIES/ in the OrcaSlicer repo, with 0.2 / 0.4 / 0.6 / 0.8 nozzle variants for each one. No download, no zip dance, no broken third-party pack. The configuration wizard finds them.
What you give up versus the bundled Cura profile: Elegoo’s curated material library doesn’t follow you. The stock OrcaSlicer filament list for Neptune 4 is bare bones (PLA, PETG, ABS, basically that). For TPU, ASA, Nylon, or carbon fill you’ll either build profiles yourself or import from the community. There’s also a small learning curve for the network printer dialog, which I’ll cover in setup. None of this is hard. It’s just not as turn-key as Cura’s “click the Elegoo preset” experience.
For beginners on day one, the bundled Cura is fine. Print the test cube, get a feel for the machine, don’t fight the slicer. OrcaSlicer is the upgrade path you graduate to when you want calibration tests, faster network workflow, and per-object features. Don’t switch on day one if you’re still figuring out which way the bed levels.
Step-by-step setup
You need OrcaSlicer 1.7.0 or newer for the Neptune 4 family. Older builds either don’t have the Plus profile or ship with the retraction bug I’ll cover later. Grab the latest stable from the OrcaSlicer GitHub releases. On the printer side, your Elegoo Klipper firmware should be V1.1.2.28 or newer. Older firmware works but Moonraker will be missing some endpoints.
Add the printer
Open OrcaSlicer. If this is a fresh install, the configuration wizard launches automatically. Otherwise, hit Configuration then Wizard from the top menu. In the vendor list, check Elegoo. In the model list, check whichever Neptune 4 variant you own and pick your nozzle size (0.4 mm is the default, the others are there if you swapped). Finish the wizard. The top-left printer dropdown should now show something like “Elegoo Neptune 4 Pro 0.4 nozzle”.
First sanity check: open Printer Settings and confirm the printable area matches what your printer actually homes to. The Pro shows 235 x 230 by default. If your physical printer’s start g-code parks the head at 225 x 225, override it now or your prints will clip the edge of the bed. The Plus is 320 x 320, the Max is 420 x 420 (some Max owners override to 425 or 427 because the actual usable envelope is a few mm larger than the spec, but stick with the upstream value unless you’ve physically verified the extra space).
Connect over the network (Moonraker)
This is the step that trips people up because OrcaSlicer’s host-type dropdown lists OctoPrint right above the option you actually want. You don’t have OctoPrint. You have Moonraker, which is the Klipper API server, and Orca’s name for that is “Octo/Klipper”.
Find your printer’s IP address from the touchscreen (Settings then Network, or Advanced Settings on some firmware revisions). Then in OrcaSlicer:
- Open Printer Settings, click the wrench/gear icon next to the printer name.
- Find the Physical Printer or Connection section.
- Set Host Type: Octo/Klipper.
- URL:
http://192.168.x.x(use your printer’s IP, include thehttp://). - API Key: leave blank on stock Elegoo firmware. Moonraker isn’t locked down by default. If you’ve added authentication via Mainsail or Fluidd later, generate a key in Settings then API and paste it here.
- Click Test. You should get a green success message.
Once the test passes, the “Print” button in the slice screen gains a “Send to printer” option that uploads gcode directly. Moonraker listens on port 7125 by default; you don’t usually need to specify it because OrcaSlicer auto-routes through the standard HTTP port. If you’ve remapped Moonraker’s port (rare), append it like http://192.168.x.x:7125.
For the deep walkthrough on Klipper printer connections in OrcaSlicer, the dedicated Klipper setup guide covers SSL, custom ports, and authentication scenarios in depth. The Neptune 4 case is the easy one, so what’s above usually does it.
Two Klipper config edits you need
OrcaSlicer’s per-object cancellation feature (the one that lets you click a failing part on a multi-part plate and skip it without aborting the whole print) requires two specific config entries on the Klipper side. Skip these and your prints will throw EXCLUDE_OBJECT_START undefined errors the second you try to use the feature, which usually means the print just stops.
SSH into your printer (default user/pass on stock Elegoo Klipper is mks/makerbase on most builds, but check your specific firmware’s documentation), or edit through the Fluidd/Mainsail config editor. Open printer.cfg and add this section anywhere:
[exclude_object]
That’s the whole section. No parameters, just the header. It enables the macros OrcaSlicer’s gcode references when you cancel an object mid-print.
Now open moonraker.conf and find the [file_manager] section (add it if it doesn’t exist). Add this line under it:
[file_manager]
enable_object_processing: True
This tells Moonraker to parse the per-object metadata that OrcaSlicer writes into the gcode, which is what populates the cancel-object UI in Mainsail / Fluidd / Orca’s print monitor. Restart Klipper and Moonraker (the Fluidd UI has buttons for both). Send a test print and the per-object cancellation should now work without errors.
I’d consider these edits mandatory for any OrcaSlicer + Neptune 4 setup. The Klipper setup pillar I linked above has the same two snippets if you need to refresh later.
Best settings to override out of the box
The upstream Orca profiles for the Neptune 4 family are pretty close to good, but they’re not perfect, and a couple of the defaults will produce noticeably worse prints than five minutes of manual override.
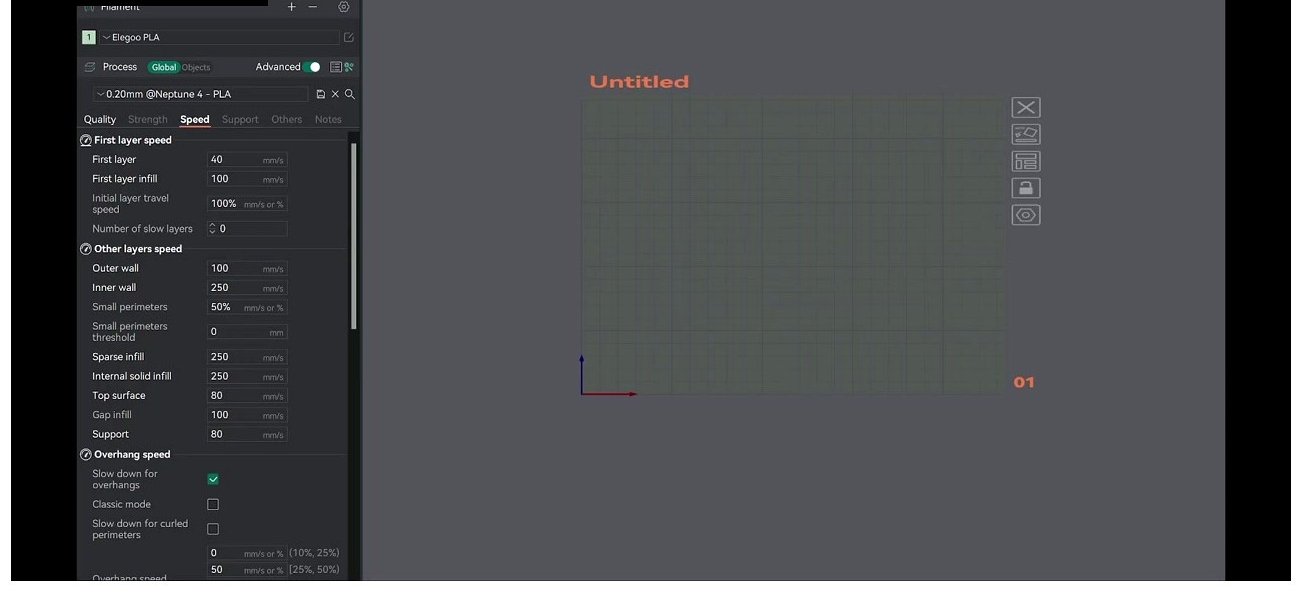
Speed-tab settings for the 0.20mm @Neptune 4 PLA process profile. The outer wall ceiling and travel speed are the two values most worth tuning to taste; the others can stay at defaults until you’ve calibrated.
Speeds and acceleration (with realistic ceilings)
The upstream fdm_neptune_4_common.json sets machine_max_speed_x and machine_max_speed_y to 500 mm/s, which matches the marketing. Acceleration is capped at 10,000 mm/s2 in the same file, which is half of Elegoo’s marketed 20,000 mm/s2 figure. The conservative number is the right one. Don’t raise it unless you’ve run input shaper calibration in Klipper and confirmed your machine handles the higher accel without ringing.
The actual print speeds in the stock process profiles are sensible. Outer wall sits around 150-200 mm/s, inner walls and infill higher, travel typically 300-500 mm/s. If you want quality, drop the outer wall. My honest numbers:
- Neptune 4 / Pro: 200 mm/s outer wall is the sweet spot for general-purpose PLA. 150 mm/s for fine detail. PETG drops to 120-150.
- Neptune 4 Plus: 120-150 mm/s outer wall. The bed is bigger, the gantry forces are higher, and pushing past 150 starts showing surface artifacts.
- Neptune 4 Max: 80-120 mm/s for any wall you care about looking nice. The Max prints big things slowly and well, not small things fast.
Retraction by variant (and the GitHub bug history)
For about a year, the upstream Neptune 4 profile shipped with retraction_length: 5.0 mm, which is wildly wrong for a direct drive printer and produced disaster prints if you didn’t catch it. GitHub issue #3476 documents the whole story; it’s been fixed in the newer 0.4-nozzle override file but if you’re running an older OrcaSlicer build, check this value first.
Current upstream defaults by variant:
| Variant (0.4 nozzle profile) | Retraction length | Retraction speed | Deretraction speed | Z hop |
|---|---|---|---|---|
| Neptune 4 (newer profile) | 0.8 mm | 60 mm/s | 45 mm/s | 0.4 mm |
| Neptune 4 Pro | 0.8 mm | 60 mm/s | 45 mm/s | 0.4 mm |
| Neptune 4 Plus (stock Bowden) | 0.5 mm | 45 mm/s | 45 mm/s | 0.4 mm |
| Neptune 4 Max (stock Bowden) | 0.7 mm | 60 mm/s | 45 mm/s | 0.4 mm |
If you’ve installed the dual-gear direct-drive upgrade kit on your Plus or Max, the retraction defaults are wrong for you. Drop both to the 0.5-0.8 mm range, treat them like a Pro. If you’ve kept the stock Bowden, leave the upstream values alone and tune from there.
Recommended starting point for any direct drive variant: 0.6-0.8 mm at 45-60 mm/s, then run a retraction tower. Don’t guess. The retraction test guide walks through how to interpret the tower, and it’ll save you a stringy week. Z-hop at 0.4 mm is fine; lower it to 0.2 if you’re chasing print times.
First layer and bed mesh handling
This is where the Plus and Max diverge from the standard model the most. On a 225 x 225 bed, an 11×11 probe mesh takes a minute and a half. On a 420 x 420 bed it takes long enough that you’ll lose patience and skip it, which is exactly when the first layer goes bad.
Two specific edits help. First, add this to your start g-code in OrcaSlicer’s machine settings so the saved mesh actually loads at print start (Klipper doesn’t auto-load it, contrary to what people assume):
BED_MESH_PROFILE LOAD=default
Second, install KAMP (Klipper Adaptive Meshing Purging) on the Plus and the Max. KAMP probes only the bed area your specific print needs, which on a 100 x 100 mm part means probing a 100 x 100 region instead of the full 420 x 420. This is the difference between a 30-second probe routine and a five-minute one.
First-layer height: 0.2 mm is fine for the standard and Pro. Bump to 0.24-0.3 mm on the Plus and Max because bigger beds have bigger flatness variation and a thicker first layer absorbs that variation gracefully. First-layer speed in OrcaSlicer should be 30-50 mm/s. Don’t push it. The first layer is the foundation; spending an extra 90 seconds on it saves the whole print.
Pressure advance is a Klipper job, not an Orca job
OrcaSlicer has a “Pressure Advance” toggle in the filament profile, but for Klipper printers this is the wrong place to set it. That checkbox controls Marlin-style linear advance, which Klipper doesn’t use. Pressure advance on the Neptune 4 lives in printer.cfg under [extruder]:
[extruder]
pressure_advance: 0.05
pressure_advance_smooth_time: 0.04
Typical Neptune 4 Pro values: 0.04-0.06 for PLA, 0.06-0.08 for PETG. Tune with OrcaSlicer’s PA test pattern (the slicer is fine for generating the test print), then write the result into printer.cfg. The full workflow is in the pressure advance guide; the short version is “print the pattern, find the cleanest line, look up its PA value, edit printer.cfg, restart Klipper.”
Temperatures (community baselines)
| Material | Hotend | Bed | Notes |
|---|---|---|---|
| PLA | 200-220C | 60C | Run a temp tower per spool |
| PETG | 230-250C | 75-80C | Slow first layer to 25 mm/s |
| ABS / ASA | 235-250C | 95-105C | Enclosure strongly recommended |
| TPU | 220-235C | 50-60C | Direct drive only, slow speeds |
| Nylon (Pro hardened nozzle) | 250-280C | 80-100C | Glue stick, dry filament |
I run a temperature tower per filament spool because batch-to-batch variation is real and the difference between a stringing nightmare and a clean print is often 5C. The filament settings guide covers what to actually change in the profile after the tower.
Calibration order that actually works
I see a lot of new owners trying to tune pressure advance before they’ve run input shaper, or chasing flow rate before bed mesh is correct. The order matters. Here’s the sequence I run on every fresh Neptune 4 setup, and the same one I’d run again after any major change (extruder swap, belt re-tension, gantry mod).
- Mechanical pass. Belts taught (X and Y), eccentric nuts checked, bed manually leveled with the springs. The touchscreen probe is not a substitute for getting close mechanically first.
- Bed mesh. Run
BED_MESH_CALIBRATEfrom Fluidd or the touchscreen. Save as default. Add the load line to your start g-code as covered above. - Input shaper. Run
SHAPER_CALIBRATEin Klipper. The standard Neptune 4 ships with on-board ADXL accelerometers on the X and Y carriages, which makes this trivial. Typical results are MZV or EI shaper around 50-65 Hz on X, 35-45 Hz on Y. Re-run after any belt or gantry change. - Pressure advance. Print OrcaSlicer’s PA pattern, find the value, write it to
printer.cfg. See the pressure advance guide. - Temperature tower. One per filament. The temperature tower guide walks the procedure.
- Flow rate. Weighed extrusion test in Klipper sets your
rotation_distancefor the extruder; OrcaSlicer’s flow ratio test fine-tunes the per-filament value after that. Both steps in the flow rate calibration guide. - Retraction tower. The retraction test guide covers tower interpretation. Run separately for PLA and PETG; they want different values.
- First-layer patch print. A small test print to confirm your final Z-offset and squish are dialed. The OpenNept4une community ships a 0.28 mm patch STL that’s perfect for this.
The master calibration guide goes deeper on each test. Run them in this order, document your numbers somewhere, and you only have to do this once per major change. Your prints in week three will look like a different printer than your prints in week one.
Pro vs Standard vs Plus vs Max: what to change
Most of switching variants is just picking the right profile in OrcaSlicer’s printer dropdown. The upstream JSONs handle the bed size, the kinematic limits, and the default retraction. Beyond that:
| Variant | What to change vs the default profile |
|---|---|
| Neptune 4 (standard) | Verify retraction is 0.8 mm not 5.0 mm if you’re on an old Orca build. Otherwise the upstream profile is solid. |
| Neptune 4 Pro | Reconcile the 235 x 230 vs 225 x 225 printable area discrepancy. Hardened nozzle handles abrasives (carbon fill, glow PLA, woodfill); add filament profiles for them since the stock list is bare. Dual-zone bed heats faster, so you can drop bed pre-heat times in your start macro. |
| Neptune 4 Plus | Stock extruder is Bowden, not direct drive. Higher retraction (1.0-1.5 mm if you’ve left the stock single-gear; 0.5-0.8 mm if you’ve installed the upgrade kit). Install KAMP. First-layer height bumped to 0.24-0.3 mm. Z offset will drift more than the standard, so re-check it weekly. |
| Neptune 4 Max | Same Bowden vs DD note as Plus. KAMP is mandatory; you’ll never wait through a full 11×11 mesh on a 420 x 420 bed twice. Some users override printable area to 425 x 425 or 427 x 426; verify against your physical homing offsets first. Lower the SGTHRS threshold for Z homing if you get failed homes. |
The Pro is the “best of the line” for a typical hobbyist: hardened nozzle, copper-titanium heatbreak, dual-zone bed, dual-gear extruder out of the box. If you’re choosing fresh, the Pro at 235 mm cube is the sweet spot. The Plus and Max only make sense if you actually print large parts; otherwise you’re paying for bed area you won’t use and dealing with a heavier gantry that prints slower in practice. The standard Neptune 4 is the value play and it’s a fine printer; the only reason to skip it is if you specifically need the hardened nozzle.
Importing community and vendor profiles
The upstream filament list for the Neptune 4 family is intentionally minimal: PLA, PETG, ABS, and not much else. If you want TPU, ASA, Nylon, or properly tuned third-party PLA profiles (Polymaker, Sunlu, Elegoo’s own house brand), you’ll either build them yourself or import a community pack.
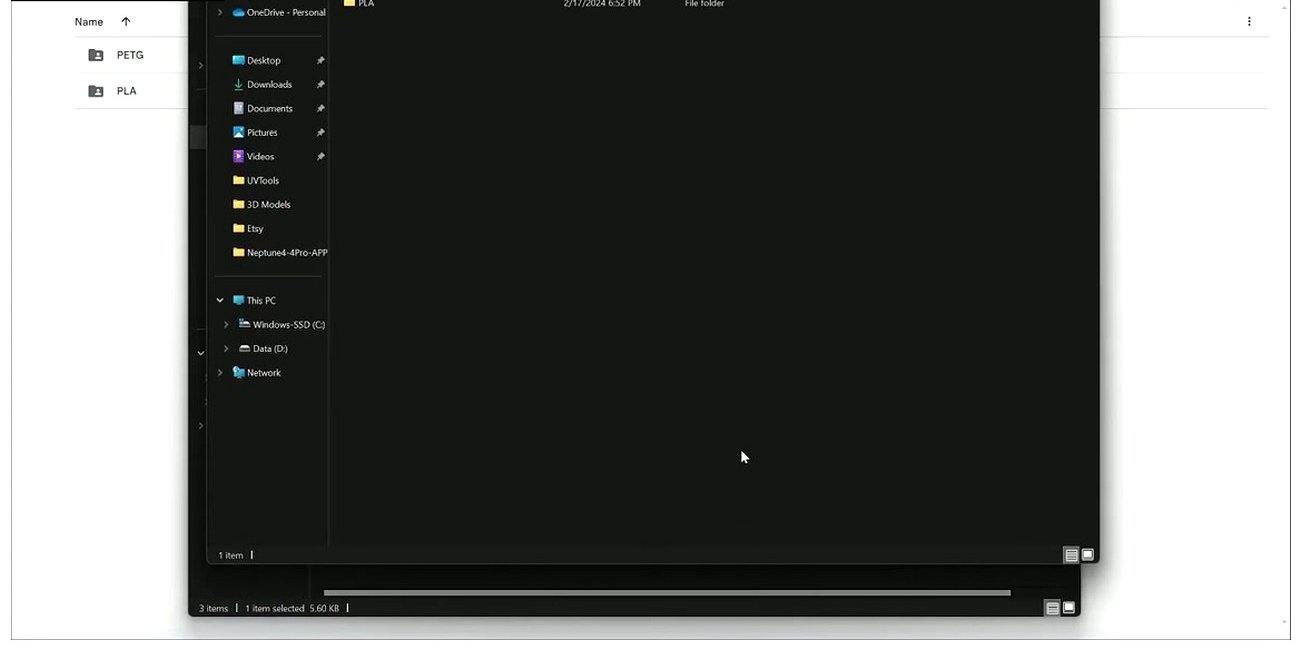
Community-maintained Neptune 4 PLA and PETG profile folder downloaded from a third-party repo. The Open-Elegoo-Community pack is the one I’d start with; it covers the gaps in the stock filament list.
The community packs I’d actually recommend:
- Open-Elegoo-Community filament-profiles on GitHub. Tuned filament profiles for the Neptune 4 series specifically. Covers TPU, ASA, woodfill, carbon fill, the things the stock list misses.
- Michael’s Neptune 4/Pro OrcaSlicer config on Printables (over 4,000 downloads). Wraps the EXCLUDE_OBJECT fix into a single import bundle.
- OpenNept4une’s profile bundle. If you’ve moved off stock Elegoo firmware to OpenNept4une (a community Klipper firmware fork that addresses several stock-firmware quirks), grab the matching OrcaSlicer profiles from their DeepWiki page.
To import any of them: File then Import then Import Configs (Ctrl+Alt+I on Windows). The dialog filters to .json, .zip, .orca_printer, and .orca_filament bundles. Select the file and OrcaSlicer adds the profiles to your active list.
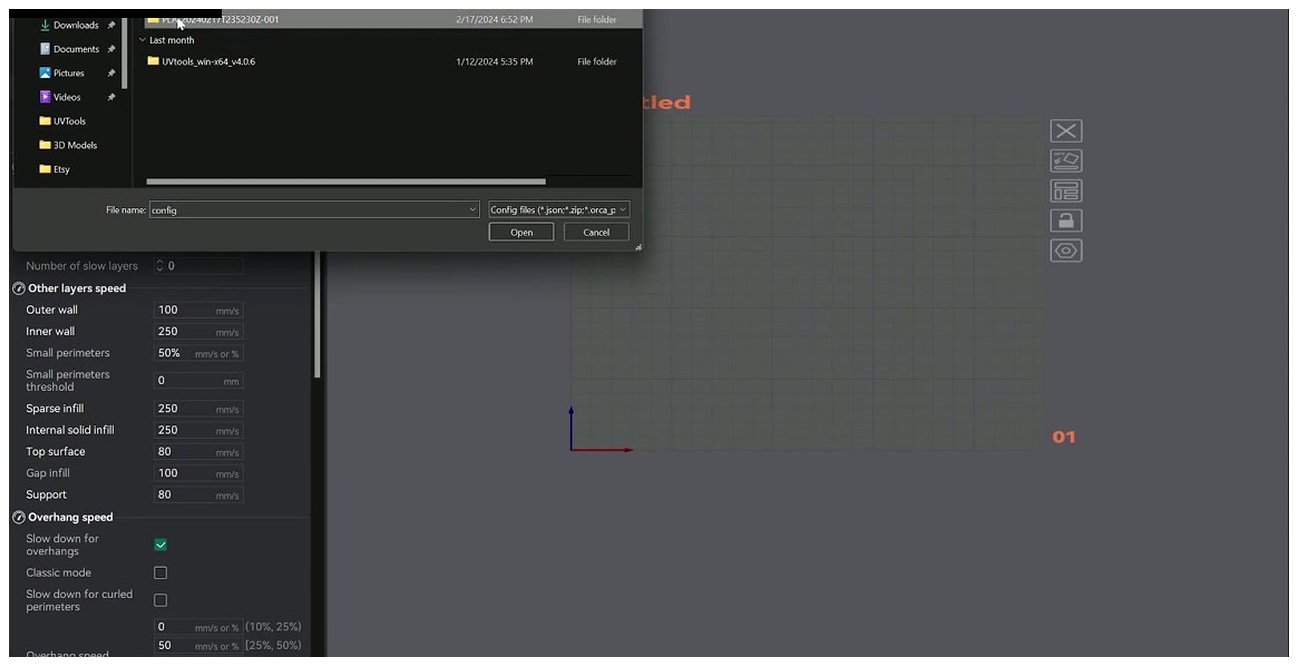
OrcaSlicer’s import-profile dialog filters to the supported bundle formats automatically. Pick the .json or .zip you downloaded and Orca handles the rest.
After import, switch to the new profile in the printer or filament dropdown. The imported settings inherit from your existing Neptune 4 profile so most of the machine config carries over; you’re really just adding the tuned filament settings on top.
Common pain points and fixes
If you’ve found this article through a Google search for one specific problem, here’s the condensed FAQ. Most of these come up weekly on the Neptune 4 subreddit and Discord, so I’d bet at least one of them is why you’re here. The troubleshooting master guide covers Orca issues that aren’t Neptune-4-specific.
“Why is my Neptune 4 stringing badly in OrcaSlicer?” Almost always the 5.0 mm retraction bug from the early upstream profile. Drop retraction to 0.8 mm. Run a tower to confirm. GitHub issue #3476 has the whole history.
“OrcaSlicer can’t connect to my Neptune 4.” Three things: host type must be Octo/Klipper, URL must include http://, and the API key field is usually blank on stock Elegoo firmware. If you’ve got Mainsail or Fluidd lockdown enabled, generate the key in their Settings then API panel.
“Thumbnails don’t show on my printer’s screen after slicing in Orca.” Stock Moonraker on the MKS Pi mainboard doesn’t process OrcaSlicer’s thumbnail format. Either install the VBitsHub elegoo_moonraker patch, or move to OpenNept4une firmware which fixes it natively.
“EXCLUDE_OBJECT_START undefined error mid-print.” Missing the two Klipper config edits from the setup section above. Add [exclude_object] to printer.cfg and enable_object_processing: True to moonraker.conf, restart both services.
“Where’s the Neptune 4 Plus profile? It’s not in the wizard.” It’s there now. Was added after community pressure (issue #2663). Re-run the configuration wizard; if you’re on an old OrcaSlicer build, update first.
“Pressure advance won’t apply from OrcaSlicer.” It can’t. PA on Klipper printers is set in printer.cfg, not in the slicer. The Orca filament-profile checkbox controls Marlin linear advance, which the Neptune 4 doesn’t use. Use Orca to print the PA test pattern, then write the value into Klipper.
“First layer is bad after every print.” Bed mesh isn’t auto-loading. Add BED_MESH_PROFILE LOAD=default to your start g-code.
“TPU / ASA / Nylon won’t show up in the Neptune 4 Pro filament list.” Hardware supports them, the stock Orca filament list doesn’t expose them. Manually add filament profiles or import the Open-Elegoo-Community pack. GitHub issue #3820 has the context.
“I want to swap filament mid-print.” The Neptune 4 supports M600 filament-change pauses through Klipper macros. The M600 filament change guide covers the macro setup, and if you’re chasing color-changes specifically the multi-color guide walks through layer-paint and pause-at-height workflows.
Neptune 4 vs Centauri Carbon: a quick honest sidebar
Elegoo’s other current line is the Centauri Carbon, a CoreXY 256 mm cube with a 320C nozzle, 500 mm/s claimed top speed (with the same caveats), and much more polished OrcaSlicer integration out of the box. The Centauri is the “just works” Elegoo. You plug it in, click the preset, and it prints.
The Neptune 4 line is the value play. You spend a Saturday on Klipper config, calibration, and profile imports, and the result is a printer that costs a third less than the Centauri and matches it on print quality once tuned. The Plus and Max give you build volumes the Centauri doesn’t offer. If you like tinkering and you want maximum print volume per dollar, Neptune 4 wins. If you want to print things and not think about firmware, the Centauri is the easier answer.
Neither is wrong. They serve different audiences and Elegoo has been smart about not cannibalizing one with the other.
Wrap-up and next steps
The Neptune 4 family is a good match for OrcaSlicer because both speak Klipper natively. Once you’ve added the printer through the configuration wizard, set up the Octo/Klipper host connection, made the two printer.cfg and moonraker.conf edits, and reconciled the retraction and printable-area defaults, you’re 90% of the way there. The other 10% is the calibration sequence, and that’s the same eight steps regardless of which variant you own.
If you got OrcaSlicer connected and prints are coming out reasonable, the next move is the calibration order I outlined. Pick one test, run it tonight, write down the result. Pressure advance and temperature tower will give you the biggest visible quality jump for the least time invested. After those, retraction and flow rate clean up the edge cases.
For the deep dives, the Klipper setup guide covers connection scenarios beyond the simple Neptune 4 case, and the master calibration guide goes deeper on each test in the sequence. The printer profiles hub is the up-link if you’re cross-shopping or running multiple machines from the same Orca install.
The Neptune 4 isn’t a 500 mm/s printer in any meaningful sense, but at honest speeds it’s a printer that punches way above its price. OrcaSlicer is the slicer that lets it do that. The bundled Cura experience is fine for getting started; the OrcaSlicer setup above is what unlocks the rest.
Related OrcaSlicer guides
- OrcaSlicer Settings Master Guide: Every Setting Explained (2026)
- OrcaSlicer Settings Hierarchy: Printer, Filament, Process
- OrcaSlicer for Creality Ender 3 V3 SE, KE & Plus: Setup Guide
- OrcaSlicer for Anycubic Kobra 3 / S1 / Max Combo: 2026 Setup Guide
- OrcaSlicer Review 2026: Honest Pros, Cons & Who Should Use It