
I lifted a fingernail-sized chunk of coating off my first smooth PEI plate four years ago, and I still keep the damaged sheet in a drawer as a reminder. It was a 200-gram PETG bracket, a clean first layer, a perfect print, and then I tried to pry the part off cold. The plate came up with the print. That was the day I learned the most expensive lesson in OrcaSlicer bed adhesion problems: the worst failures are not the ones that come loose, they are the ones that bond too well to the wrong surface. Since then I have run three printers daily (a Bambu P1S, an X1C, and a Voron 2.4) through every material I could justify buying, and I have logged more bed-adhesion failures than I care to admit.
This guide is the one I wish I had then. It is not a generic “my print is not sticking” walkthrough, because that question hides at least five different failure modes, and the fix for each is different. If your first layer never lays down cleanly, you have a leveling and Z-offset problem, not an adhesion problem. If your first layer is gorgeous and then a corner peels at layer 40, you have warping. If your whole part pops off the bed as a slab in the middle of the print, that is what most of this article is about. And if your print finished but you cannot get it off without a chisel, you have over-adhesion, which is its own (smaller) section below.
I have tried to be specific where it counts and humble where I should be. I am citing Bambu’s official wiki, OrcaSlicer’s GitHub wiki, MatterHackers’ material guides, and Magigoo’s own product docs rather than inventing numbers. When I say “do not put bare PETG on smooth PEI,” I mean it, and I will explain why. Let’s get into it.
Table of Contents
- Diagnose your adhesion problem in 30 seconds
- Why a print starts well and then detaches
- Bed surfaces ranked by versatility
- Material-by-material adhesion strategy
- Glue strategies: which glue when
- OrcaSlicer settings that actually fix adhesion
- Cleaning and maintaining your build plate
- When over-adhesion is the real problem
- Per-printer notes (Bambu, Prusa, Creality, Voron, Qidi)
- Quick reference checklist
- FAQ
Diagnose your adhesion problem in 30 seconds
Before you reach for a glue stick or open OrcaSlicer’s settings, figure out which problem you actually have. I have wasted whole afternoons cleaning a plate that was fine and dialing settings that were never the cause. The table below is the same triage I now run mentally before I do anything else. Read the symptom column, then go where it points.
| Symptom | Real cause | Where to read next |
|---|---|---|
| First layer never lays down cleanly, lines do not squish, filament curls behind the nozzle | Leveling and Z-offset, not adhesion | First-layer problems guide |
| First layer is perfect, corners lift around layer 20 to 50, eventually pop free | Cooling-induced warping, mostly thermal physics | Warping and lifting corners plus the mid-print section below |
| Whole print pops off the bed as a slab, no visible warp on the underside | Surface, glue, or maintenance failure | This article (keep reading) |
| Print finished but you cannot remove it without a chisel | Over-adhesion (common: PETG on smooth PEI) | This article, over-adhesion section |
| Layers misalign mid print (visible shift in X or Y) | Mechanical layer shift, belts or steppers | Z wobble and banding for related mechanical issues |
| Loud clicking from the extruder during the print | Extruder skipping (heat creep, jam, or under-extrusion), not adhesion | See your printer’s extruder troubleshooting docs |
| Your bed sheet has visible peeled spots or texture loss | Worn surface, replace or re-coat | Maintenance section |
If the table sent you elsewhere, follow the link. I would rather lose you to the right article than have you adjust settings that will not fix your actual issue. If you are still here because your part pops off the bed mid-print as a clean slab, or because your material does not stick at all, the rest of this guide is for you. If you want the bigger picture across every kind of failure, the OrcaSlicer troubleshooting guide is the parent page that links everything together.
Why a print starts well and then detaches
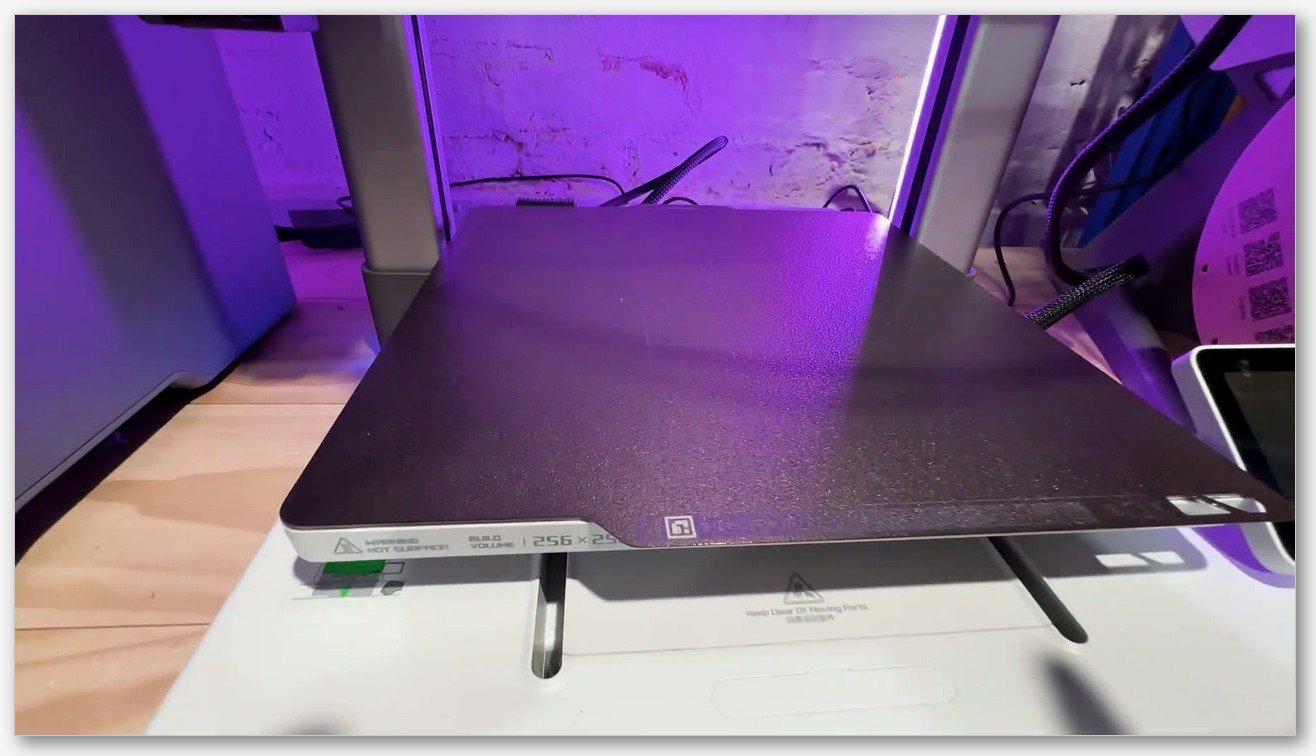
Mid-print detachment is the failure mode that makes you want to throw the printer out the window. The first layer is perfect, the bed is hot, the part is laying down cleanly, and then four hours in you walk past the printer and see a sad lump of plastic being dragged around by the nozzle. There are five common reasons this happens, and they almost never travel alone.
1. Cooling contraction (warping). Every layer above the first cools and shrinks. The amount of shrinkage depends on the polymer: ABS and ASA are roughly 0.8 percent, polycarbonate around 0.7, PETG around 0.4, and PLA around 0.3. Those percentages sound small until you remember they are linear contraction across a 200 mm part, which is several millimeters of force concentrated at the corners. Once the cumulative pull exceeds the bond strength at a corner, that corner lifts, the failure propagates inward, and your print either curls visibly or pops off as a chunk. The fix is not glue, it is thermal management: enclosure, lower part-cooling fan speed, brim, and (for the worst materials) a chamber heater. The full warping playbook lives in the warping and lifting corners guide, which I will not duplicate here.
2. Bed temperature drift during long prints. Some printer mainboards cycle the bed heater in a way that lets the surface dip 5 to 10 degrees between cycles. On marginal adhesion, that is the entire difference between hold and fail. If you can switch your bed control loop to PID instead of bang-bang, do it. If you cannot, pre-heat the bed longer before the print starts, raise your setpoint 5 degrees, or insulate the underside of the bed (cork sheet is the cheap classic).
3. Cooling fans bouncing under the part. A handful of printer designs route the part cooling fan duct so the airflow deflects off the bed and back under one edge of the part. On a 6-hour ABS print, this is enough to chill one corner faster than the others and trigger asymmetric warping. Check the duct alignment, especially on Bambu A1, P1S, and any Voron with a single-fan setup.
4. High-lever-arm part geometry. A 100 mm tall part on a 30 mm square base is a class-one lever pulling on the corners. No surface in the world holds that without help. A brim is mandatory. Mouse ears (small circular tabs at the corners) help further. I have never regretted adding a brim to a tall narrow part, even when the surface was supposedly bulletproof.
5. Worn or stale plate. PEI loses tackiness over roughly 100 to 300 prints, depending on how aggressively you abuse it. The first-layer trace can still look fine to the naked eye while the actual bond strength has dropped by half. If you have replaced glue, cleaning method, settings, and even filament, and you still see detachment, replace the plate. Bambu PEI sheets are around 30 USD and a healthy plate solves a remarkable number of mysterious adhesion problems.
There is a sixth cause that does not get talked about enough: re-leveling drift. If you have moved the printer recently, replaced the hotend, re-greased the bearings, or even just bumped the build plate while clearing a print, your stored auto-bed-level mesh might be slightly off. Re-run leveling. On Bambu printers that means triggering the manual full calibration (not just the bed mesh) from the Device tab. On Klipper machines, run BED_MESH_CALIBRATE fresh and save.
Bed surfaces ranked by versatility
If I could only own one build plate for the rest of my printing life, it would be a textured PEI. It is not the best surface for any single material, but it handles more materials acceptably than anything else on the market. Here is how I rank the common options for general 3D printing use.
- Textured PEI (Bambu Engineering Plate textured side, Bambu Textured PEI Plate, Wham Bam Snake Skin, Energetic textured PEI, Prusa Satin sheet). Handles PLA, PETG, ABS, ASA, PC blends, TPU, and most CF variants. Forgiving, durable, and the first-layer cosmetic finish is excellent. If you are buying your first build plate, buy this.
- Bambu High Temperature Plate (or any smooth PEI plate explicitly rated for 100 plus degree beds). The right plate for PC, PA, PA-CF, and aggressive ABS. Smooth finish on the print side, glossy look. Pair with glue stick for PC.
- Smooth PEI / Bambu Cool Plate. Best first-layer cosmetics for PLA. Glossy, almost mirror, can produce stunning bottoms on display models. Do NOT print bare PETG on this surface. More on that in a minute.
- Garolite (G10 / FR4). Nylon specialist. MatterHackers and basically every nylon filament maker recommends it. Do not use for PLA (it over-adheres and you risk damaging the surface during removal).
- Glass. Cheap, flat, easy to clean. Needs a release agent (glue stick or hairspray) for most materials. Gives the most mirror-like first layer of any surface for PLA. Heavier and slower to heat than PEI sheets.
- BuildTak and similar adhesive films. Legacy tech. They can grip very well, sometimes too well, and they tear permanently when adhesion gets out of hand. Not recommended for a new build in 2026.
Two notes on this ranking. First, “versatile” does not mean “best.” Textured PEI is mediocre at first-layer cosmetics compared to smooth PEI or glass. If you are printing display-side-up parts and you care about the bottom appearance, smooth PEI or glass will look better. Second, “Bambu” plate names like “High Temperature Plate” or “Cool Plate” map to specific Bambu products, but the same chemistry exists in third-party plates from Energetic, Wham Bam, and others. The recipes below work regardless of brand, as long as you match the chemistry.
Material-by-material adhesion strategy
This is the section that took me the longest to write because every claim has to be checked against the relevant filament maker or plate vendor, and I would rather link to a source than fabricate a number. Where exact temperatures are noted, they are ranges that cover the most common variants of the material; tune within the range based on your specific filament’s recommended sheet.
| Material | Best surface | Glue strategy | Bed temperature | Brim? |
|---|---|---|---|---|
| PLA | Textured PEI, smooth PEI, glass | None on PEI; glue stick or hairspray on glass | 55 to 65 C | Only for tall, narrow, or large flat parts |
| PETG | Textured PEI; smooth PEI ONLY with glue stick release agent | Glue stick mandatory on smooth PEI; optional on textured | 70 to 85 C | 3 to 5 mm if part is tall or thin-based |
| ABS / ASA | Textured PEI or Bambu High Temp Plate | Glue stick or Magigoo Original; Wolfbite ABS on glass | 100 to 110 C | Yes, 5 to 8 mm for anything over 40 mm tall |
| TPU | Textured PEI bare, or glass with glue stick | None on PEI; glue stick on glass | 40 to 60 C | Rarely needed; slow first layer to 15 to 20 mm/s instead |
| Nylon (PA, PA-CF, PA-GF) | Garolite (G10 / FR4) | PVA glue stick, or Magigoo PA | 60 to 80 C | Yes; raft acceptable for tricky geometries |
| Polycarbonate (PC, PC blends) | Bambu High Temp Plate or glass | Glue stick or Magigoo PC; Wolfbite PC on glass | 100 to 110 C | Yes, mandatory above 30 mm tall |
| PLA-CF, PETG-CF | Same as base resin | Same as base resin | Same as base resin | Same as base resin |
PLA
PLA is the easiest material I have ever printed in terms of bed adhesion. On a clean textured PEI plate at 55 to 65 C, it sticks fine without any glue, brim, or fan tuning. Smooth PEI works just as well and gives you a glossier underside. Glass works if you add a thin layer of glue stick or a single pass of hairspray. The Bambu Cool Plate is designed for PLA and produces a near-mirror first layer when clean.
The exceptions are large flat prints (enclosure panels, baseplates, anything over 150 mm in one axis) and tall narrow prints (small base, big top). Either case can still curl as the upper layers cool. For these, a 3 mm brim solves it. PLA does not need a brim for normal-shape parts on a clean plate.
If your PLA is not sticking and you are sure the plate is clean and level, look at your bed temperature first. Some people print PLA at 50 C because “it works at room temp anyway.” It works better at 60 C. Polymer adhesion improves with surface mobility, and a hotter plate gives you more wetting at the interface. The full PLA setting profile lives in the PETG settings guide‘s sibling article (the PLA settings page links from the main hub).
PETG
This is the section you should read twice. PETG is the material where surface choice matters most, because PETG forms a covalent bond with bare smooth PEI. That is not me being dramatic. Bambu’s own community forum has multiple threads documenting users who tore the PEI coating off their build plate trying to remove a PETG print. Their wiki recommends a release agent (Bambu liquid glue or a generic glue stick) when printing PETG on any smooth PEI surface. Print PETG bare on smooth PEI once, and you may damage your plate.
The rule I follow: never put bare PETG on smooth PEI. If I am on smooth PEI and I want to print PETG, I apply a thin even layer of Elmer’s purple glue stick first. The purple dye lets me see coverage. Water cleans it off later. The glue acts as a release agent between the part and the PEI surface, so the part bonds to the glue layer, not to the PEI itself.
On textured PEI, PETG usually behaves. Some PETG formulations (Bambu PETG-CF, Bambu PETG HF, certain Polymaker PETGs) bond aggressively even on textured plates and have been reported to pull chunks of texture off during removal. If your PETG print fights you when you try to remove it cold, or you see surface scuffing on the plate underneath, apply a thin glue stick coat next time as a release. I would rather re-glue every 5 prints than buy a new plate every six months.
On glass, PETG needs glue stick or hairspray. Without it, PETG will not adhere consistently to bare glass, and the rare case it does adhere it bonds too hard. Bed temperature 70 to 85 C, first layer 80 to 90 C. If you want the full PETG slicer profile (temps, flow, retraction), see the OrcaSlicer PETG settings guide.
ABS and ASA
ABS is the material that taught me to respect enclosures. Open frame ABS is a coin flip on anything bigger than a coin (my literal experience, with literal coins). ABS shrinks roughly 0.8 percent linearly as it cools, and it shrinks in three dimensions, so a 150 mm part has more than a millimeter of contraction trying to happen at every corner. The corners lose.
The most common reliable combo I have used is textured PEI plus a thin glue stick coat, bed 100 to 110 C, enclosure with ambient at least 30 to 40 C, brim 5 to 8 mm, and part-cooling fan at 0 to 10 percent for the first 30 layers. The Bambu High Temperature Plate is what Bambu officially recommends for ABS at 110 C plate temperatures, and it works as well as textured PEI for me. Glass plus Wolfbite ABS is the legacy combo from the pre-PEI era and still works on big glass beds. The full ABS profile is in the OrcaSlicer ABS and ASA settings article.
A brim is essentially mandatory for ABS parts taller than 40 mm. I have tried to skip it on shallow plates and lost too many prints. Add the brim. Removing it later is a 30-second job with a deburring tool.
TPU and flexibles
TPU does not warp the way ABS does. It is soft and elastic enough to absorb its own contraction stress. The issue with TPU adhesion is different: the nozzle drags the soft material around, and if the first layer is not seated firmly, the drag pulls it loose. The fix is a slow first layer (15 to 20 mm/s), zero part-cooling fan for the first 3 to 5 layers, and bed 40 to 60 C.
On textured PEI, TPU usually grips fine bare. On glass, you need a glue stick. Painter’s tape is the budget-tier surface for TPU and still works fine on older Enders that came with it. The full TPU profile lives in the OrcaSlicer TPU settings guide.
Nylon (PA, PA-CF, PA-GF)
Nylon is famously hard to stick. PEI alone fails for most users. The gold standard surface for nylon is Garolite (G10 or FR4 sheet), which MatterHackers and basically every nylon filament maker recommends. A PVA glue stick on Garolite gives nylon something to bond to. Magigoo PA is the branded option if you want a single-product solution; it is formulated specifically for nylon and works on smooth PEI as well as Garolite.
The most overlooked nylon adhesion fix has nothing to do with the surface. It is drying the filament. Wet nylon hisses out of the nozzle, leaves voids in the first layer trace, and does not bond. Dry your spool at 70 to 80 C for 8 to 12 hours before printing. If you do not own a filament dryer, an oven set to its lowest temperature with the door cracked works. The OrcaSlicer nylon settings guide has the full setup, including drying schedules and chamber recommendations.
Polycarbonate (PC, PC blends)
PC is in the same warping tier as nylon and ABS, just hotter. Chamber 60 C or higher, bed 100 to 110 C minimum, and enclosure mandatory. The Bambu High Temperature Plate paired with a thin glue stick (or Magigoo PC, which is PC-specific) is the modern recipe. Glass plus Wolfbite PC is the legacy alternative. Brim mandatory above 30 mm tall, and mouse ears at the corners help further. The OrcaSlicer PC settings guide covers the slicer profile in full.
Do not bother trying PC on bare smooth PEI. It will either fail to stick or it will deform the PEI surface from the heat. The textured plate or the High Temperature plate is the right choice.
Carbon-fiber and glass-fiber variants
CF and GF variants follow the rules of their base resin. PETG-CF prints like PETG. PA-CF prints like nylon. PLA-CF prints like PLA. The fiber filler does not change adhesion much; what it changes is nozzle wear (you need a hardened steel nozzle) and shrinkage (the fiber restrains the matrix, so the part warps less). Detailed coverage in the troubleshooting hub and individual material guides.
Glue strategies: which glue when
Glue stick is a release agent and an adhesion booster at the same time. On a surface that already grips (textured PEI with PLA), it makes the print harder to remove for no benefit. On a surface that grips too well (smooth PEI with PETG), it prevents permanent plate damage. On a surface that does not grip at all (glass with PETG), it provides the bond. Which job the glue is doing depends on the material-surface combo.
| Product | Use case | Notes |
|---|---|---|
| Elmer’s purple glue stick (PVA) | PLA on glass, PETG release agent on smooth or textured PEI, nylon on Garolite, TPU on glass | Cheapest, washes off with warm water. The purple dye lets you see coverage and fades when dry. |
| Bambu Lab liquid glue | Bambu plates, any material where Bambu’s wiki recommends glue | Bambu’s own recommendation when adhesion is shaky. Spread thin with the included applicator. |
| Magigoo Original | PLA, PETG, generic FDM materials | Pen applicator, dries fast. Good for one-coat-per-print workflows. |
| Magigoo PA | Nylon (PA, PA-CF, PA-GF) | Nylon-specific formulation. Works on smooth PEI and Garolite. |
| Magigoo PC | Polycarbonate and PC blends | PC-specific. See Magigoo’s product page for compatibility. |
| Wolfbite Original / Mega / PC | ABS, ASA, PC on glass | Brush-applied. Popular before PEI became standard. Still useful for large glass beds. |
| 3DLAC / Dimafix hairspray | ABS, PETG, general purpose | Quick to apply, messy in practice. Re-coat every print. |
| PVA glue diluted with water | Nylon backup, large area coating | Brush-painted, dries to a thin film. DIY alternative to commercial slurries. |
When NOT to use glue
Glue is not a universal good. Three cases where adding it makes things worse, not better:
- Bare textured PEI with PLA. Textured PEI grips PLA at the perfect strength out of the box. Adding glue makes removal harder, leaves residue, and forces you to clean the plate more often. Just print on the clean plate.
- Bare textured PEI with fresh ABS, before you have actually seen a warping failure. Try the clean plate first. If you see warping on a specific geometry, add a brim. Only after the brim fails do I add glue.
- Third-party glue that conflicts with a manufacturer’s plate. Bambu’s docs warn against unspecified third-party adhesives on their textured PEI. If you are on a Bambu plate, use Bambu liquid glue or a known-safe PVA stick.
Application technique matters more than brand. The right amount is a single thin even coat across the entire print area. Too thick and the first layer rides high; too thin and you get patchy adhesion. I apply with the cap-and-press motion, let it dry for 30 seconds, then start the print. For glue stick on smooth PEI, I cover the whole plate even if my part is small, because residue at the edges does no harm and full coverage is faster than measuring.
OrcaSlicer settings that actually fix adhesion
I am going to be conservative here, because there are a dozen settings that touch first-layer behavior, and most of them are not worth changing. The seven below are the ones I actually use to fix adhesion problems. Field names are verified against OrcaSlicer 2.3.x. If your version is older, some of these (notably initial layer flow ratio and brim flow ratio) may not exist.
| Setting | Where to find it | Value to try | Why it helps |
|---|---|---|---|
| Initial layer height | Quality > Layer height | 0.20 to 0.25 mm for a 0.4 mm nozzle | Thicker first layer means more squish, more surface contact, and masks small bed unevenness. |
| Initial layer line width | Quality > Line width | 0.42 to 0.50 mm | Wider lines spread more material onto the plate and increase mechanical lock. |
| Initial layer flow ratio | Quality > Flow (2.3.2 nightly and later) | 1.00 to 1.05 | Adds extra plastic at layer 1 only. Use sparingly; over 1.05 starts to elephant-foot. |
| Initial layer print speed | Speed > Initial layer | 20 to 30 mm/s for trouble materials | Slower lines give heat time to soften the bottom of each line and bond to the plate. |
| First-layer fan speed | Cooling > Fan speed | 0 percent for ABS / PETG / PC; 0 to 30 for PLA | Cooling fan blowing across the hot first layer reduces wetting and breaks adhesion. Keep it off for layers 1 to 5. |
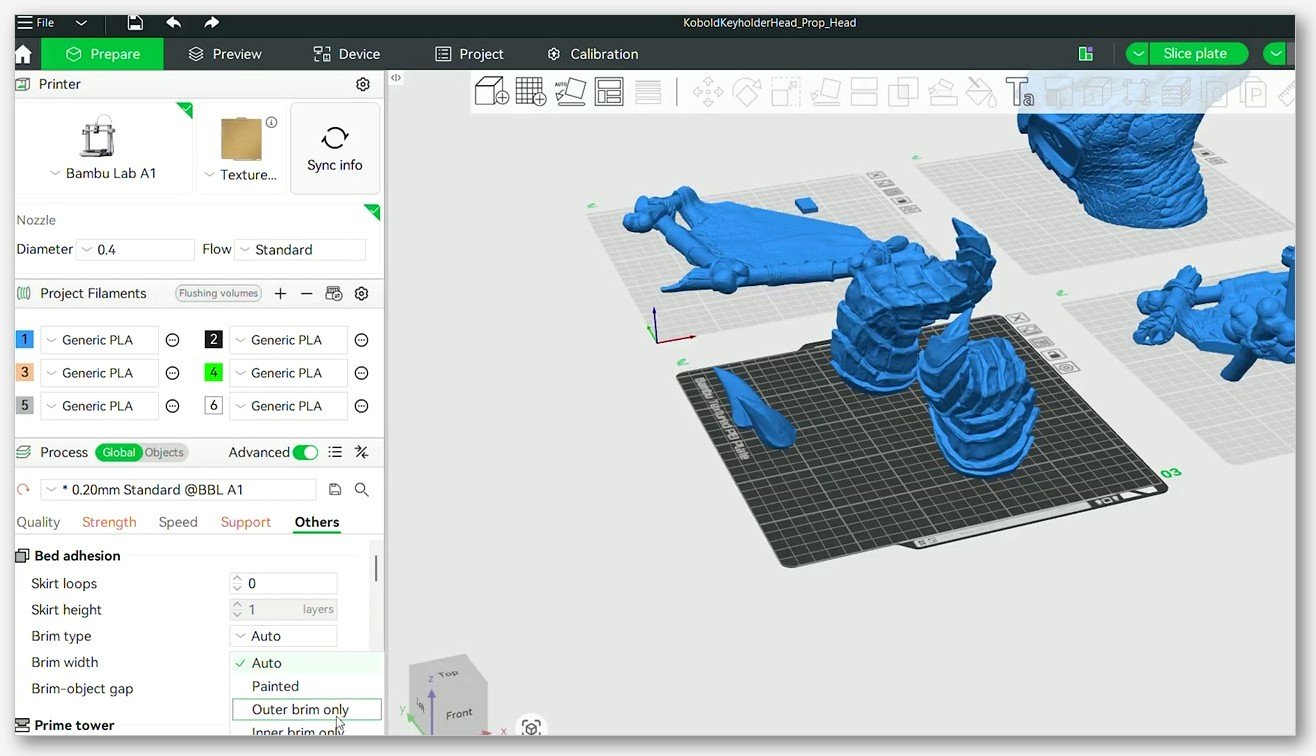
| Brim type | Others > Brim | Outer brim (default) | Anchors corners mechanically. The single most effective adhesion lever for warpy materials. |
| Brim width | Others > Brim | 3 mm PLA, 5 mm PETG, 5 to 8 mm ABS / PC | Width is more useful than depth. A wide thin brim outperforms a narrow thick one. |
| Brim object gap | Others > Brim | 0.1 mm strong, 0.2 mm easy to remove | Smaller gap means harder removal but stronger anchor. Tune to your geometry. |
| Brim flow ratio | Others > Brim (2.3.2 nightly and later) | 1.00 to 1.05 | Tunes brim grip independently of the main print’s flow. Distinct from initial-layer flow ratio. |
Two of these deserve more attention. Initial layer flow ratio and Brim flow ratio are separate knobs in OrcaSlicer 2.3.2 and later. Changing one does not change the other. If your brim is gripping but your main print is detaching from inside the brim, raise the initial-layer flow ratio. If your main print is fine but the brim is peeling and curling, raise the brim flow ratio. They were added in the 2.3.2 nightly cycle precisely because users wanted to tune brim grip without inflating the whole first layer.
The other knob worth understanding is raft versus brim versus skirt. People conflate these constantly. A skirt is a single loop around your print used for nozzle priming and bed-level visual check. It contributes nothing to adhesion. A brim is one or more rings flush with the first layer of your part, mechanically anchoring the part to the plate. A raft is a sacrificial multi-layer platform under the part, used for severe warping or for nylon on a slick surface. In 2026, raft is overkill for almost everything. I use raft only for nylon on Garolite and for occasional tall PC parts on a marginal surface. For everything else, brim. The brim, raft, and skirt explainer goes deep on the differences and when each makes sense.
Cleaning and maintaining your build plate
I would estimate that 60 percent of “my print stopped sticking” complaints in forums come from people printing on a dirty plate. PEI is hydrophilic. It picks up skin oils, fingerprints, dust, and food residue. After 20 to 30 prints the surface energy drops enough that adhesion goes patchy. The fix is not glue, it is washing the plate. The right cleaning protocol depends on which surface you have.
Smooth PEI and glass
Before each print: wipe with 91 percent or higher isopropyl alcohol on a clean lint-free cloth. Do not touch the printing area with bare fingers afterward. If you must reposition, hold the plate by the edges.
Once a week or after a particularly sticky print: dish soap and warm tap water in the sink, scrub gently with a clean paper towel or microfiber, rinse, and dry. The soap removes oils that IPA only spreads around.
When IPA wipes stop reviving adhesion: acetone wipe with 100 percent acetone on a clean cotton pad. Smooth PEI tolerates acetone fine. Do not use acetone on textured PEI; it damages the texture coating.
When acetone stops working: very fine steel wool (0000 grade) or 2000-grit wet sanding refreshes the surface. This is your last resort before replacing the plate.
Textured PEI
This is where Bambu’s official wiki diverges from a lot of older internet advice. The Bambu wiki says: dish soap and warm water with a soft brush, rinse, paper towel dry. That is the routine for textured PEI plates. Do not use isopropyl alcohol on textured PEI. Bambu’s documentation states that IPA can spread oils across the textured surface rather than removing them, and degrade the coating over time. Some community sources allow occasional IPA, but for the default routine, dish soap matches Bambu’s docs and is safer for the surface.
Do not use acetone on textured PEI. Bambu’s wiki explicitly warns this strips the texture. Do not use abrasive pads, steel wool, or sandpaper either; you will permanently shave the texture off and create patchy adhesion zones. When you use glue stick on textured PEI, re-coat every 5 to 10 prints; rinse the old glue off with warm water first.
The summary: dish soap routine, no IPA, no acetone, no abrasives. If you have already been using IPA on a textured plate and it still works, you are probably fine, but the safer default going forward is soap and water.
Garolite
90 percent or higher IPA before and after each print. Light 220-grit sanding when adhesion drops (Garolite tolerates sanding well; it is a structural composite). PVA glue stick re-coat every 1 to 2 nylon prints; nylon eats through glue layers faster than other materials.
Glass
IPA wipe before each print plus a glue stick or hairspray application. Dish soap wash once a month. If the glass plate has dried glue residue from older prints, soak it in warm water for 10 minutes and the glue lifts off.
When to replace the plate
Signs your plate is past its service life: visible peeling, lifting, or texture loss in any region the print touches; deep gouges from nozzle crashes; adhesion stays bad after a soap wash and a known-good setting profile. PEI sheets are inexpensive relative to the cost of a failed print. I replace plates rather than nurse them past the point of reliability.
When over-adhesion is the real problem
This is the bookend to the rest of the article. If your print is stuck to the plate so hard that you cannot remove it without prying, you have over-adhesion. It is a real failure mode, and it can damage the plate. The two most common cases:
PETG on bare smooth PEI. Already covered. Apply a glue stick release coat next time. If you can flex the plate (Bambu plates are spring steel and pop out of the magnetic base), pop it off the printer and flex it gently; the temperature differential between the print and the cooled plate often releases the bond. If flexing does not work, run hot water over the underside of the plate for a minute to expand the metal, then try flexing again. Do not pry at the print with a metal blade; you will gouge the PEI.
Aggressive PETG on textured PEI. Some PETG variants (notably Bambu PETG-CF and PETG HF, and certain Polymaker PETGs) bond very firmly to textured PEI. Users on the Bambu community forum have reported texture chunks tearing off during removal. Solution going forward: apply a thin glue stick coat as a release agent. Solution right now: let the plate cool fully to room temperature, then flex. Cold PETG releases more easily than warm PETG.
For ABS and PC parts that bond too hard: the trick is the same. Let the plate cool fully, then flex. Most ABS and PC over-adhesion is a consequence of running glue stick thicker than needed; back off the glue thickness next time.
Per-printer notes
Bambu P1S, P1P, X1C. Default Bambu profiles assume the textured PEI plate with PLA or PETG and the High Temperature plate with ABS or PC. The Bambu liquid glue is the official recommendation when adhesion is shaky. Do not use IPA on Bambu textured plates; use the dish soap routine. Manual calibration (the full one, not just bed mesh) resets the auto-bed-level mesh and fixes a surprising number of mysterious first-layer issues after moves or repairs. See the Bambu AMS setup guide for related Bambu-specific quirks.
Prusa MK4 and MK3S+. The Prusa Satin sheet is functionally a textured PEI plate and follows the same rules. Prusa Knowledge Base recommends IPA for smooth PEI and dish soap for the satin texture, which lines up with the broader PEI consensus. Live-Z adjustment during the purge line is the fastest way to dial in adhesion on a Prusa printer. See the first-layer problems guide for the full Prusa-specific workflow.
Creality K1, Ender 3 V3, K1 Max. Creality’s stock textured PEI plates work well for PLA and PETG. For ABS, the stock 60 C max ambient temperature inside the K1 partial enclosure is borderline; a brim is mandatory. Klipper users can switch bed control to PID via the printer config ([heater_bed] section).
Voron 2.4 and Trident. Most Voron builds run a textured PEI on top of an aluminum bed with a removable spring steel sheet. The recipe is unchanged: dish soap routine for textured surface, IPA only on smooth, and chamber thermistor monitoring matters for ABS and PC. The Voron community standard for nylon is Garolite mounted on top of the PEI with magnetic adhesive on the back.
Qidi X-Plus 3, X-Max 3, Q1 Pro. Qidi machines ship with a textured PEI plate by default plus a slick double-sided sheet. The slick side is closer to smooth PEI and follows the IPA-cleaning rule; the textured side follows the soap rule. Heated chamber capability on the X-Plus 3 and Q1 Pro is what makes them genuinely useful for ABS, PC, and PA-CF.
Quick reference checklist
If you are mid-failure right now and you just want the bullets, here they are.
- Right surface for the material (textured PEI handles most; nylon needs Garolite; PC needs High Temperature Plate or glass).
- Plate is clean (dish soap for textured PEI; IPA for smooth PEI and glass).
- Bed temperature is at the high end of the manufacturer’s range for the filament.
- First-layer fan speed is 0 percent for ABS, PETG, PC; 0 to 30 percent for PLA.
- First-layer print speed is 20 to 30 mm/s for trouble materials.
- Brim width is 3 mm for PLA, 5 mm for PETG, 5 to 8 mm for ABS or PC.
- Glue applied where the surface needs it (PETG on smooth PEI mandatory; nylon on Garolite mandatory; PC on High Temperature Plate recommended).
- Enclosure stable for ABS, ASA, PC, PA (passive ambient at least 30 to 40 C; chamber heater for the worst cases).
- Filament dry, especially for nylon and PC.
- Auto-bed-level mesh re-run after moves, repairs, or hotend swaps.
If you have done all ten and you still see detachment, the plate is probably worn. Replace it before you replace anything else.
FAQ
Can I print PETG on smooth PEI without a glue stick?
No, and the reason matters. PETG forms a covalent bond with bare smooth PEI, and removing the print risks tearing the PEI coating off the steel substrate underneath. Bambu’s own forum has multiple threads documenting plate damage from exactly this. Apply a thin even layer of Elmer’s purple glue stick (or Bambu liquid glue) as a release agent. The glue takes the bond instead of the PEI.
Why does my bed get clean with IPA but adhesion still fails?
IPA spreads oils as much as it removes them. If you have been wiping with IPA for months on a textured PEI plate, residue may have built up in the texture’s micro-pores. The Bambu wiki recommends dish soap and warm water for textured PEI for exactly this reason. Wash the plate with dish soap, rinse thoroughly, and dry with a clean paper towel before the next print.
Do I need a brim on every ABS print?
For ABS parts taller than about 40 mm, yes. For shallow ABS parts (less than 20 mm tall, large flat bottom), sometimes no, especially in a properly heated enclosure. My default for ABS is 5 mm brim, and I disable it only for thin plates where the brim is more cleanup than insurance.
Is raft worth using in 2026?
Almost never. A brim does what a raft does for 90 percent of warping cases, and a brim is faster to print, cheaper in filament, and easier to remove. The exceptions are nylon on Garolite (where a small raft helps the part separate cleanly) and very tall PC parts where you want a sacrificial layer between the part and the plate. For everything else, brim. The brim, raft, and skirt guide covers the trade-offs in full.
Will a heated chamber fix my adhesion problem?
For ABS, ASA, PC, and PA, yes, it helps a lot. A heated chamber keeps the lower layers above their glass transition temperature, which lets them absorb the contraction stress from upper layers instead of transmitting it to the corner bond. Open-frame printers running ABS will always fight warping. Passive enclosures (P1S, X1C without a chamber heater) help. Active chamber heaters (Voron with PTC, Qidi Q1 Pro) help more. For PLA, PETG, and TPU, a chamber heater is unnecessary and can actually cause heat-creep extruder jams.
My first layer is fine but the print detaches at layer 50. What gives?
That is the classic mid-print detachment signature, and it is almost always cooling-induced warping. The first layer adheres because the bed is hot and the polymer is mobile. By layer 50, the lower layers have cooled and rigidified, and the contraction force from upper layers concentrates at the bed bond. Solutions: brim, lower part-cooling fan, enclosure (for ABS, PC, PA), and verify your bed temperature is not dipping between heater cycles. The warping and lifting corners guide has the full playbook.
Can I use Garolite for everything?
No. Garolite is nylon-specific. PLA on Garolite over-adheres and can damage the surface during removal. PETG on Garolite is unpredictable. ABS on Garolite has been done but textured PEI is easier. Garolite earns its keep when you are printing nylon and the rest of your surface lineup fails. The nylon settings guide covers the full workflow.
How often should I replace my textured PEI plate?
In my shop, every 300 to 500 prints depending on materials. PLA-heavy printers go longer; ABS and PETG-heavy printers go shorter (the textured surface picks up faster wear from high-grip materials). Signs: visible peeling at the corners, texture loss in any region the print touches, or persistent adhesion failure after a soap wash. PEI sheets are inexpensive enough that I would rather replace than nurse a marginal plate.
Where do I download OrcaSlicer to get the new flow ratio settings?
The initial layer flow ratio and brim flow ratio fields landed in the 2.3.2 nightly cycle. Get the latest stable or nightly from the official OrcaSlicer releases page on GitHub. orcaslicer.net is a third-party content site; we link to the official binaries on GitHub rather than hosting them ourselves.
Final thoughts and where to go next
Bed adhesion is the kind of problem that feels mysterious until you understand it, and then it stops being mysterious in any way. Match the surface to the material, keep the surface clean according to the manufacturer’s actual instructions (not the internet’s averaged-out advice), apply glue where it acts as a release agent or where the surface does not grip on its own, and dial in the seven OrcaSlicer settings that move the needle. That is most of the game. The remaining 10 percent is thermal management, brim geometry for trouble parts, and replacing the plate before it actually fails.
If you came in looking for a single fix, I am sorry that the answer is “depends on the material and surface.” If you came in willing to learn the underlying logic, the rest of your prints should fail less often than they used to. From here, three good next steps: the parent troubleshooting guide if you want the bigger picture, the warping deep dive if your problem is specifically corner lift, and the brim, raft, and skirt explainer if you want to understand why brim is almost always the right answer over raft. Good luck out there, and dry your nylon.
Related OrcaSlicer guides
- OrcaSlicer Troubleshooting: Master Index of Every Common Fix
- OrcaSlicer Print Time Estimate Wrong: Why and How to Fix
- Elephant Foot in OrcaSlicer: Compensation Done Right (2026 Guide)
- OrcaSlicer Top Surface Quality Issues: Pillowing, Gaps, Rough Tops
- OrcaSlicer Support Failures: Painting, Tree & Removal (2026)